Install the appliance
Install Virtual Appliance onto prepared target VMs from the Management web application. Use a Management administrator account. This is a fresh installation; for an existing appliance with lost access or data, start with Recovery options.
| Screenshots show the Management frontend with simulated example data. Versions, hostnames, timestamps and status observations do not describe a deployed appliance. |
Before you begin
-
Deploy Management using the ISO or Docker or Podman, and verify administrator sign-in.
-
Make the intended release bundle available locally.
-
Prepare the topology, network and storage plan in Deployment requirements.
-
Arrange hypervisor access to create and configure every target VM, plus access to transfer the boot artifact.
-
Prepare an access-controlled location outside Management for the generated artifact bundle.
Submit the Installation Plan
-
Open Installation > Install and select Start the installation wizard.
-
In Appliance software, select the intended locally available release.
-
In Topology and platform, choose Standalone or Three nodes and select Proxmox or VMware. The platform selects the matching boot artifact. For Proxmox, choose whether to include the QEMU guest agent. The VMware OVA includes VMware Tools.
-
In Network and nodes, enter the cluster name, shared subnet prefix, gateway, DNS and time servers. Add proxy settings only where required by your network.
-
Enter the application load-balancer IPv4 address and application hostname, followed by each node’s name and IPv4 address. Check that the application hostname resolves to the load-balancer address from its clients.
-
Review the generated node connections. Kubernetes uses
<node-ip>:6443; Talos uses<node-ip>:50000. The wizard derives these from node IPs without a separate API hostname or load-balancer choice. -
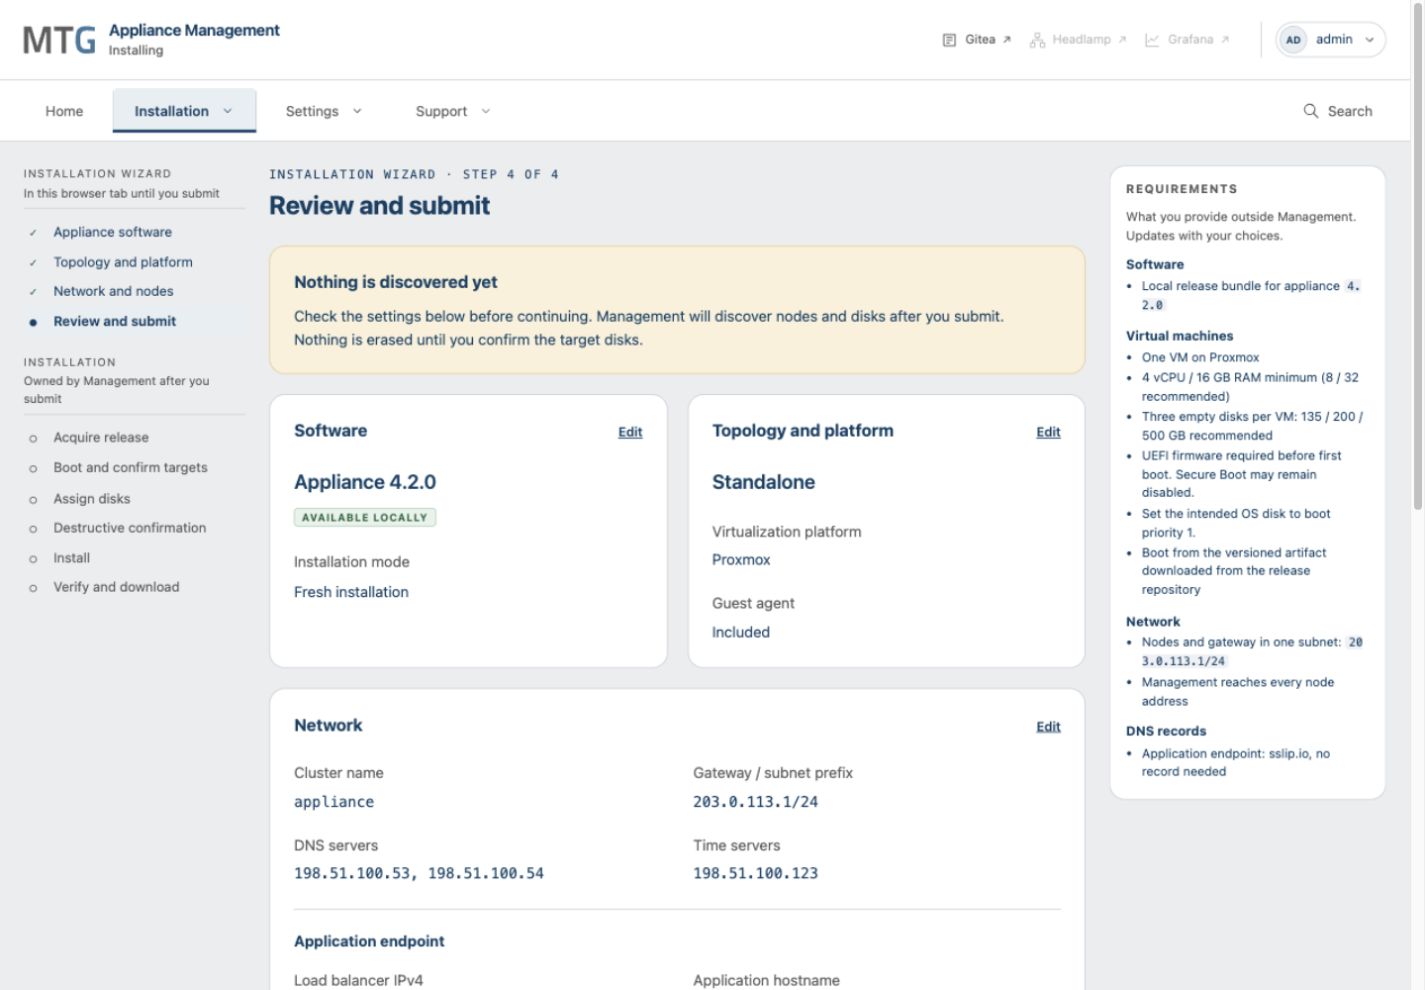
In Review and submit, check software, topology, network, application endpoint and node connections. Use the section’s Edit action for corrections, then select Submit to Management.
Before submission, the browser tab holds the draft. After submission, Management tracks the installation attempt and its progress. Submitting the plan starts release preparation; it does not erase target disks.
Download and boot the Targets
-
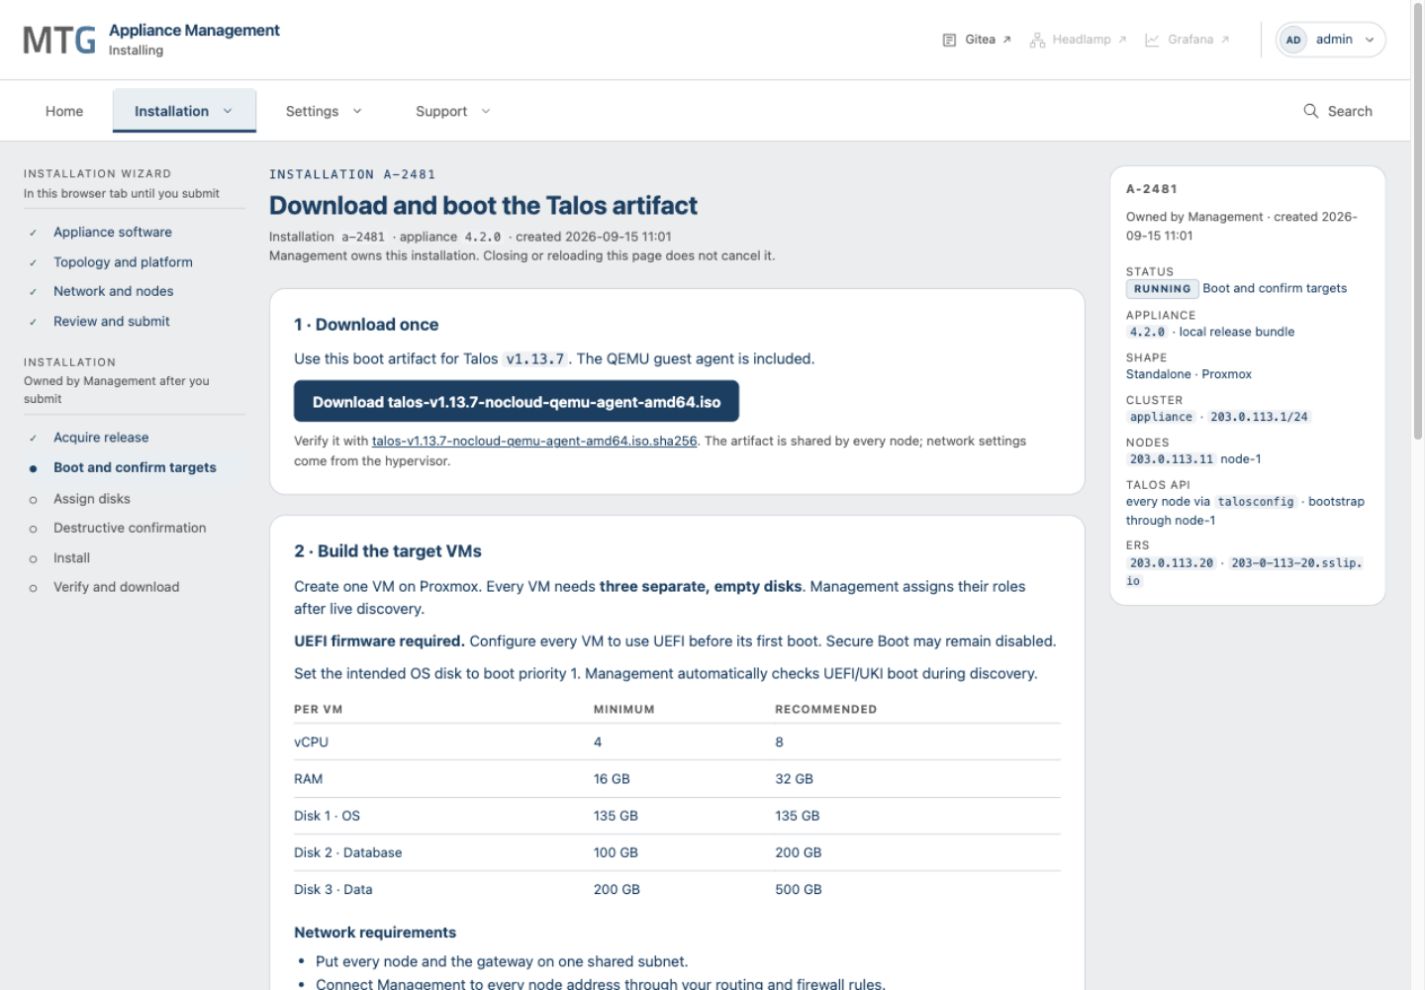
Wait for Download and boot the Talos artifact.
-
Download the artifact and its
.sha256file using the links for the selected release and platform. Verify the artifact’s SHA-256 digest against that checksum. -
Use the Proxmox or VMware guide to provision the targets. Use the exact per-node network values displayed by Management.
-
Boot every target into Talos maintenance mode and keep Management running.
The boot artifact is shared across the nodes; network settings come from the hypervisor. Use the artifact supplied for this release, not an unrelated upstream Talos image. If boot media information is unavailable, obtain the matching artifact and checksum from MTG before proceeding.
Confirm the Targets and Disks
-
Select Start target discovery. Management checks each configured address, records the observed machine identity and checks UEFI boot, CPU and memory.
-
Compare each observed MAC address and machine identity with the intended VM in the hypervisor. Every target must show Accepted.
-
Select Confirm these 1 targets and discover disks for standalone or Confirm these 3 targets and discover disks for three nodes.
-
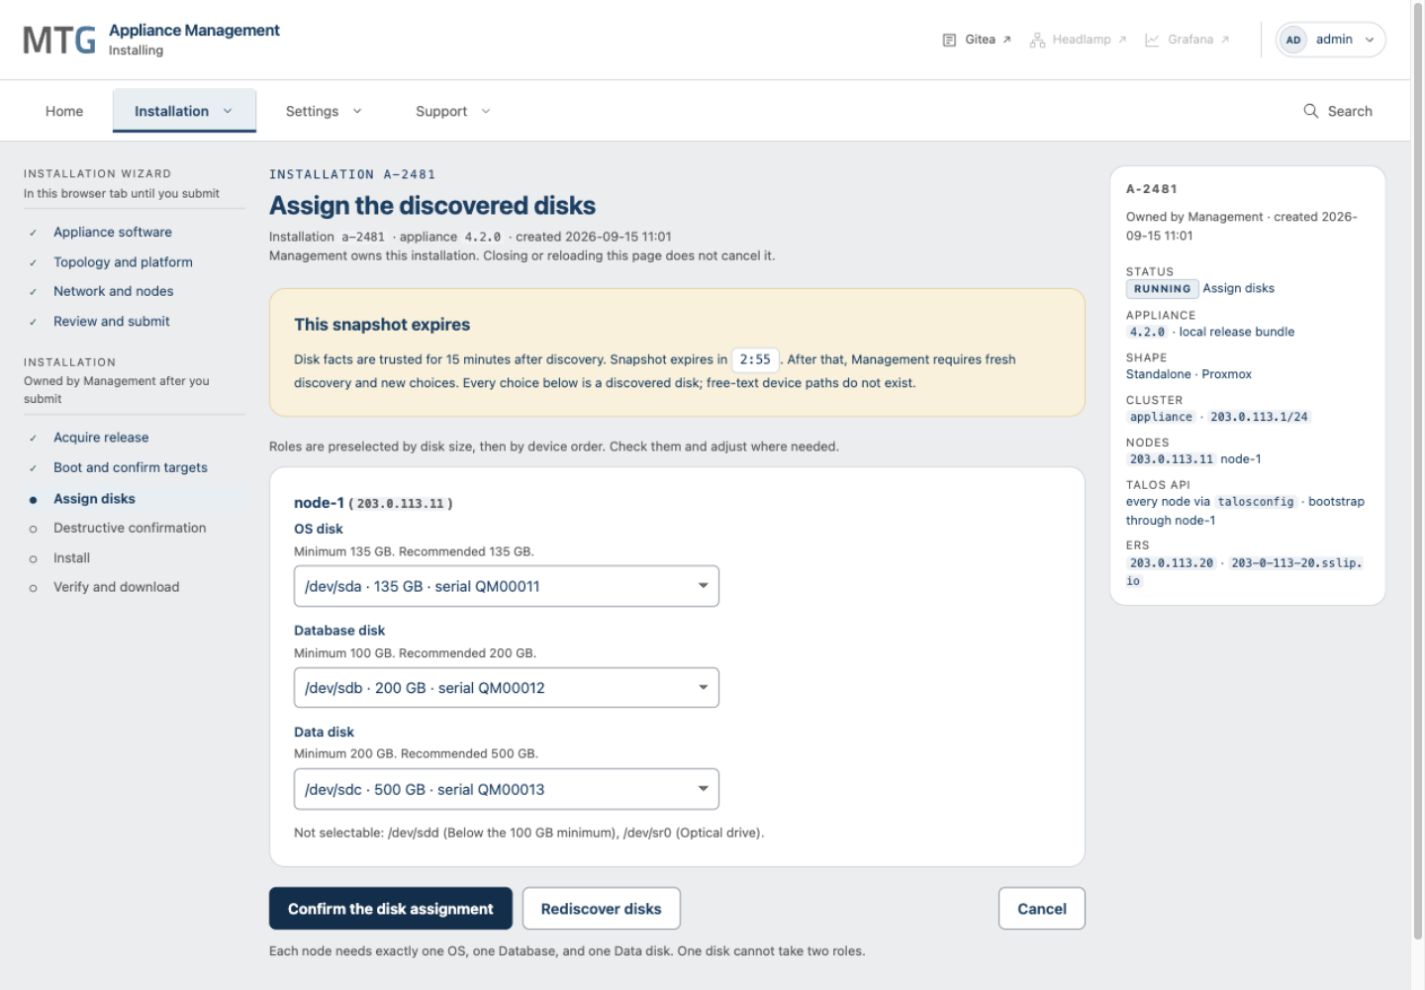
On Assign the discovered disks, check each node’s OS, Database and Data disk. Compare path, capacity and serial with the hypervisor’s disks. Management suggests disks by size. Verify every role before confirming.
-
Select Confirm the disk assignment.
The disk snapshot expires after 15 minutes. If it expires or disk hardware changes, use fresh discovery and review the new assignments. Management excludes ineligible disks and requires three distinct selected disks per node.
Approve and monitor Installation
| The next confirmation erases the selected appliance disks. Check every target and every disk in the destructive summary before proceeding. Cancelling after execution starts does not restore erased data. |
-
Read the destructive summary and type the cluster name to confirm the intended deployment.
-
Select Erase these disks and install appliance, checking that the version shown in the button matches your selected release.
-
Follow the installation stages and logs. Management installs Talos configuration, bootstraps the cluster, installs appliance services and verifies the resulting appliance version.
-
Leave Management and the targets running. You may close or reload the browser and return to the same attempt, but do not restart Management during the operation.
-
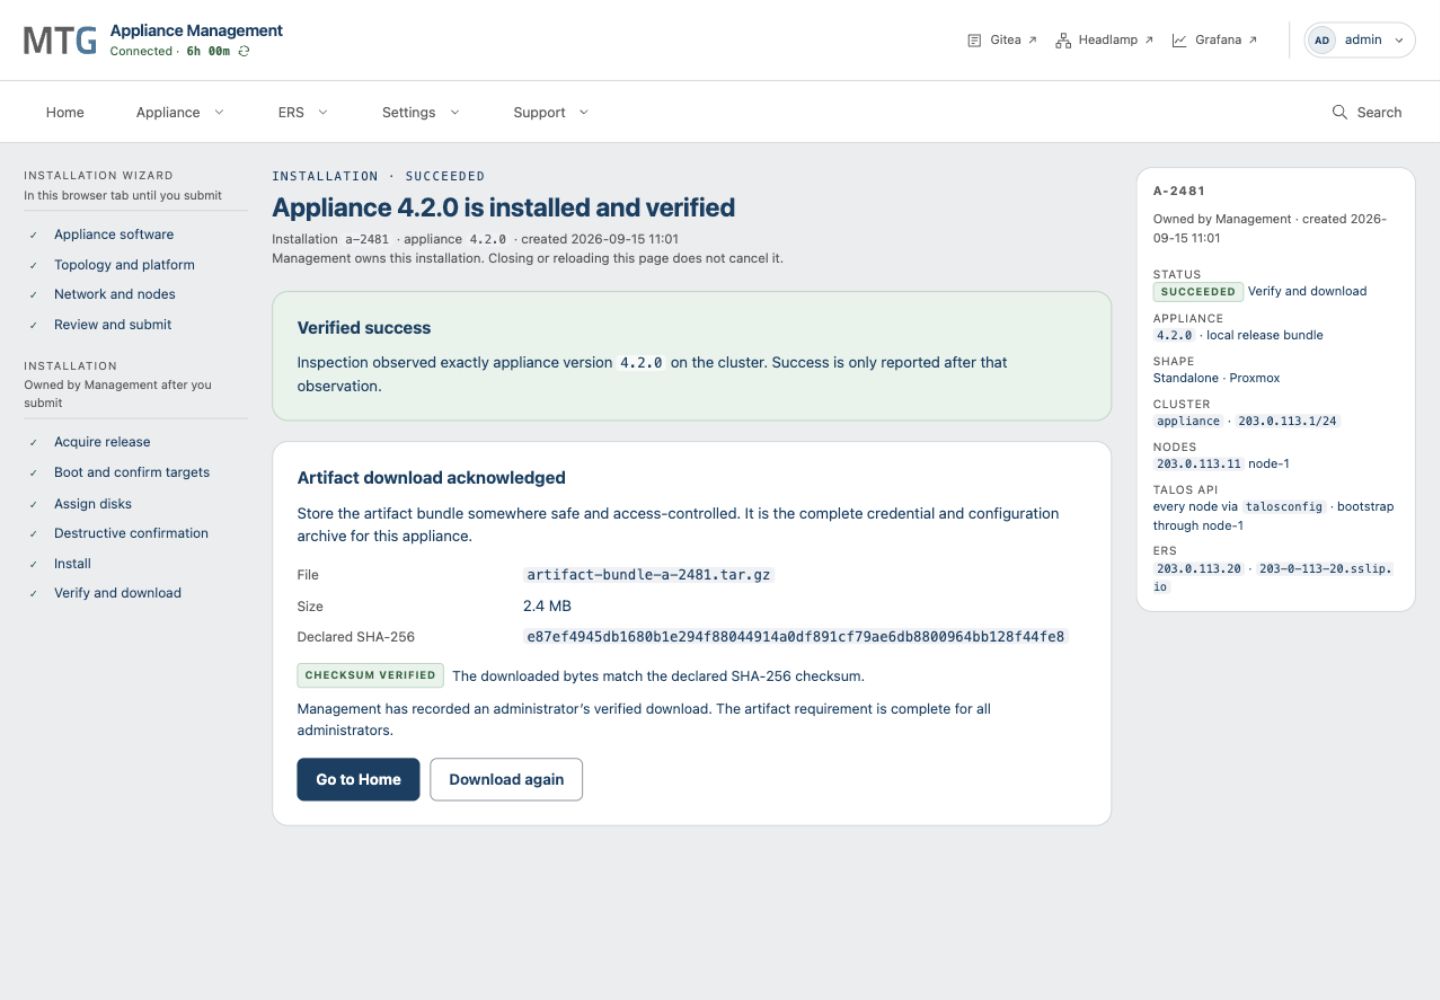
Wait for confirmation that the selected appliance release is installed and verified, and for Verified success.
Retain the Artifact Bundle
-
Select Download the artifact bundle on the success page.
-
Wait for Checksum verified. The browser checks the downloaded bytes against the digest supplied by Management, and Management records the verified download.
-
Copy the verified archive to your access-controlled recovery storage outside Management. Associate it with this appliance’s identity, release and installation date.
-
Retain the release bundle and matching boot material with the deployment records.
-
Select Go to Home and continue with Post-installation checks and Initialize ERS.
Management holds the generated artifact bundle in memory. A restart can lose it before download. It contains cluster credentials. Protect it as you would other administrator credentials. It is not a backup of the appliance’s data.
Troubleshooting a failed Installation
Read the reported stage and retain the available logs and artifact bundle before closing the attempt or restarting Management. An artifact bundle offered after a failure can provide access for investigation; it does not confirm a successful installation.
For discovery failures, check the intended boot artifact, UEFI configuration, resources, per-node network settings and reachability. Correct the cause and select Try discovery again. For an expired disk snapshot, rediscover and confirm the disks again.
Cancel requests that Management stop the running attempt. Wait for Installation cancelled. Changes already made to targets remain, and they can require preparation in maintenance mode before a new attempt. Closing an attempt removes its retained input and logs. Download and verify any retained artifacts first. Follow the instructions for the failed stage and consult Troubleshooting before starting another destructive installation.