Integrating Microsoft Entra ID with Keycloak for MTG CLM Authentication
This guide walks you through configuring Microsoft Entra ID (formerly Azure AD) as an identity provider for Keycloak, enabling single sign-on for MTG CLM users.
Prerequisites: Microsoft Entra ID administrative privileges, Keycloak administrative access, and MTG CLM environment access.
Create the App Registration in Entra ID
To allow Keycloak and MTG CLM to authenticate users against your Microsoft environment, you must first register an application in your Entra ID tenant.
-
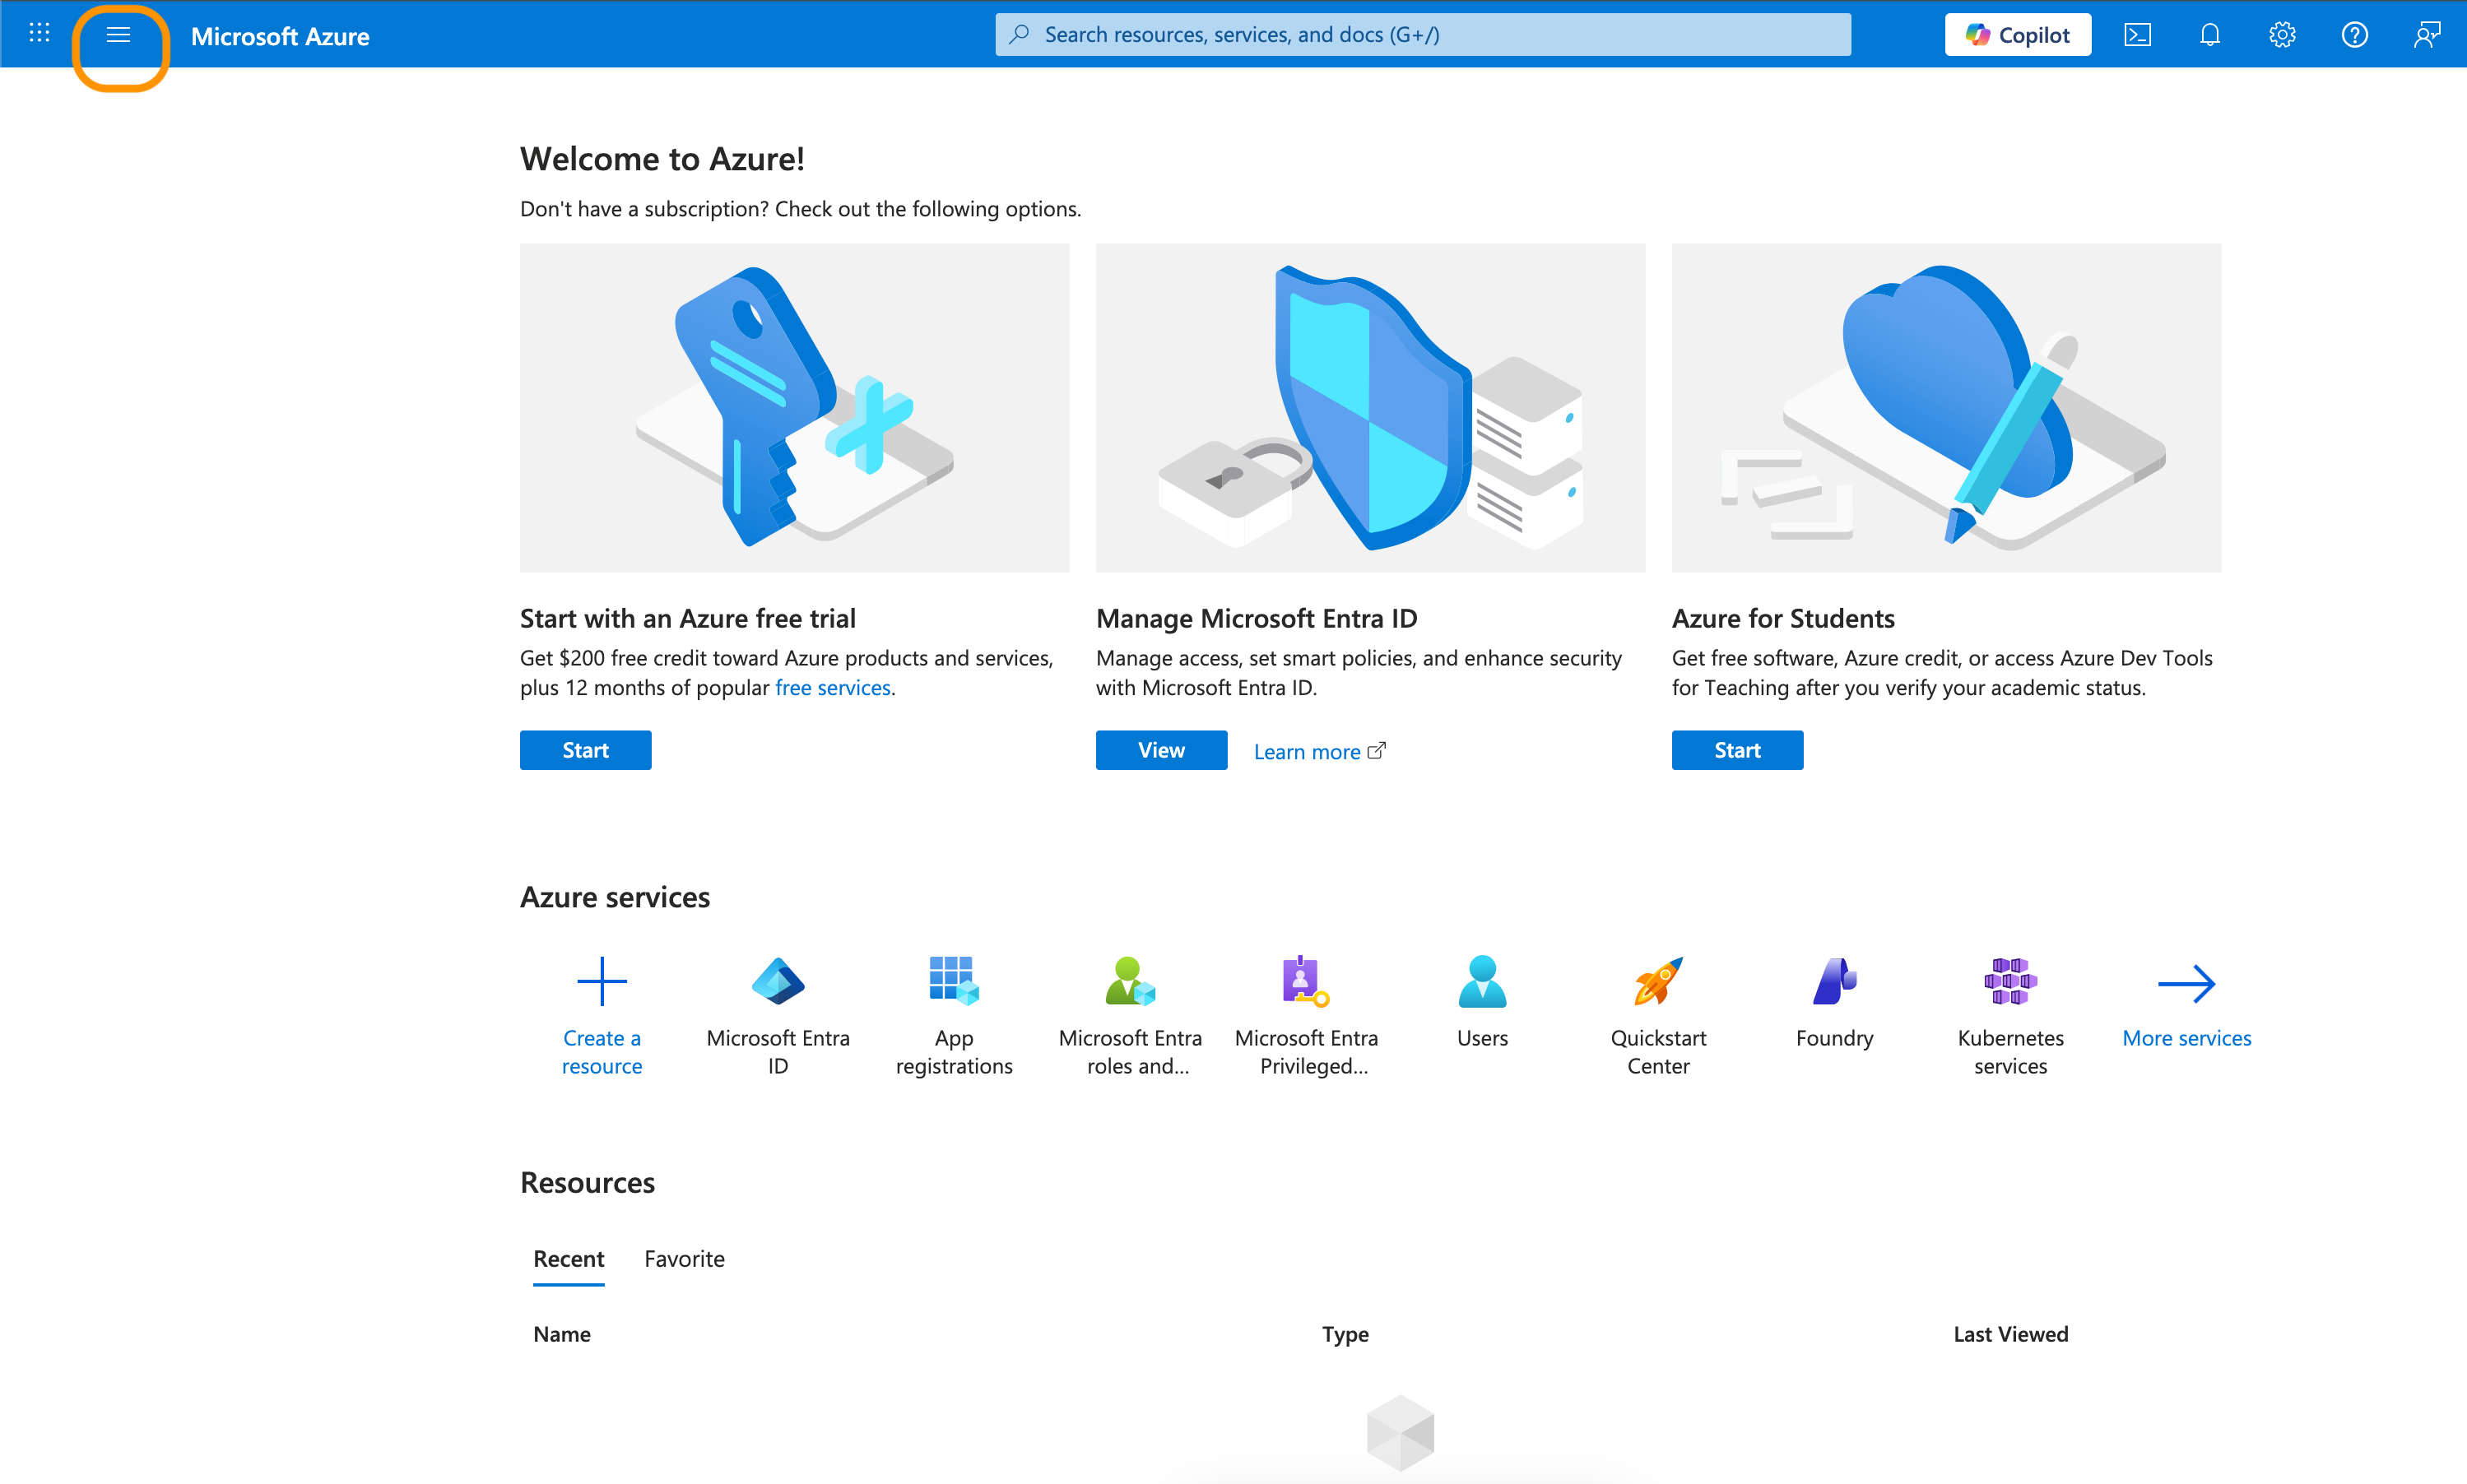
Log in to Azure Portal 🔗.
-
Click the hamburger button on the top left corner.
-
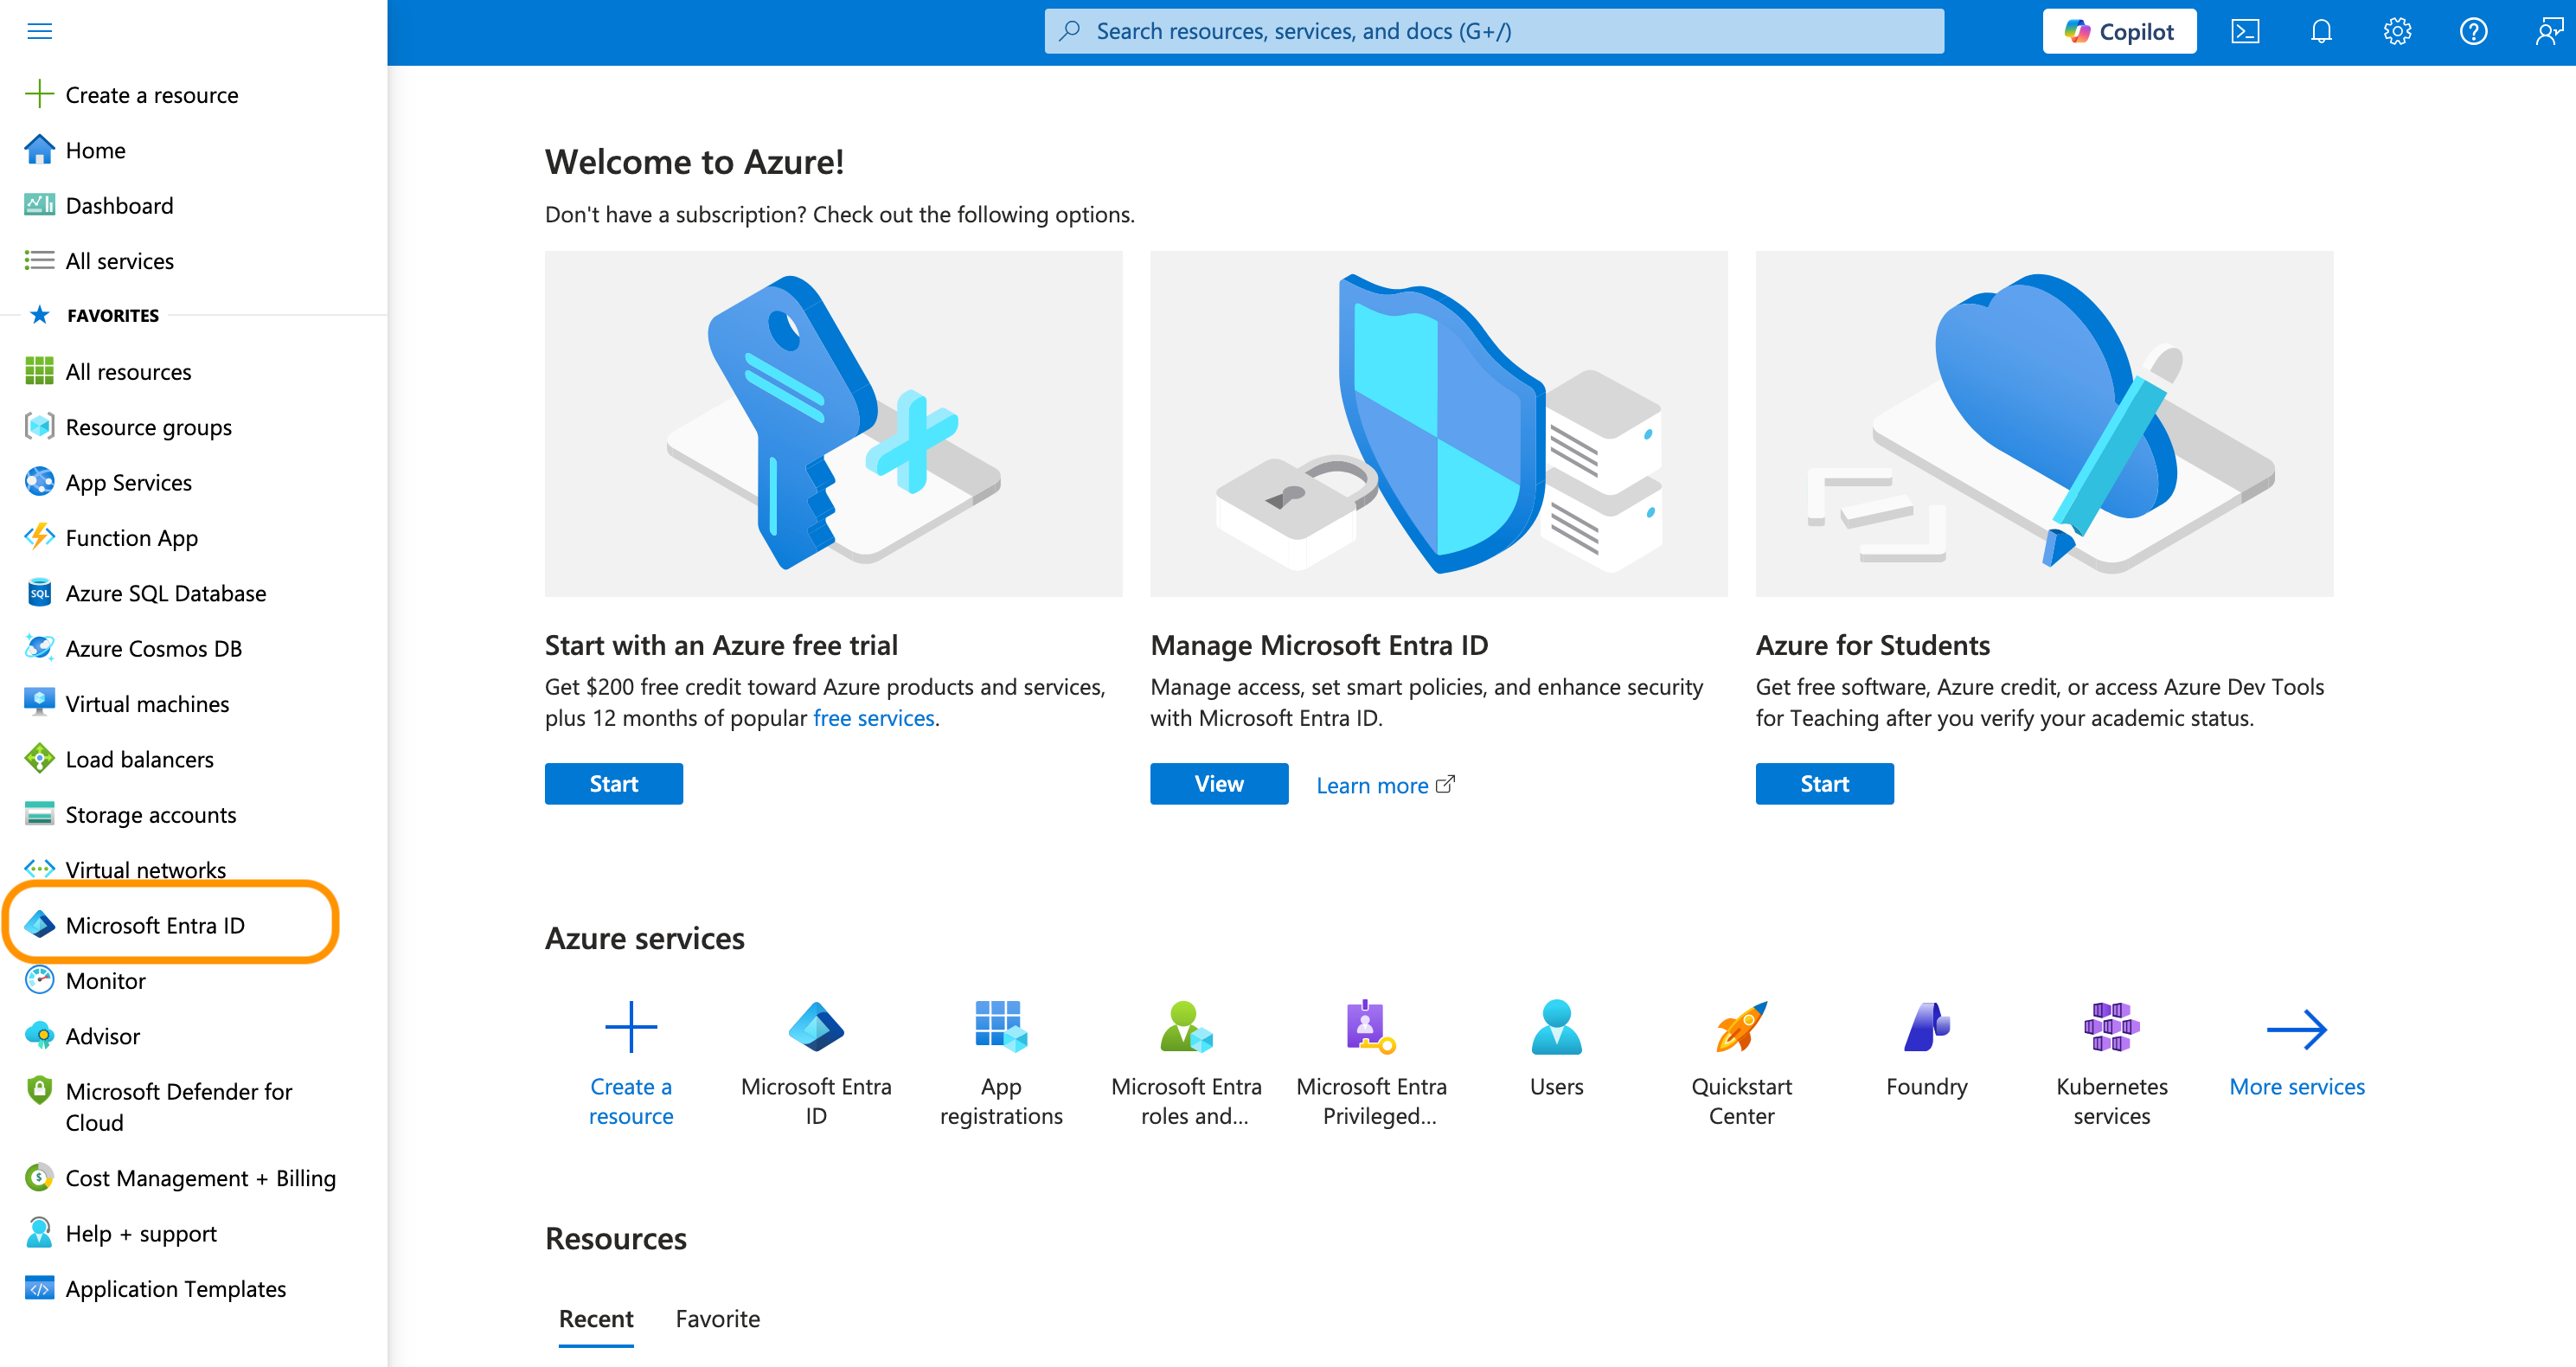
Select Microsoft Entra ID.
-
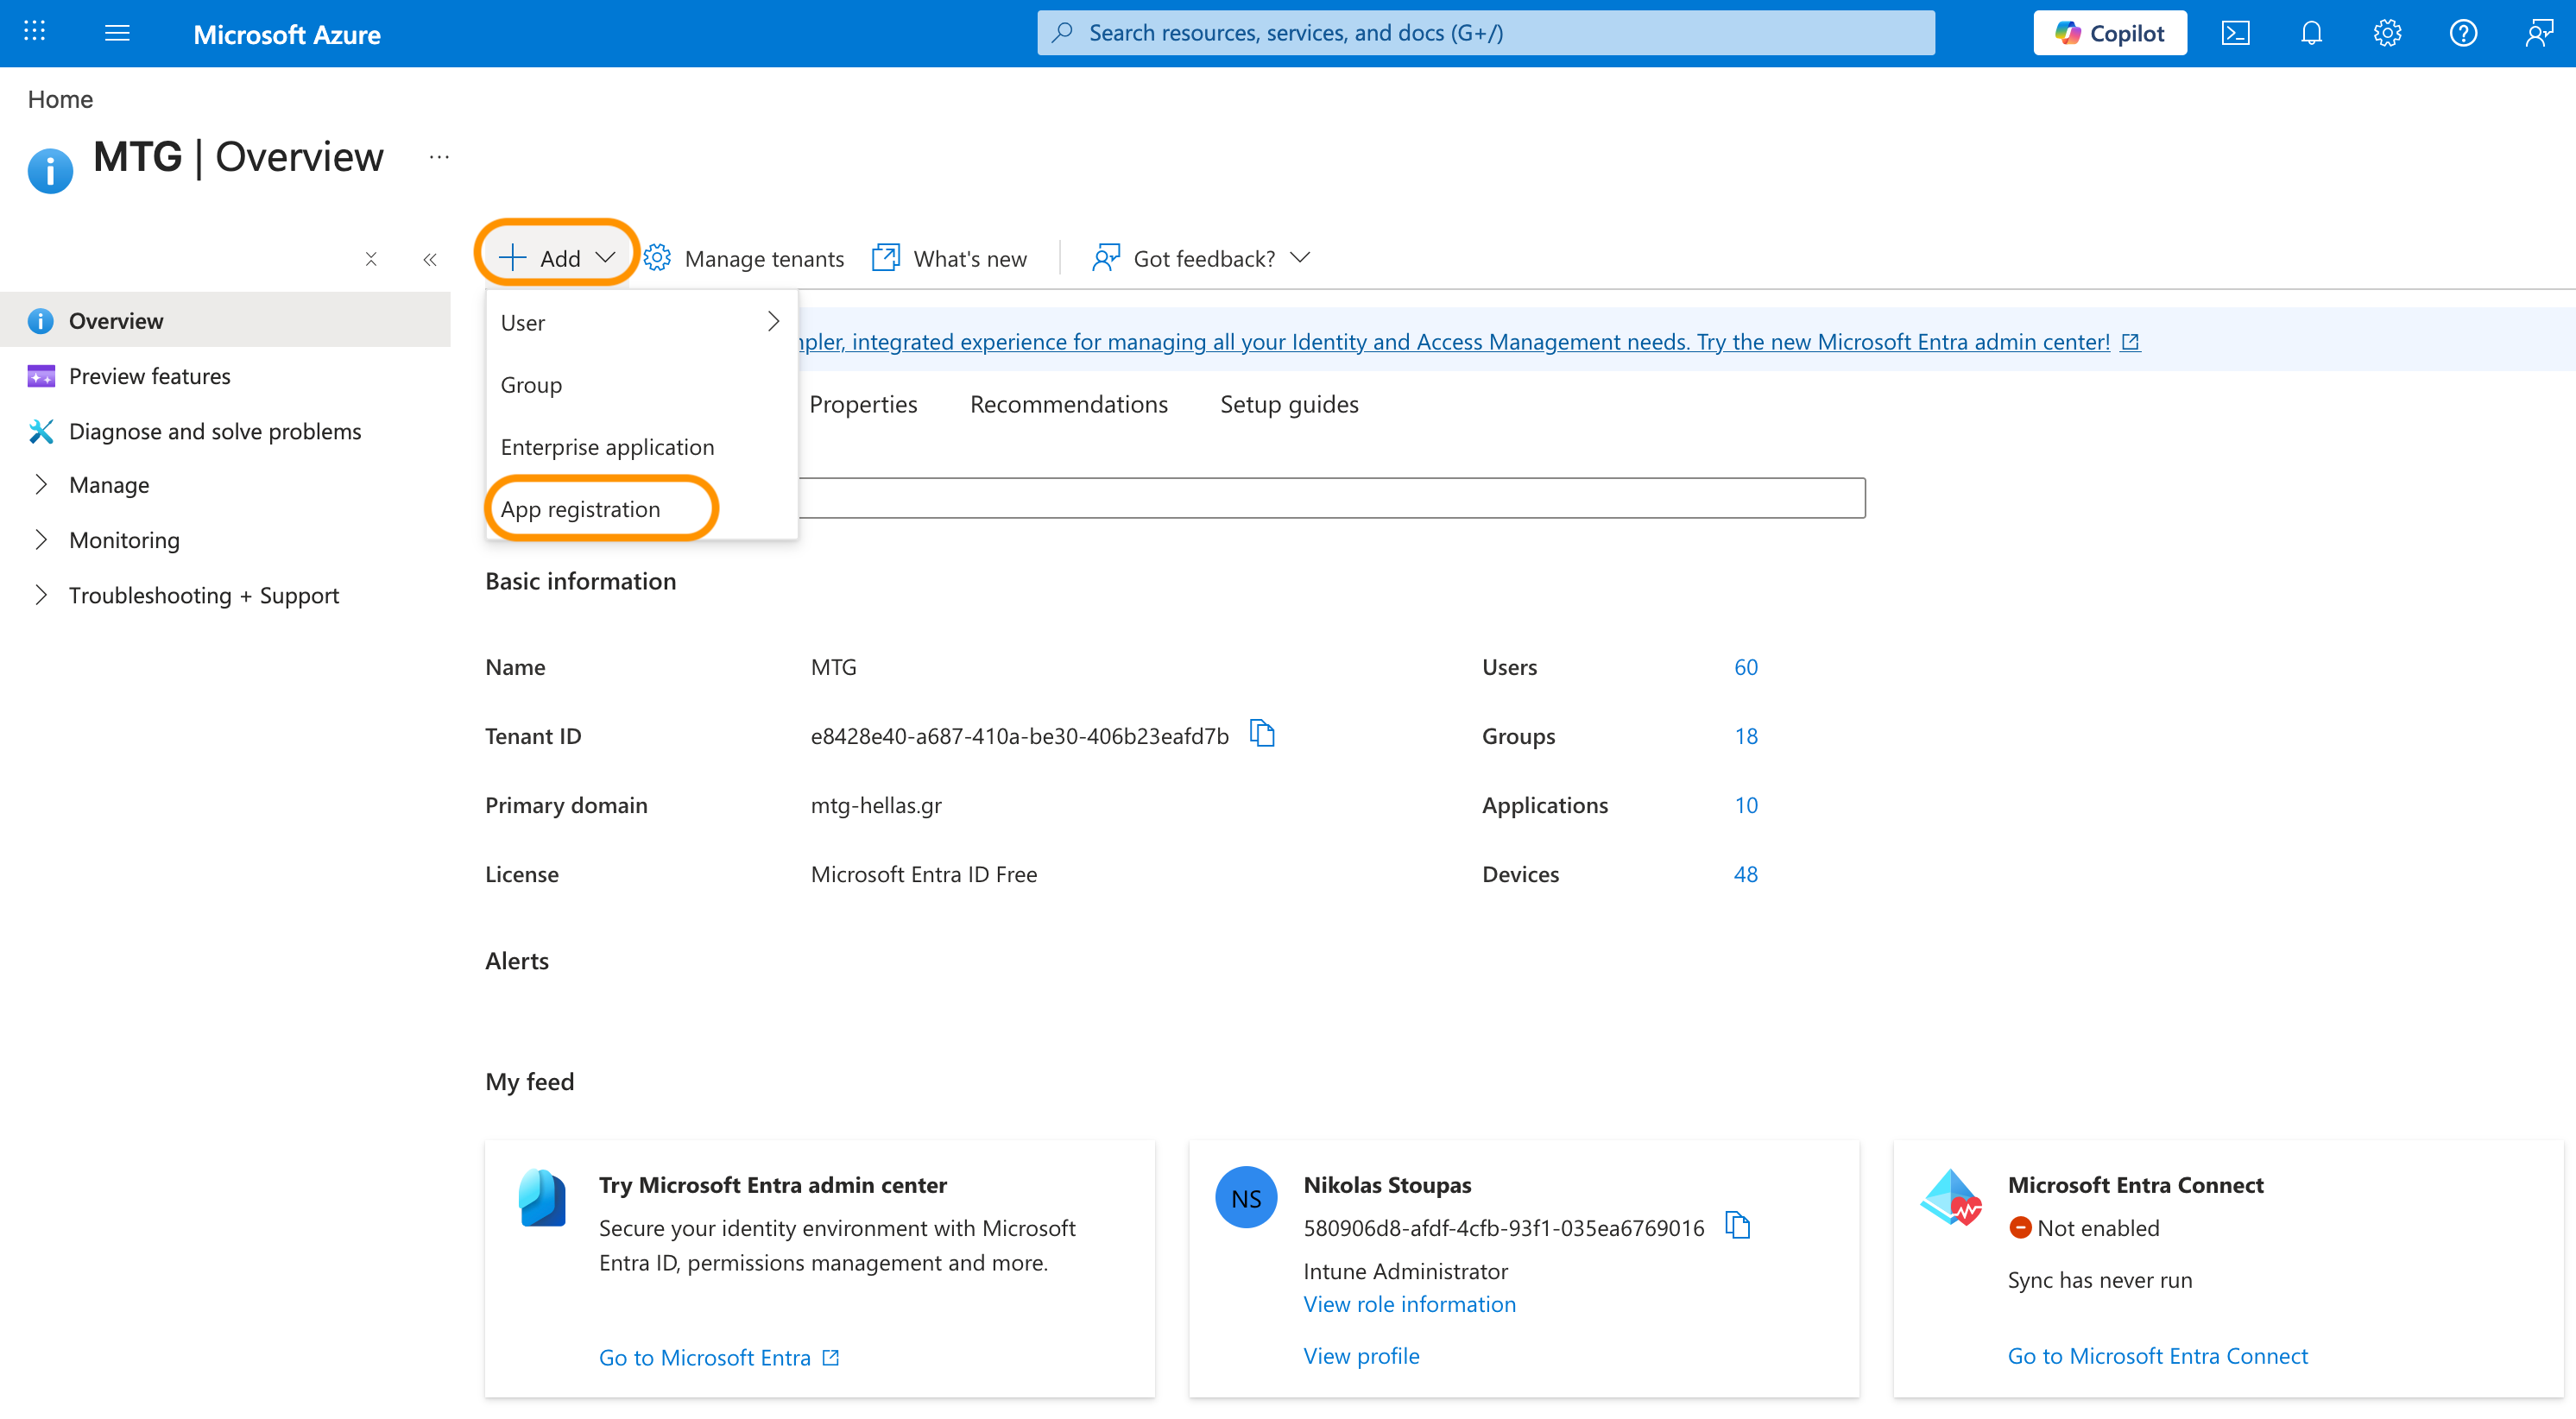
Click + Add and then App Registration.
-
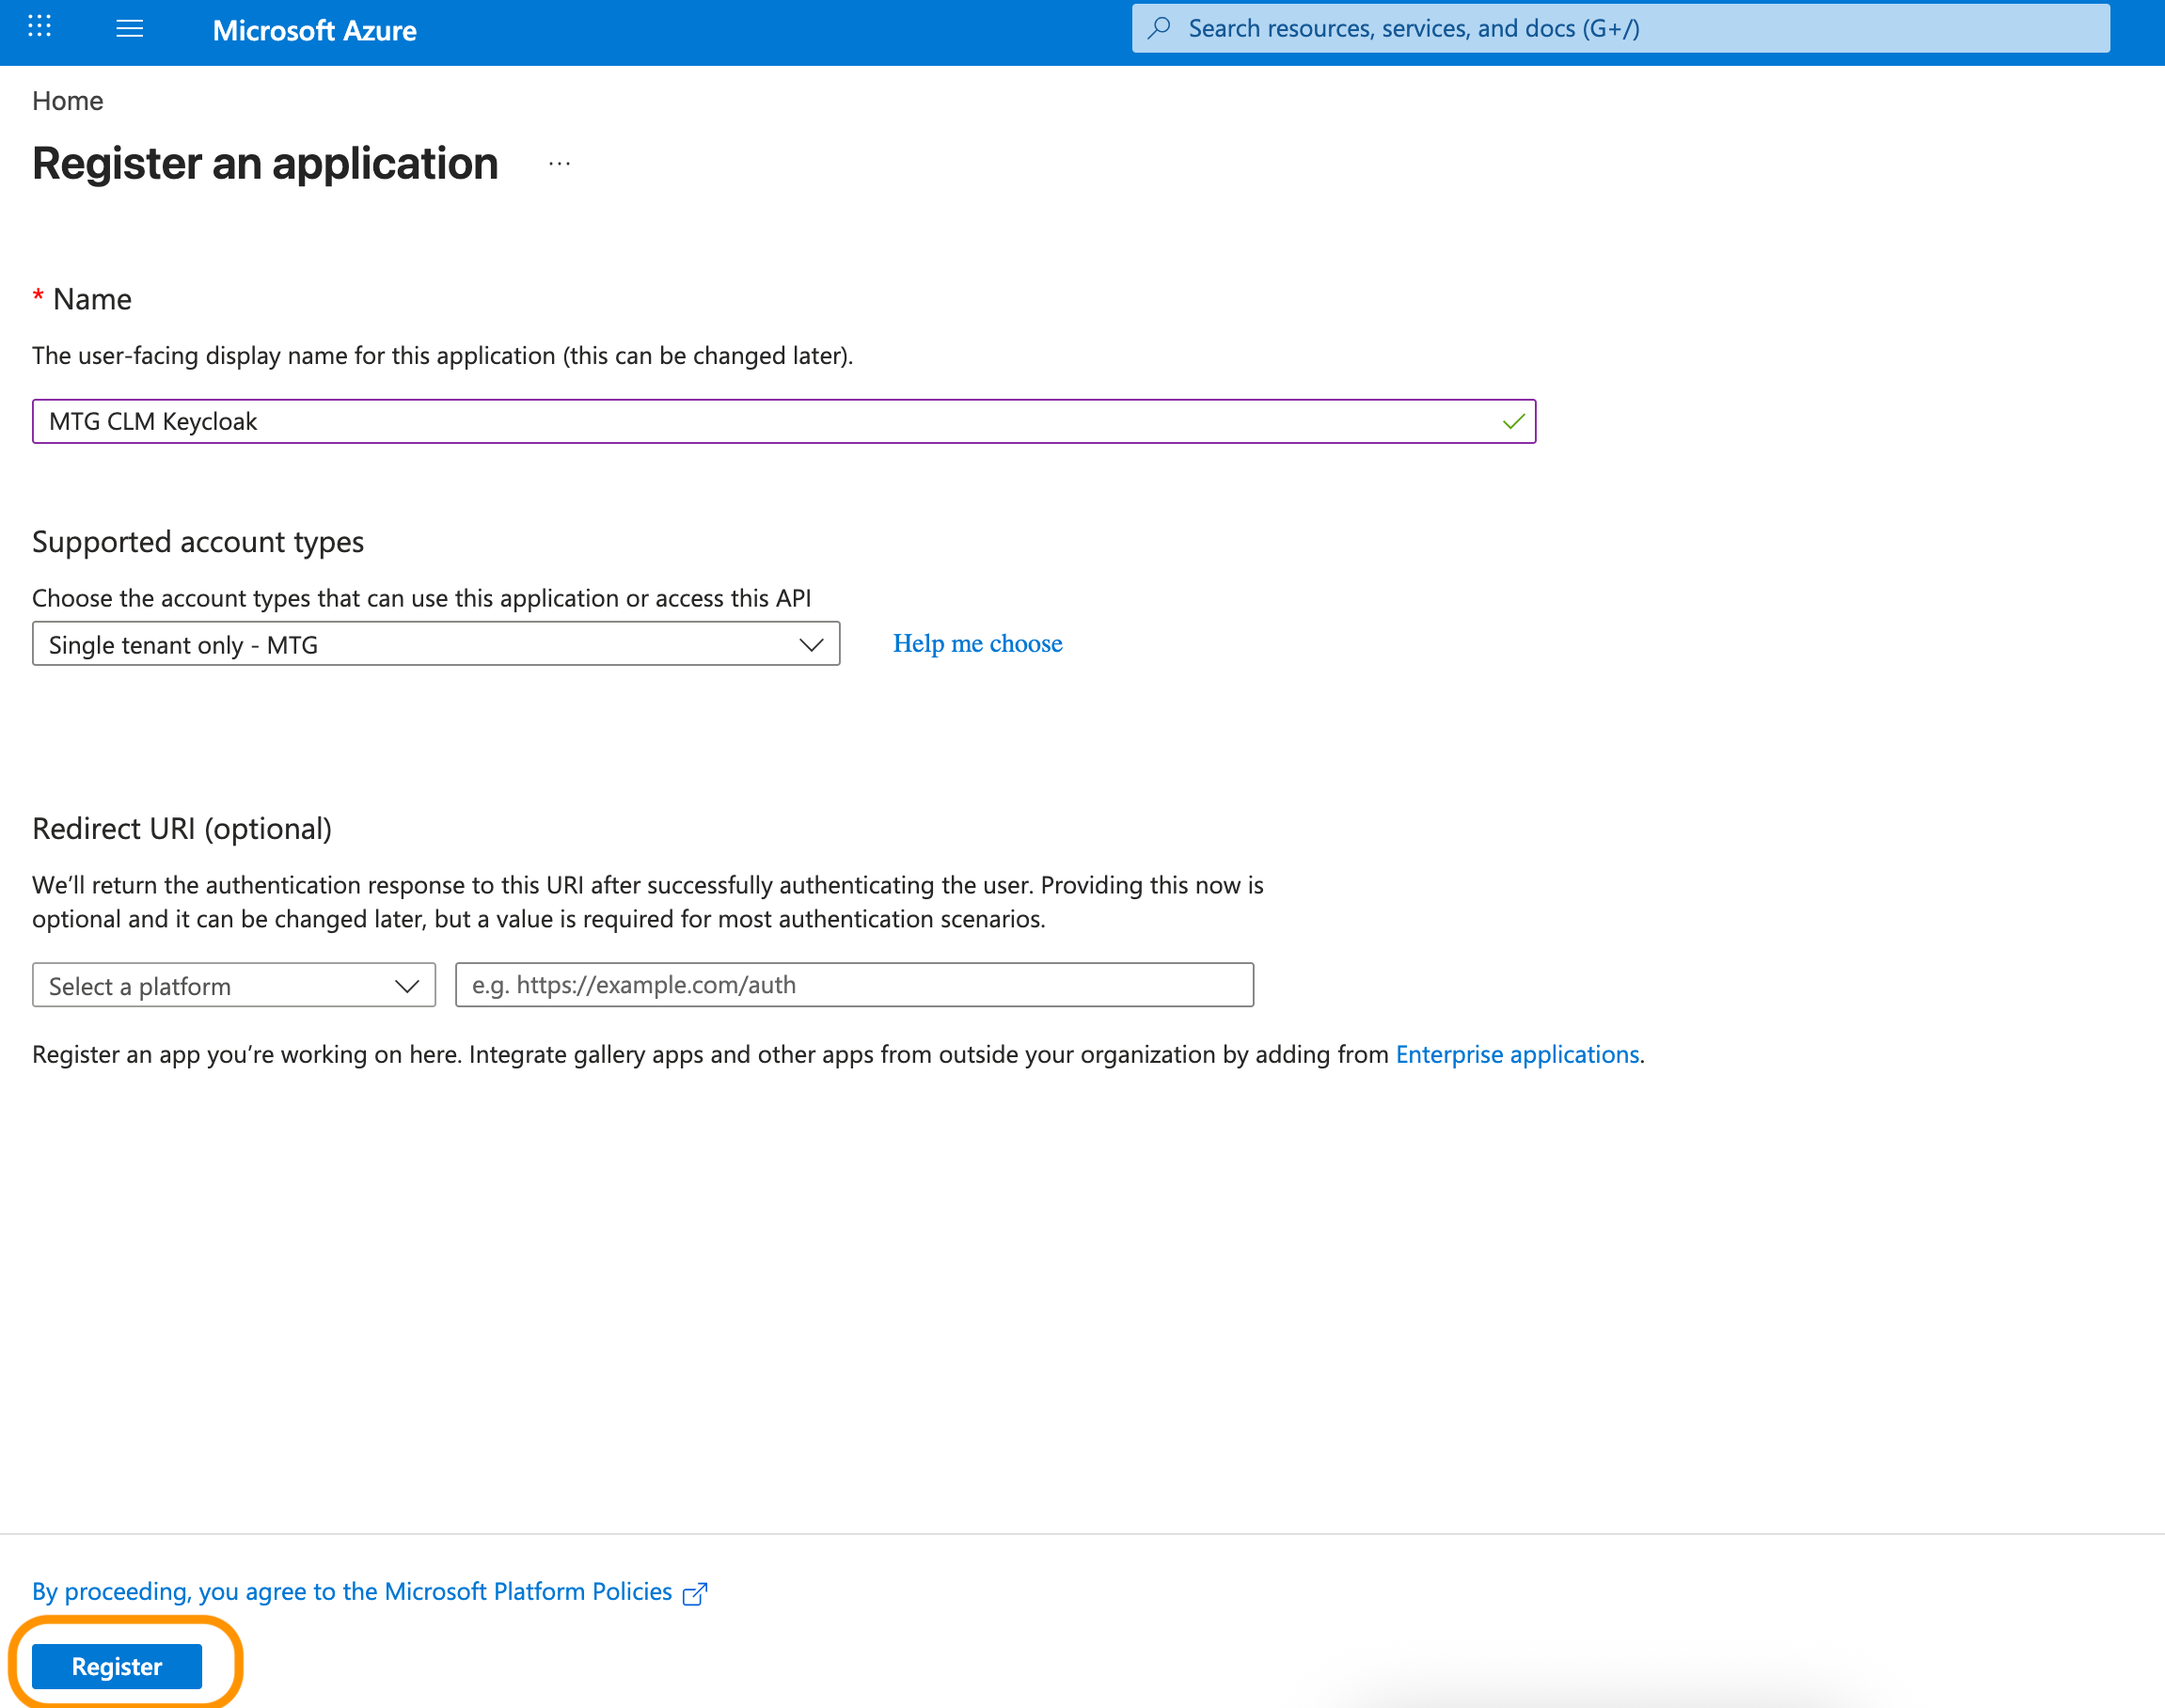
Enter a descriptive Name for the application (e.g., MTG CLM - Keycloak).
-
Under Supported account types, select Single tenant only.
-
Leave the Redirect URI blank for now. You will configure this later when setting up Keycloak.
-
Click Register.
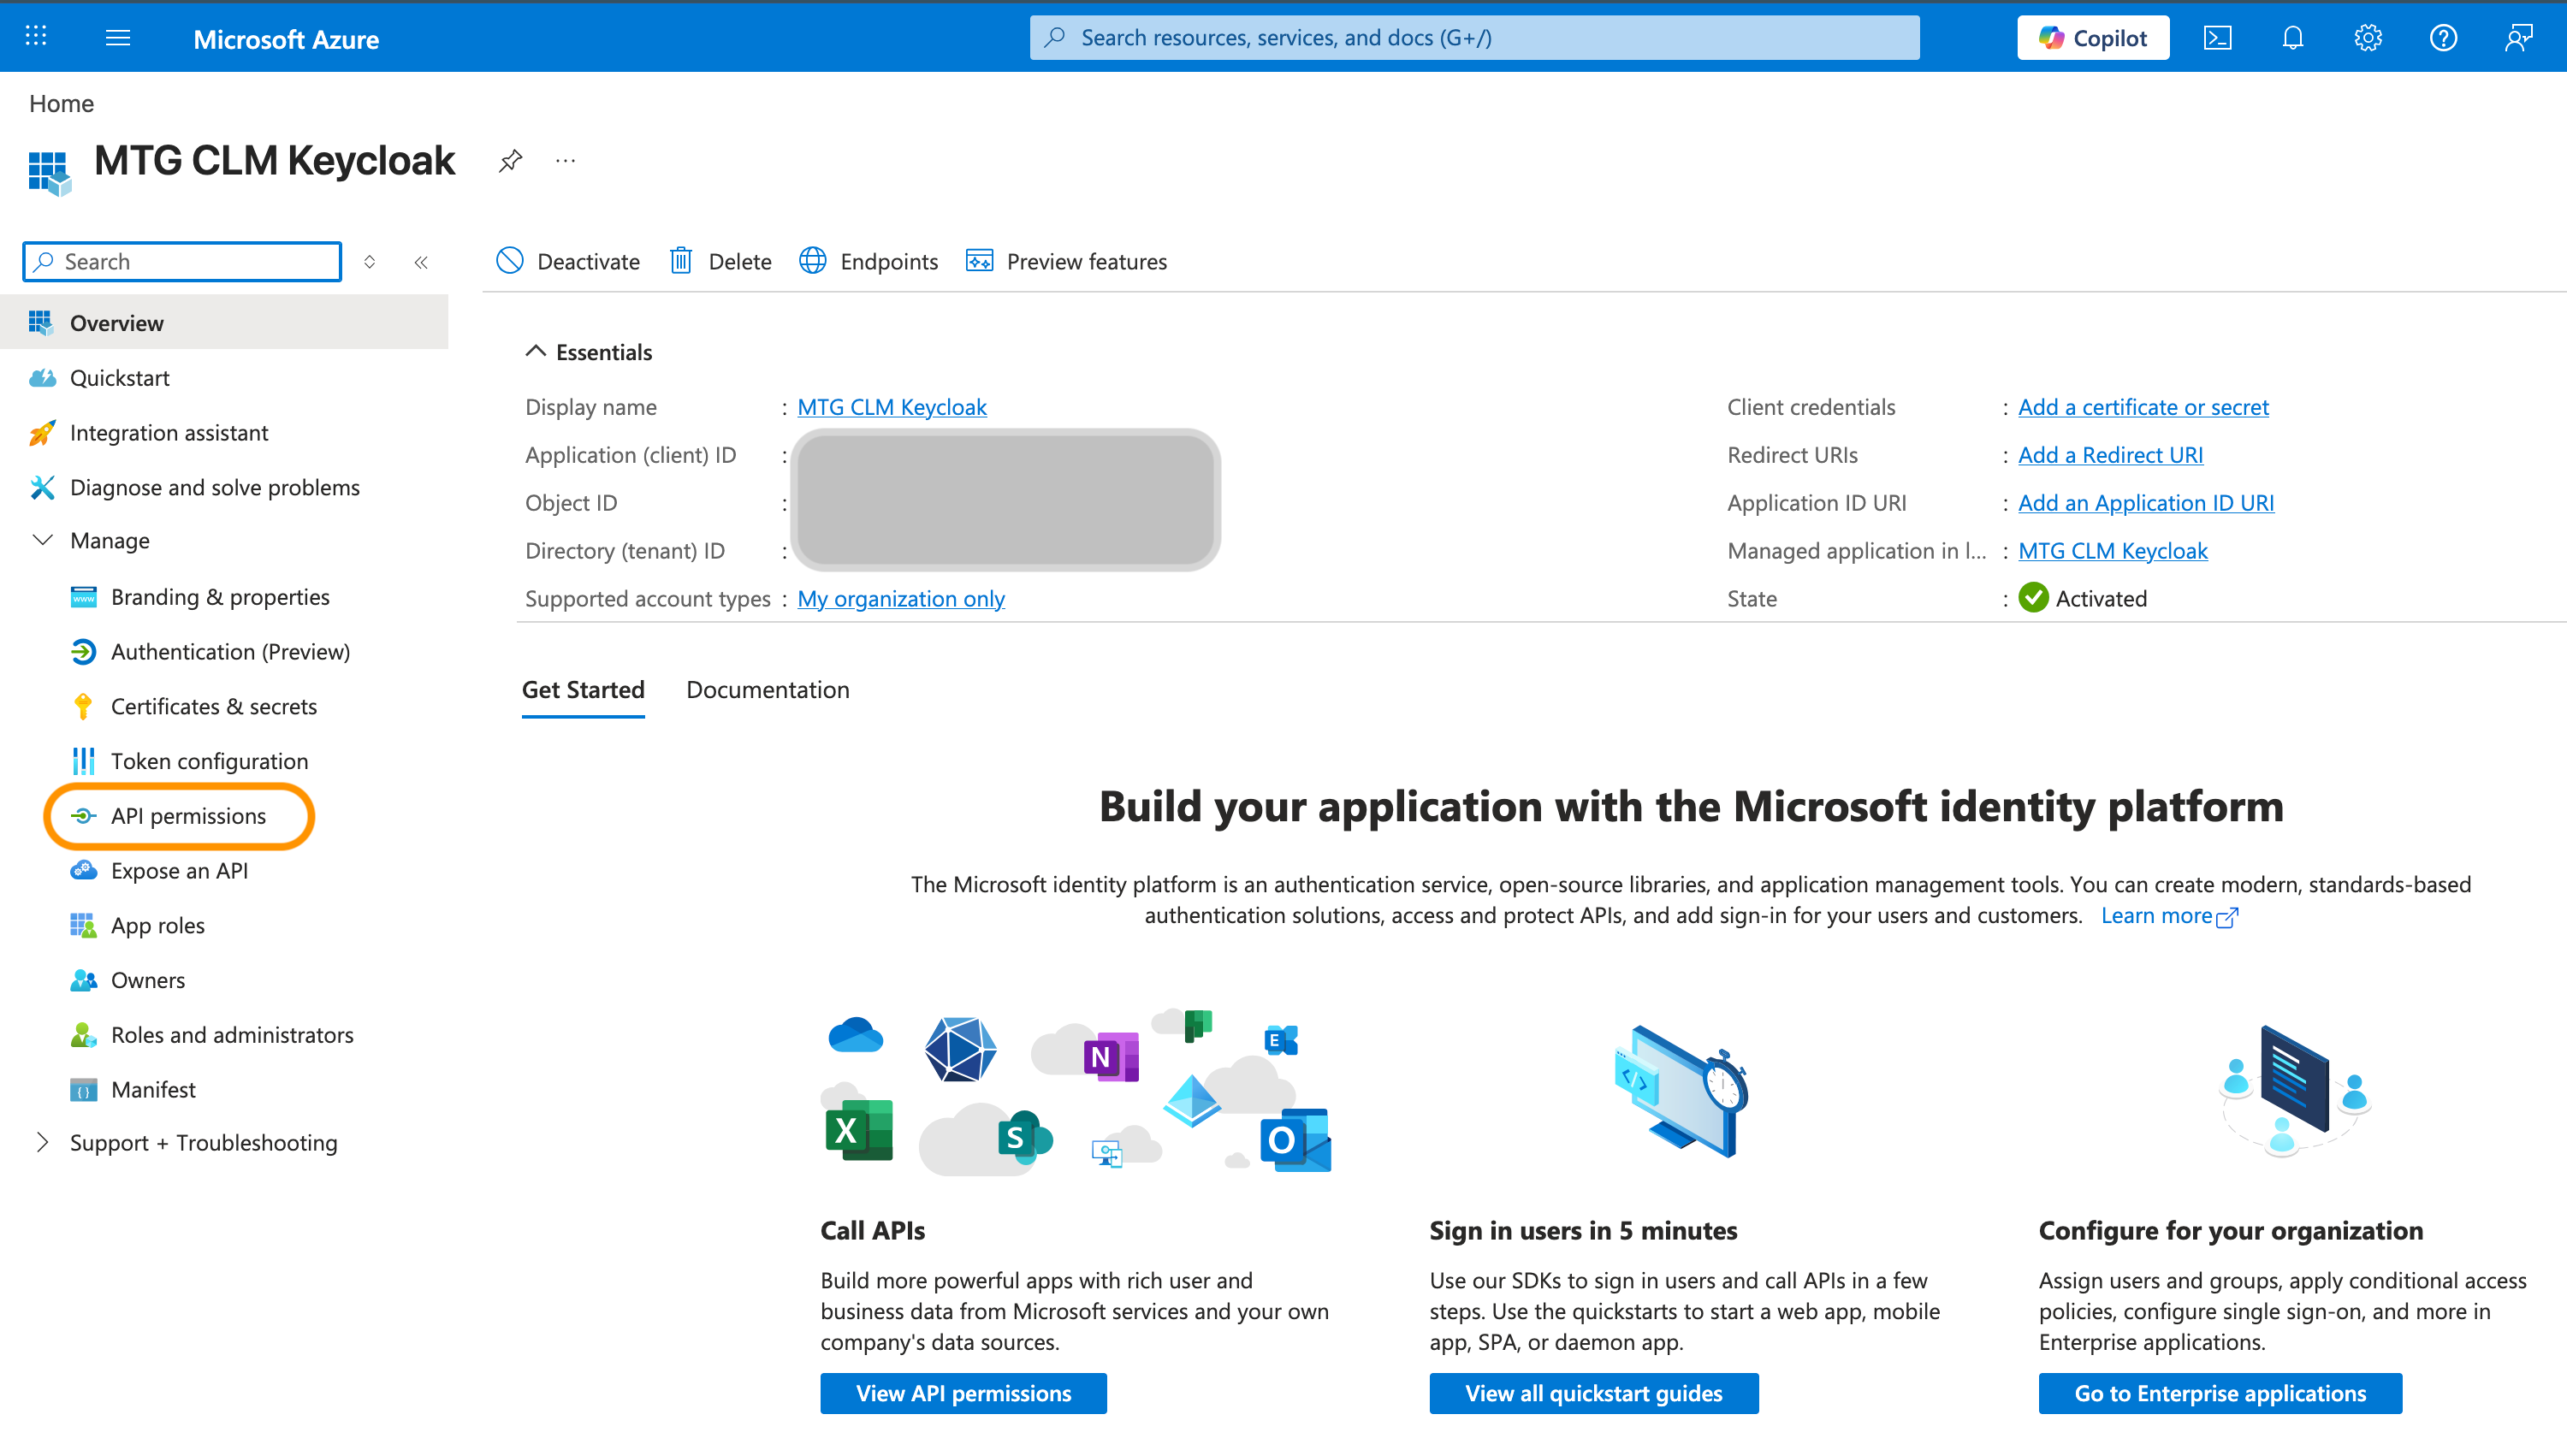
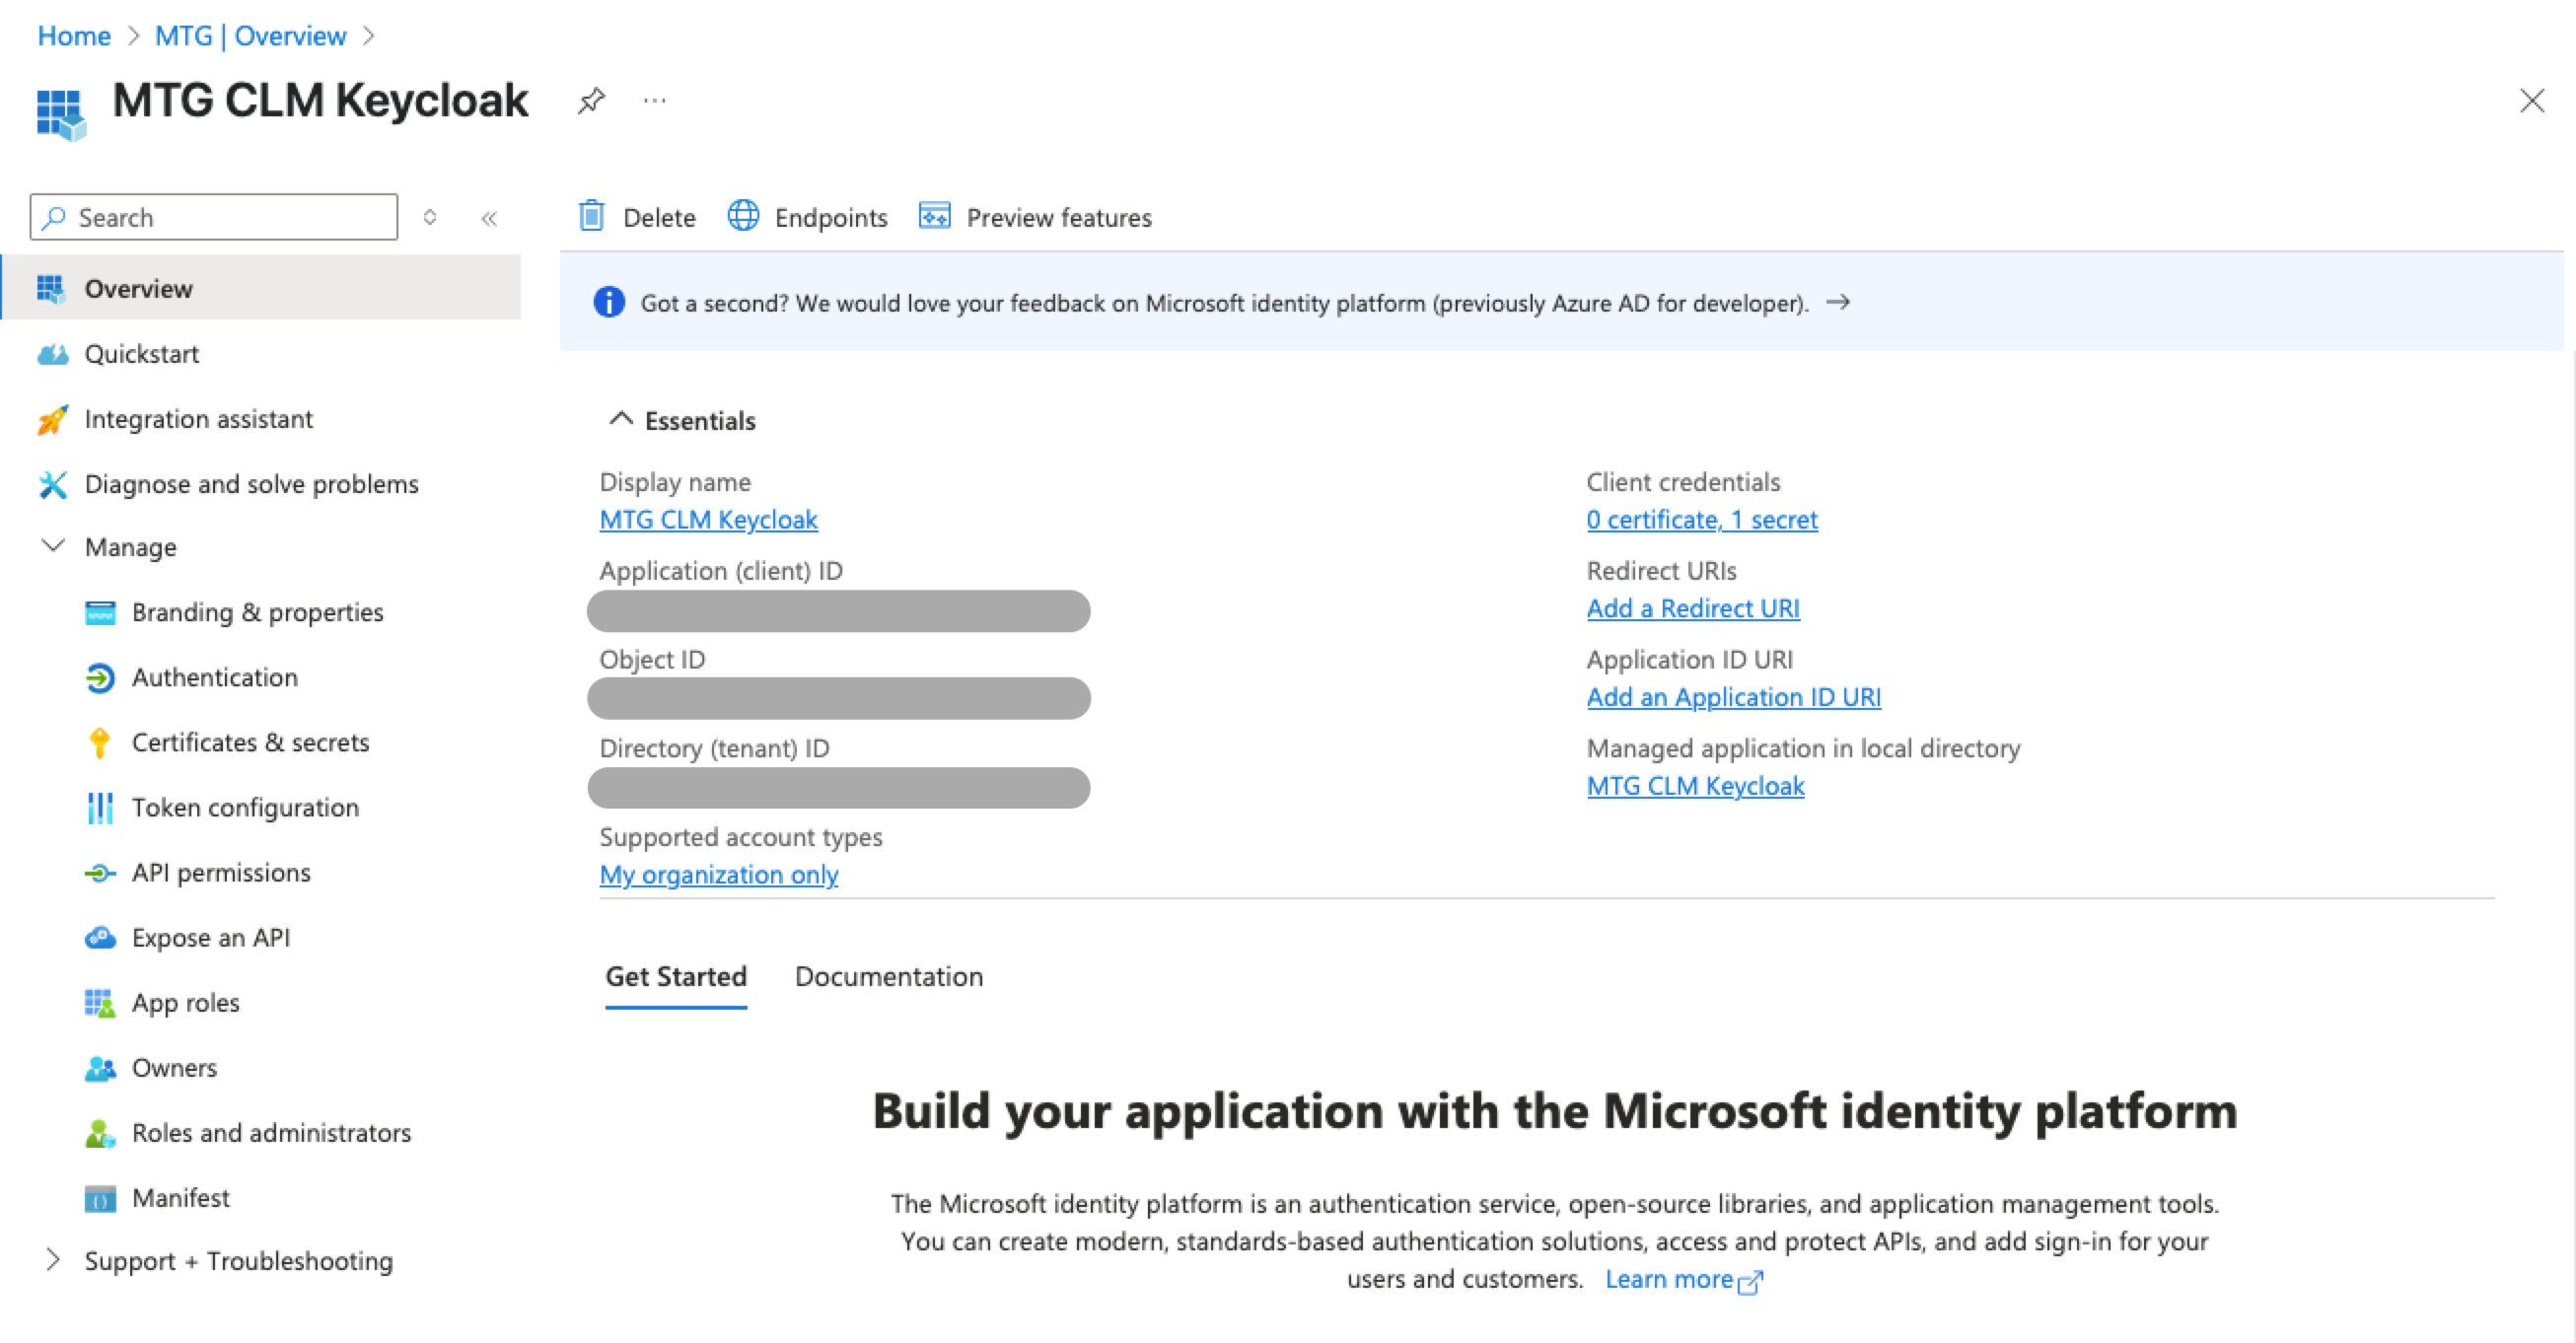
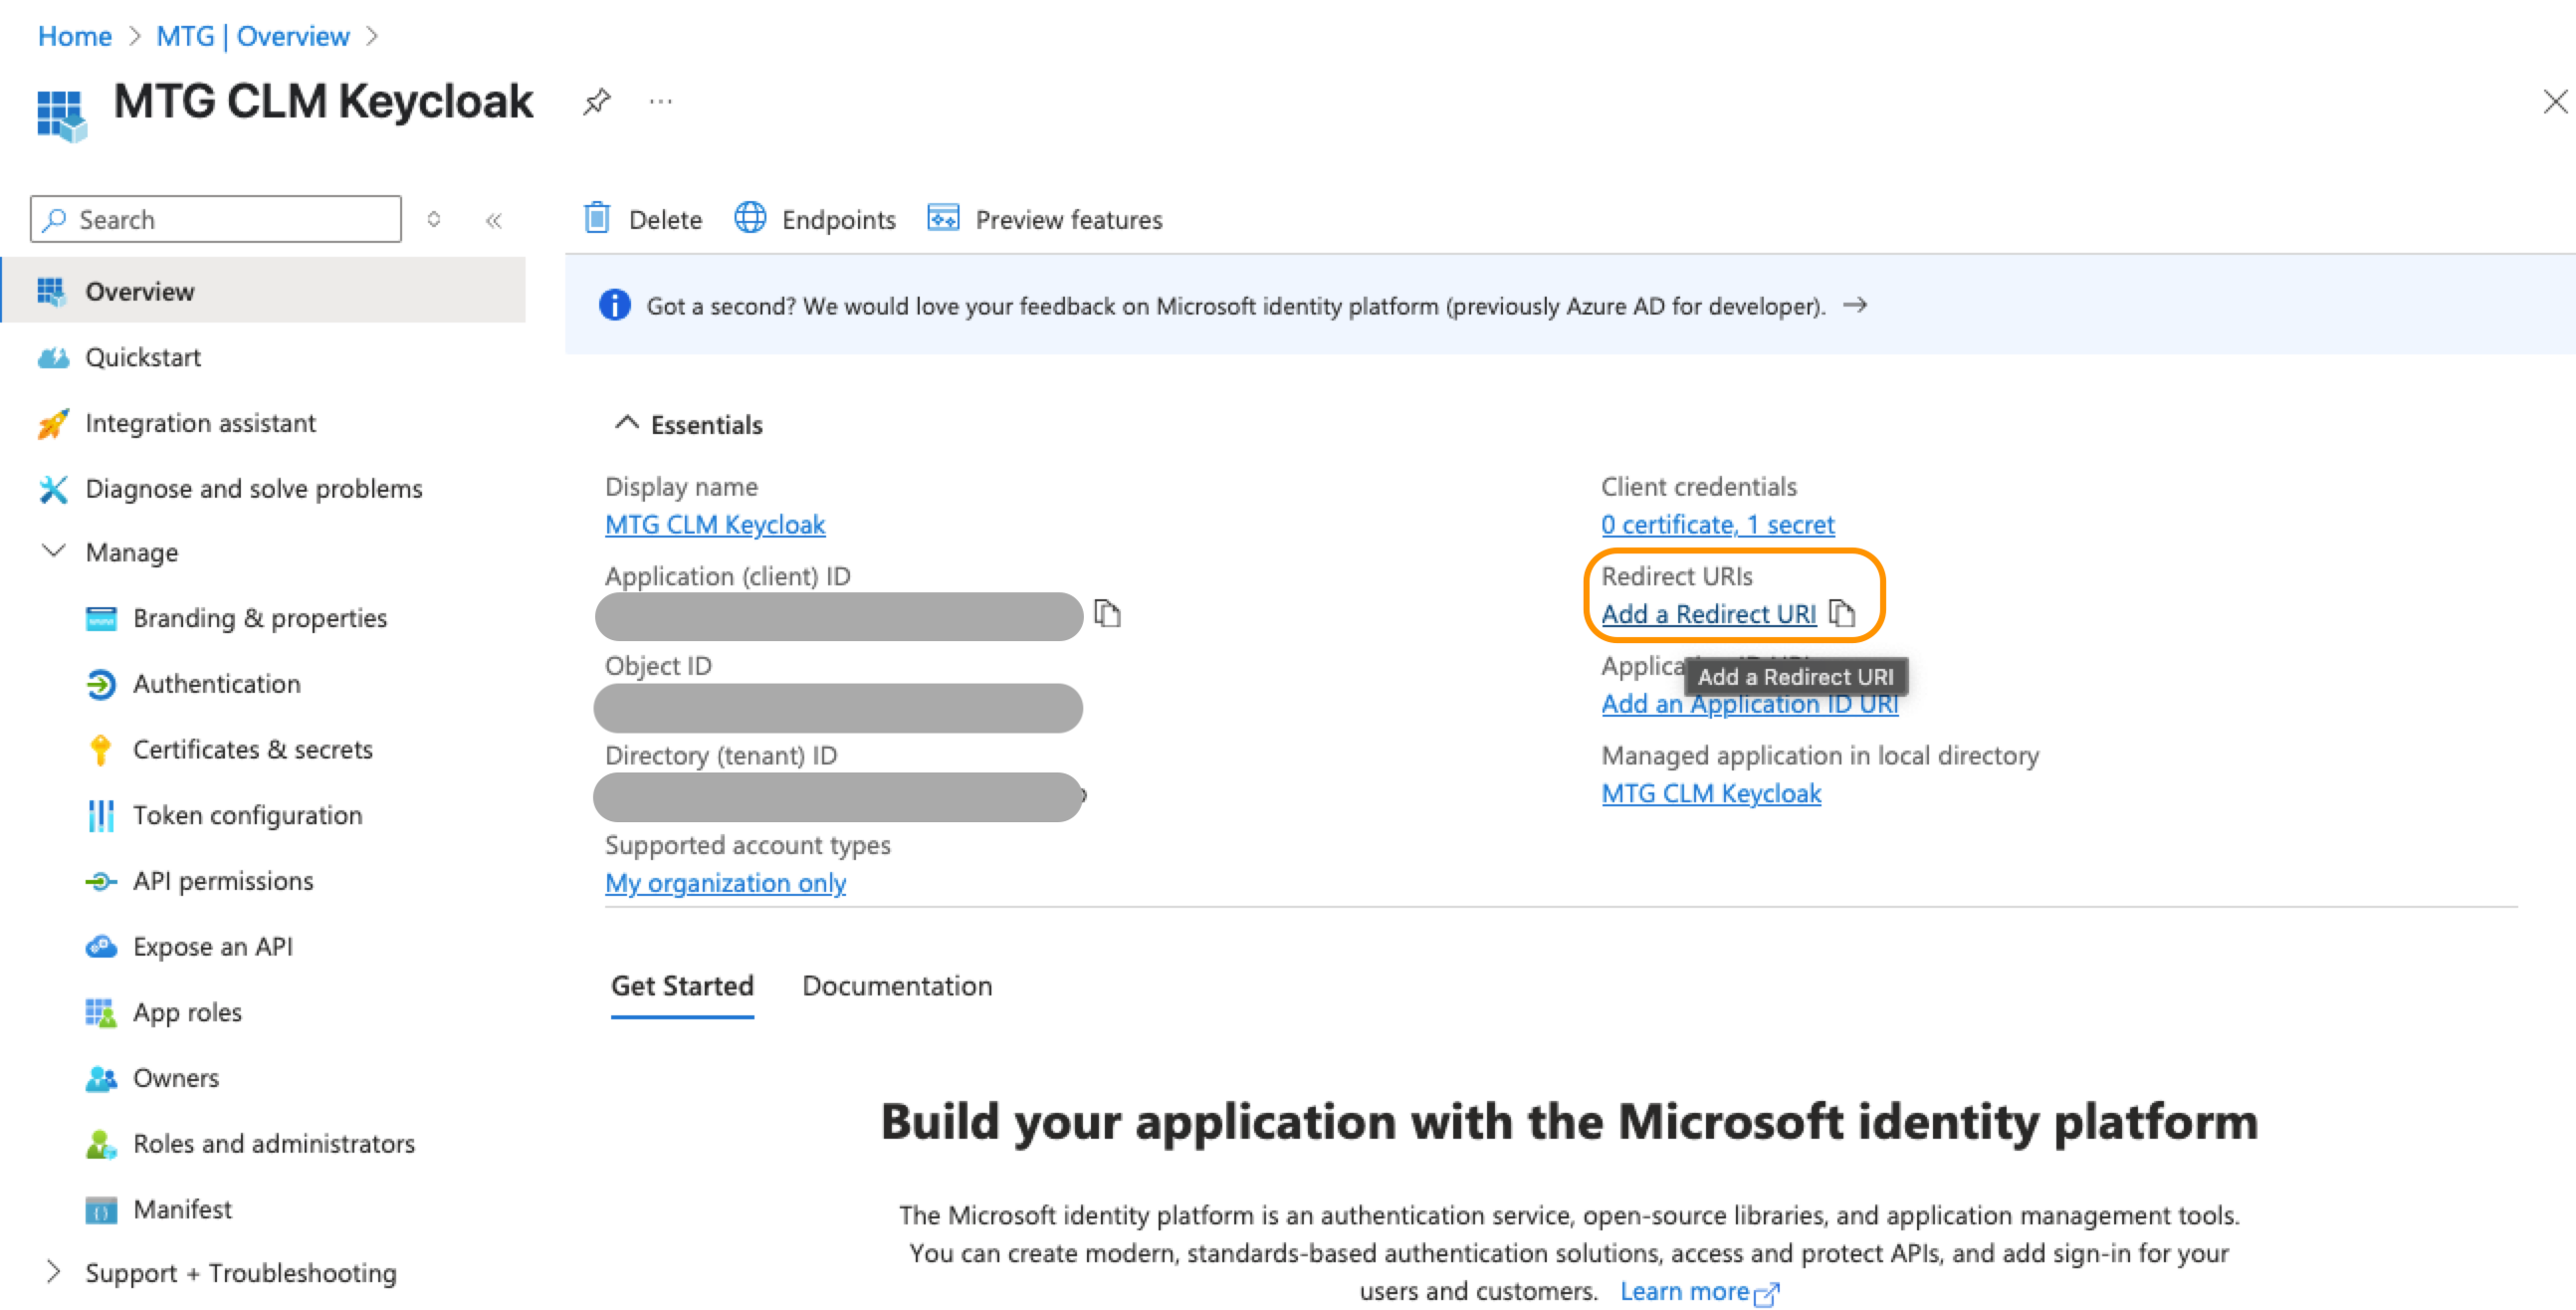
Once the application is created, you are taken to the Overview page.
Copy and securely store the following two values, as you will need them for the Keycloak configuration:
-
Application (client) ID
-
Directory (tenant) ID

Configure API Permissions and Admin Consent
To allow MTG CLM to read user and directory objects within your tenant, you must grant the App Registration specific Microsoft Graph API permissions.
-
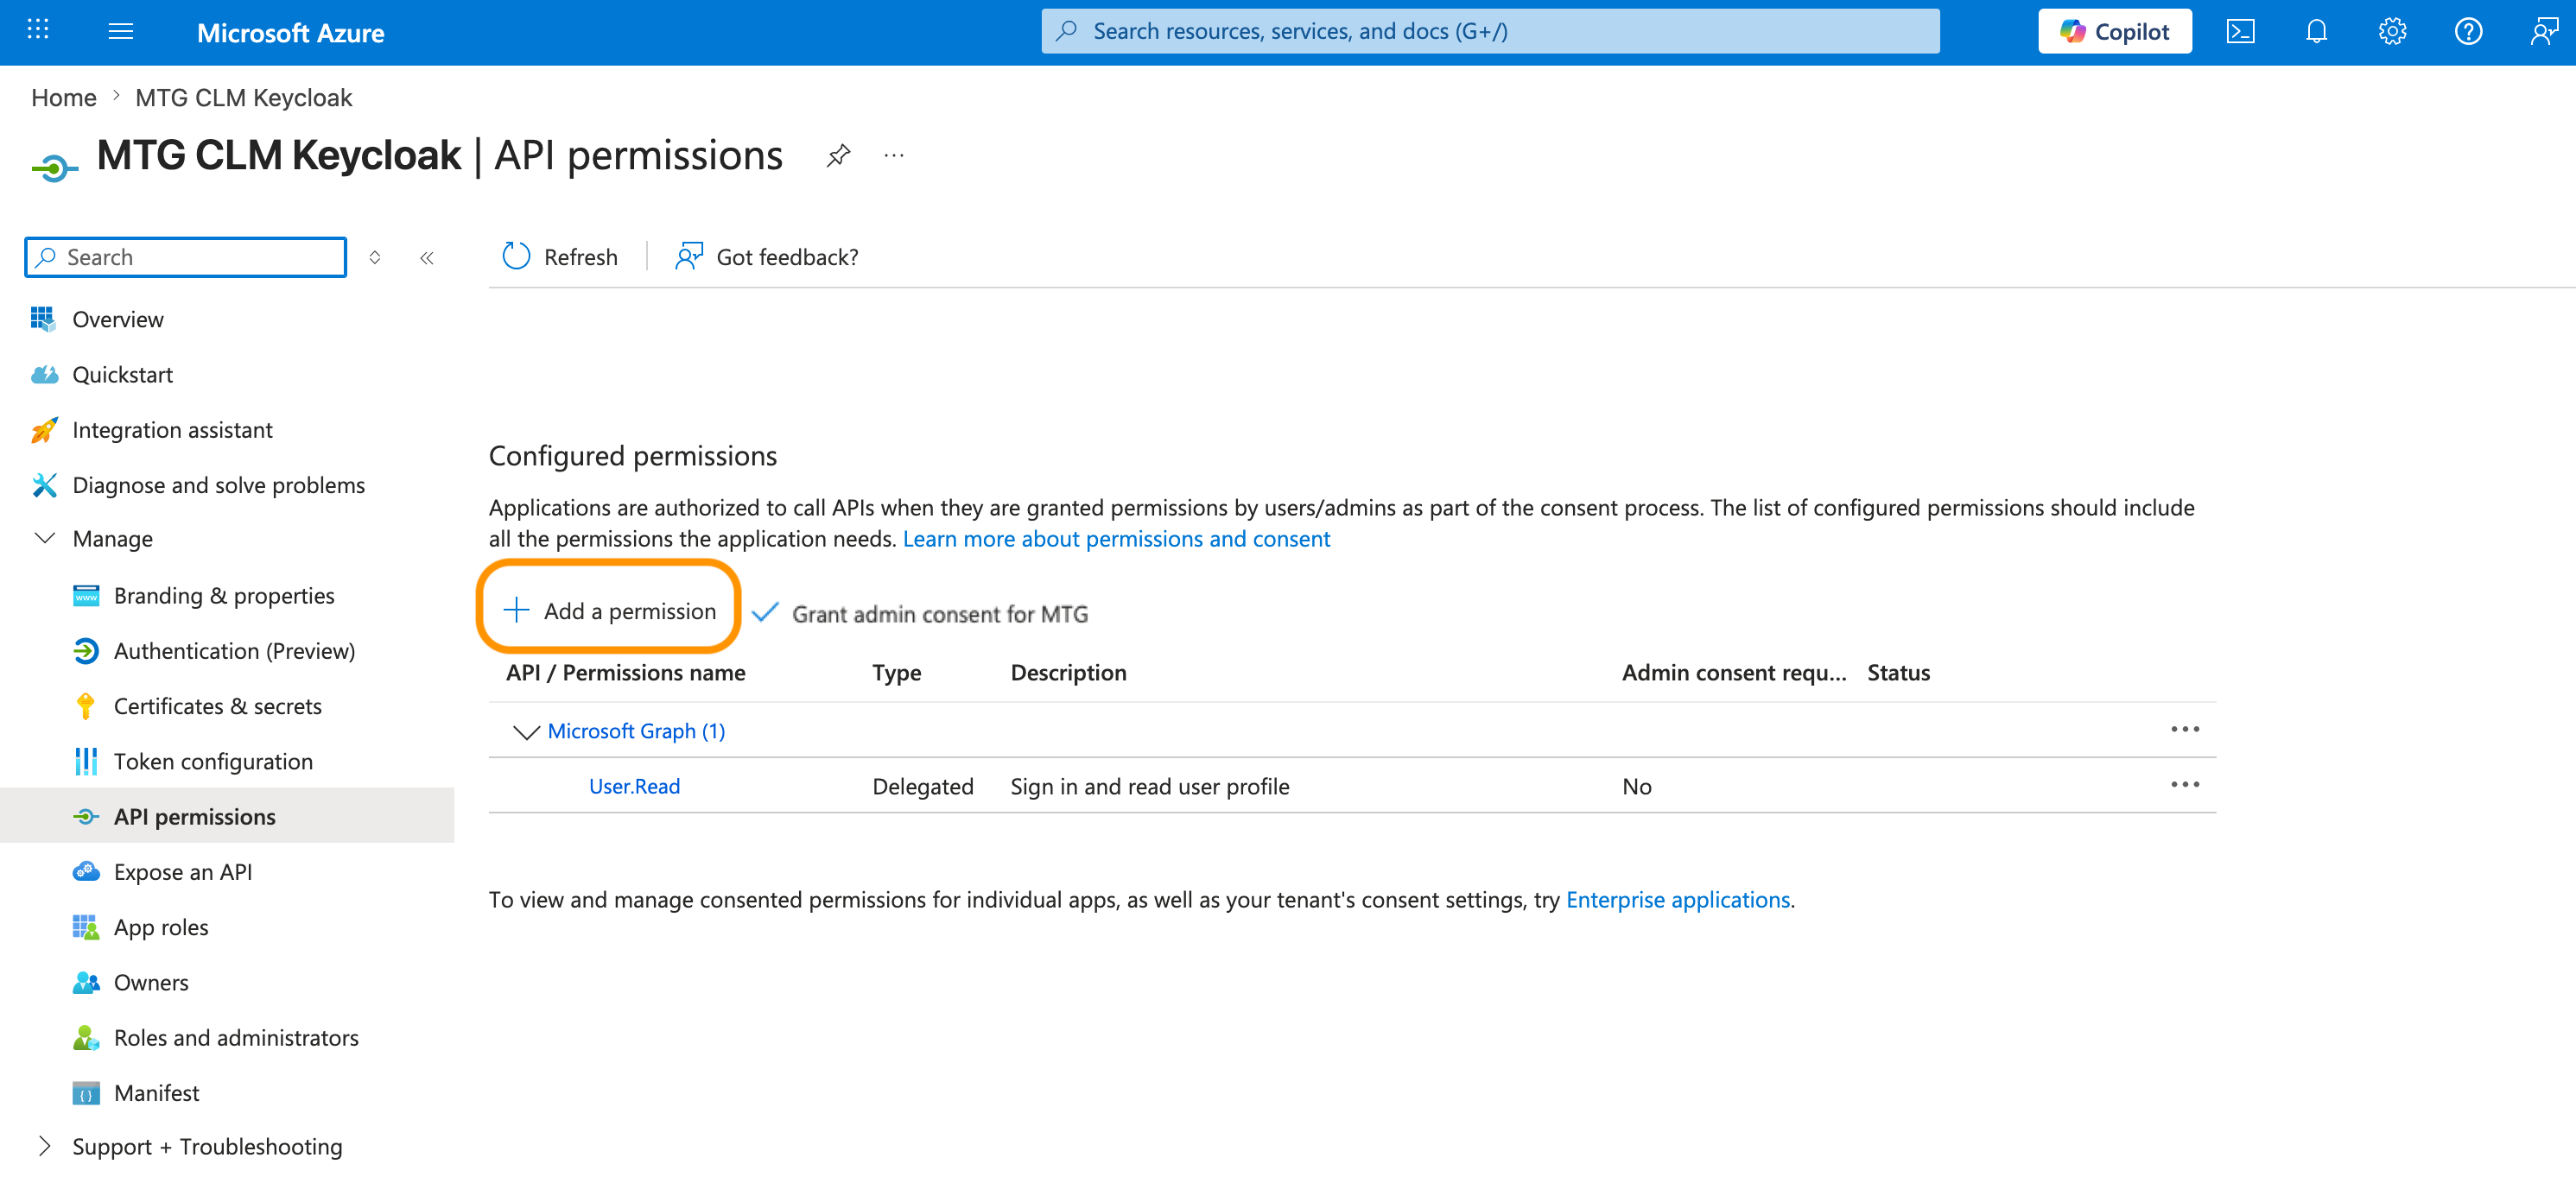
In your App Registration menu, select API permissions from the left sidebar.
-
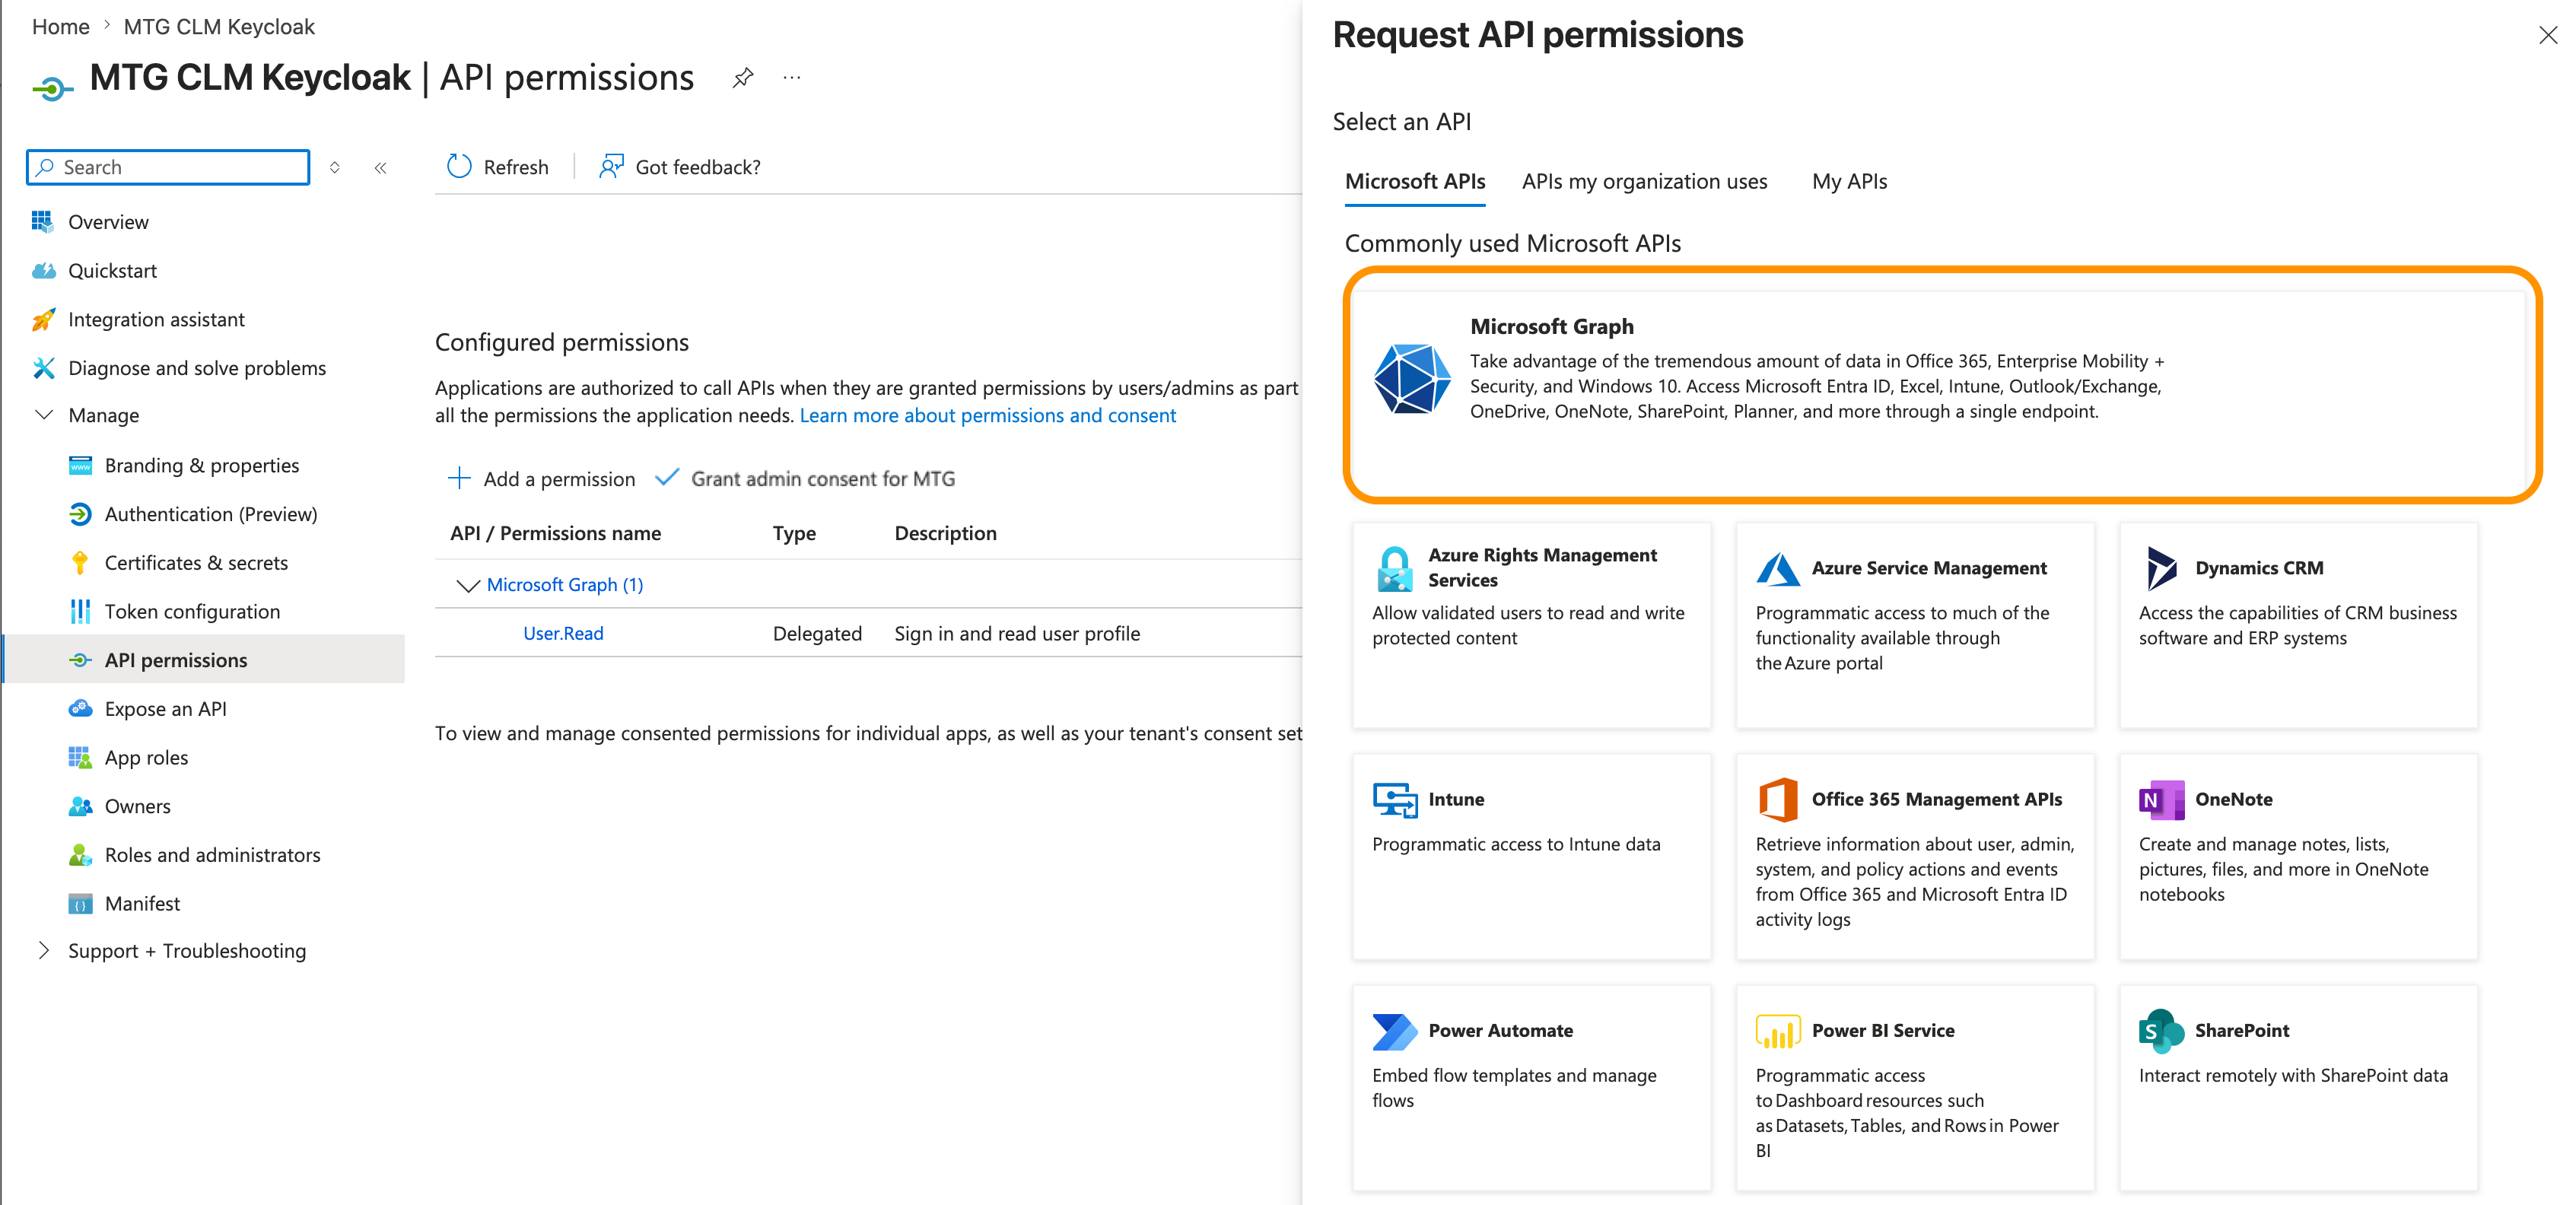
Click + Add a permission.
-
Select Microsoft Graph.
-
Select Application permissions (not Delegated permissions).

-
In the search bar, locate and check the following permission:
Directory.Read.All. Click Add permissions at the bottom of the screen.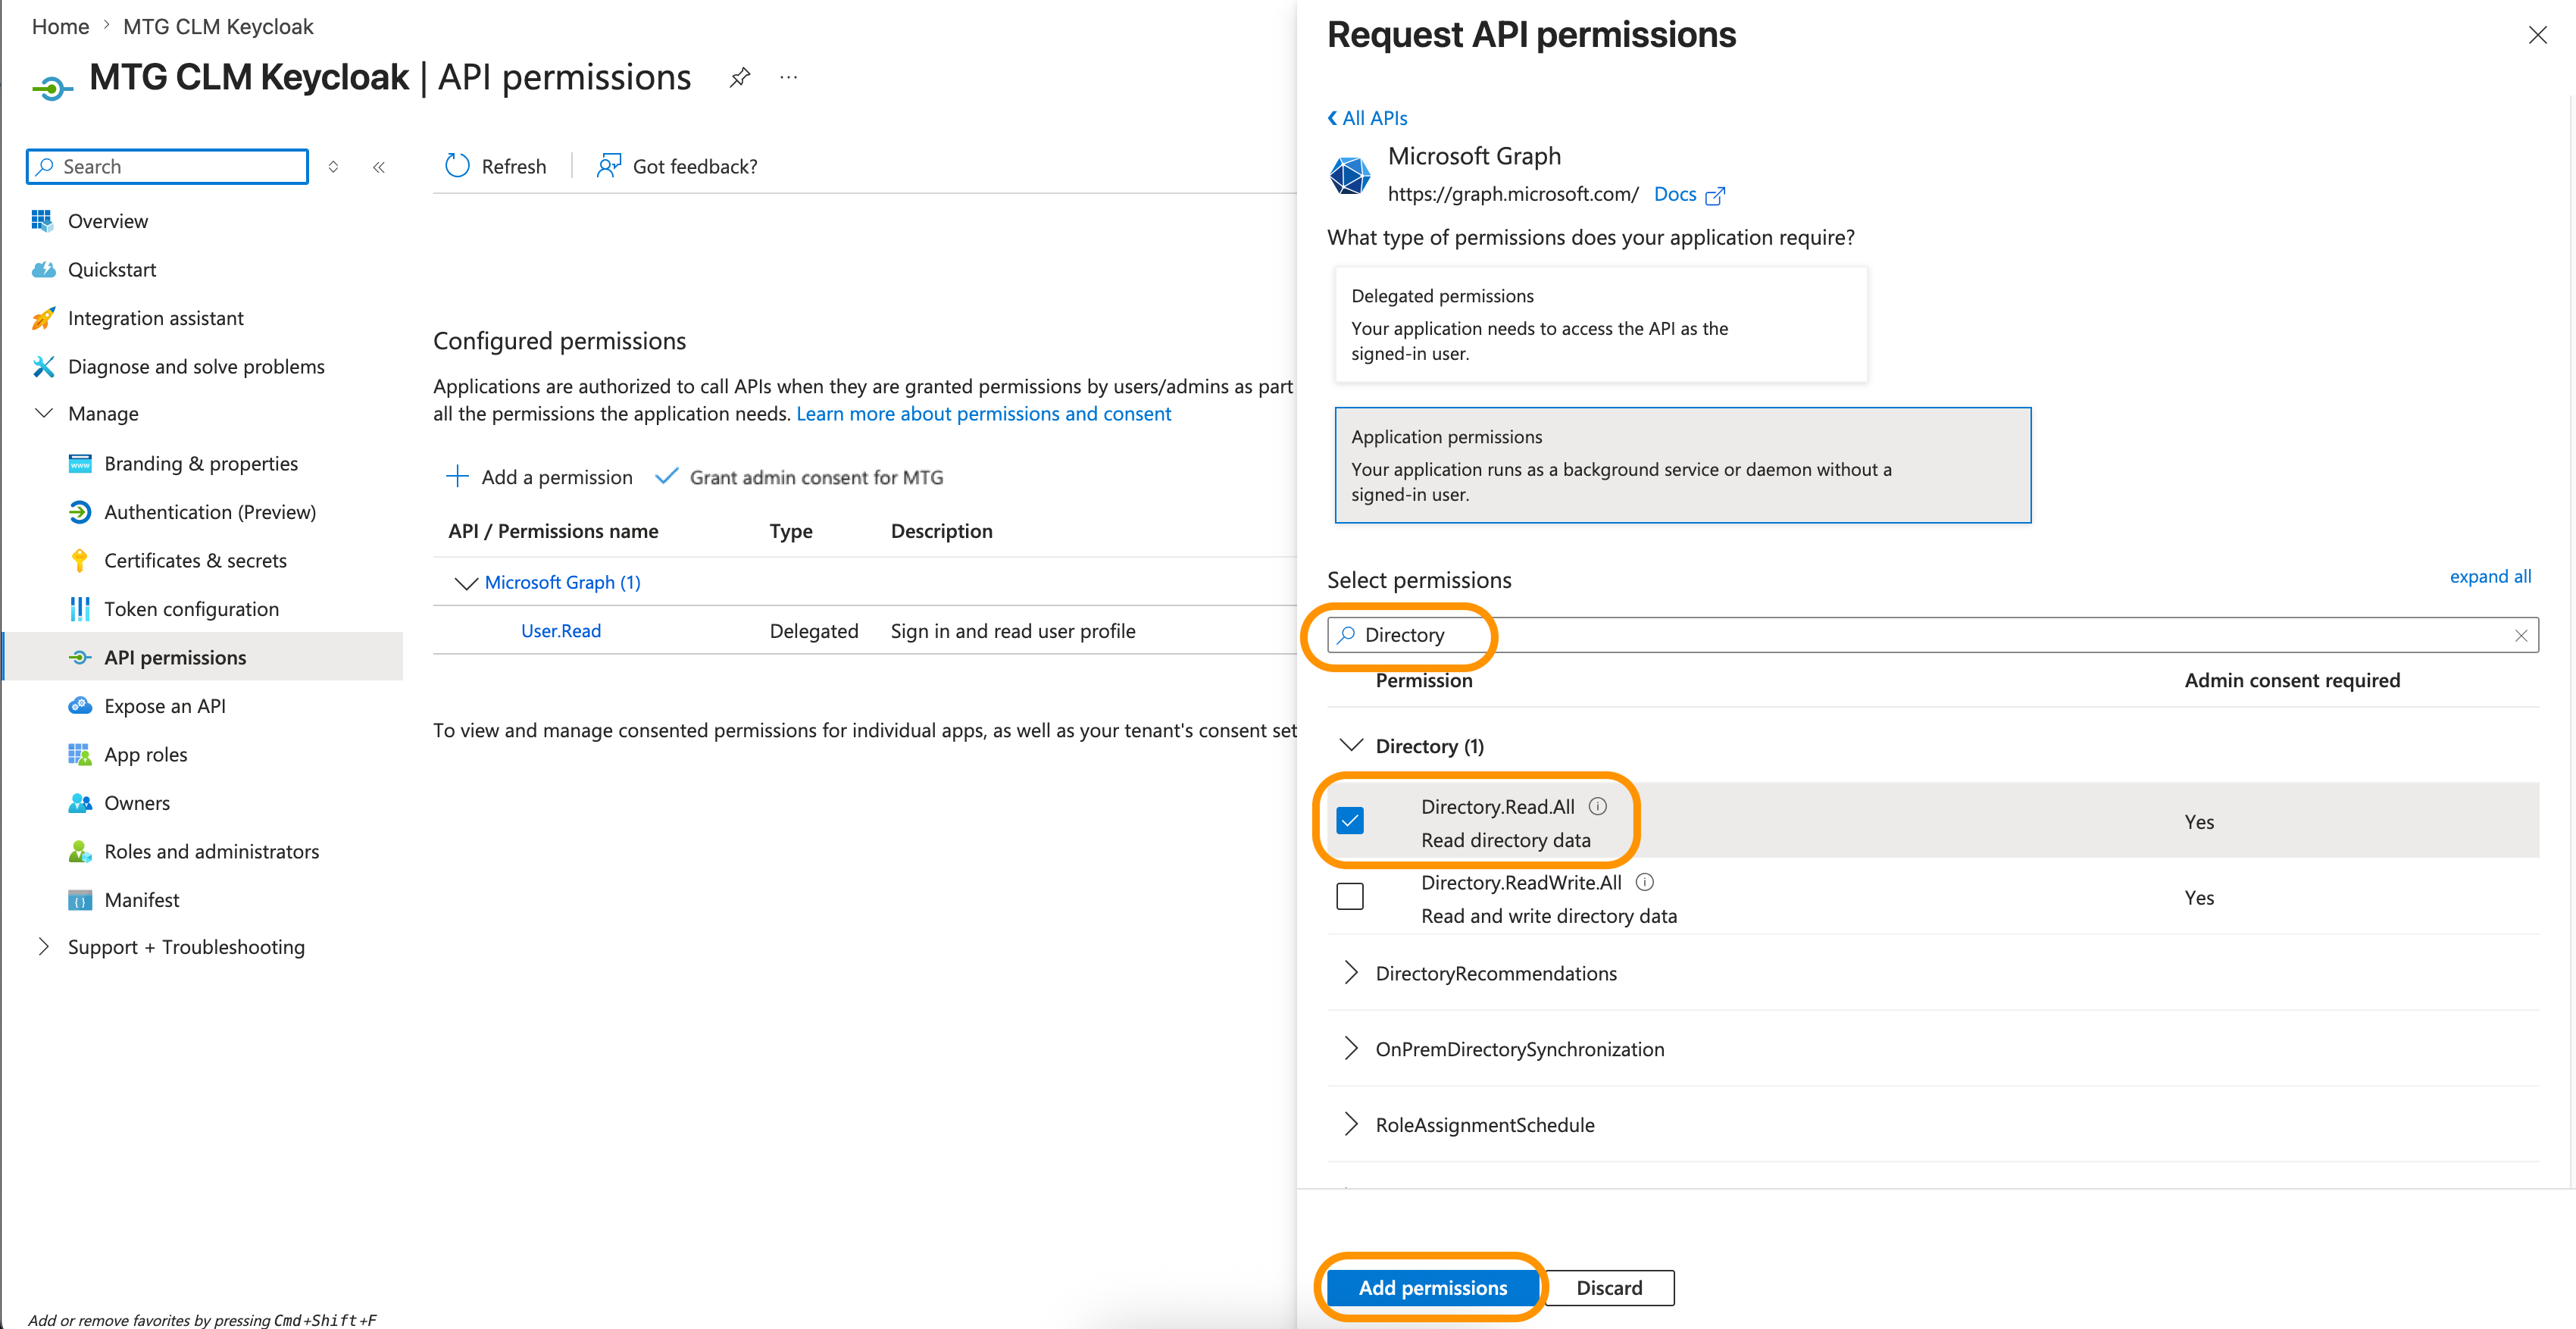
-
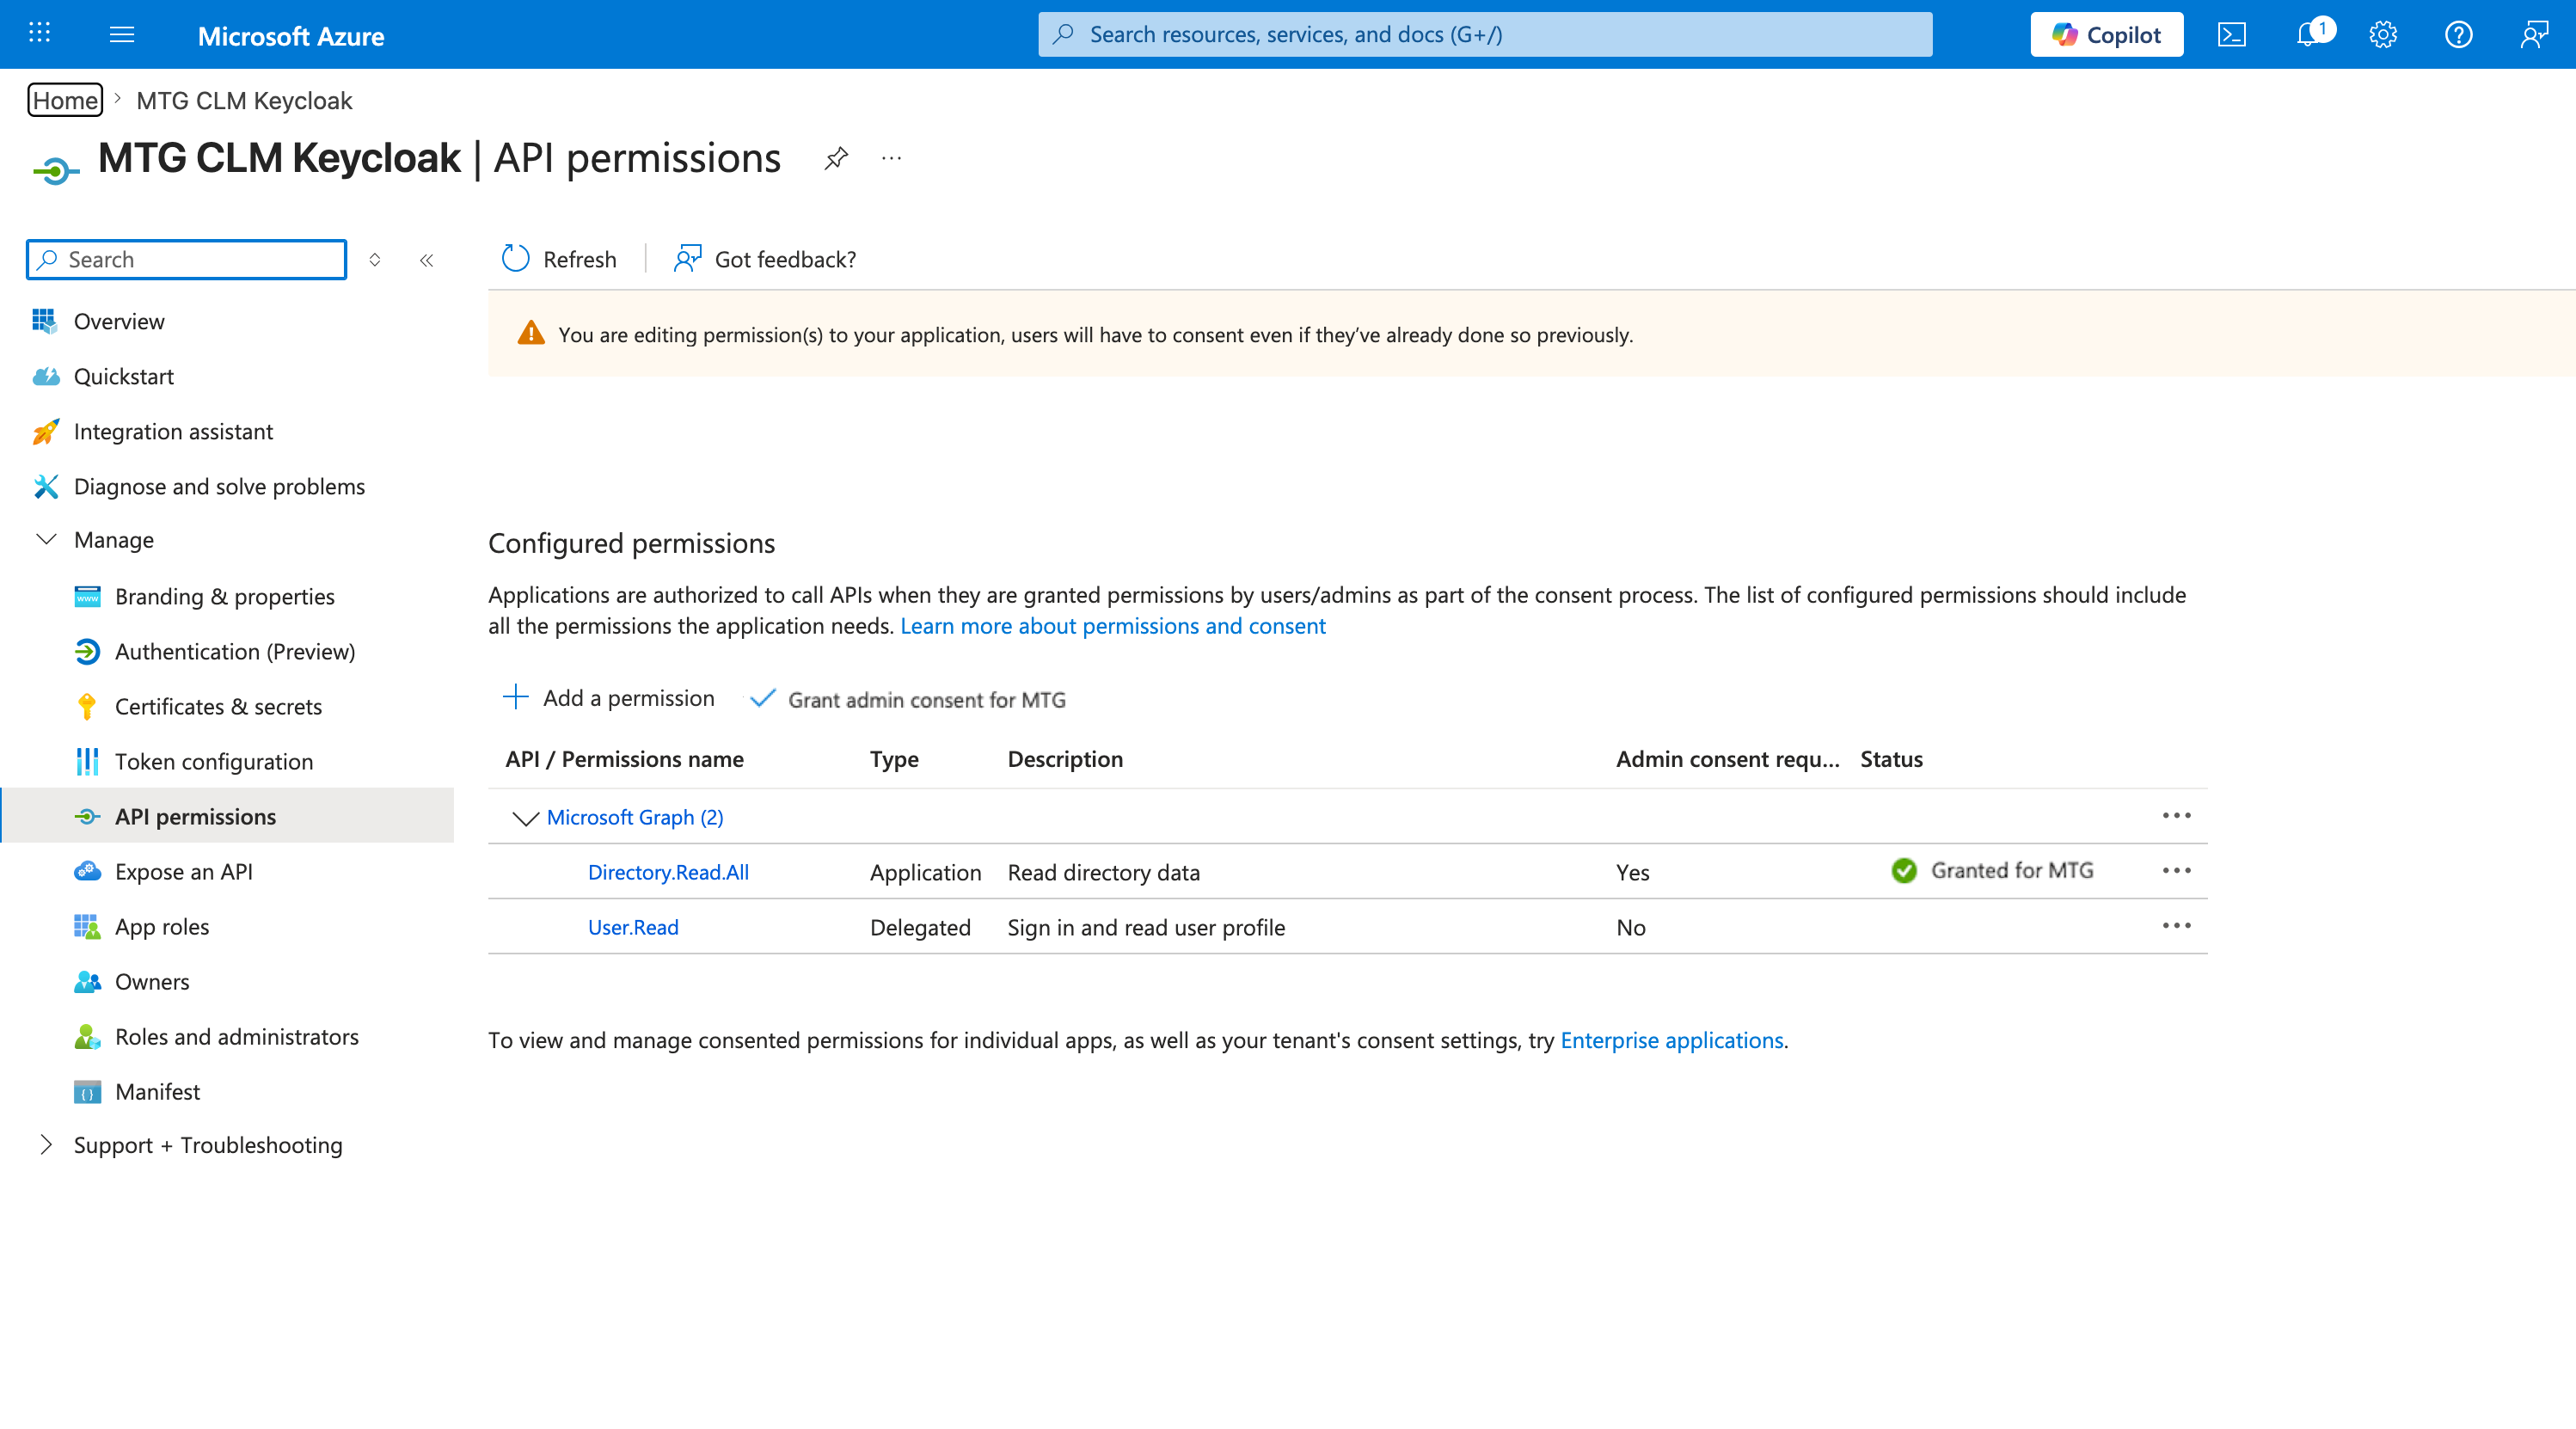
Once the permissions are added, select them and click the Grant admin consent for [Your Tenant Name] button located above the permissions list.
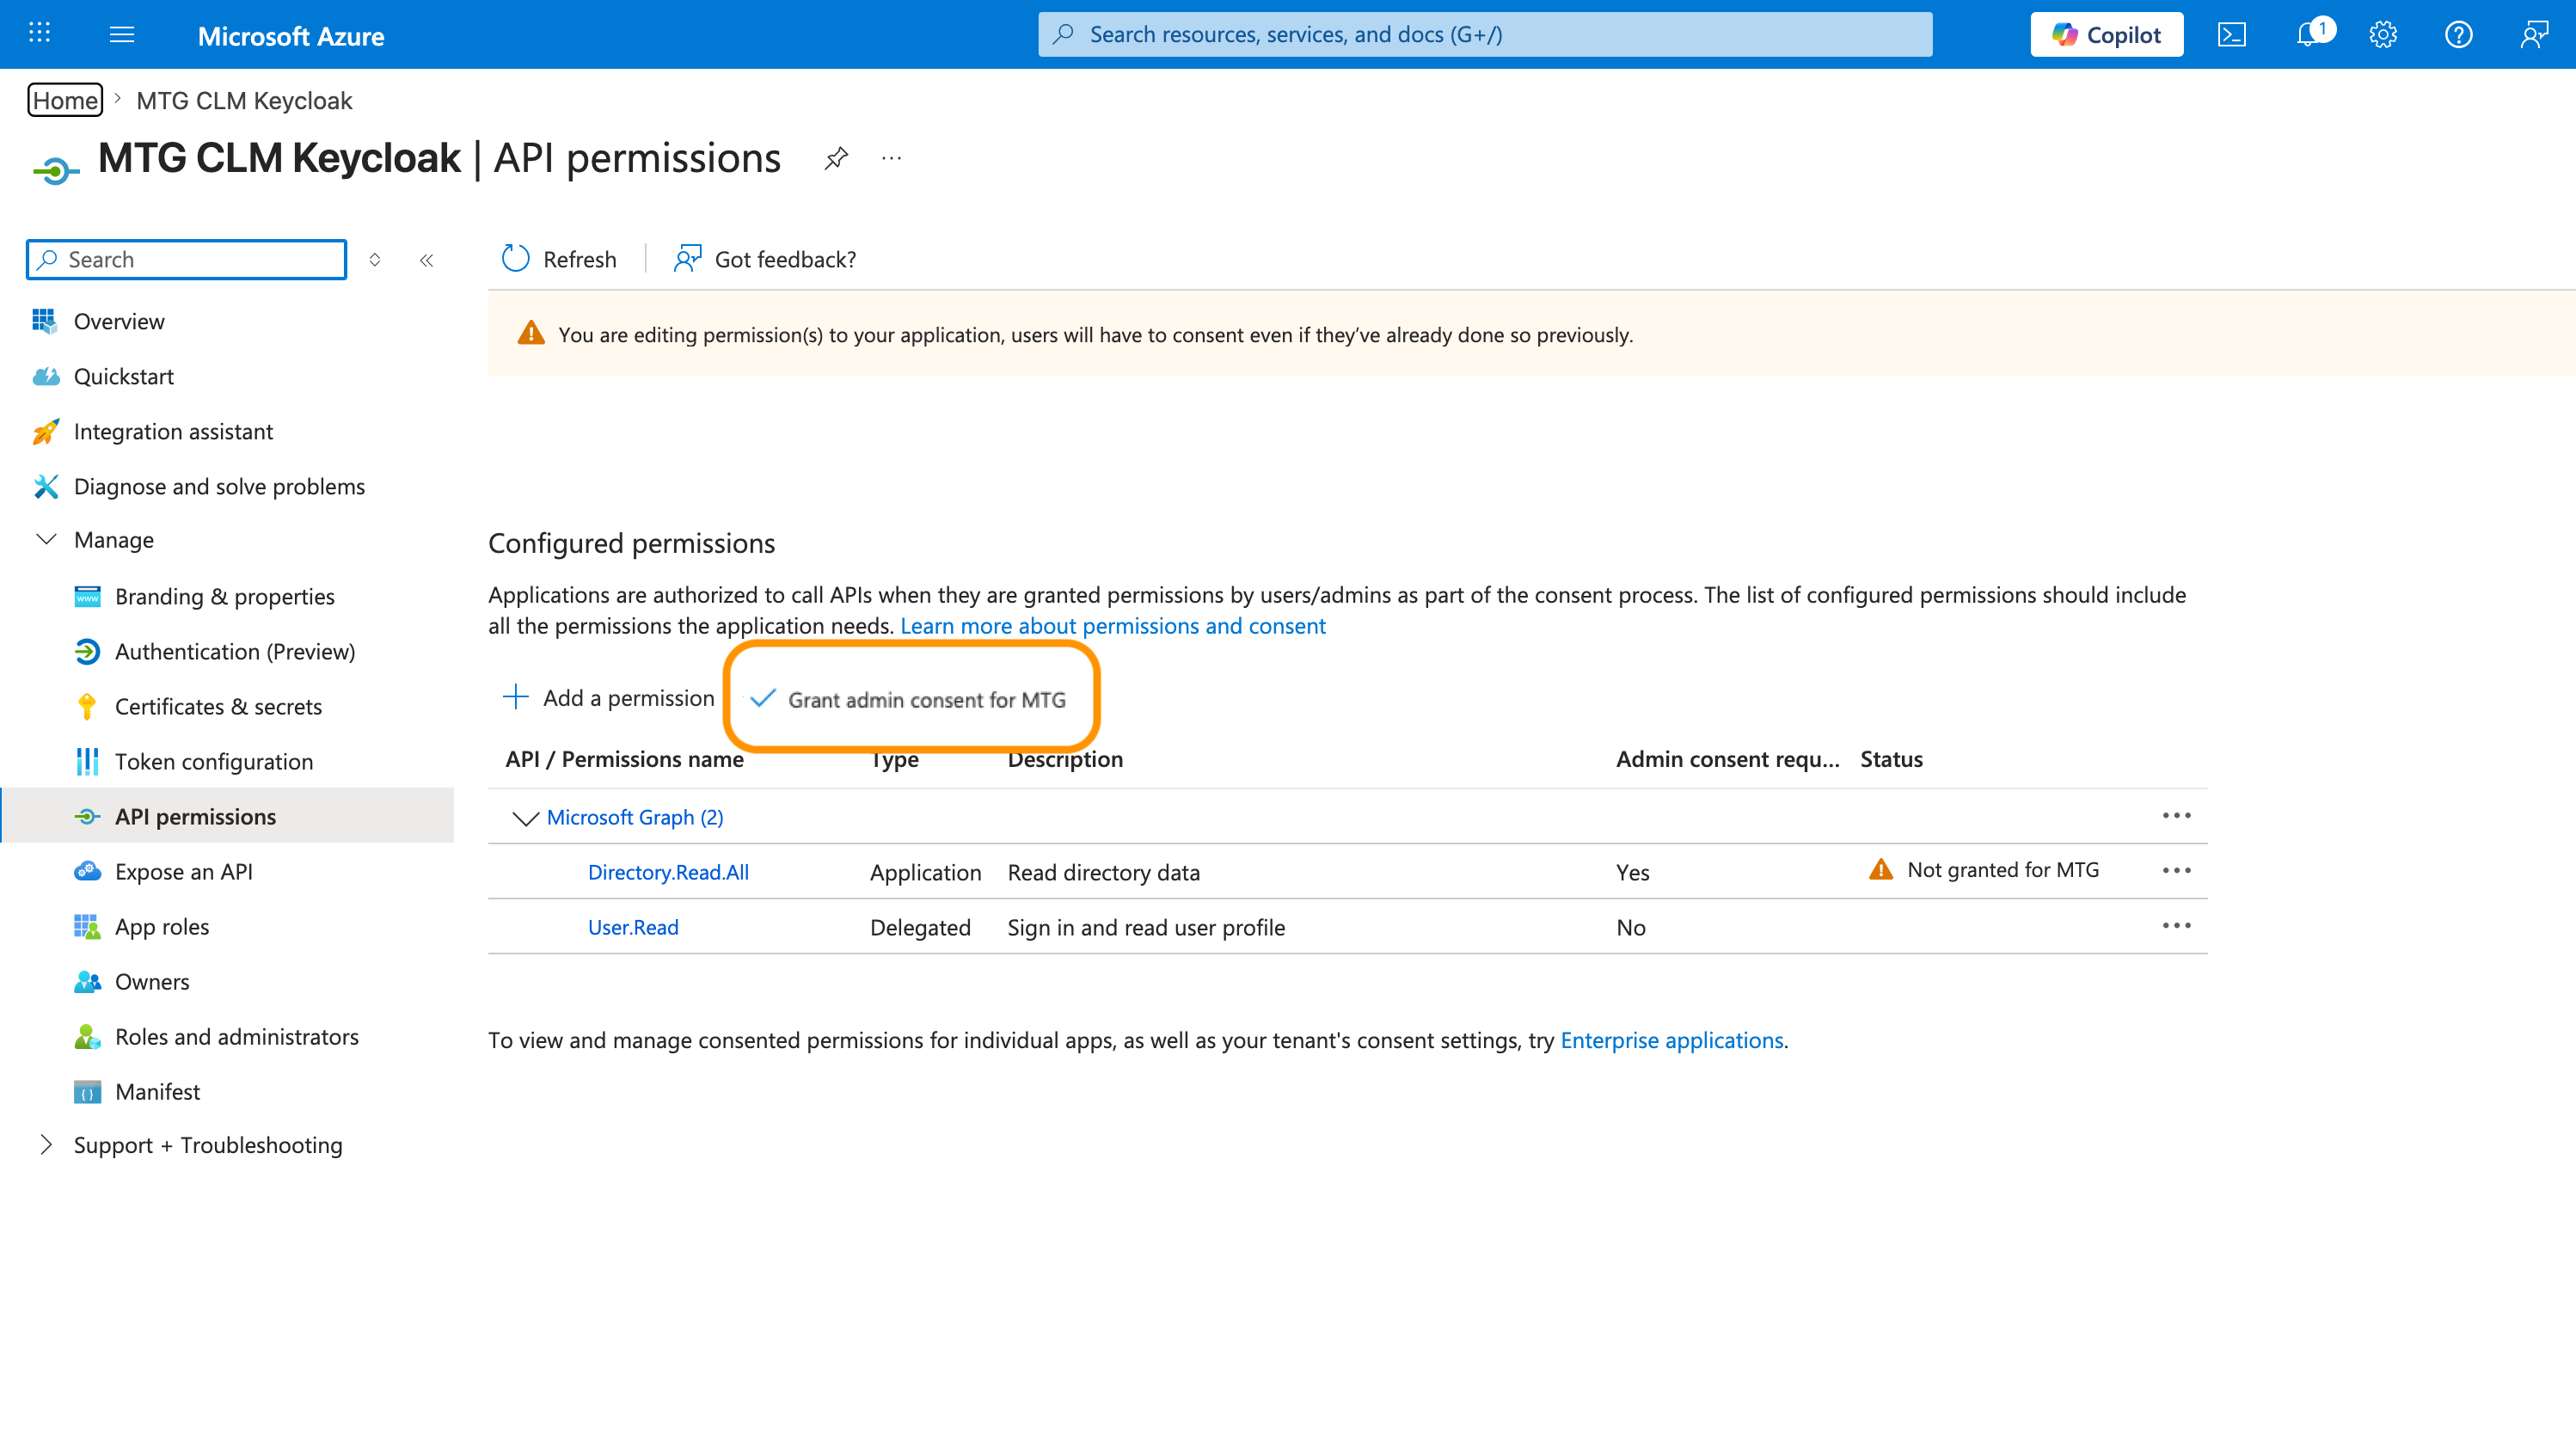
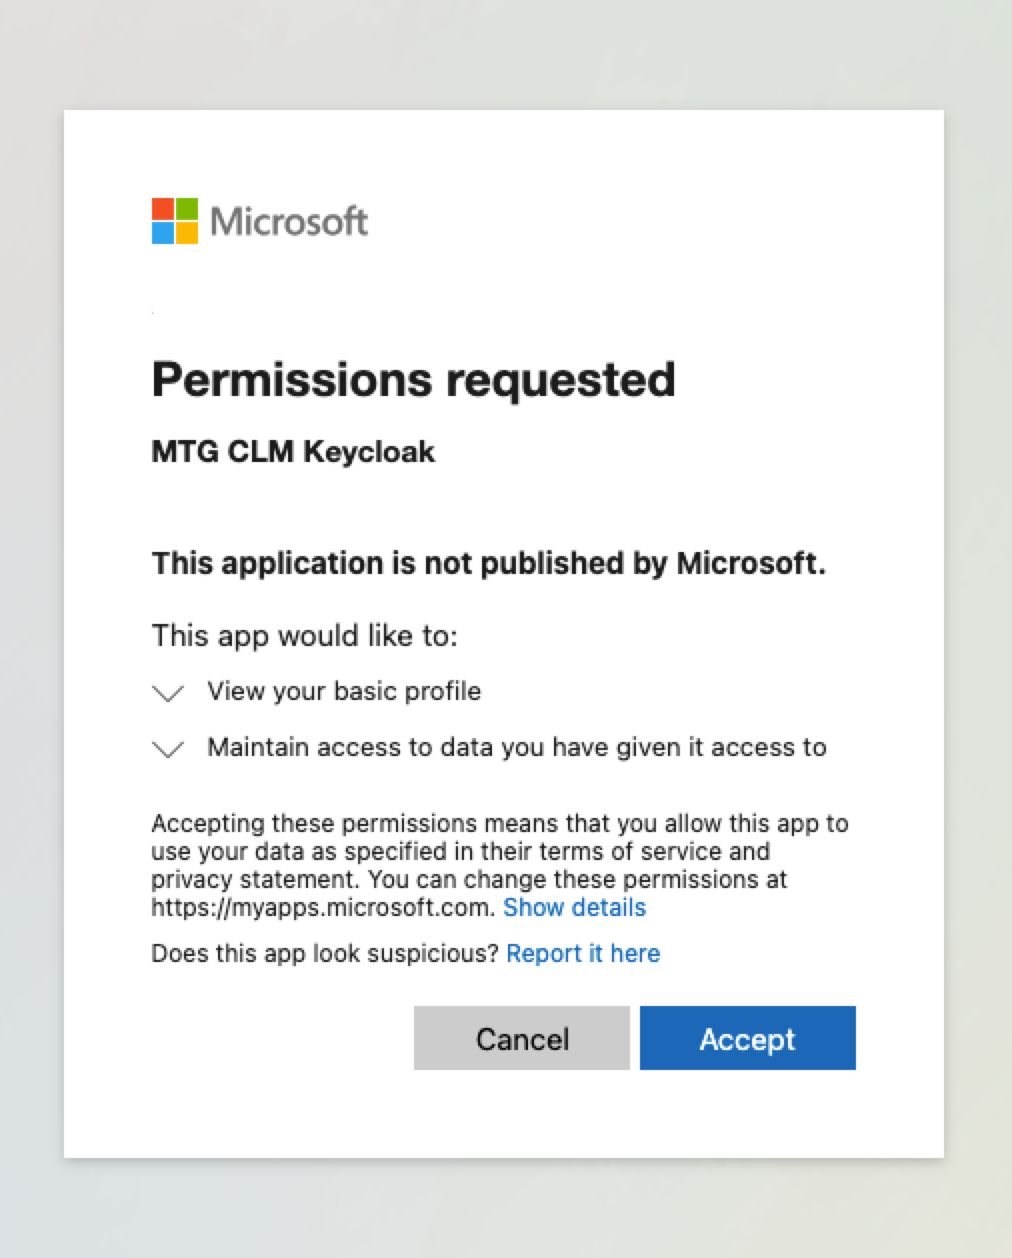
-
Click Yes in the confirmation prompt. You should be seeing a similar screen to:
| If the Grant admin consent button is greyed out, your current account does not have the Global Administrator or Privileged Role Administrator rights required to authorize these permissions. |
Generate the Client Secret
Keycloak requires a client secret to authenticate against your Entra ID tenant securely.
-
In your App Registration menu, select Certificates & secrets from the left sidebar.
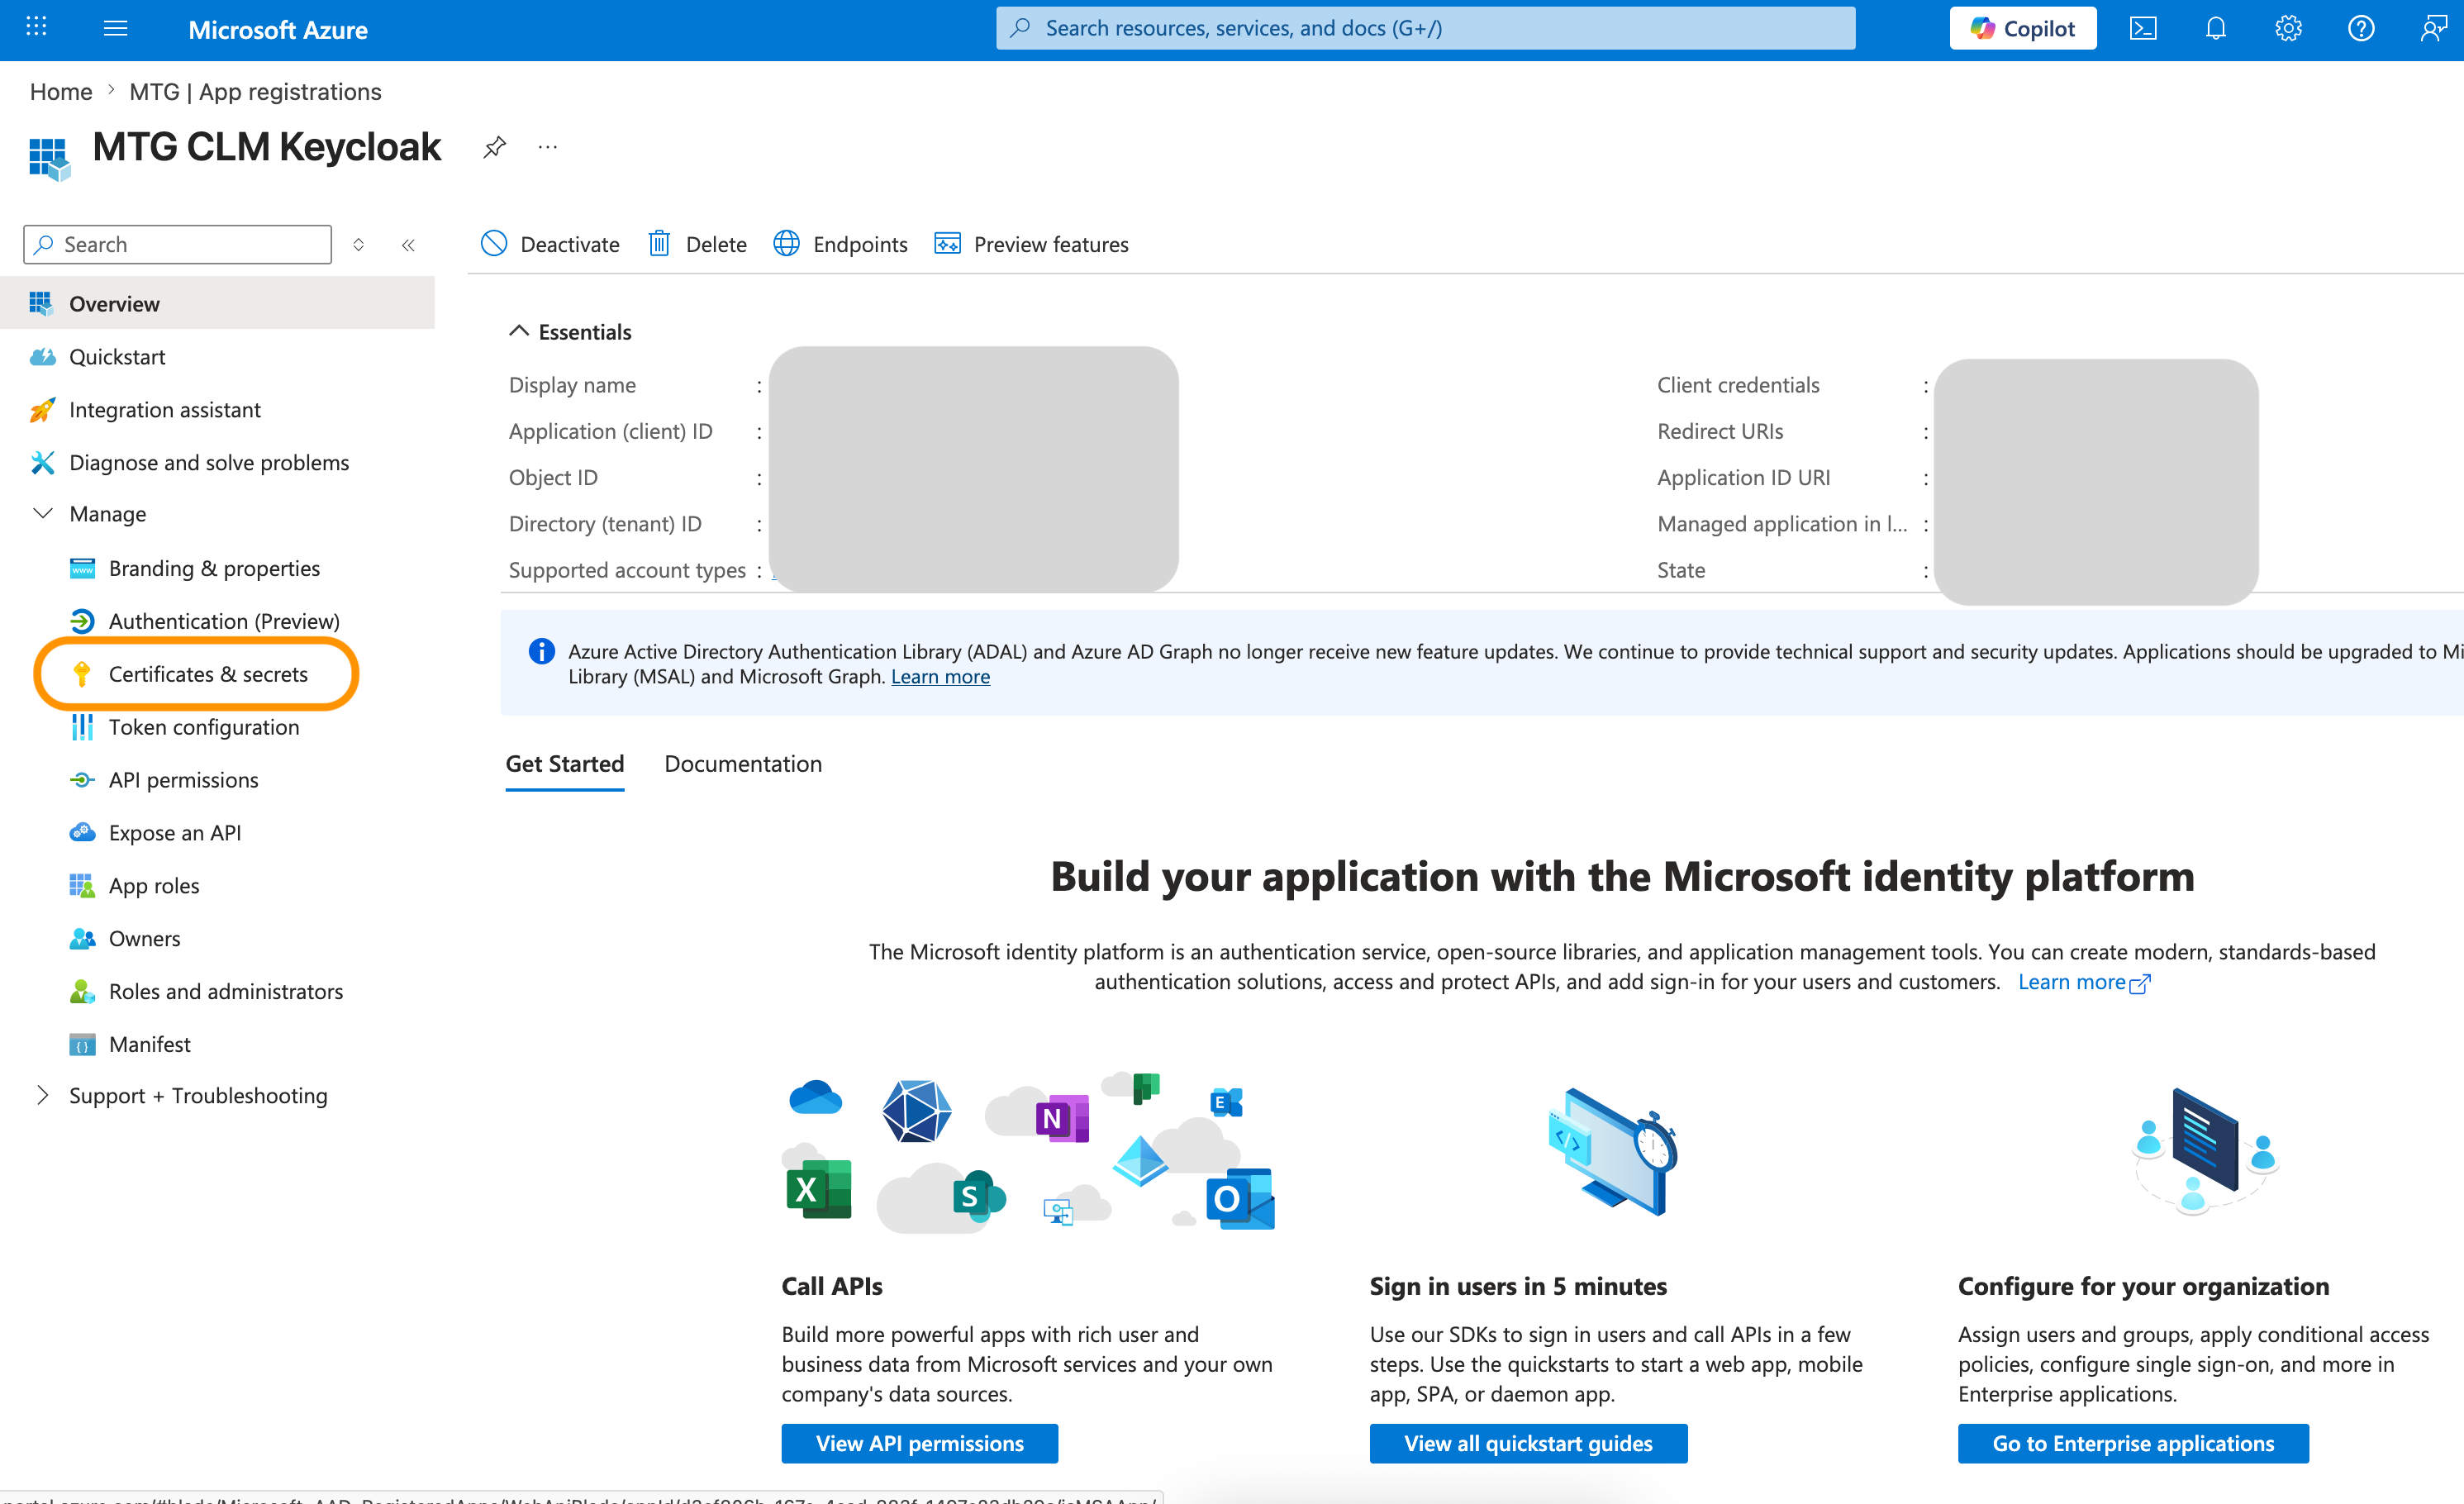
-
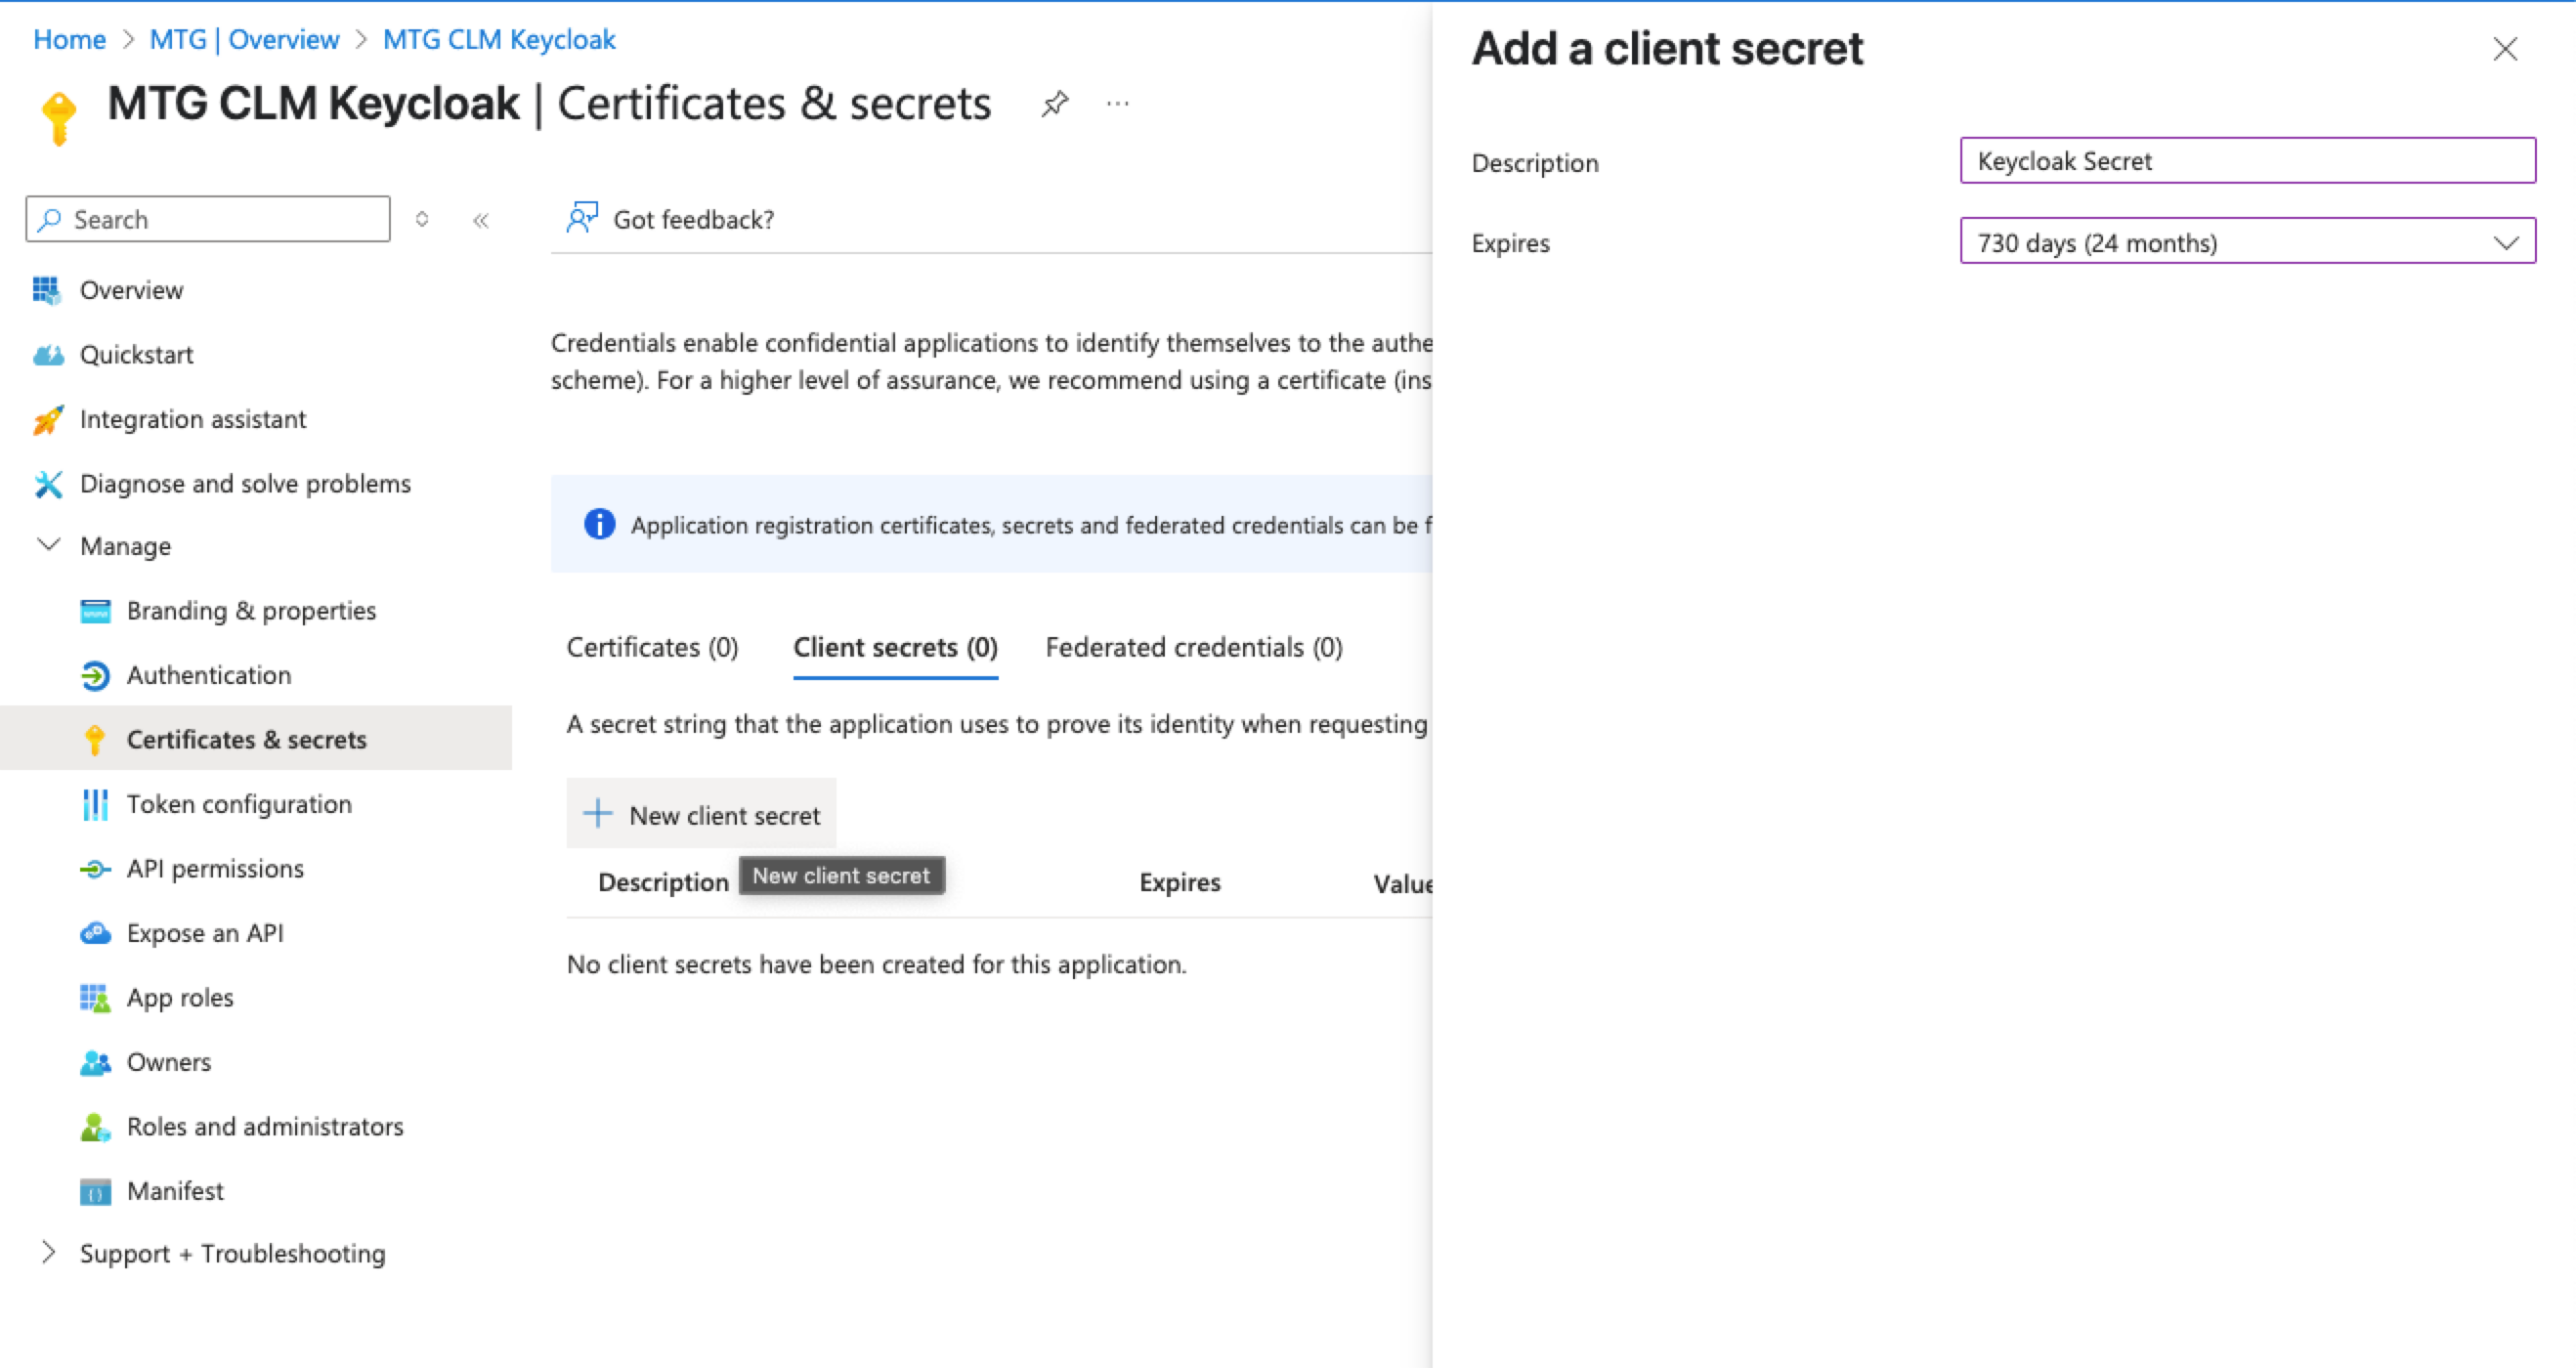
Click + New client secret.
-
Enter a descriptive Description (e.g., MTG CLM-Secret) and select an Expires duration according to your security policy.
-
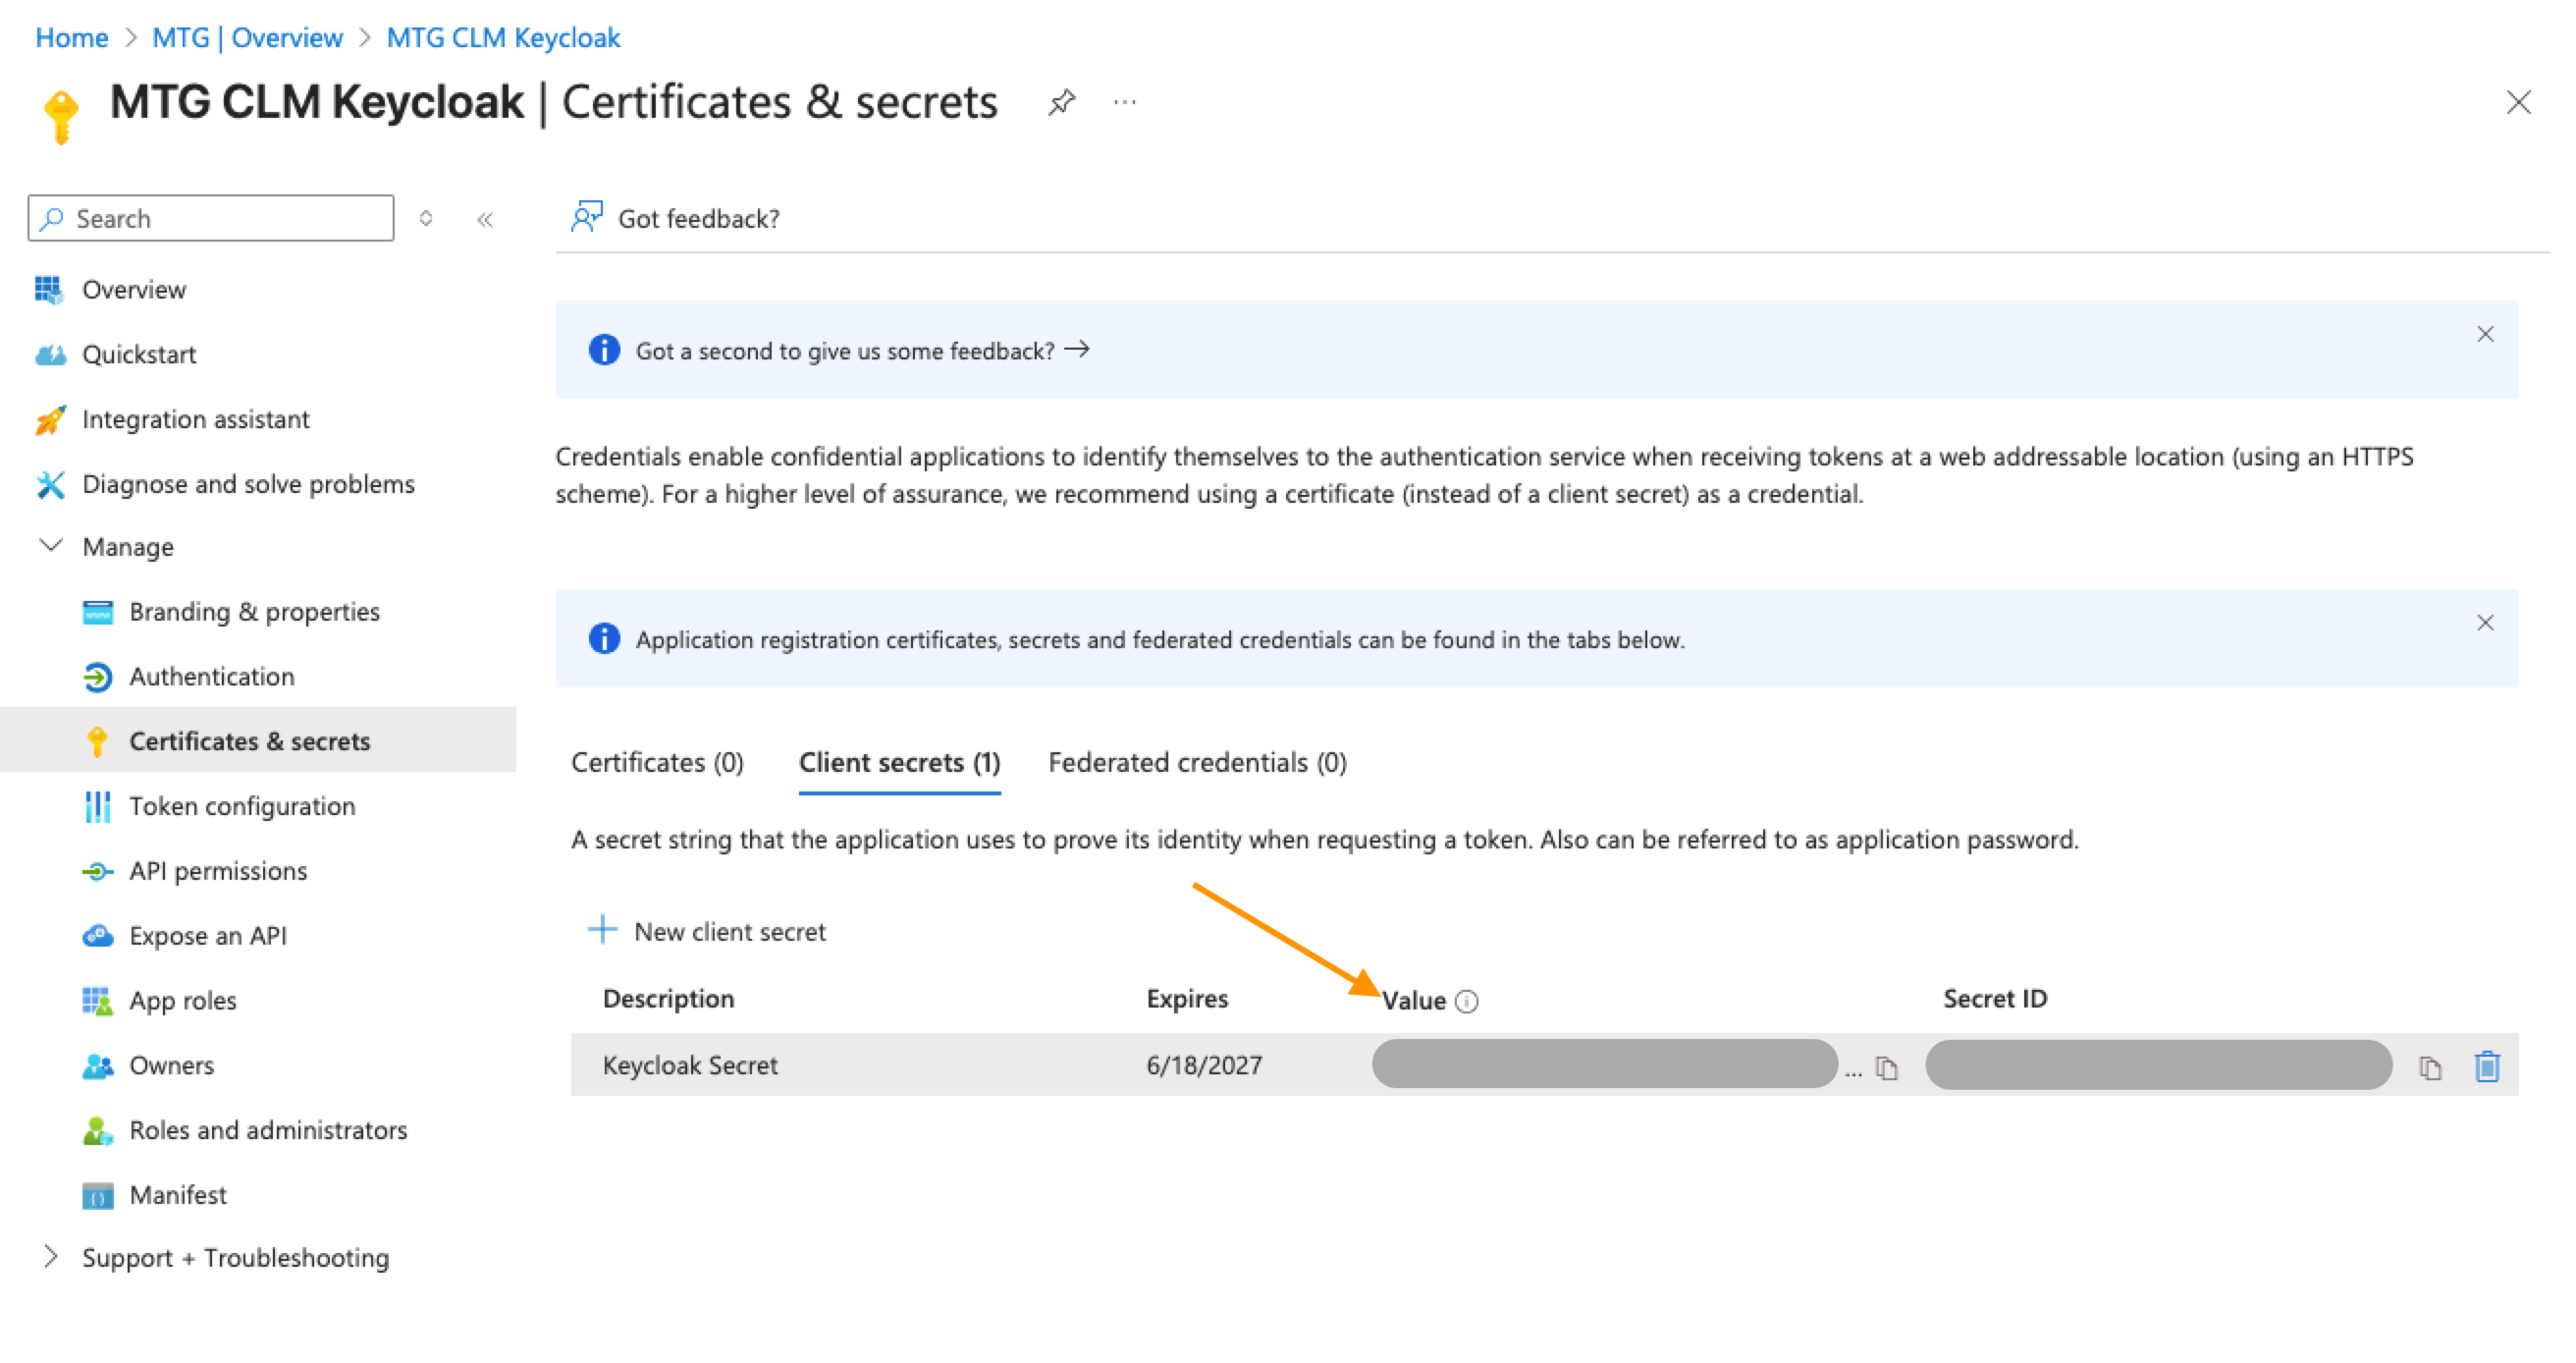
Click Add.
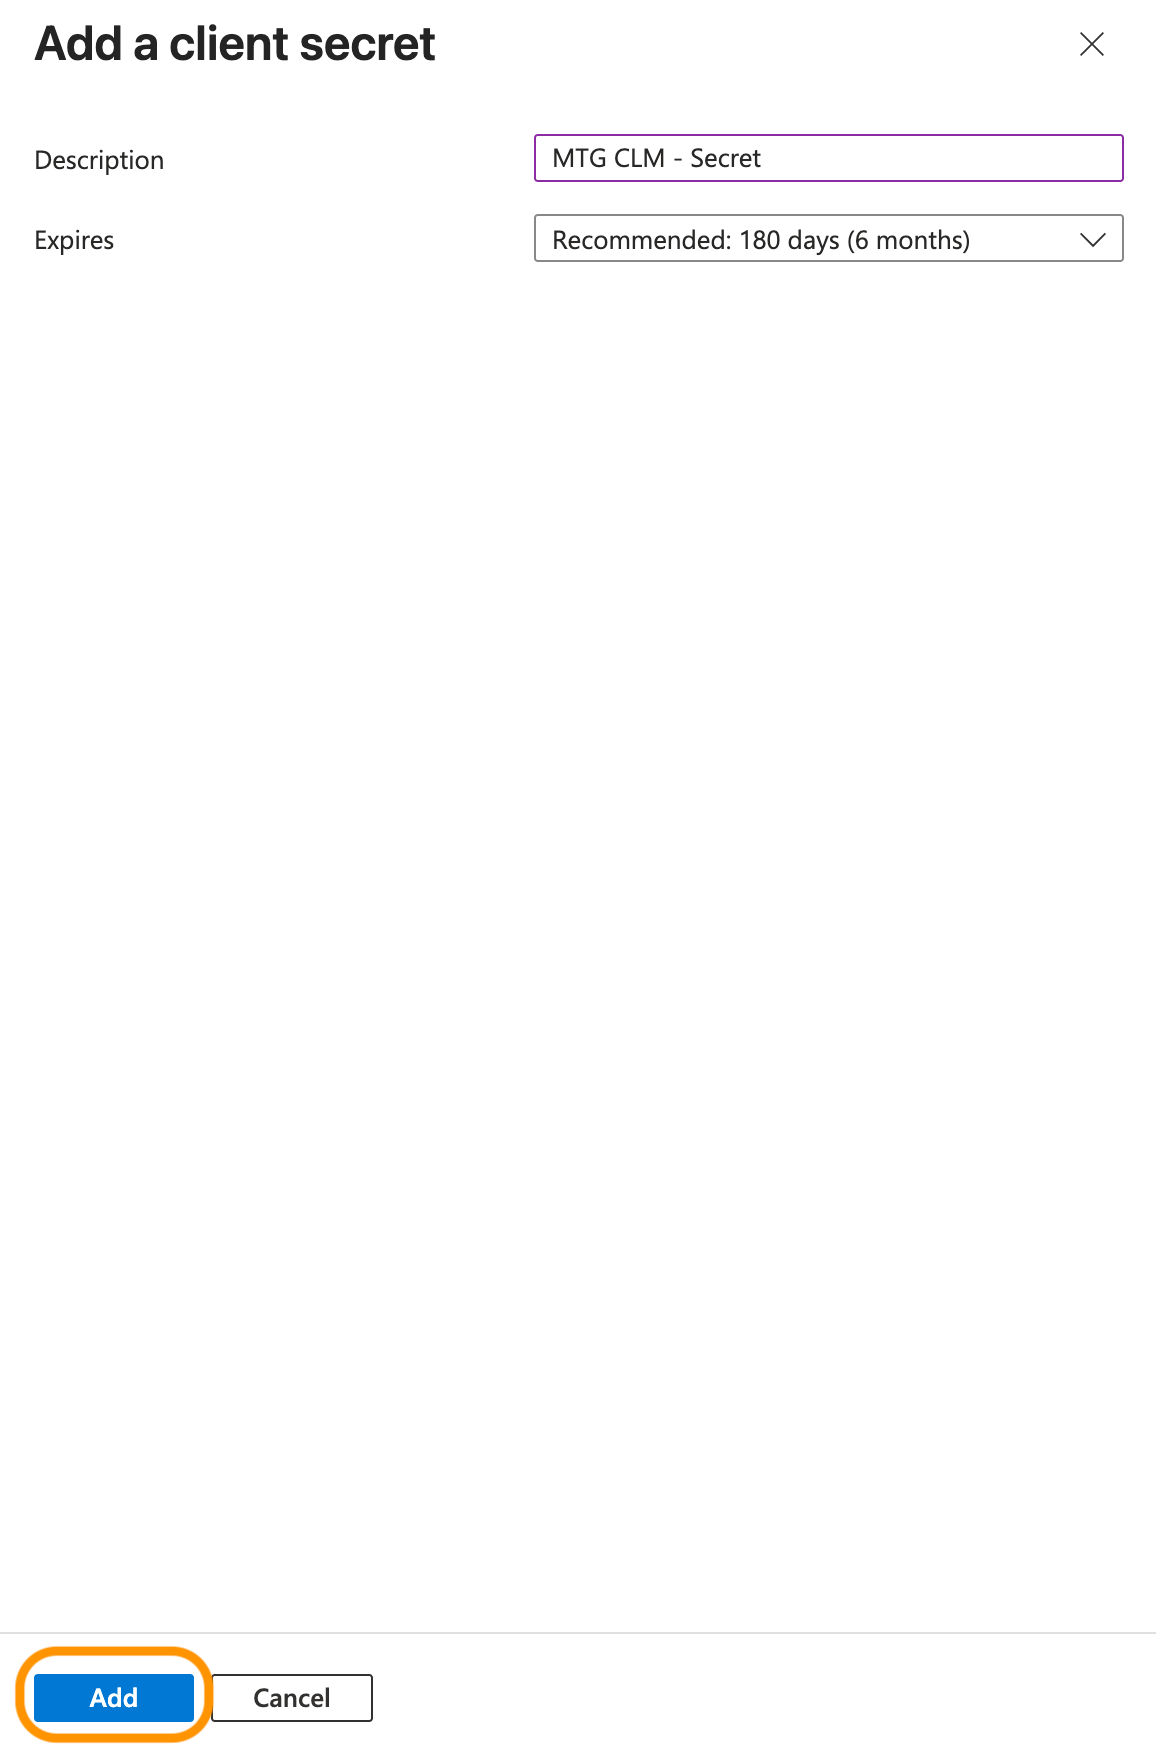
| Copy the Value string immediately and store it in a secure location. This value will be permanently hidden once you leave this page, and you cannot retrieve it later. You will paste this value into Keycloak in the next section. |
Configure Keycloak Identity Provider
Access Identity Provider Configuration
-
Sign in to your Keycloak administration console.
-
Navigate to your target realm for MTG CLM integration.
-
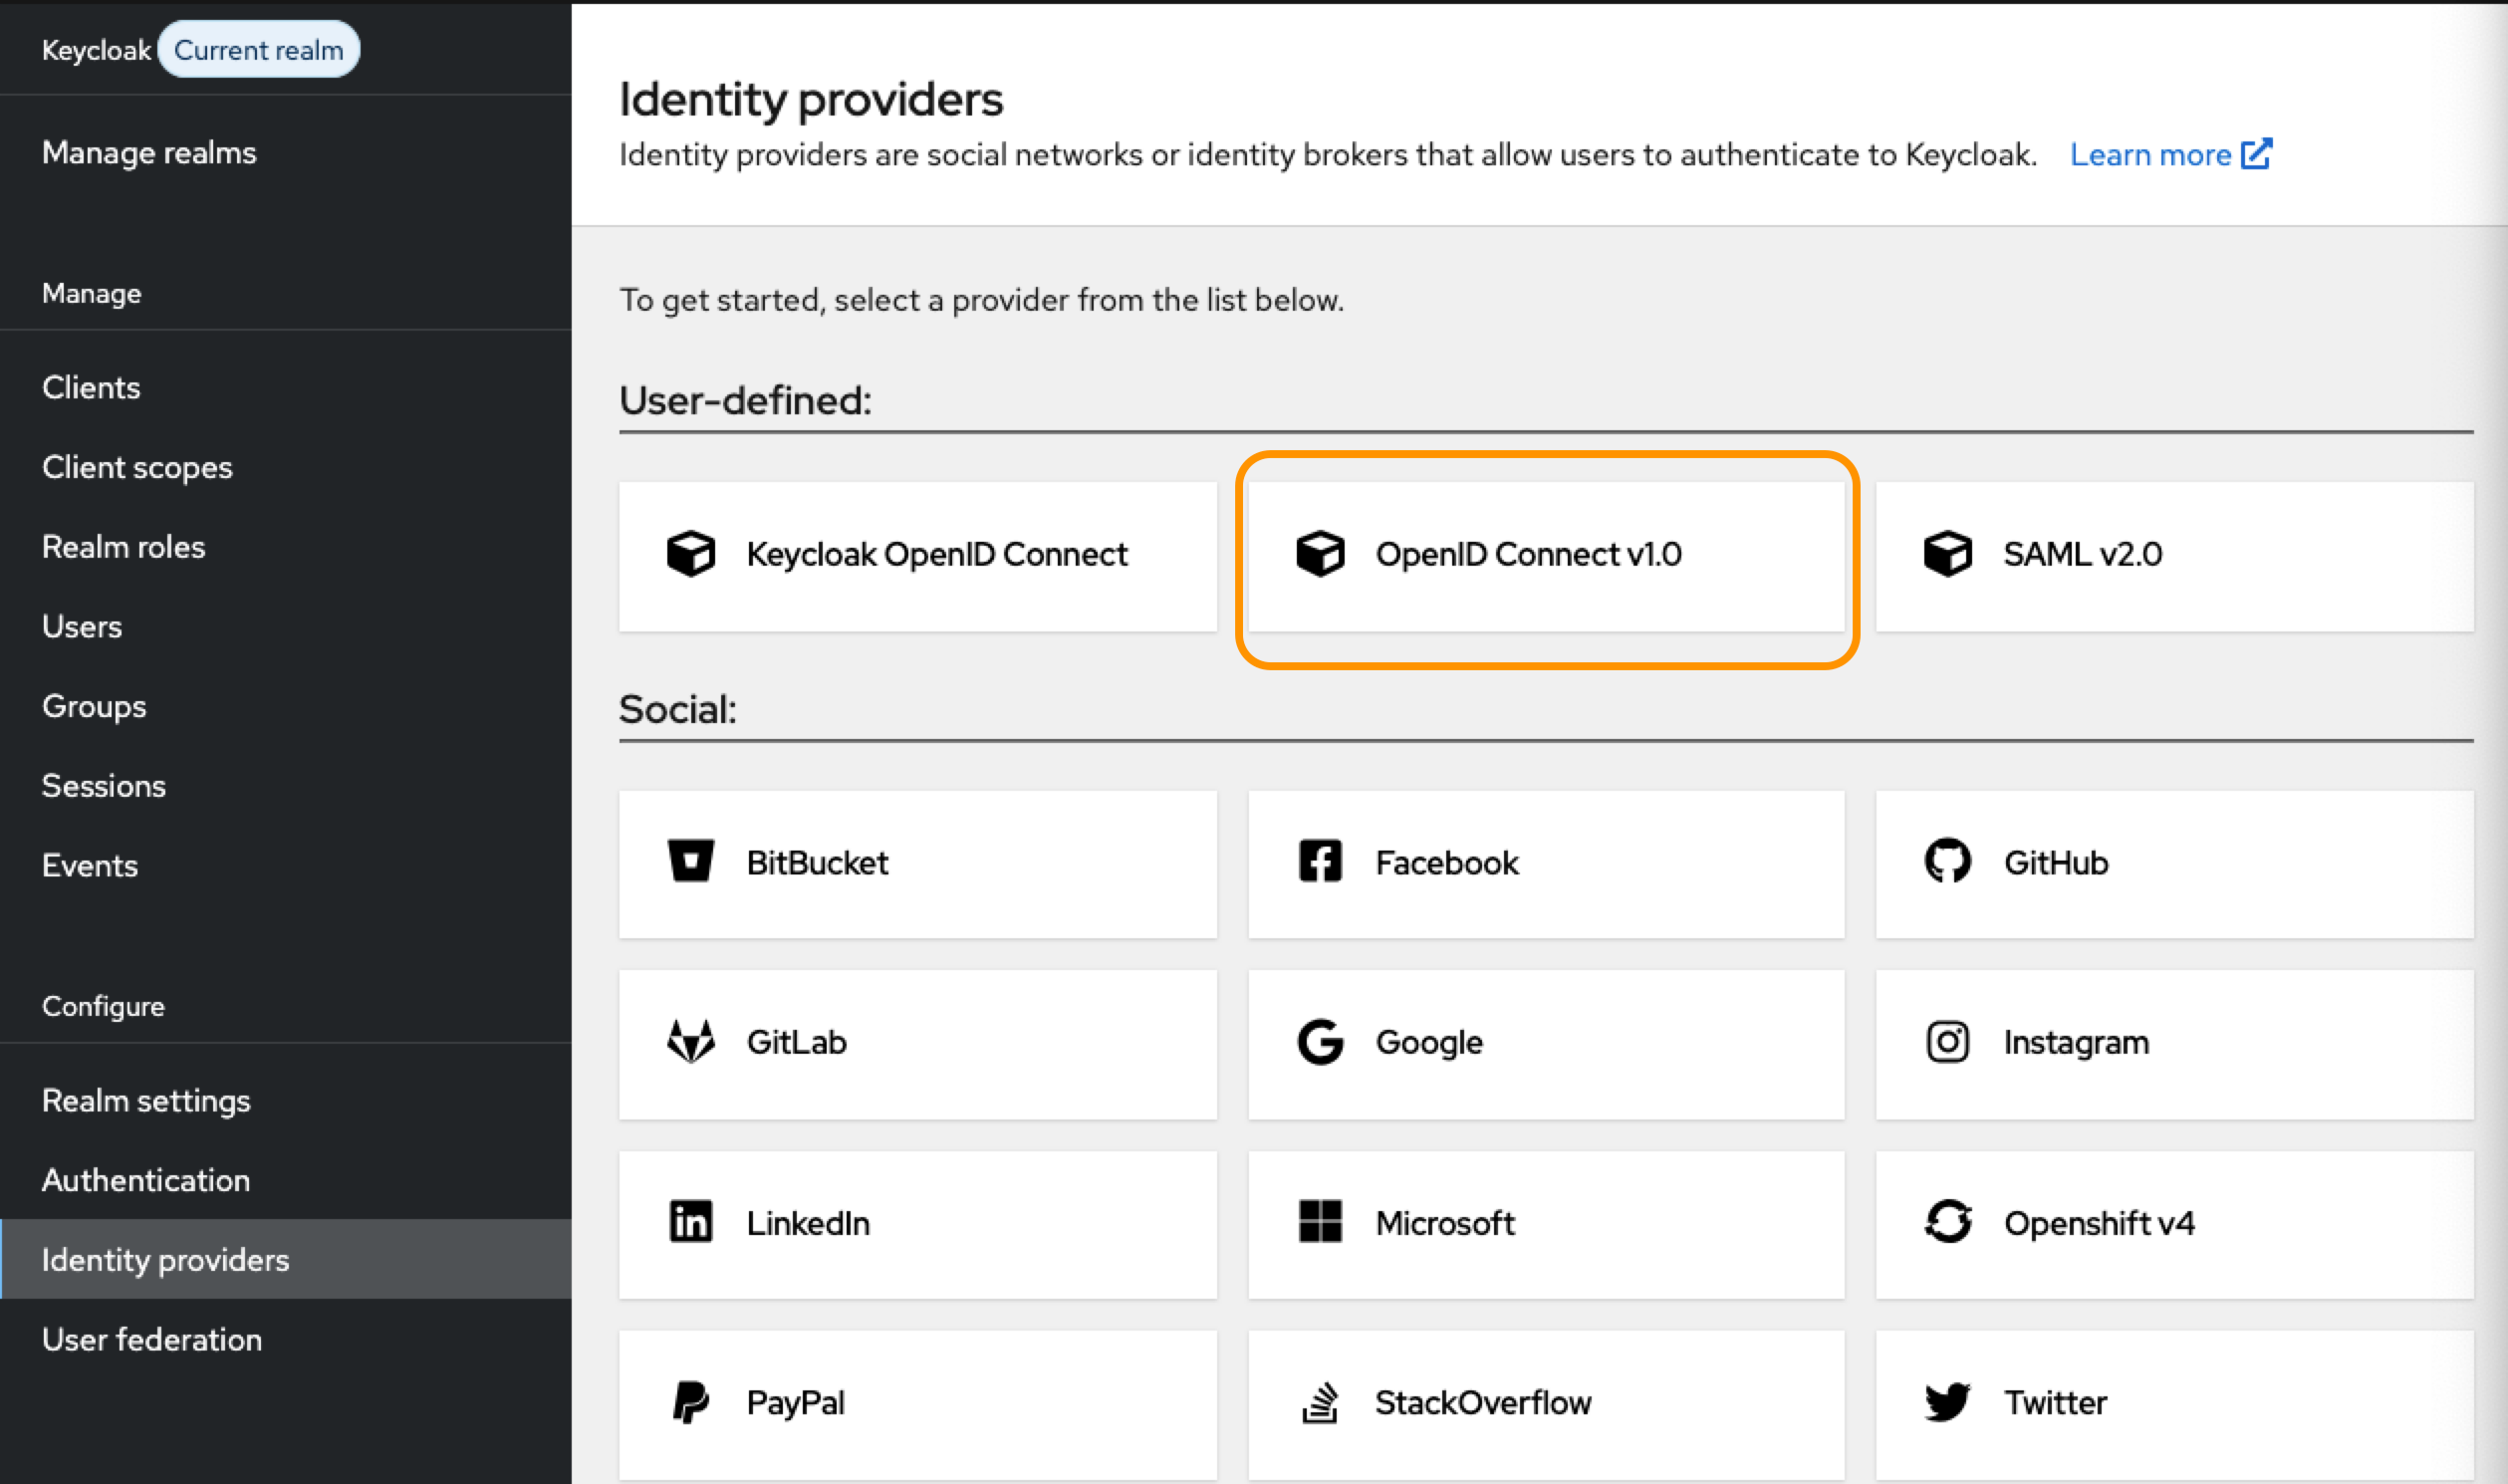
Select Identity Providers from the left navigation menu.
-
Click OpenID Connect v1.0.
Configure Provider Settings
1. Basic Configuration
-
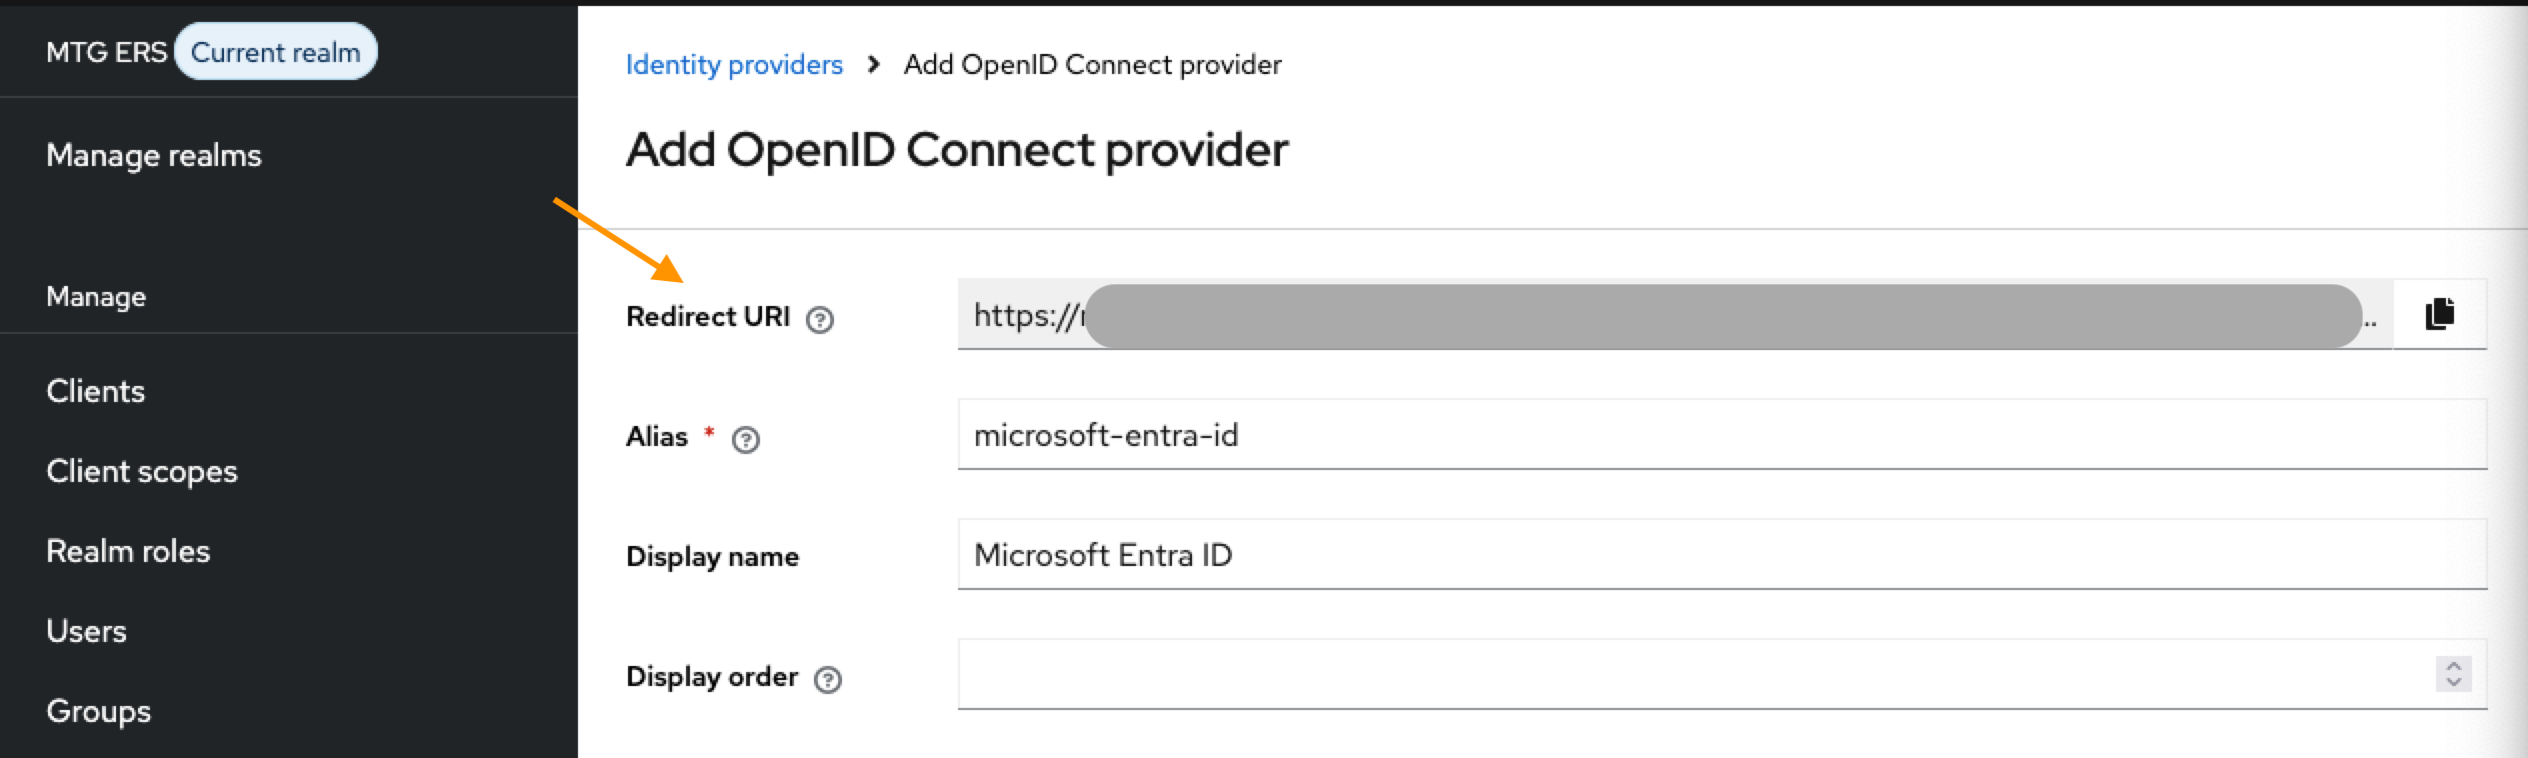
Alias: Enter "microsoft-entra-id" (or organizational standard).
-
Display Name: Enter "Microsoft Entra ID".
Make sure you store your Redirect URI now. You are going to need it later.
2. OpenID Connect Settings
-
Keep Use discovery endpoint on and retrieve it from portal.azure.com.
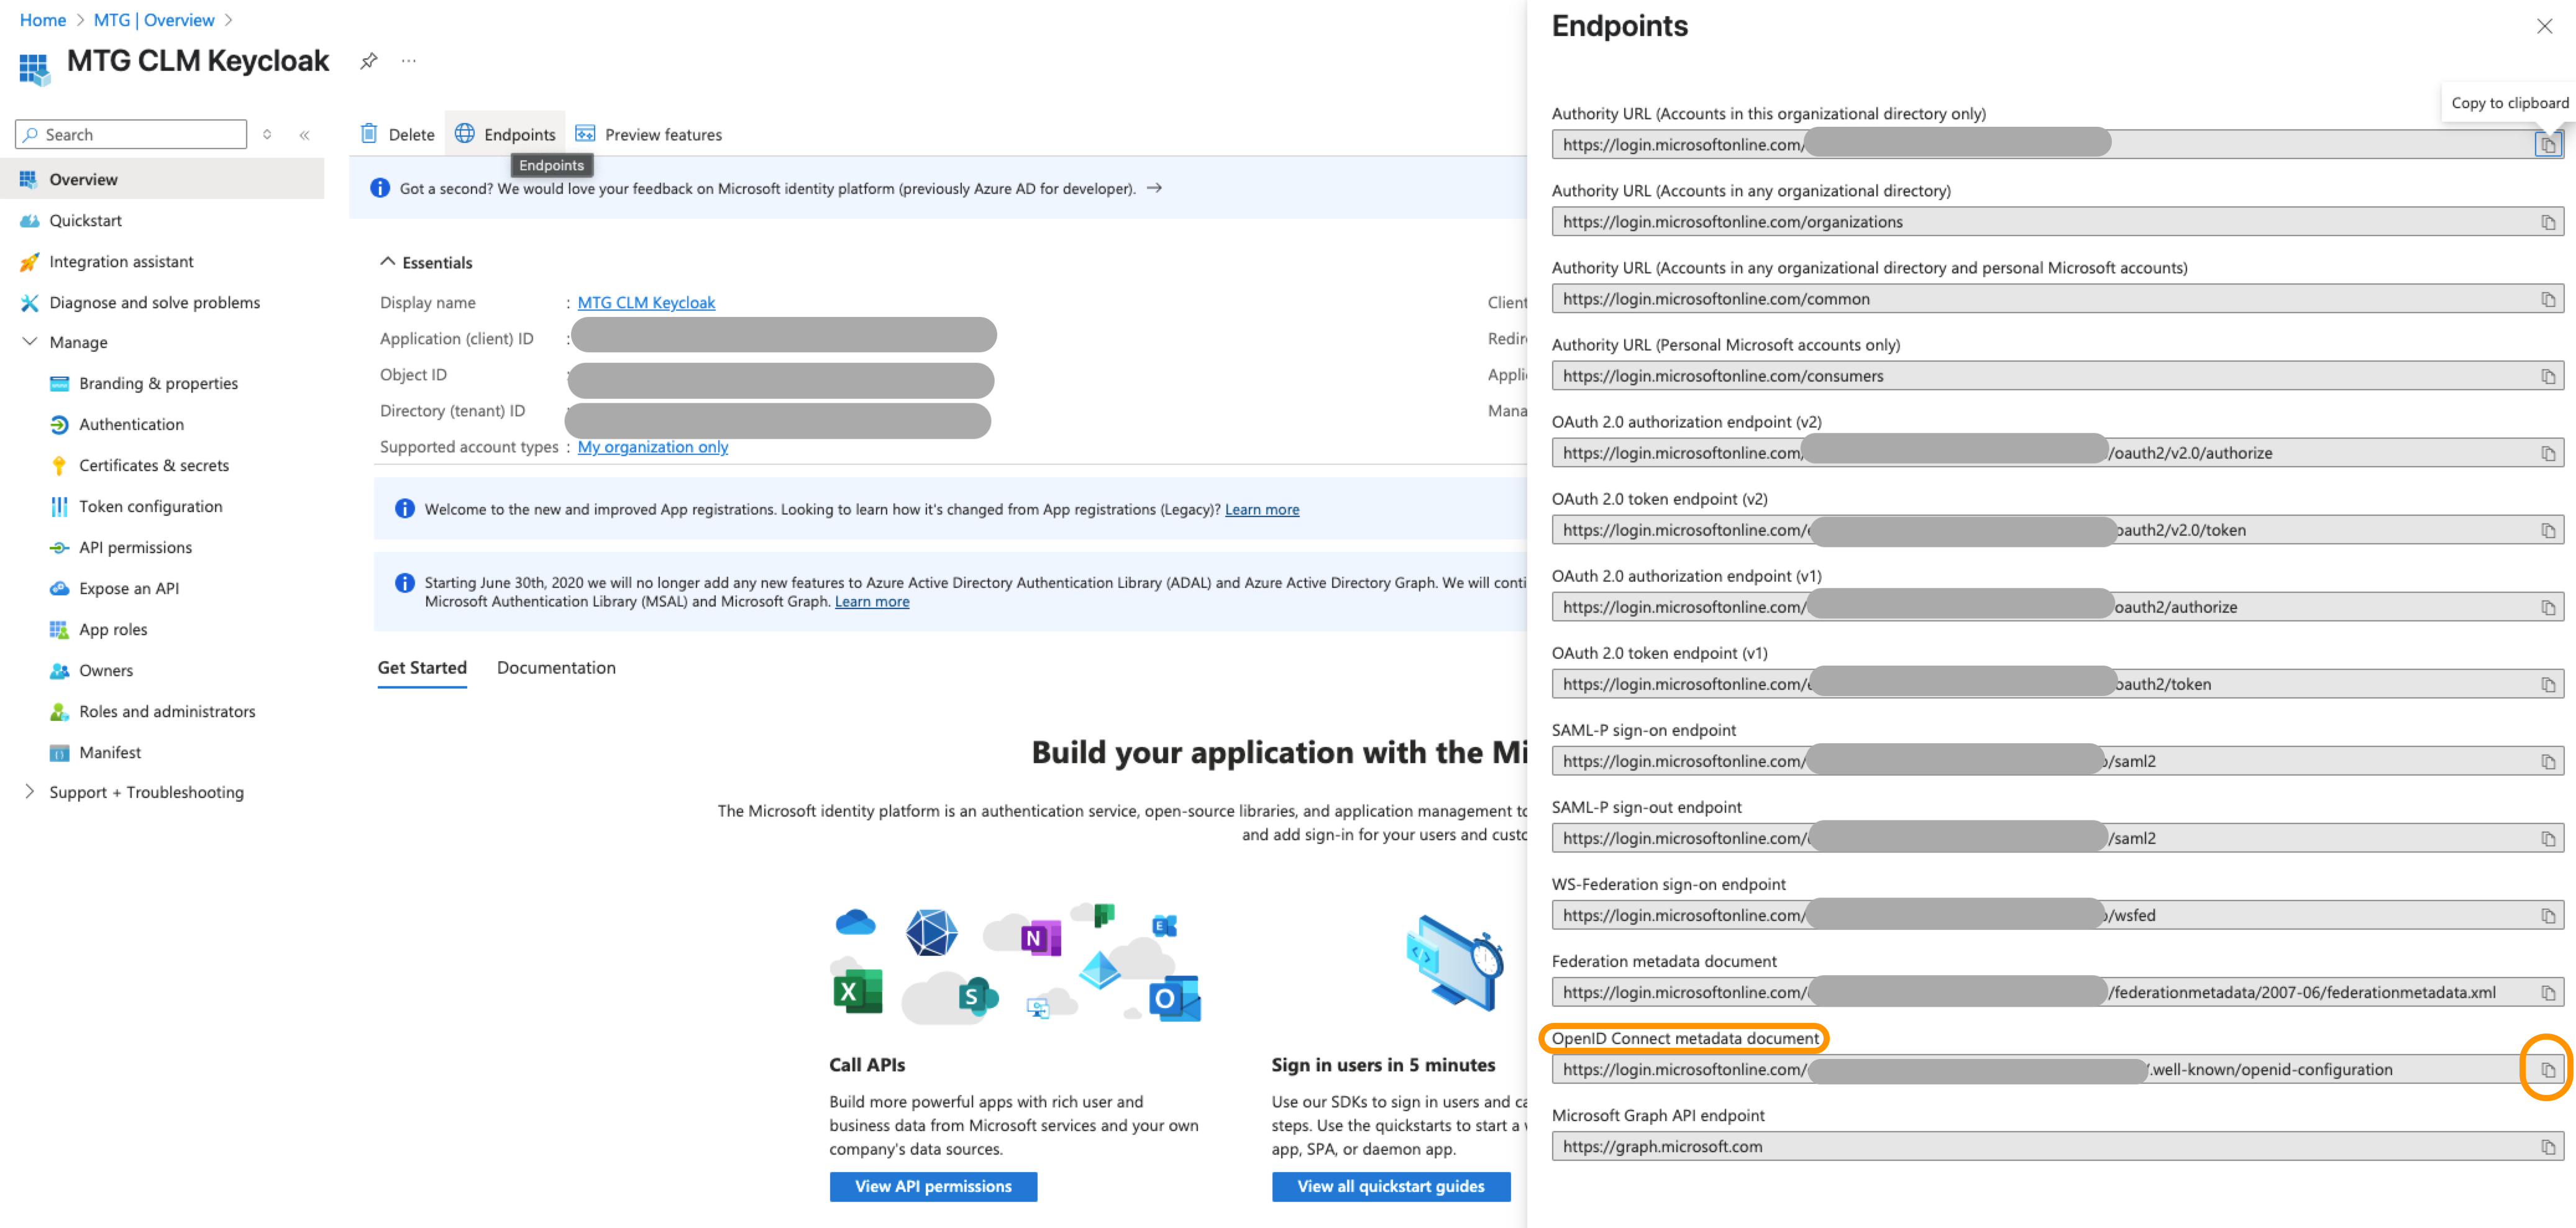
| The metadata fields related to endpoints will be automatically populated upon pasting. |
-
Client Authentication: Select "Client secret sent in the request body" from the dropdown list.
-
Client ID: Retrieve from portal.azure.com → Overview.
-
Client Secret: Retrieve from portal.azure.com → Certificates & secrets Select "Client secret sent in the request body" from the dropdown list.
| Make sure to timely renew the client secret before your selected expiration date. |
| Upon creation, you must copy the Client Secret Value and store it to a secure location. You will not be able to access it later! |
Paste the Client Secret Value to the appropriate field in Keycloak and keep Client assertion signature algorithm to "Algorithm not specified".
The completed page should now look like this:
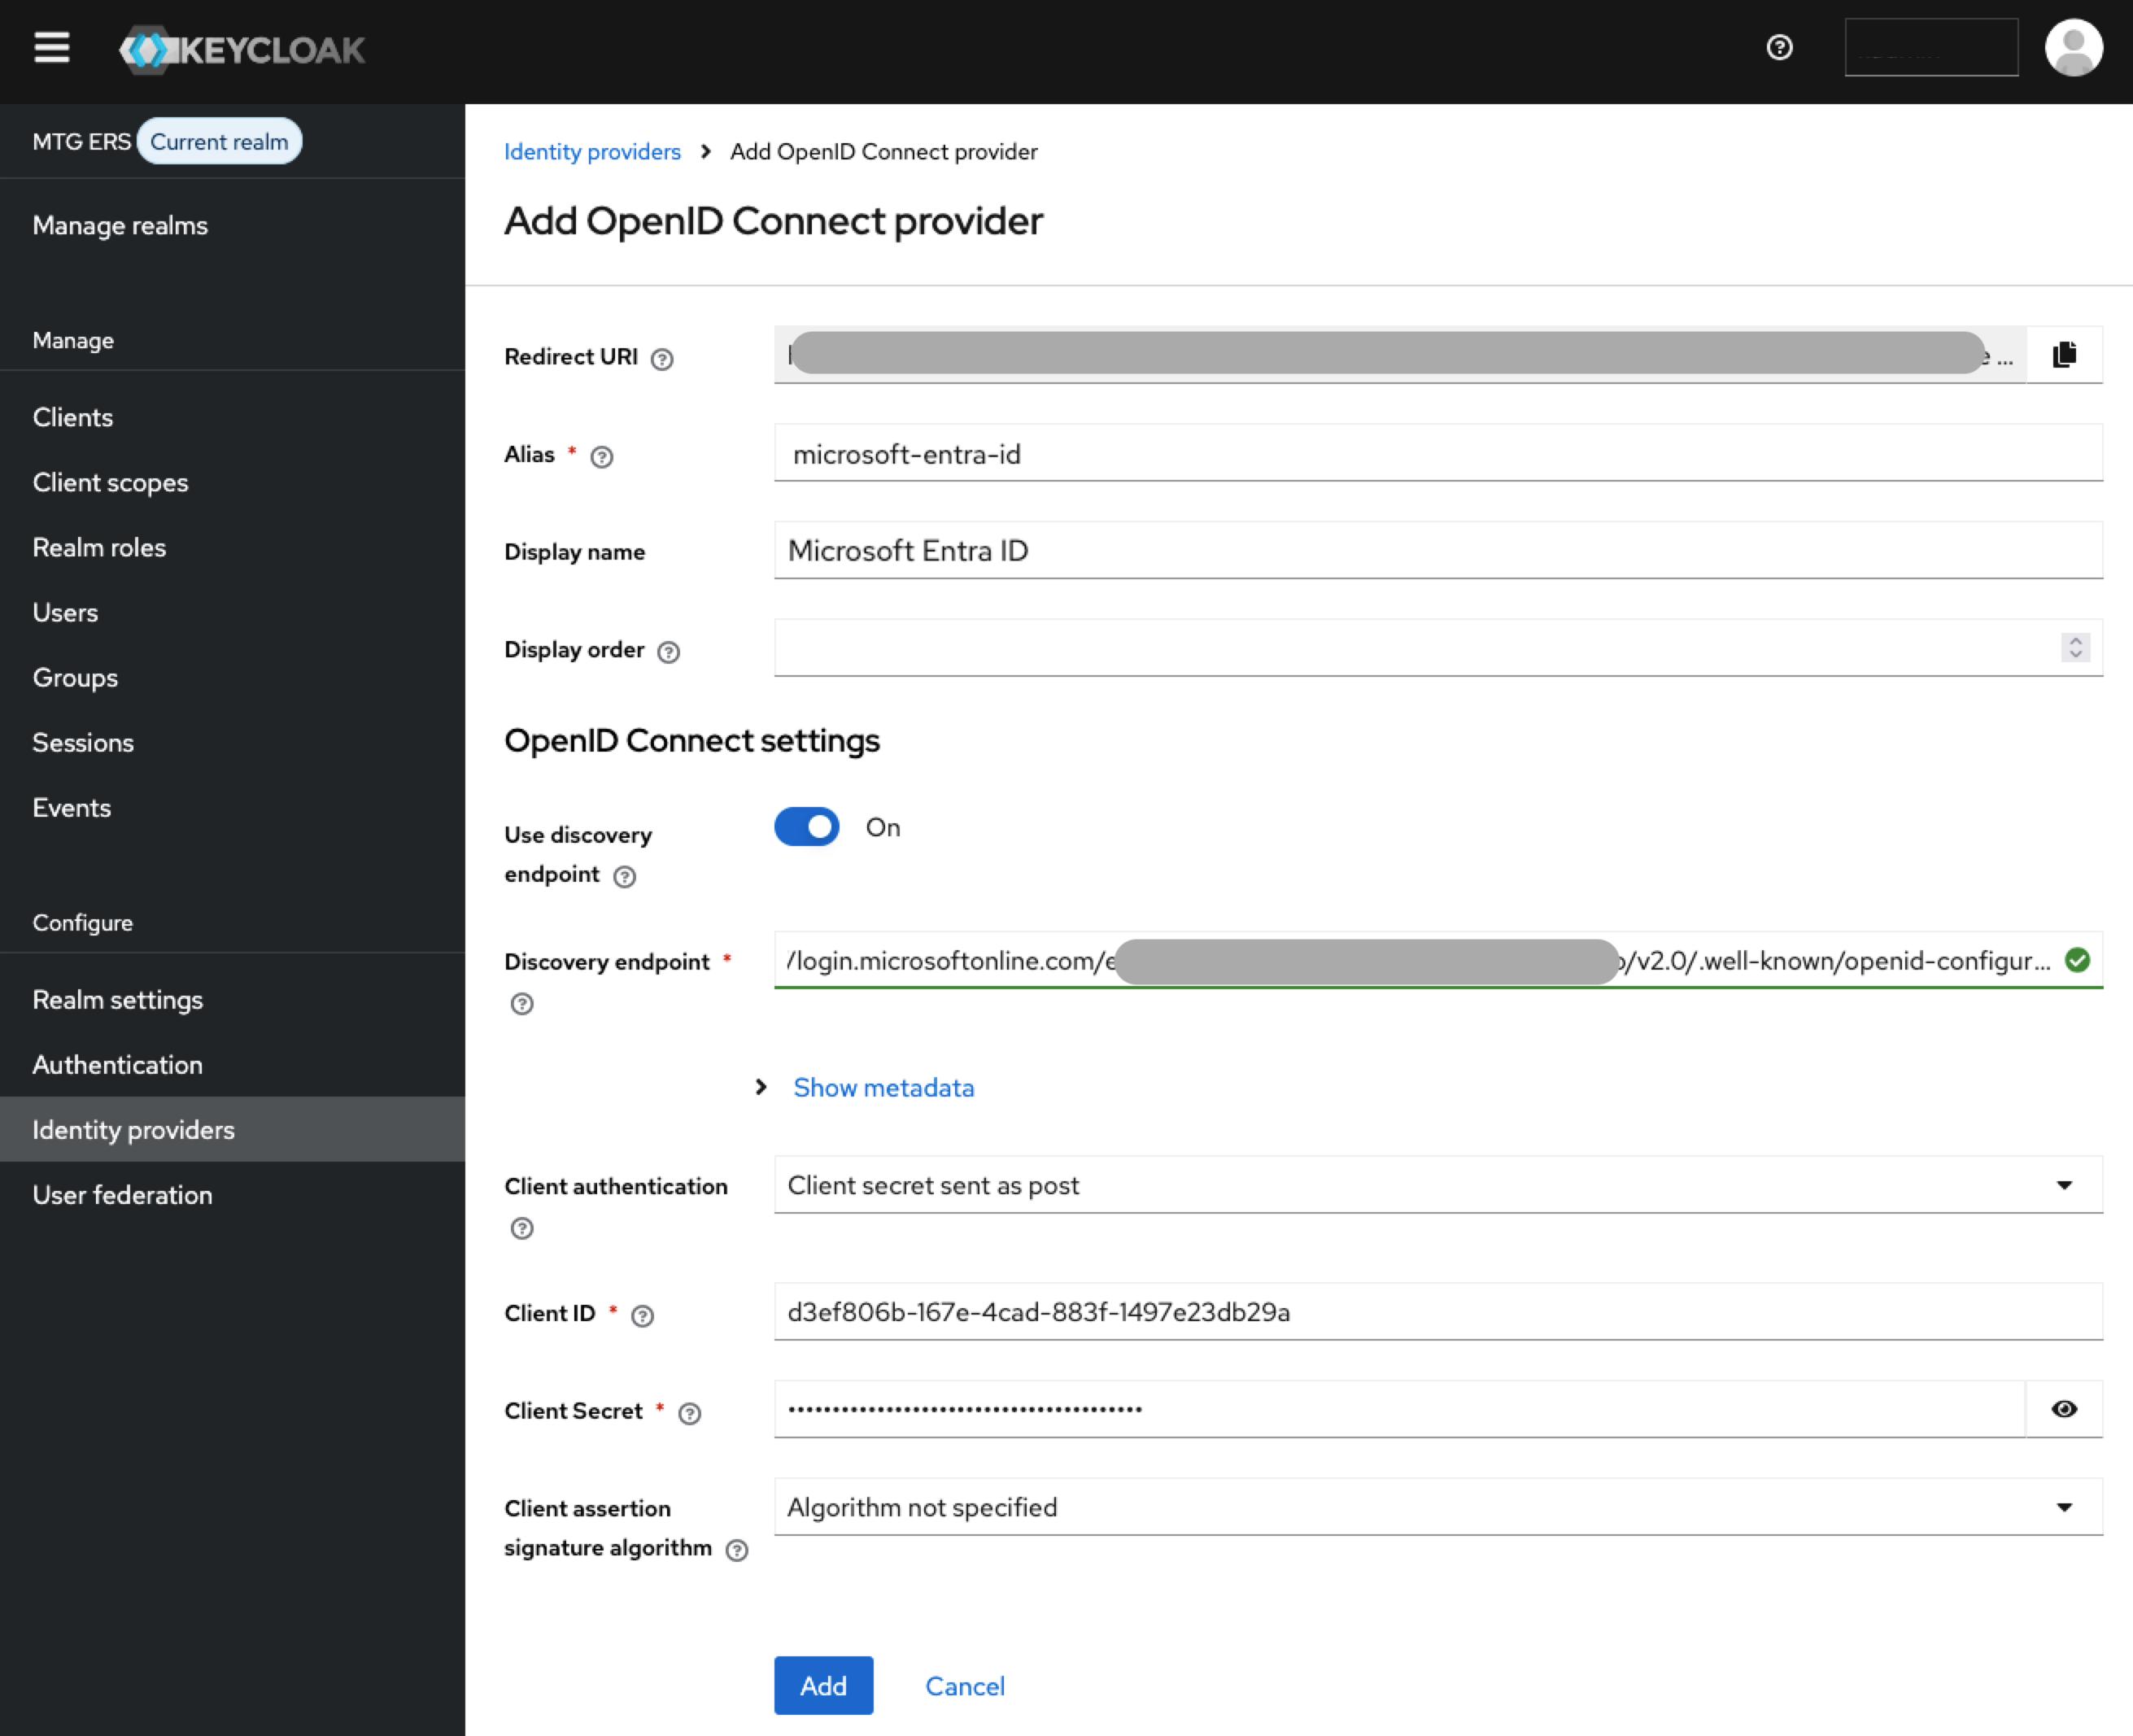
Click "Add" to proceed.
Now copy your redirect URI you saved above and paste it in portal.azure.com
Click "Add a platform" and then select "Web".
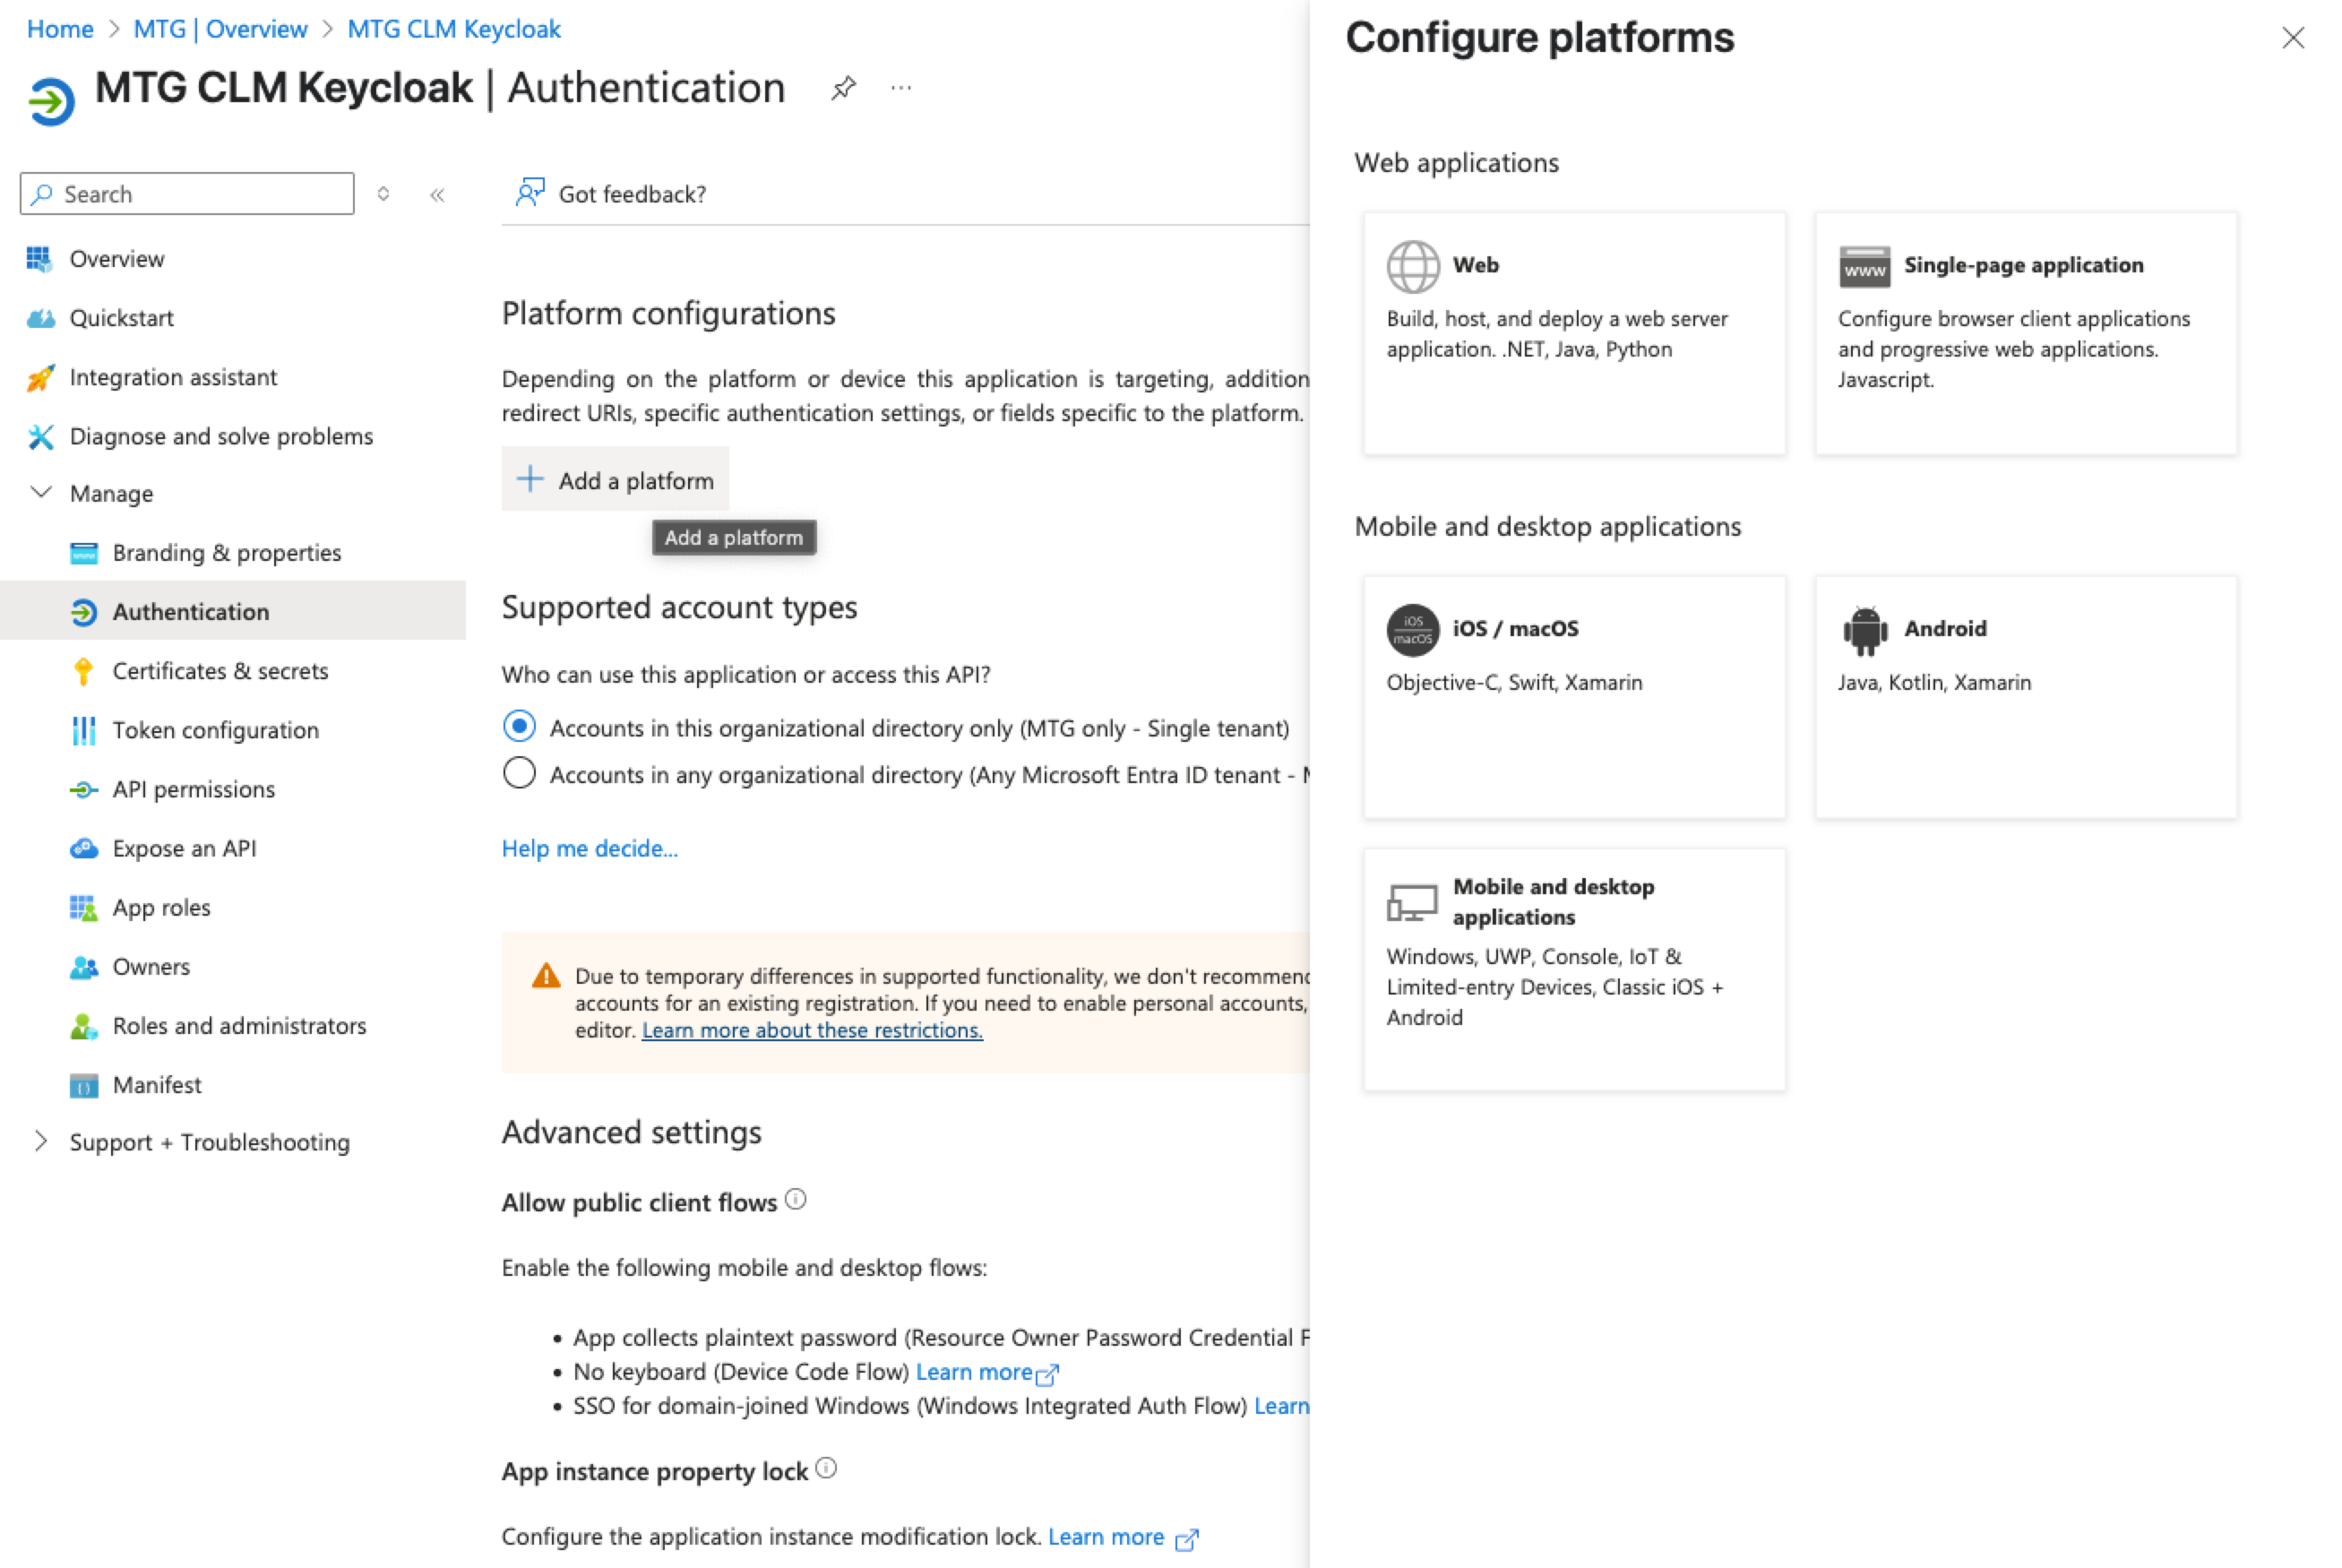
Paste the Redirect URI in the appropriate field and then select "Configure" to finish.
In Keycloak go to Clients (within MTG ERS realm) and choose the account-console client.
In Access Settings make sure Web origins is set to "*".

Configure Keycloak Roles for Entra ID Federation
This subsection covers mapping roles from Microsoft Entra ID into Keycloak when using Entra ID as an external identity provider. If your application uses Keycloak for local authentication while federating users from Entra ID, complete the steps below to ensure roles flow correctly between the two systems.
|
This subsection assumes you already have an app registration in Entra ID. Either create a new one or use an existing registration that has roles defined and assigned to your test user. |
Prerequisites
-
Access to the Azure Portal with permissions to manage app roles and assignments
-
Access to your Keycloak admin console for your test realm
-
A test user in Entra ID with an app role assigned
Define App Roles in Entra ID
First, create the roles in your Entra ID app registration that will later be mapped into Keycloak.
-
Navigate to Microsoft Entra ID → App registrations and select your app.
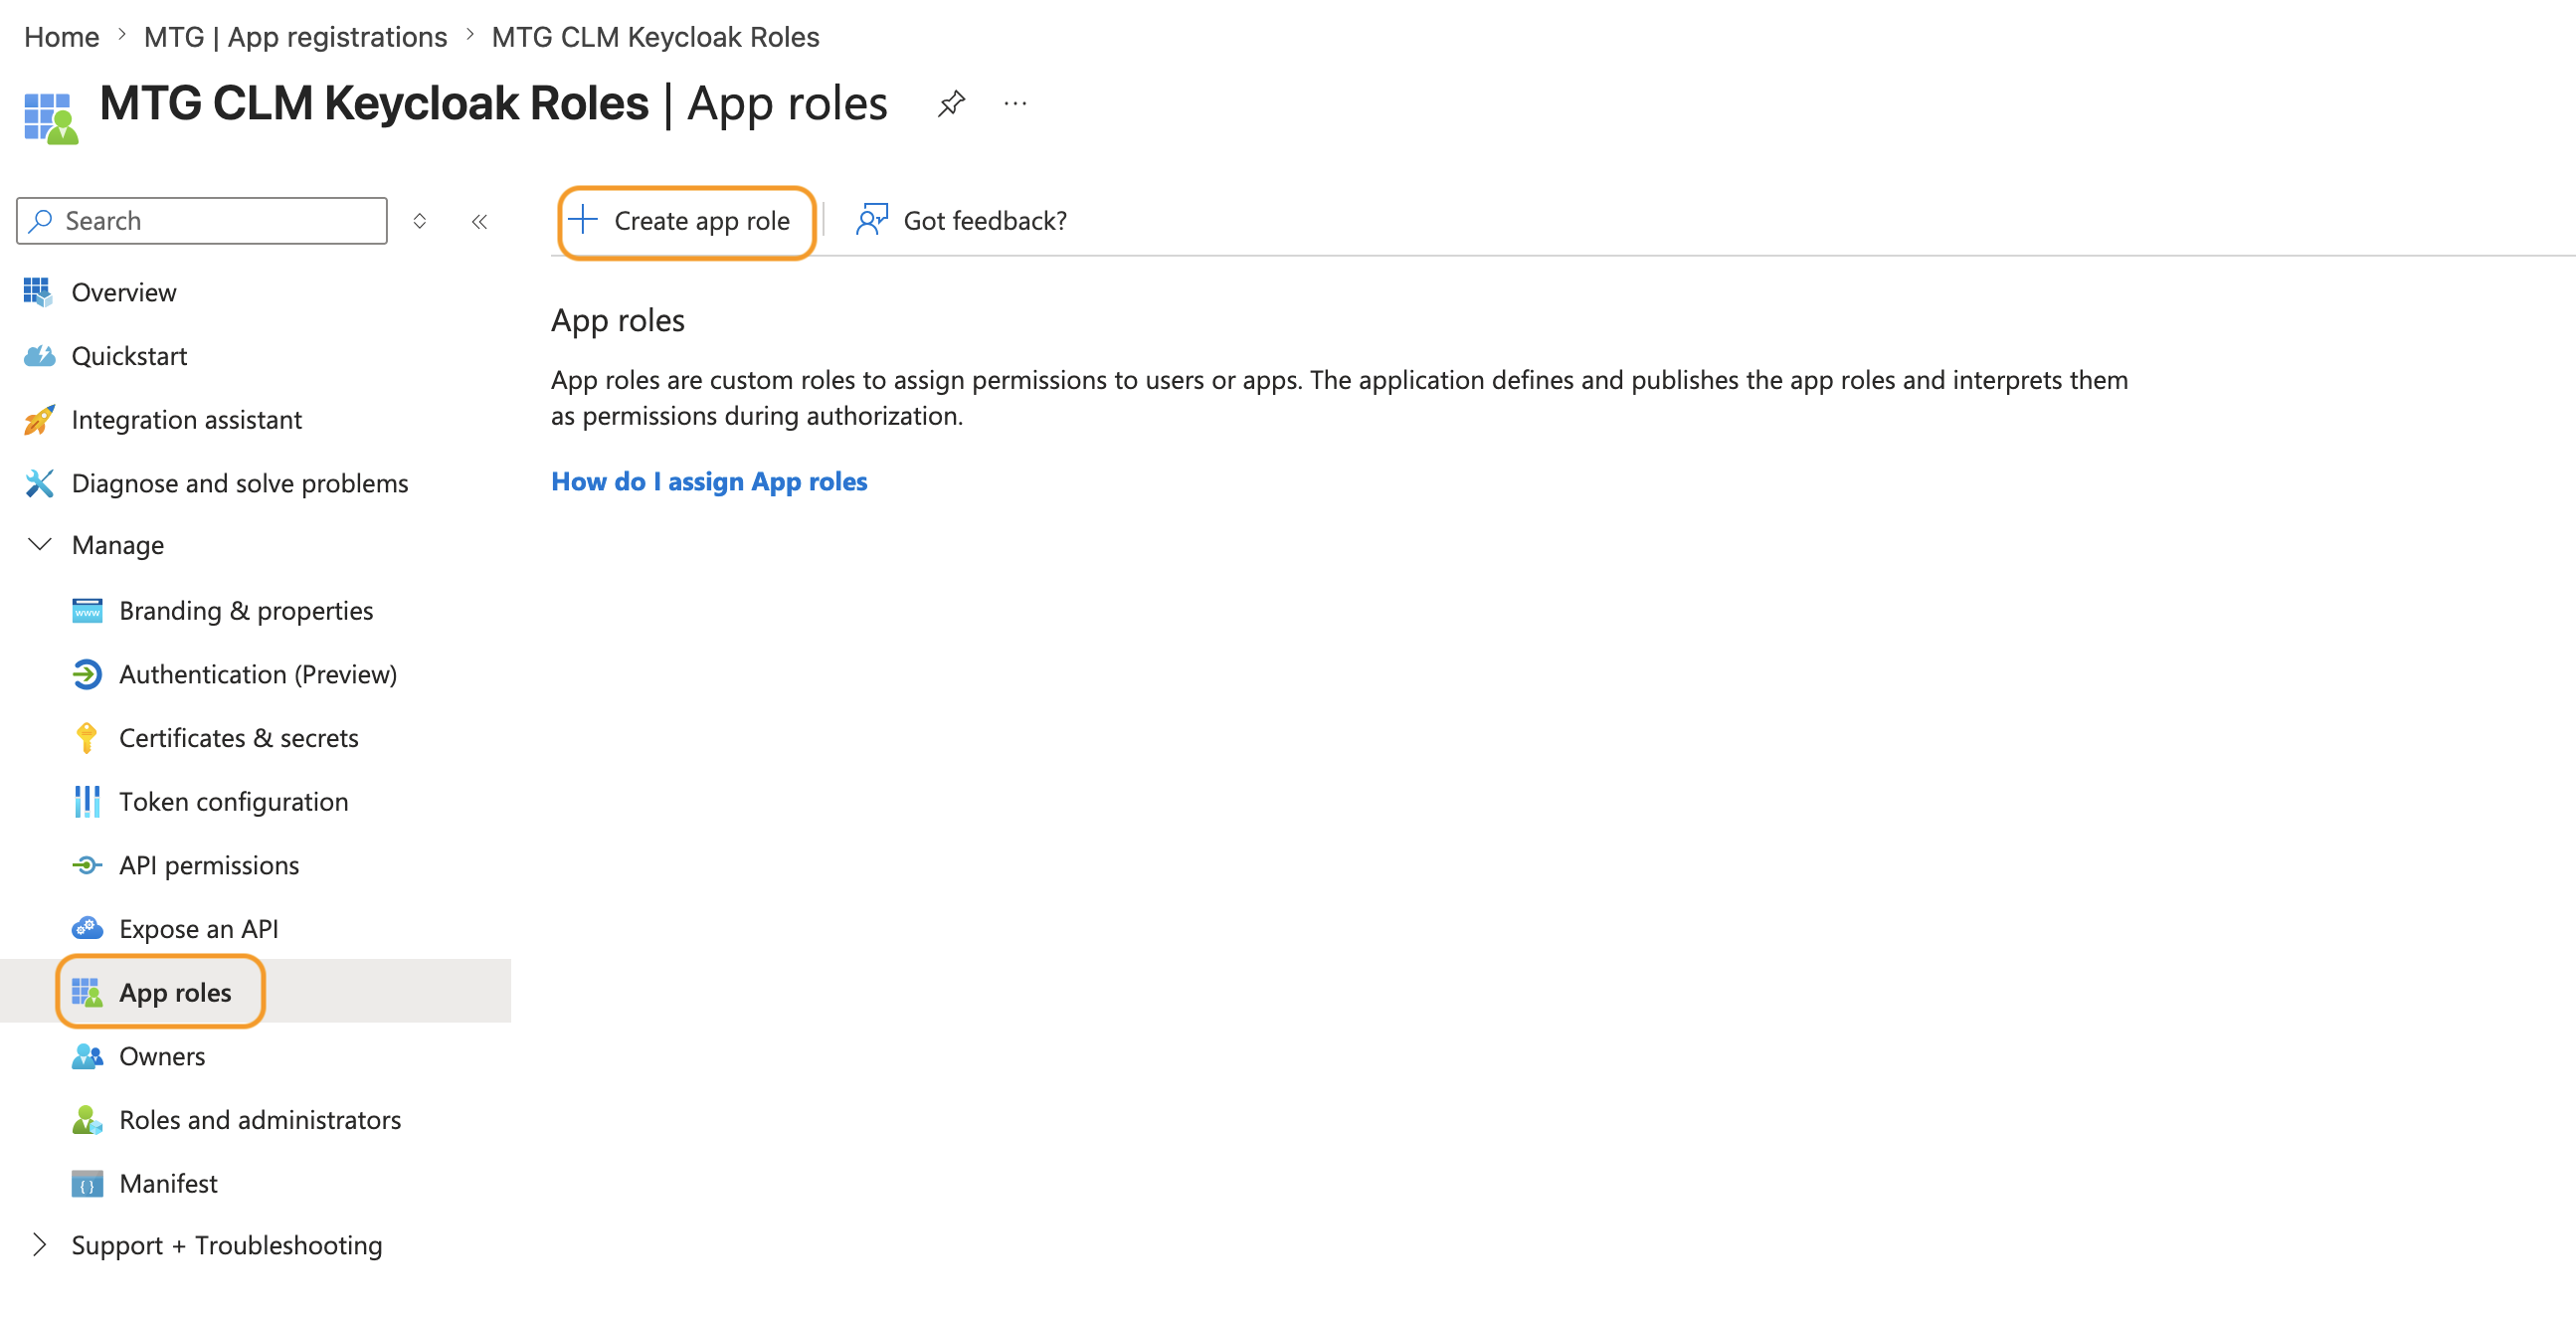
-
Go to App roles → Create app role.
-
Fill in the following fields:
Field Example Value Notes Display name
CLM AdminHuman-readable label
Value
clm_adminMachine-readable string; keep lowercase with underscores
Description
Full administrative access to CLMFor your own documentation
Allowed member types
Users/GroupsDefault selection
-
Click Apply.
-
Repeat to create additional roles as needed (for example,
clm_viewerfor read-only access).
|
The Value field is what Keycloak will see in the token claim. It must be lowercase with no spaces. Document these values carefully: you will need them when configuring mappers in Keycloak. |
Assign the App Role to Your Test User
-
Go to Enterprise applications and search for your app registration by name.
-
Select Users and groups → Add user/group.
-
Under Users, search for and select your test user (your own Entra ID account works for testing).
-
Under Select a role, choose the role you created (for example,
CLM Admin). -
Click Assign.
| Verify that your user appears in the Users and groups list with the assigned role. |
Configure the Entra ID Identity Provider in Keycloak
Now connect Keycloak to your Entra ID app registration.
-
In the Keycloak admin console, ensure you are in your test realm (not the
masterrealm). -
Go to Identity Providers and select Microsoft from the dropdown.
-
Configure the following fields:
Field Value Alias
Keep the default or enter a recognizable name like
entraidClient ID
Your Entra ID Application (client) ID
Client Secret
The client secret you created for the app registration
Tenant ID
Your Entra ID Directory (tenant) ID
-
Leave all other settings at their defaults and click Save.
-
After saving, copy the Redirect URI displayed on the identity provider settings page.
Add the Redirect URI to Entra ID
-
Return to the Azure Portal and open your app registration.
-
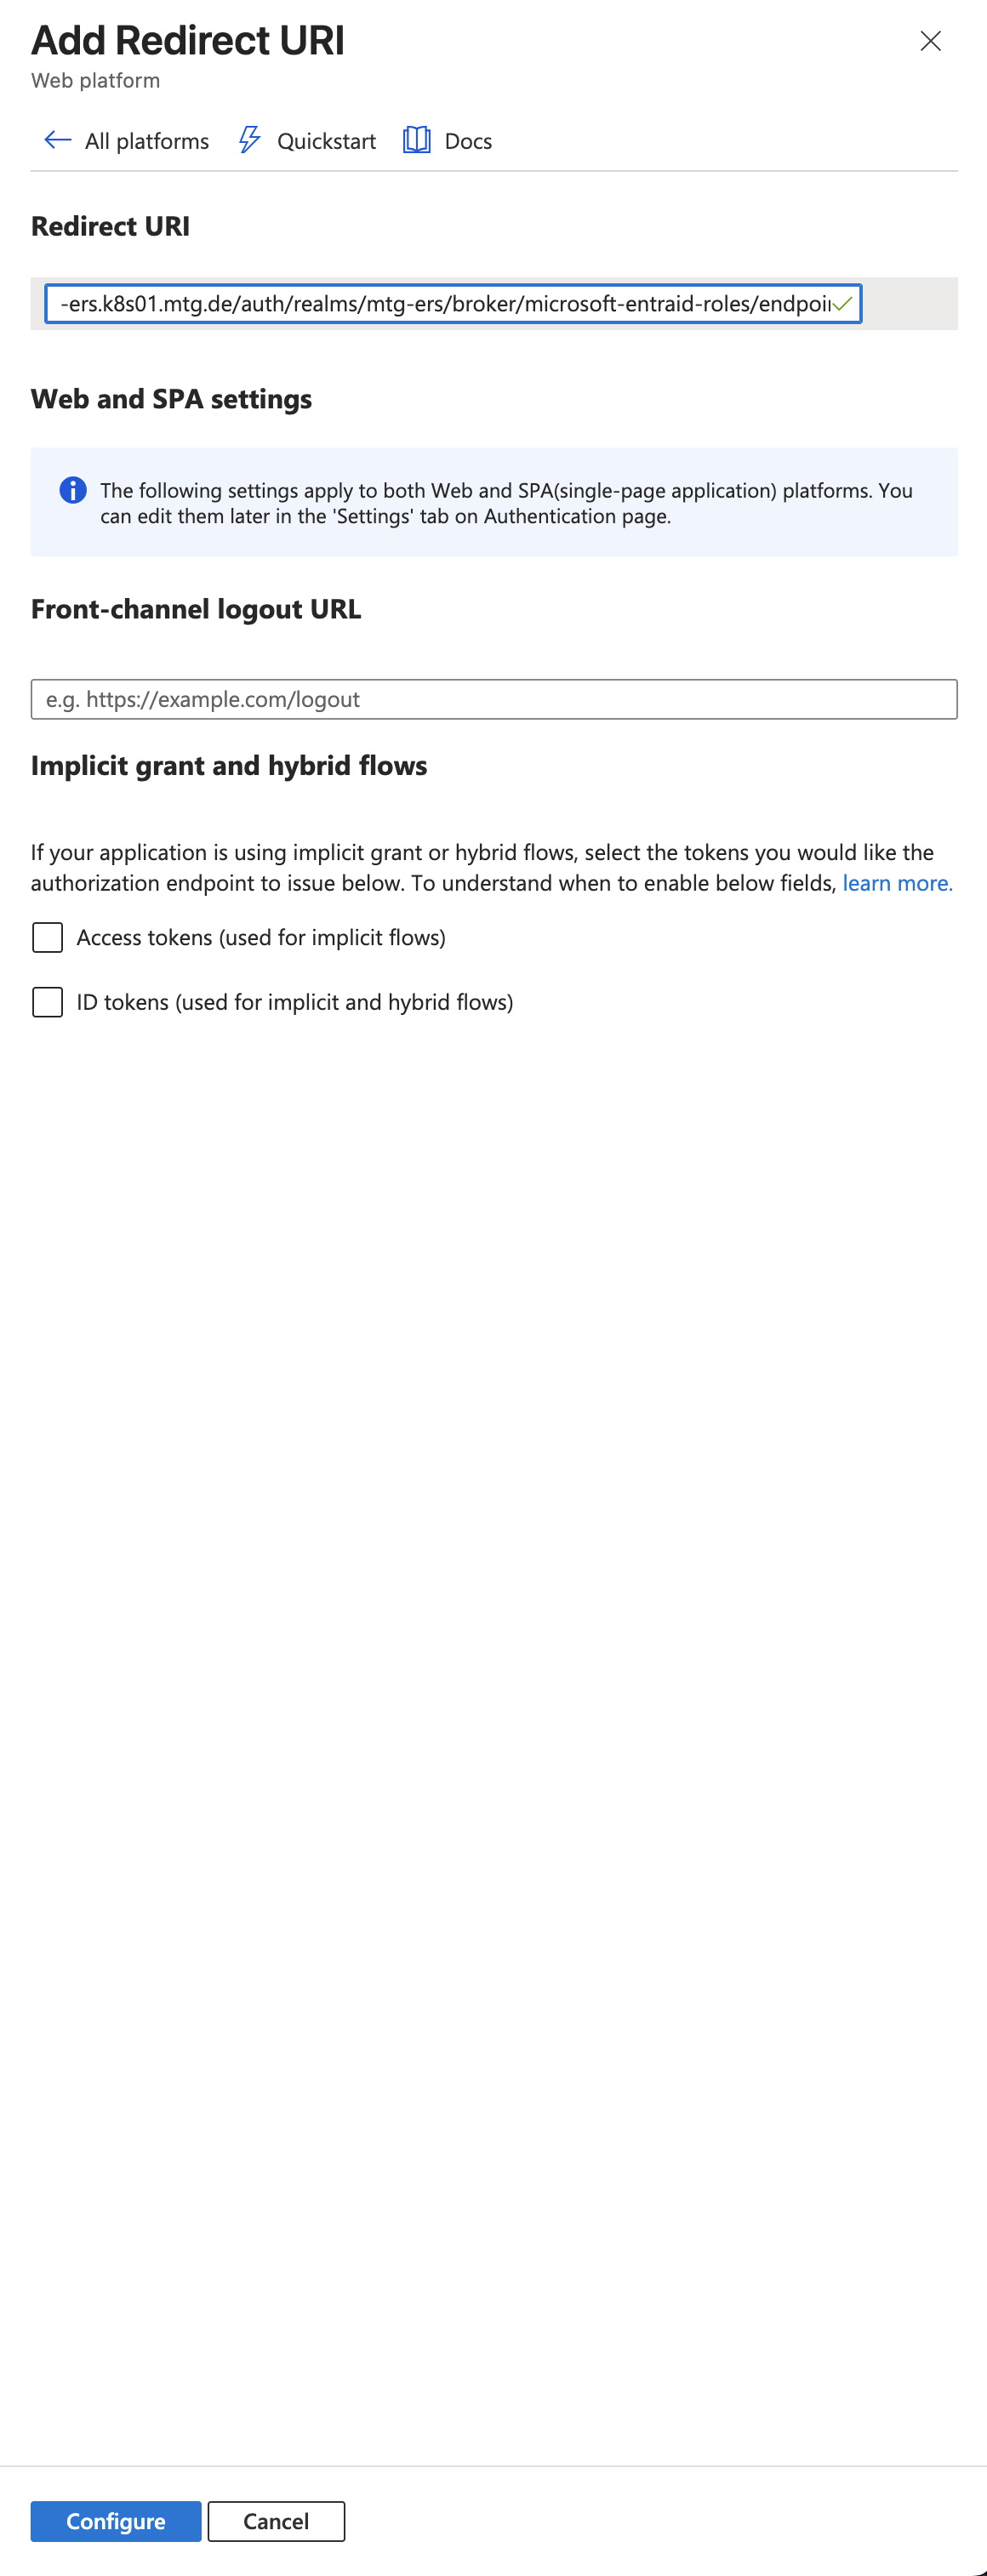
Go to Authentication → Add a platform → Web.
-
Paste the Redirect URI you copied from Keycloak.
The URI follows this format:
https://<keycloak-host>/realms/<realm-name>/broker/microsoft/endpoint
-
Click Configure and Save.
Verify the Federation Connection
-
Open a private or incognito browser window.
-
Navigate to your Keycloak account console:
https://<keycloak-host>/realms/<realm-name>/account
-
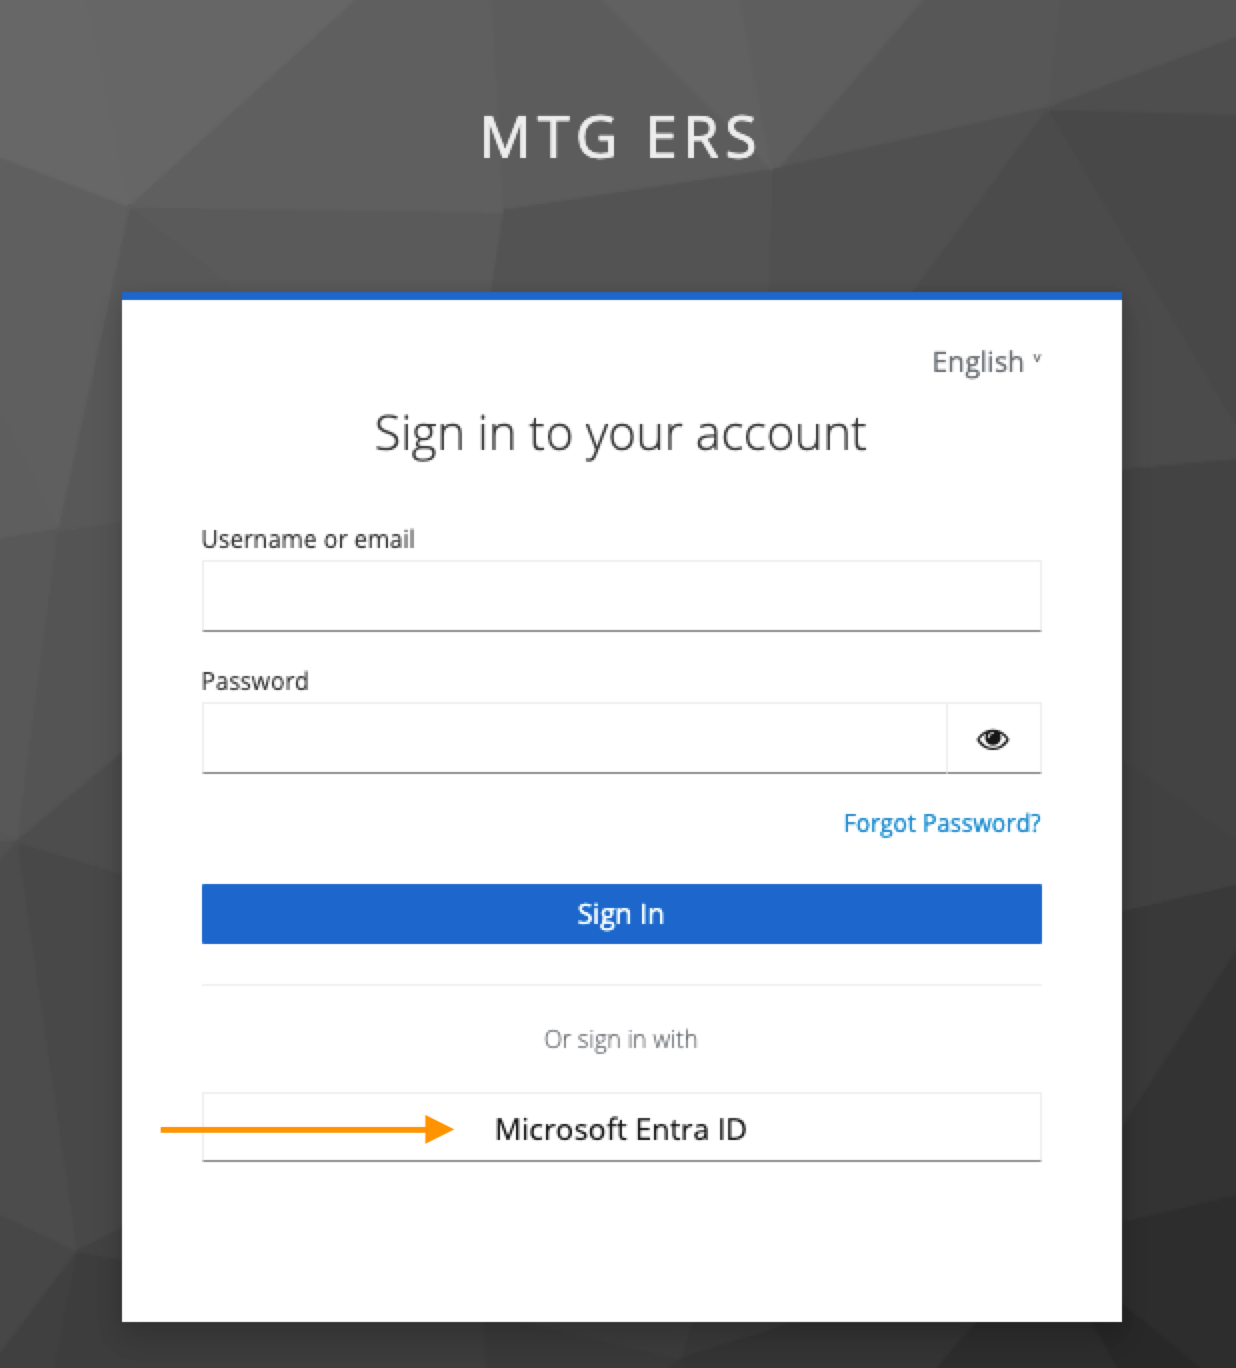
Verify that a Sign in with Microsoft button appears on the login page.
-
Click the button and sign in with your Entra ID credentials.
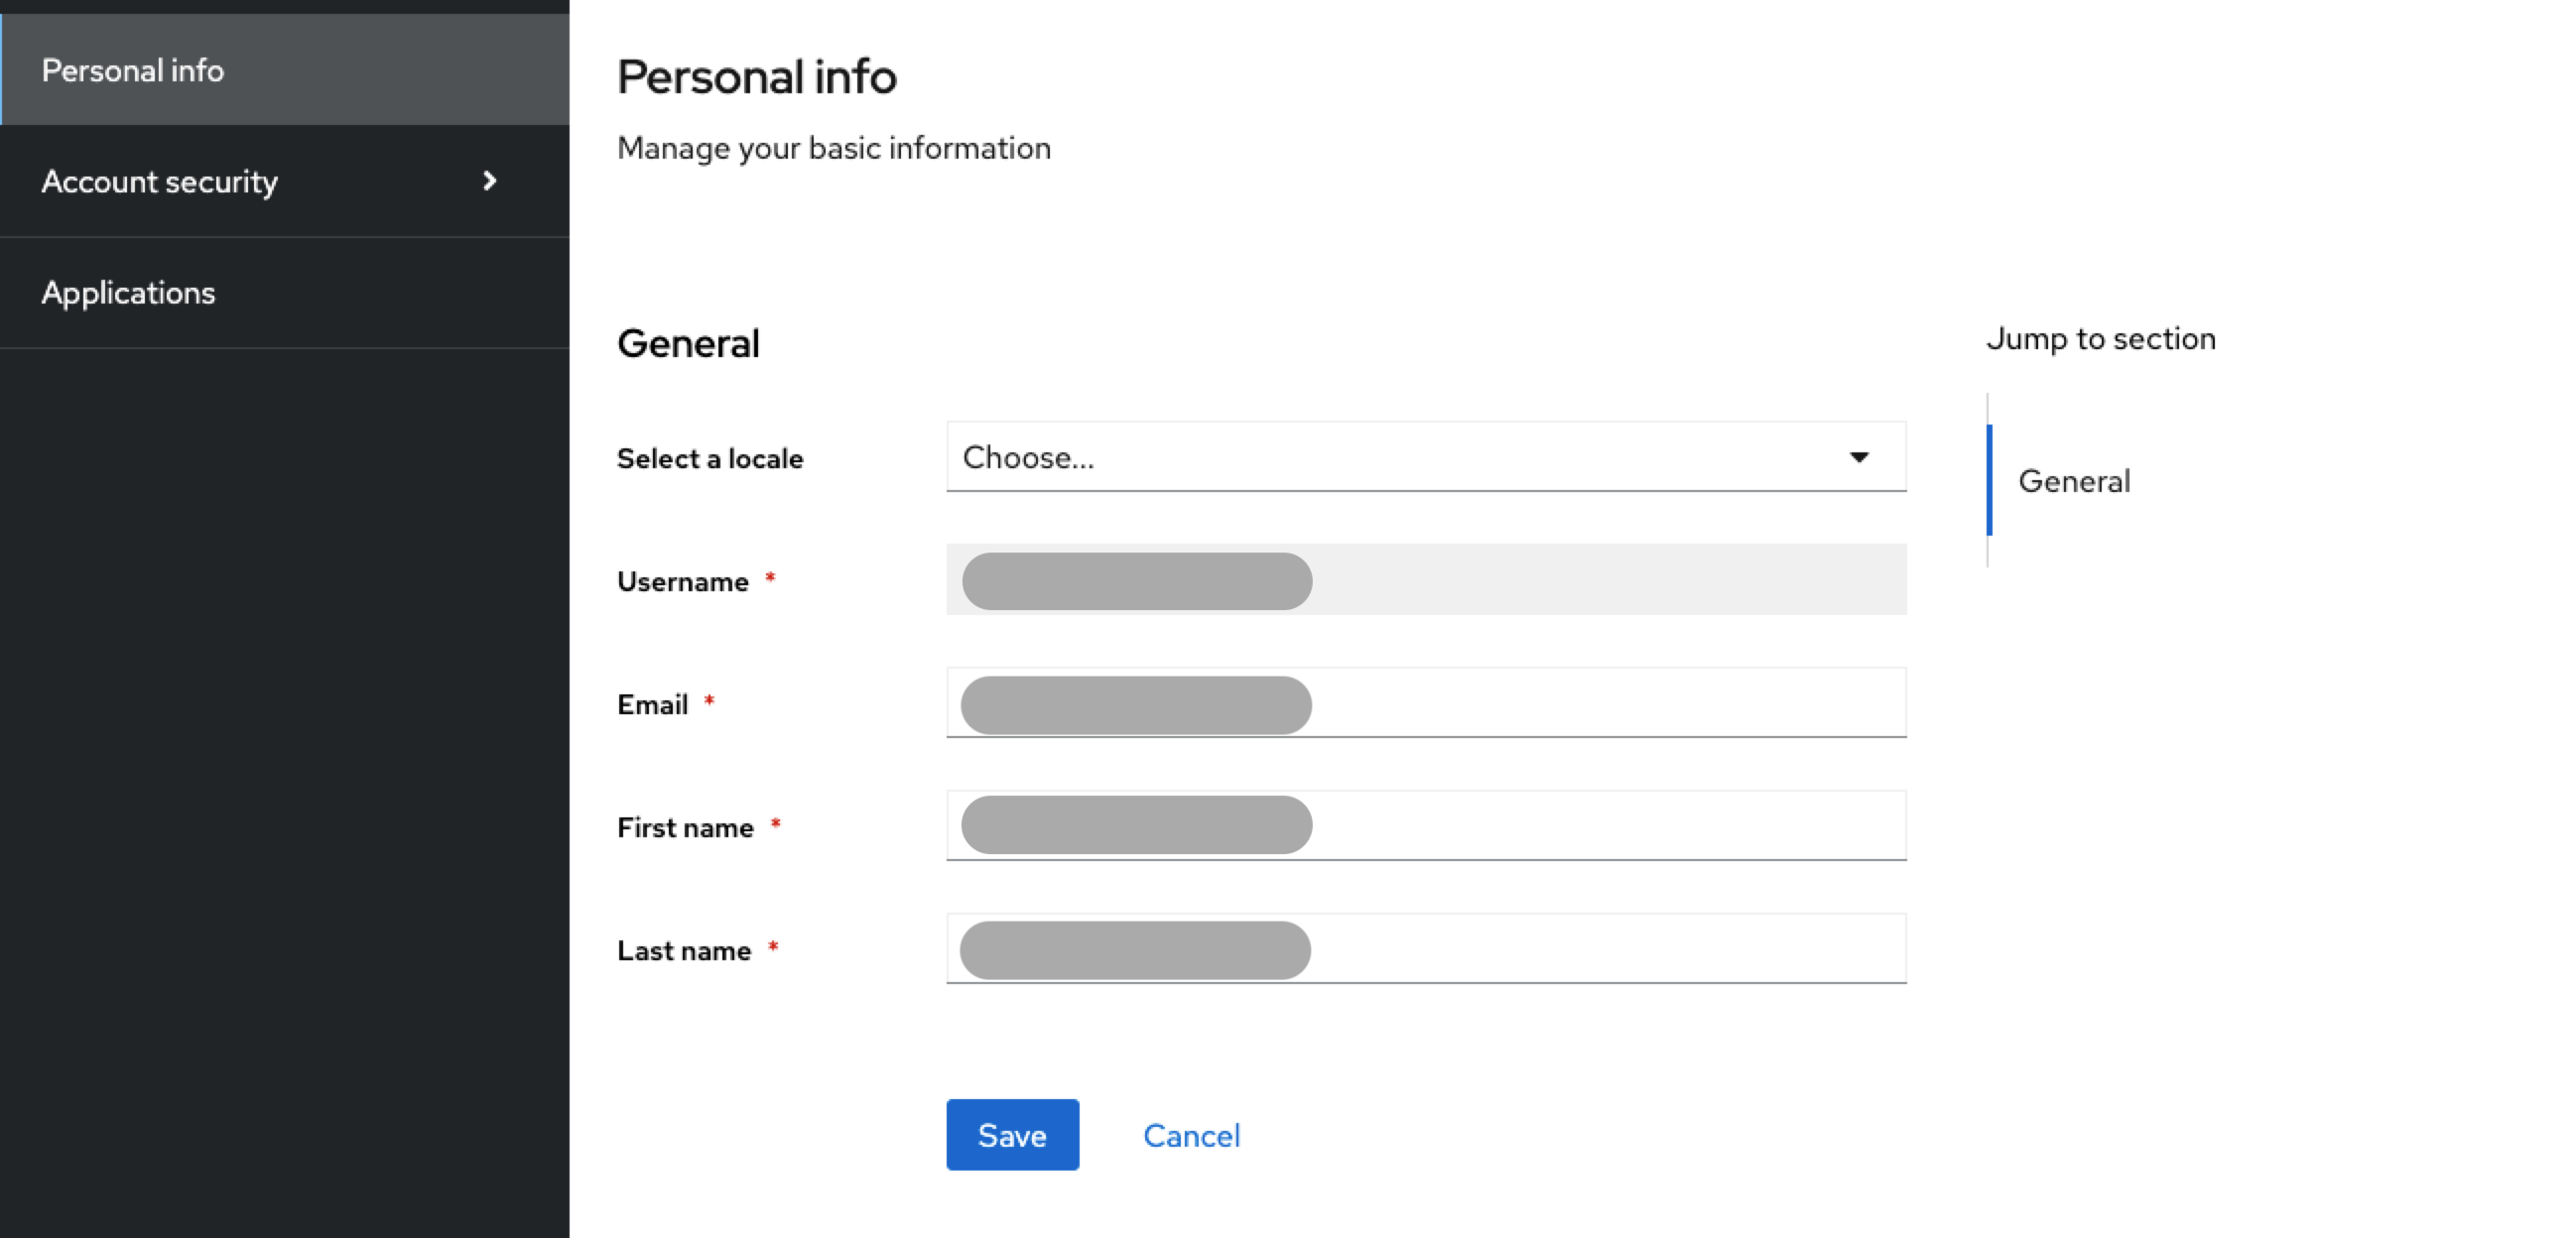
-
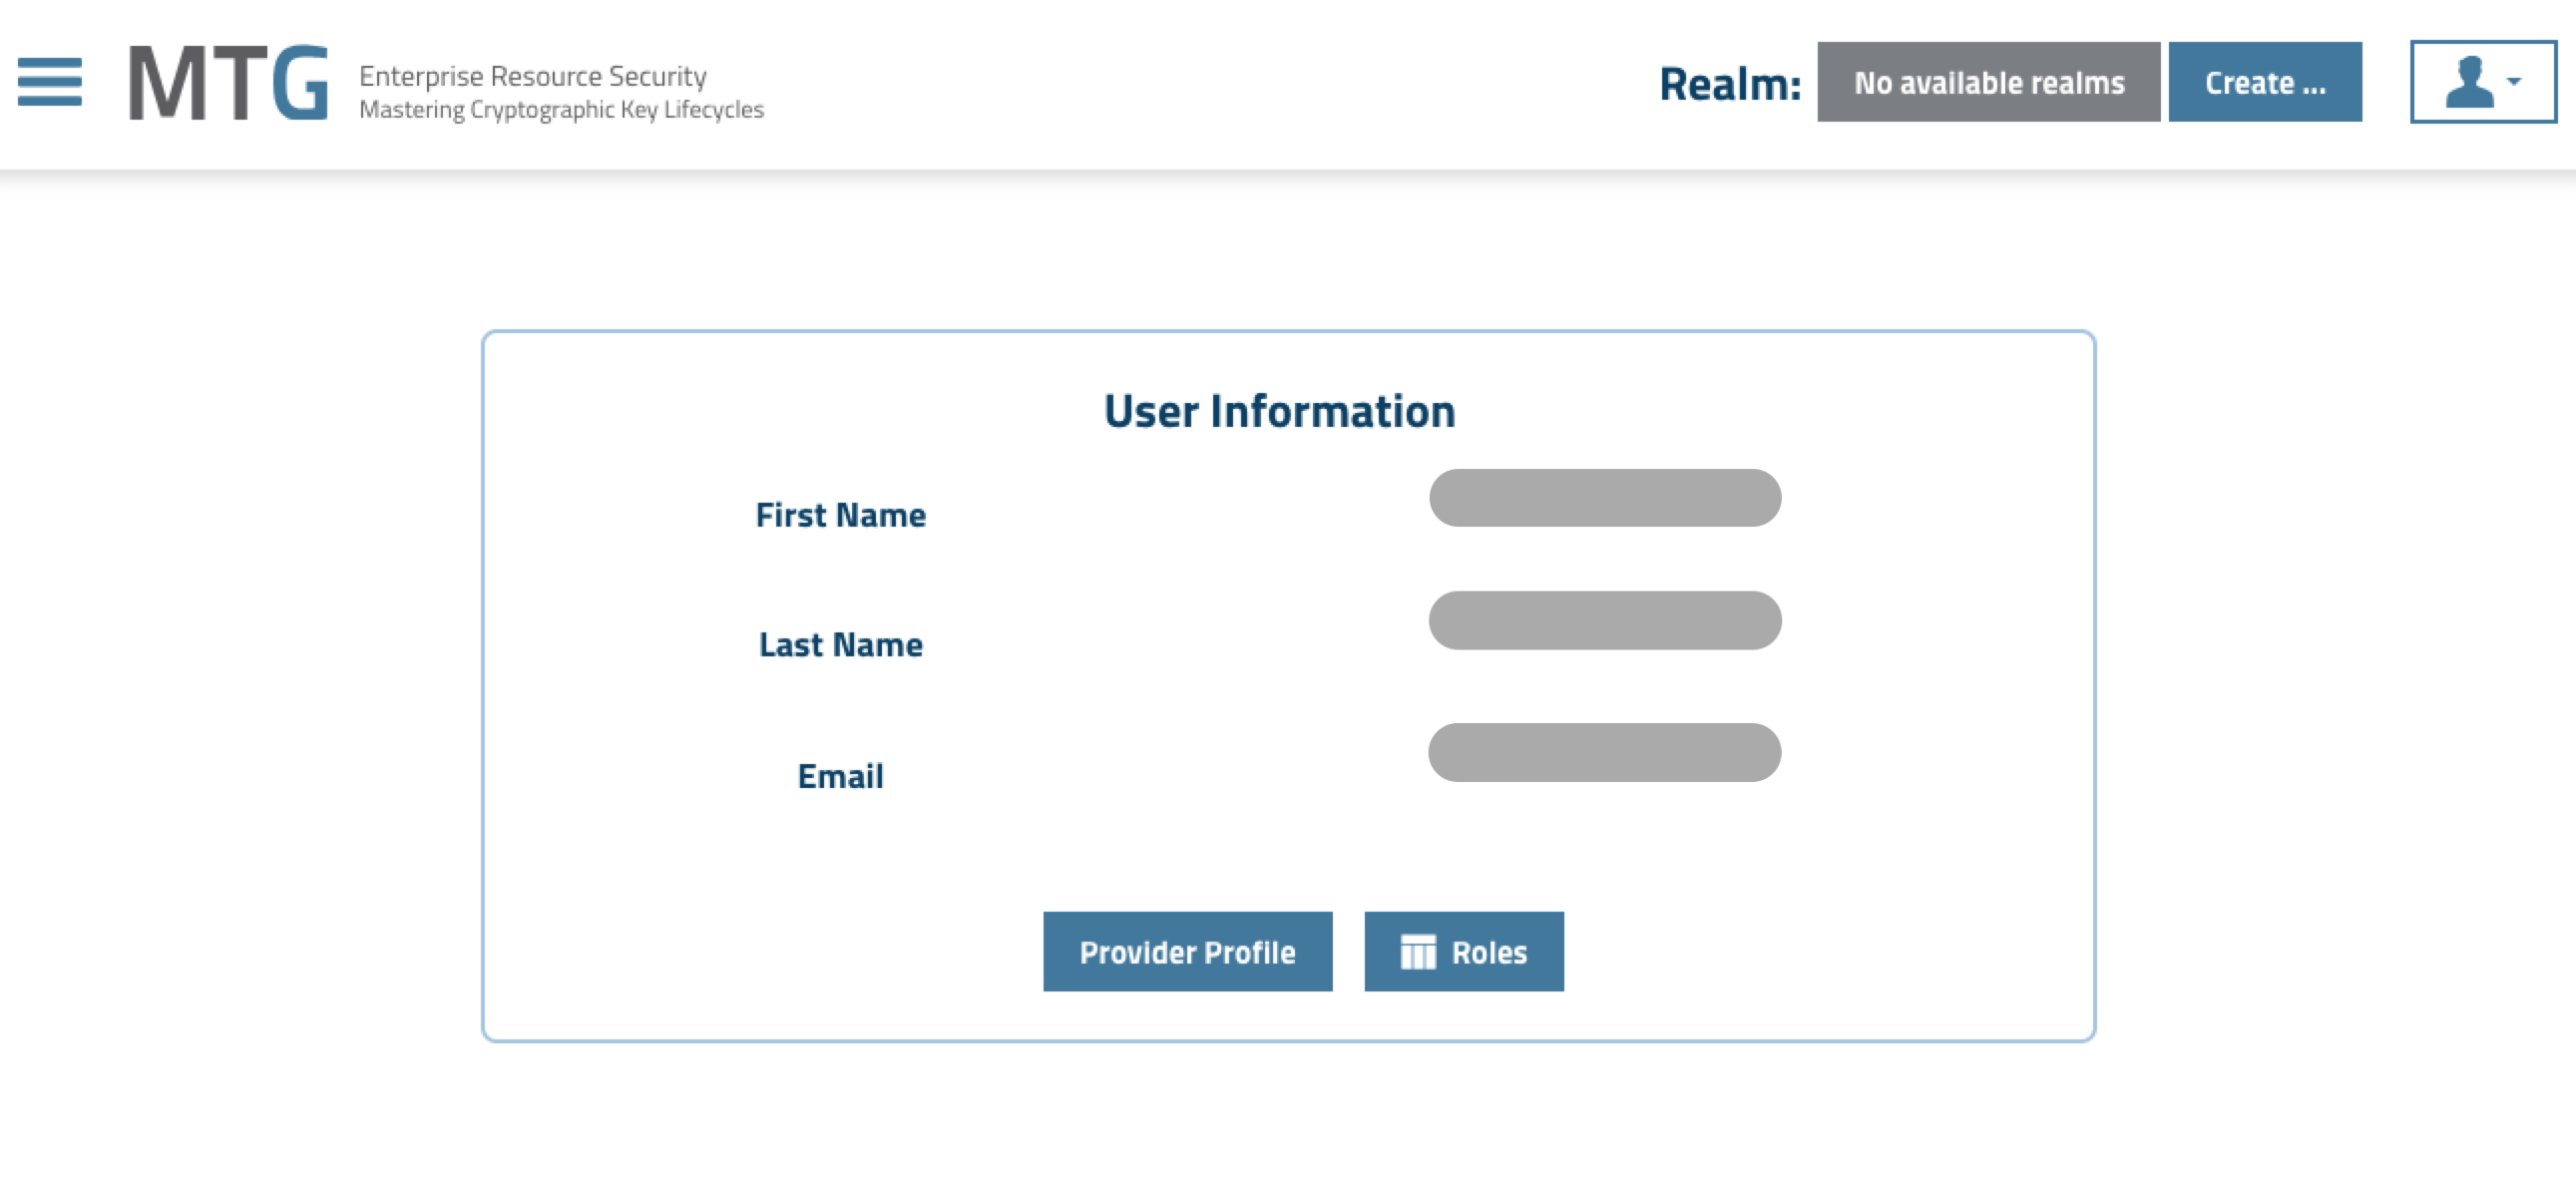
Upon successful authentication, you are redirected to the Keycloak account page, confirming the federation pipeline is working.
|
Troubleshooting: Login times out after Microsoft sign-in If you enter your Microsoft credentials successfully but the browser times out on the redirect back to Keycloak, this is typically a network reachability issue:
If live federation is unavailable, you can still validate the end-to-end role mapping by manually creating the federated user in Keycloak and assigning the role directly. See Manual Verification (If Live Federation Is Unavailable). |
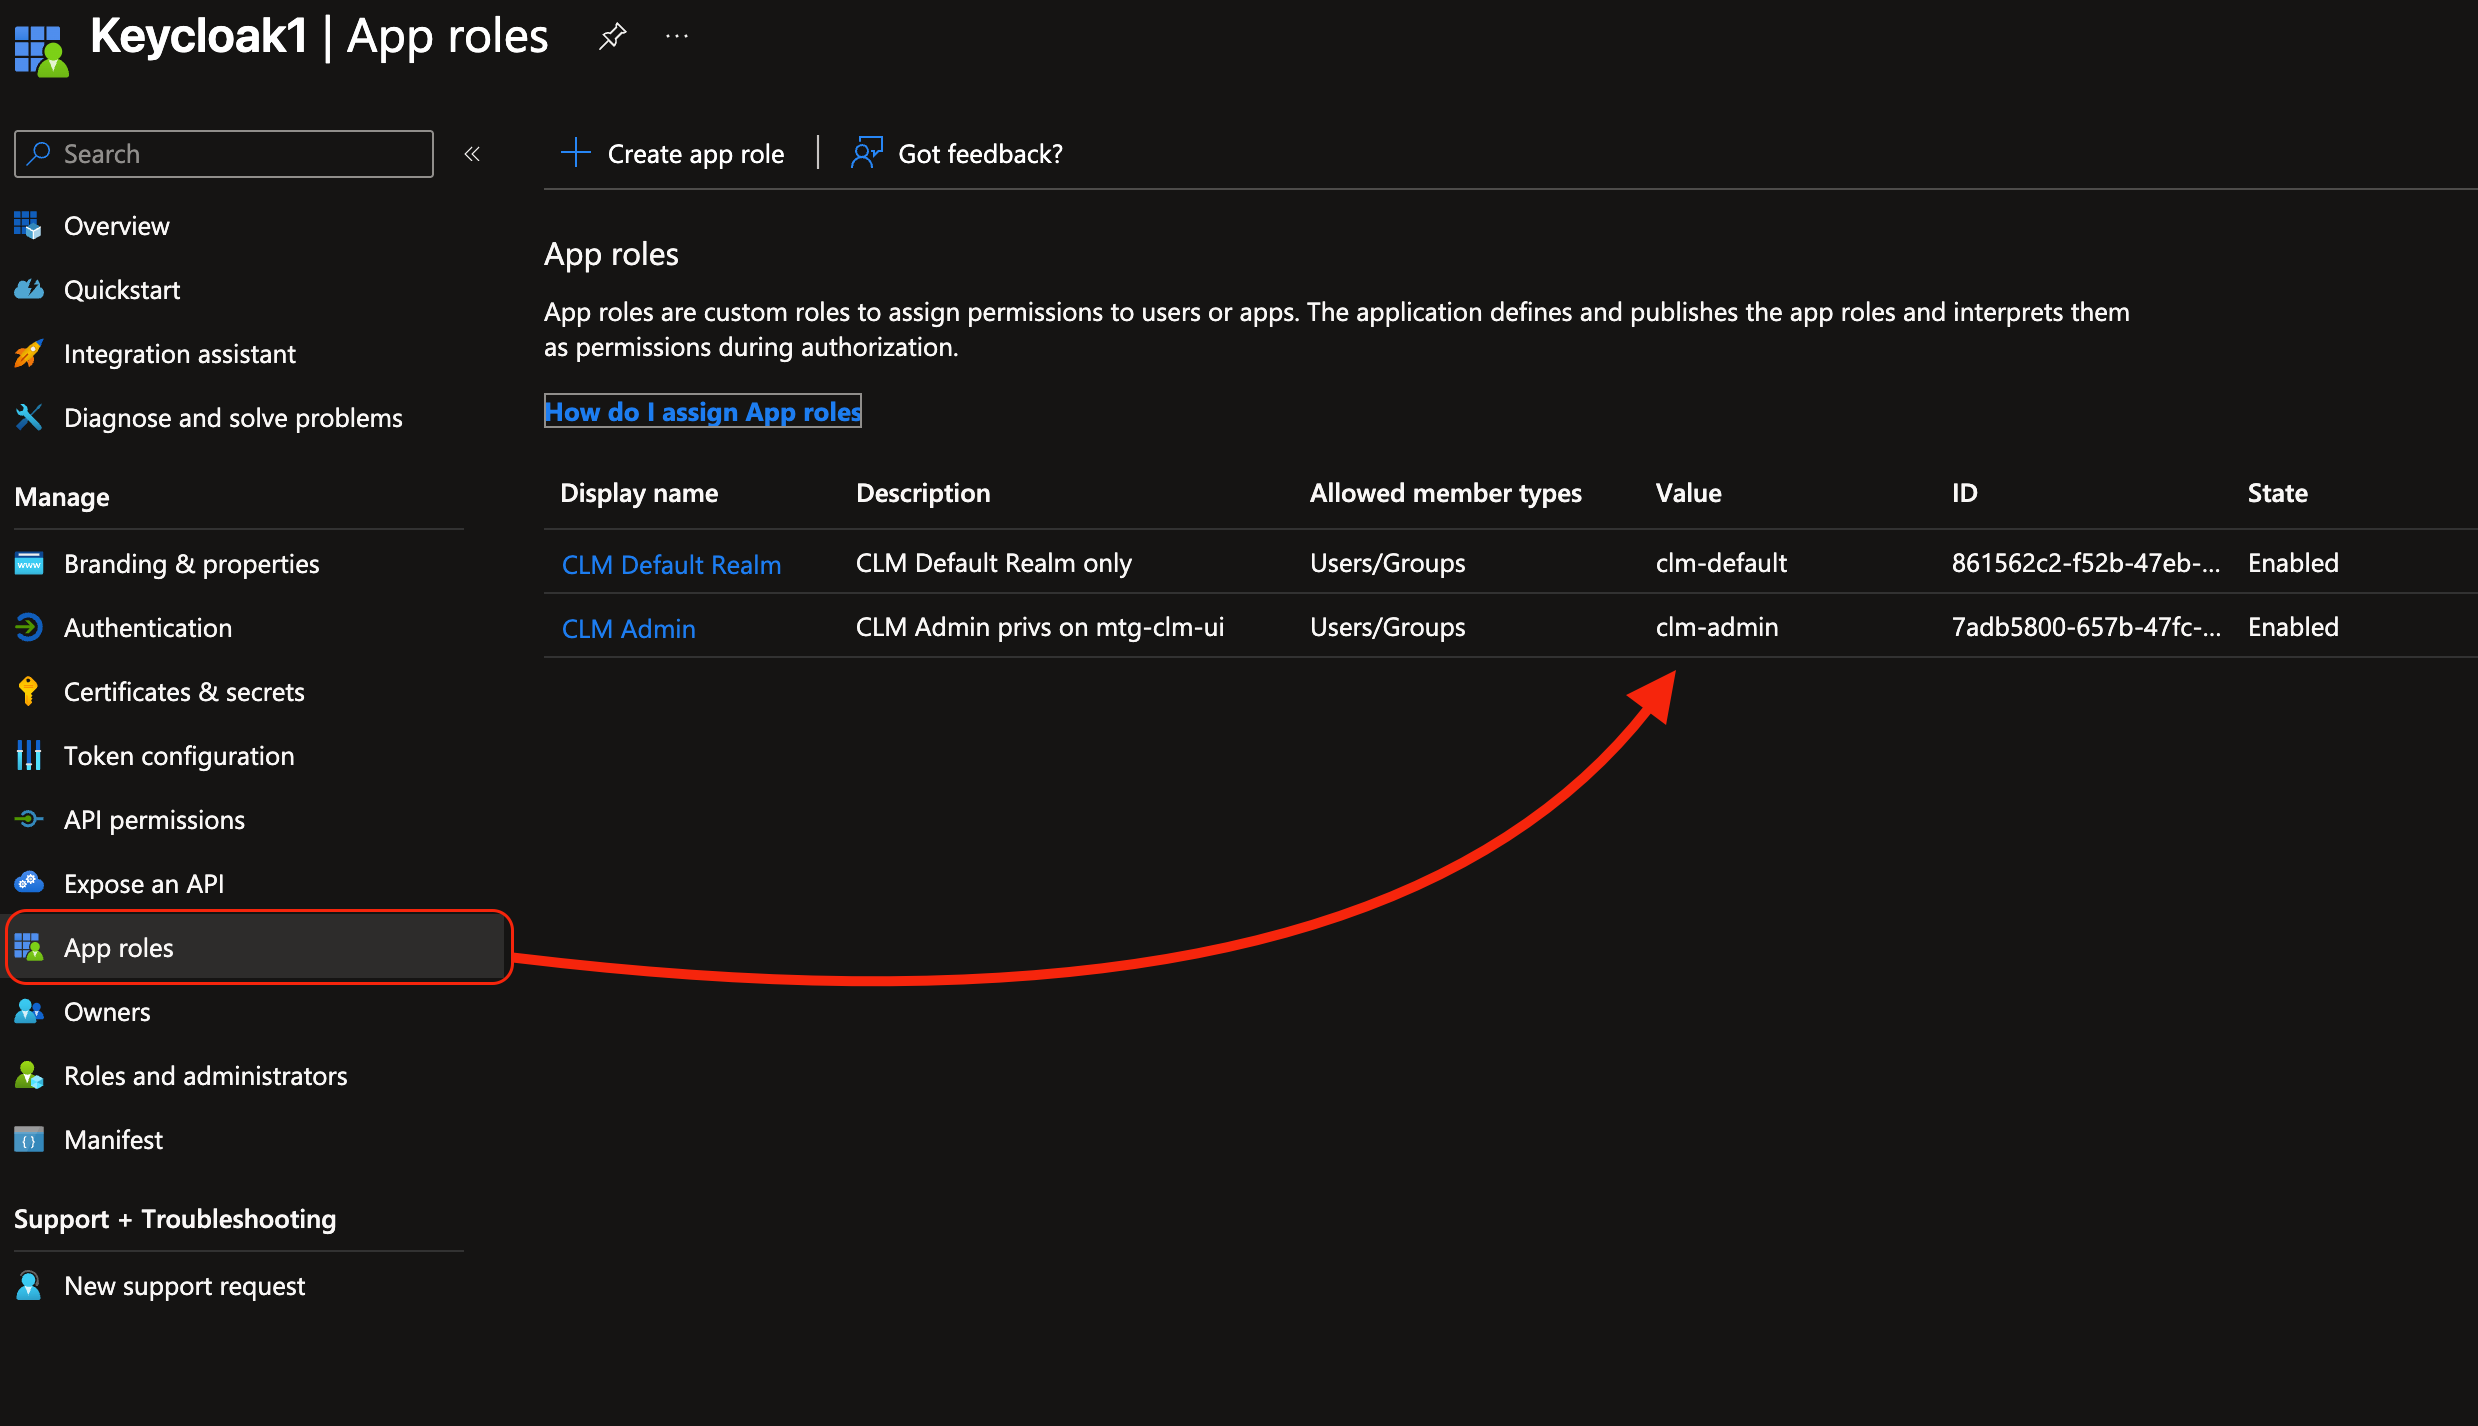
Defining app roles in Entra ID
In your Azure app registration, under App roles, create entries such as clm-admin or clm-default.
These roles will be included in the roles claim of the ID token.
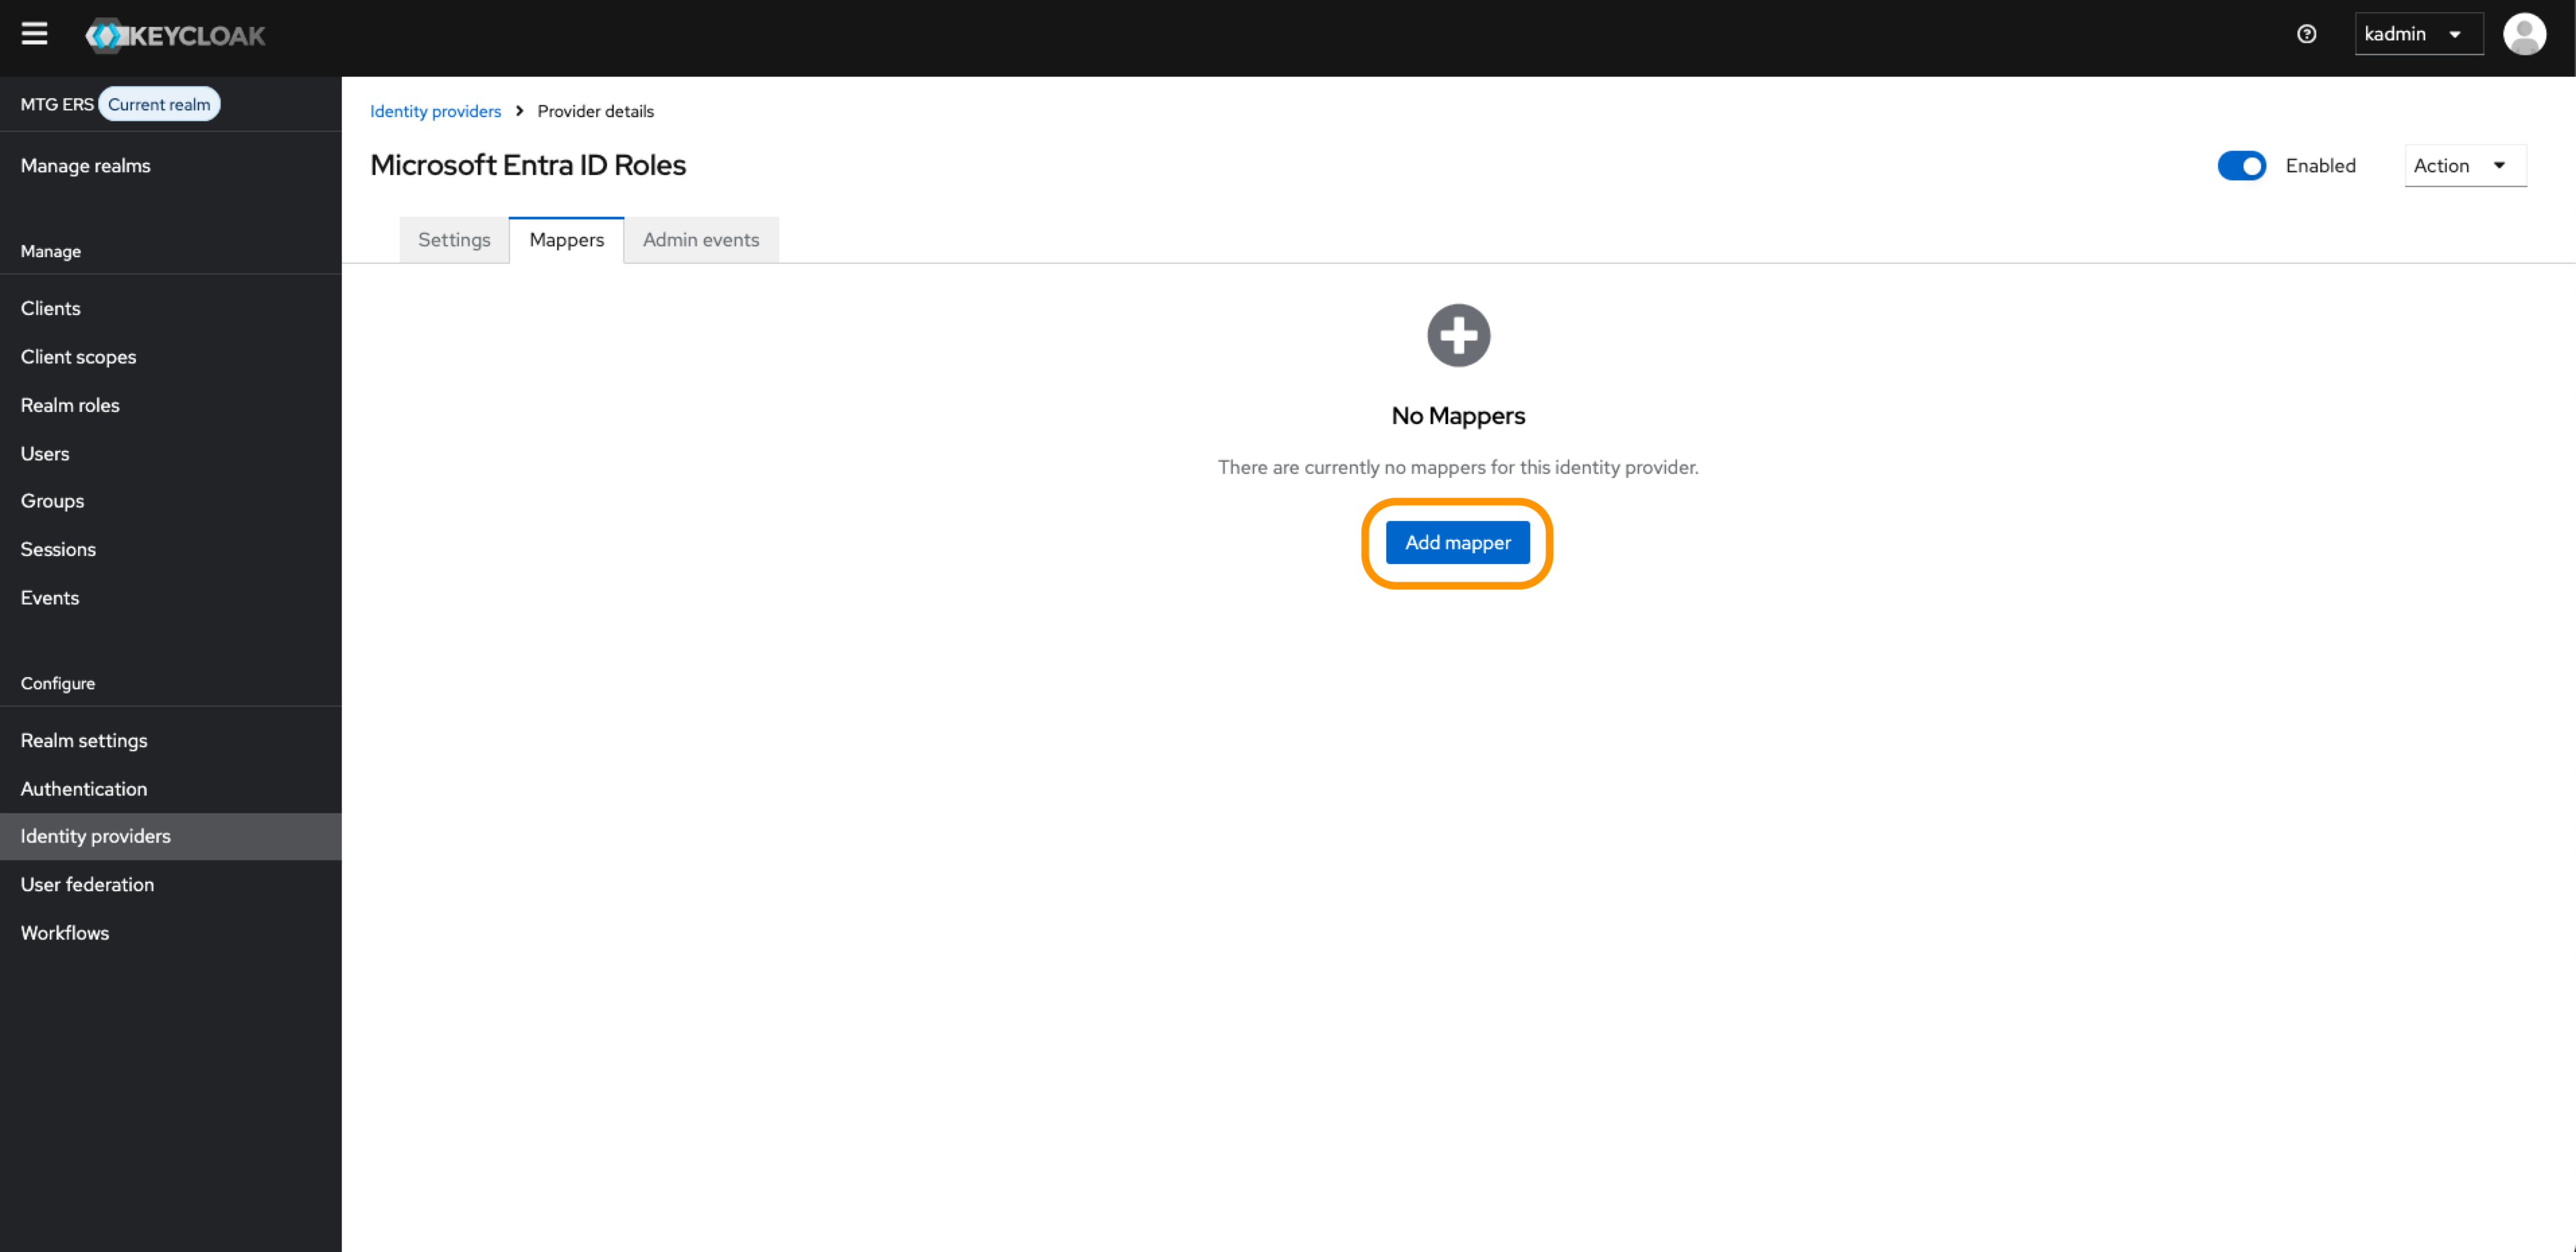
Adding Mappers in Keycloak
In Keycloak → Identity Providers → Your Azure provider:
-
Open the Mappers tab → click Add mapper.
Configuring Mappers
| Make sure the Keycloak realm roles you are setting up below, already exist under Realm roles. |
Configure the mapper according to your specific needs:
-
Name: e.g.,
Admins -
Mapper type:
Claim to Role -
Claim:
roles -
Claim value:
clm-admin -
Role: select the corresponding Keycloak role e.g.,
clm_admin -
Sync mode override:
Force

| The above configuration effectively tells Keycloak: "When the token contains a roles claim with the value clm_admin, assign the Keycloak realm role named clm_admin to the user." |
| The Claim to Role mapper bridges Entra ID and Keycloak by matching the roles claim in the token to a Keycloak realm role. A Keycloak role is only assigned if a corresponding App Role is defined and assigned to the user in Entra ID. The mapper does not create roles in Entra ID, and changes to Entra ID role assignments take effect on the next federated login. |
After successful setup the user should be inheriting above roles on login.
Verify Role Assignment
-
Log out of Keycloak completely.
-
Open a fresh private or incognito window and navigate to the account console:
https://<keycloak-host>/realms/<realm-name>/account
-
Sign in with Microsoft using your Entra ID credentials.
-
In your regular browser window log into the Keycloak admin console (if you had logged out before) with administrator credentials.
-
Go to Users and select the federated user.
-
Verify the following: The Role Mapping tab shows
clm_adminunder Name.
-
Manual Verification (If Live Federation Is Unavailable)
If your Keycloak environment is not publicly reachable and the live federation test cannot complete, you can still verify that role assignment works correctly for your application:
-
In the Keycloak admin console, go to Users > Add user.
-
Set the Username to the full email address of your Entra ID test user (for example,
you@company.com). -
Click Save.
-
Go to the Role Mappings tab for the newly created user.
-
Under Realm Roles, select the role you created (for example,
clm_admin) and click Add selected.
This replicates the end state that the federation mapper produces: a Keycloak user with the appropriate realm role assigned. Your application will see this role exactly as it would after a successful federated login.
Troubleshooting
| Issue | Likelihood | Solution |
|---|---|---|
No Microsoft button on the Keycloak login page |
High |
- Confirm the identity provider is enabled in Keycloak. |
Login times out after Microsoft authentication |
Medium |
- Ensure the Keycloak instance is publicly reachable or you are connected to the required VPN. |
Mappers not firing: no attributes or roles appear on the user after login |
High |
- Set Sync Mode Override to |
|
Medium |
- In Entra ID, go to Enterprise applications → your app → Users and groups and confirm the user is assigned the App Role. |
Role appears in Attributes but not under Role Mappings |
Medium |
- Use a Claim to Role mapper (not Attribute Importer alone). The Attribute Importer stores the claim as a user attribute but does not assign a realm role. |
Second mapper for a role not defined in Entra ID does not assign |
Expected behavior |
- The mapper only assigns a role if the corresponding |
Existing Keycloak user conflicts during first federated login ("Account already exists") |
Medium |
- Choose Add to existing account to link the Microsoft identity to the existing Keycloak user. This preserves existing role assignments. |
Role assigned in Entra ID but not reflected after re-login |
Low |
- Log out completely and use a fresh incognito window. The mapper only executes during a new authentication flow, not on token refresh. |
Multiple identity providers pointing to the same Entra ID app registration |
Low |
- Disable unused providers to avoid conflicts. Only one provider should be active per Entra ID app registration at a time. |
User attributes populated but |
Medium |
- Verify the Entra ID app registration uses |