GlobalSign Certificate Provider
This page describes the steps needed to connect your existing GlobalSign account (from GlobalSign Atlas portal) to MTG CLM. This will enable you to use the GlobalSign API for issuance and revocation of GlobalSign public certificates for TLS and S/MIME purposes.
| Some certificate request modes, cryptographic algorithms and ERS component might not be compatible with GlobalSign certificate provider. For more details, see here 🔗 |
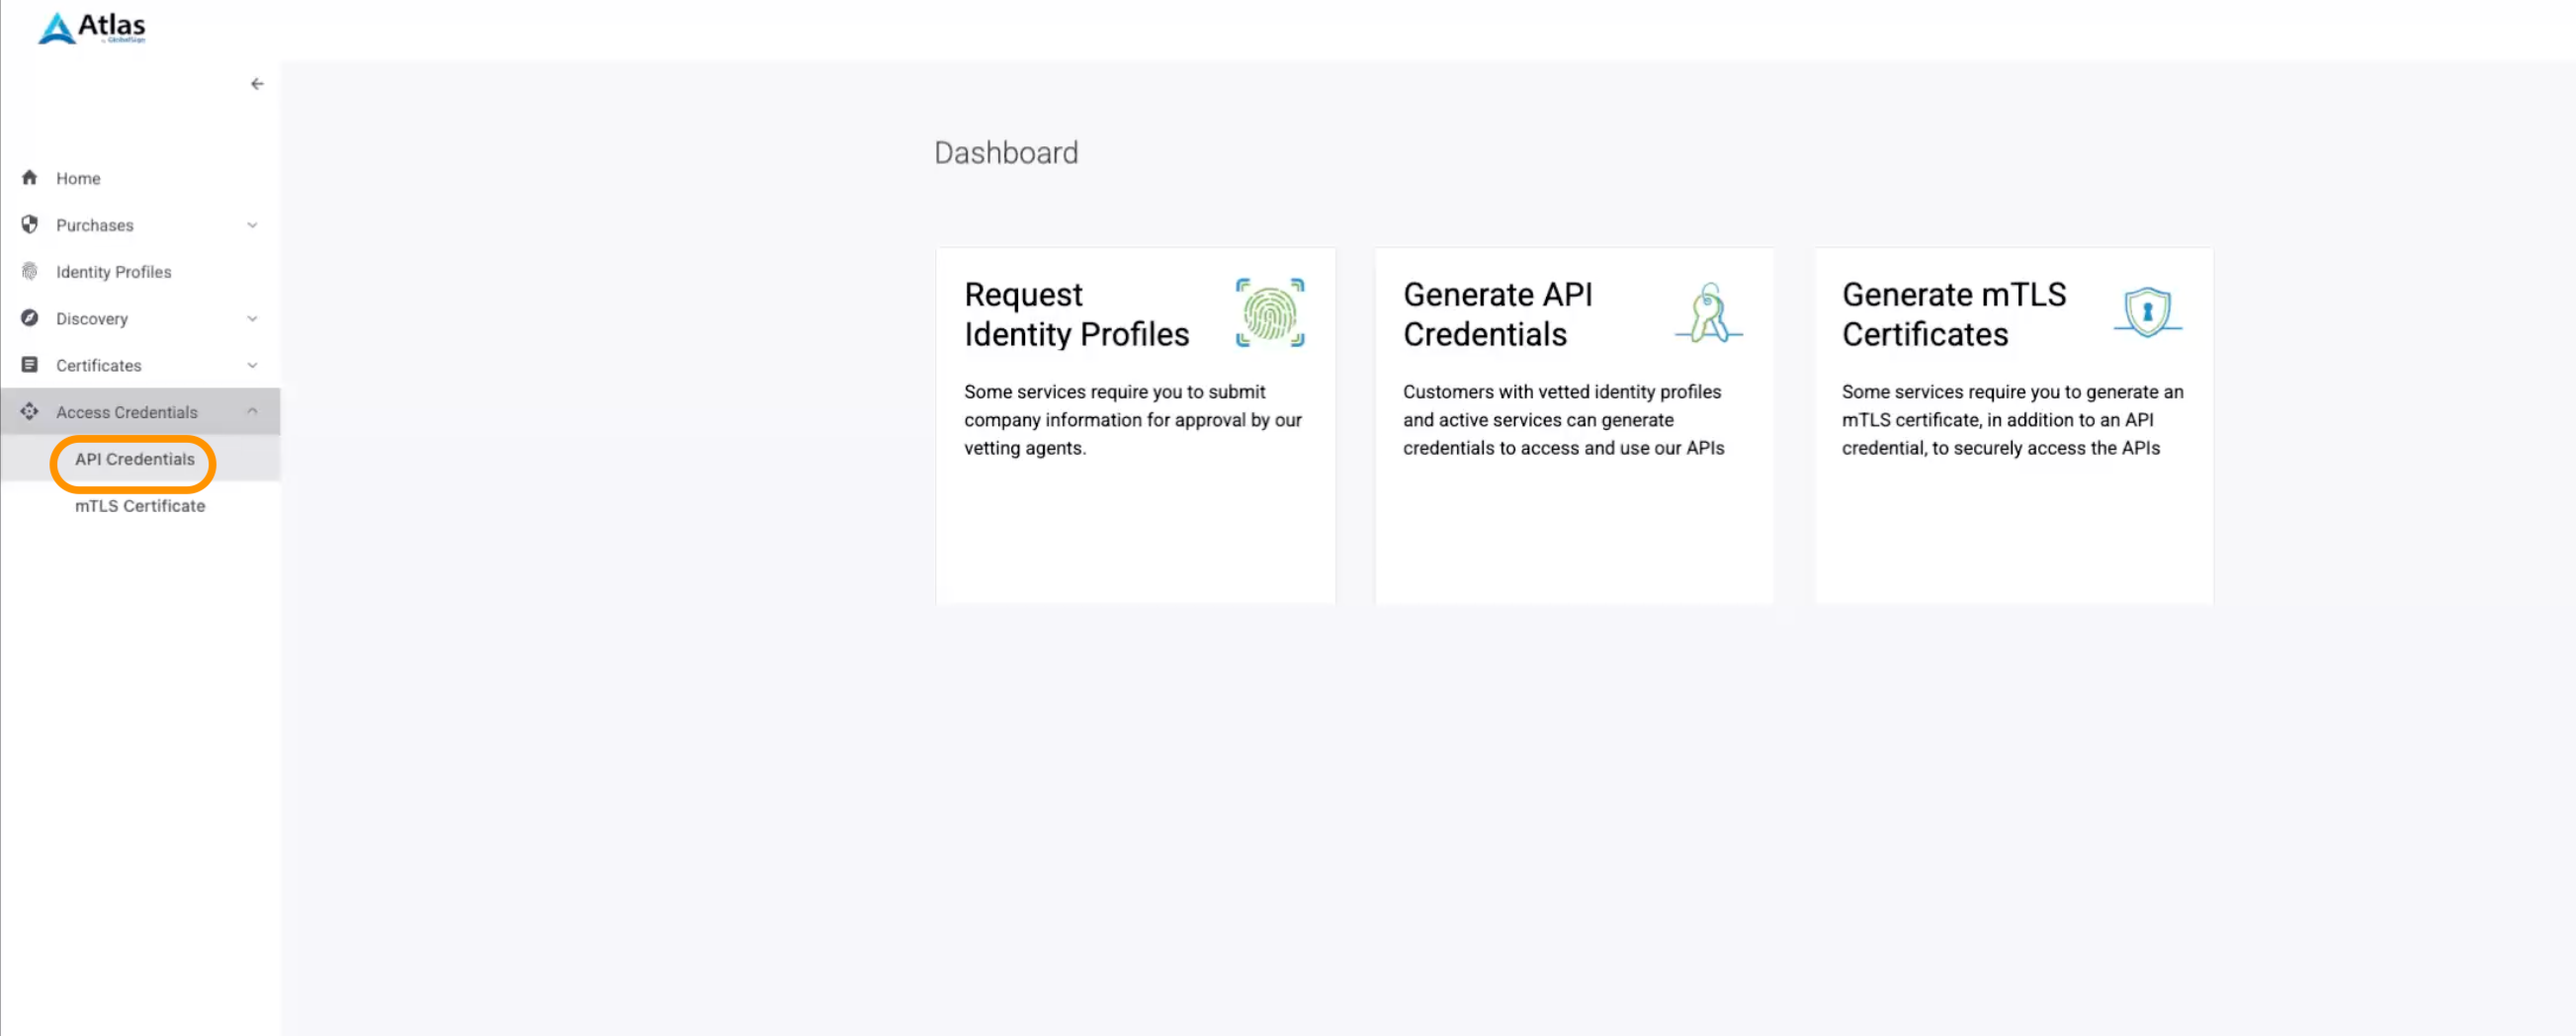
Create Access Credentials
Create API Credentials
-
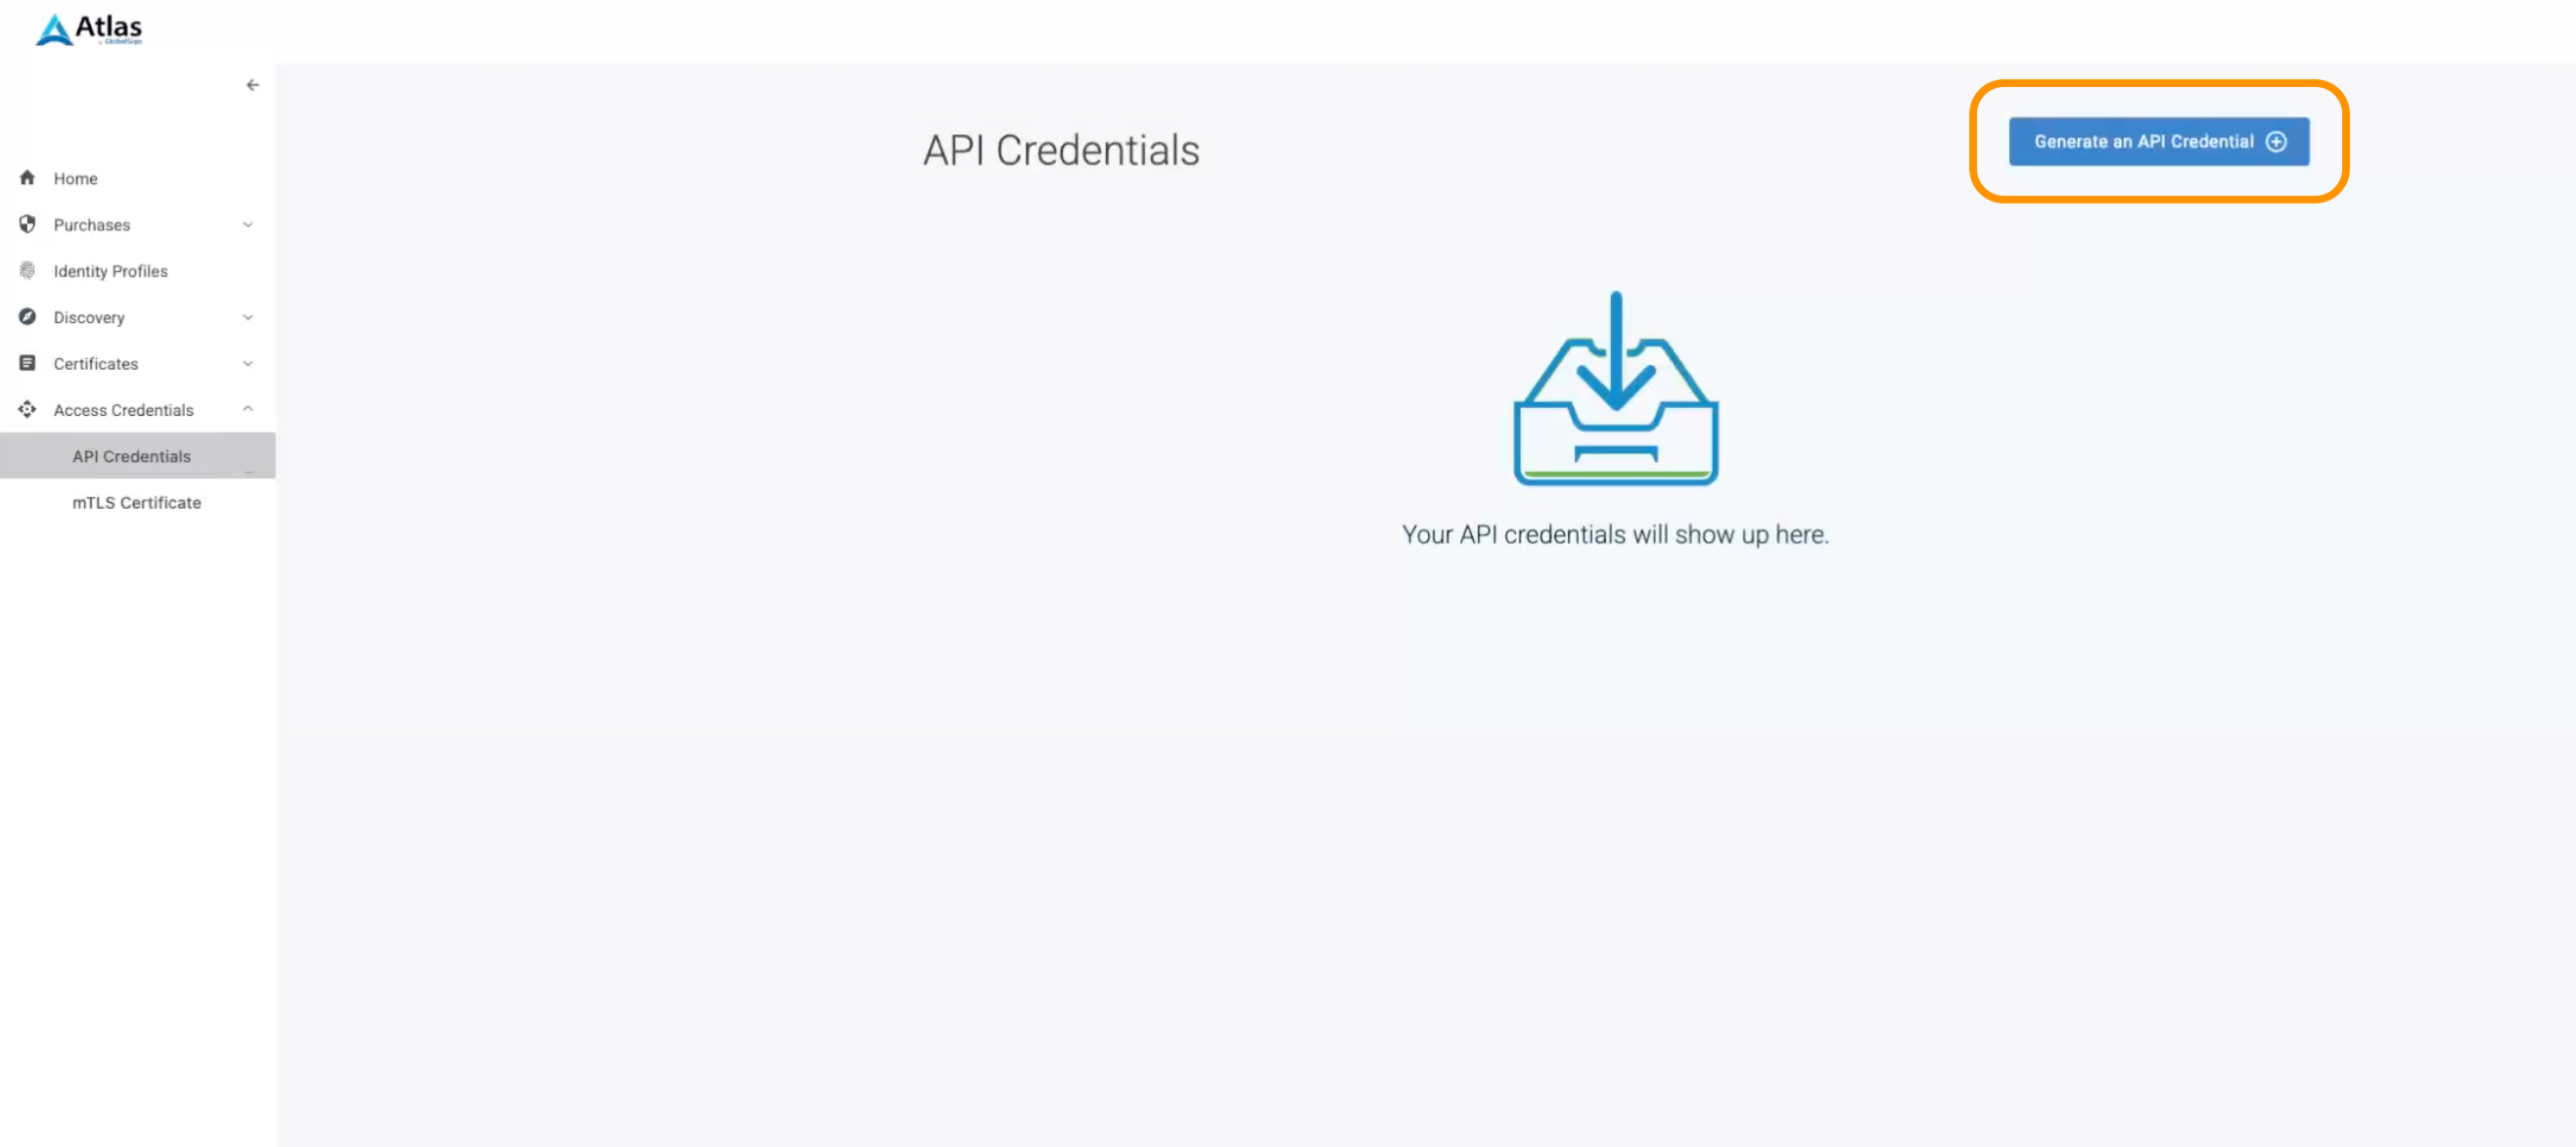
In your GlobalSign Atlas Dashboard navigate to Access Credentials → API Credentials using the sidebar.
-
Select Generate an API Credential.
-
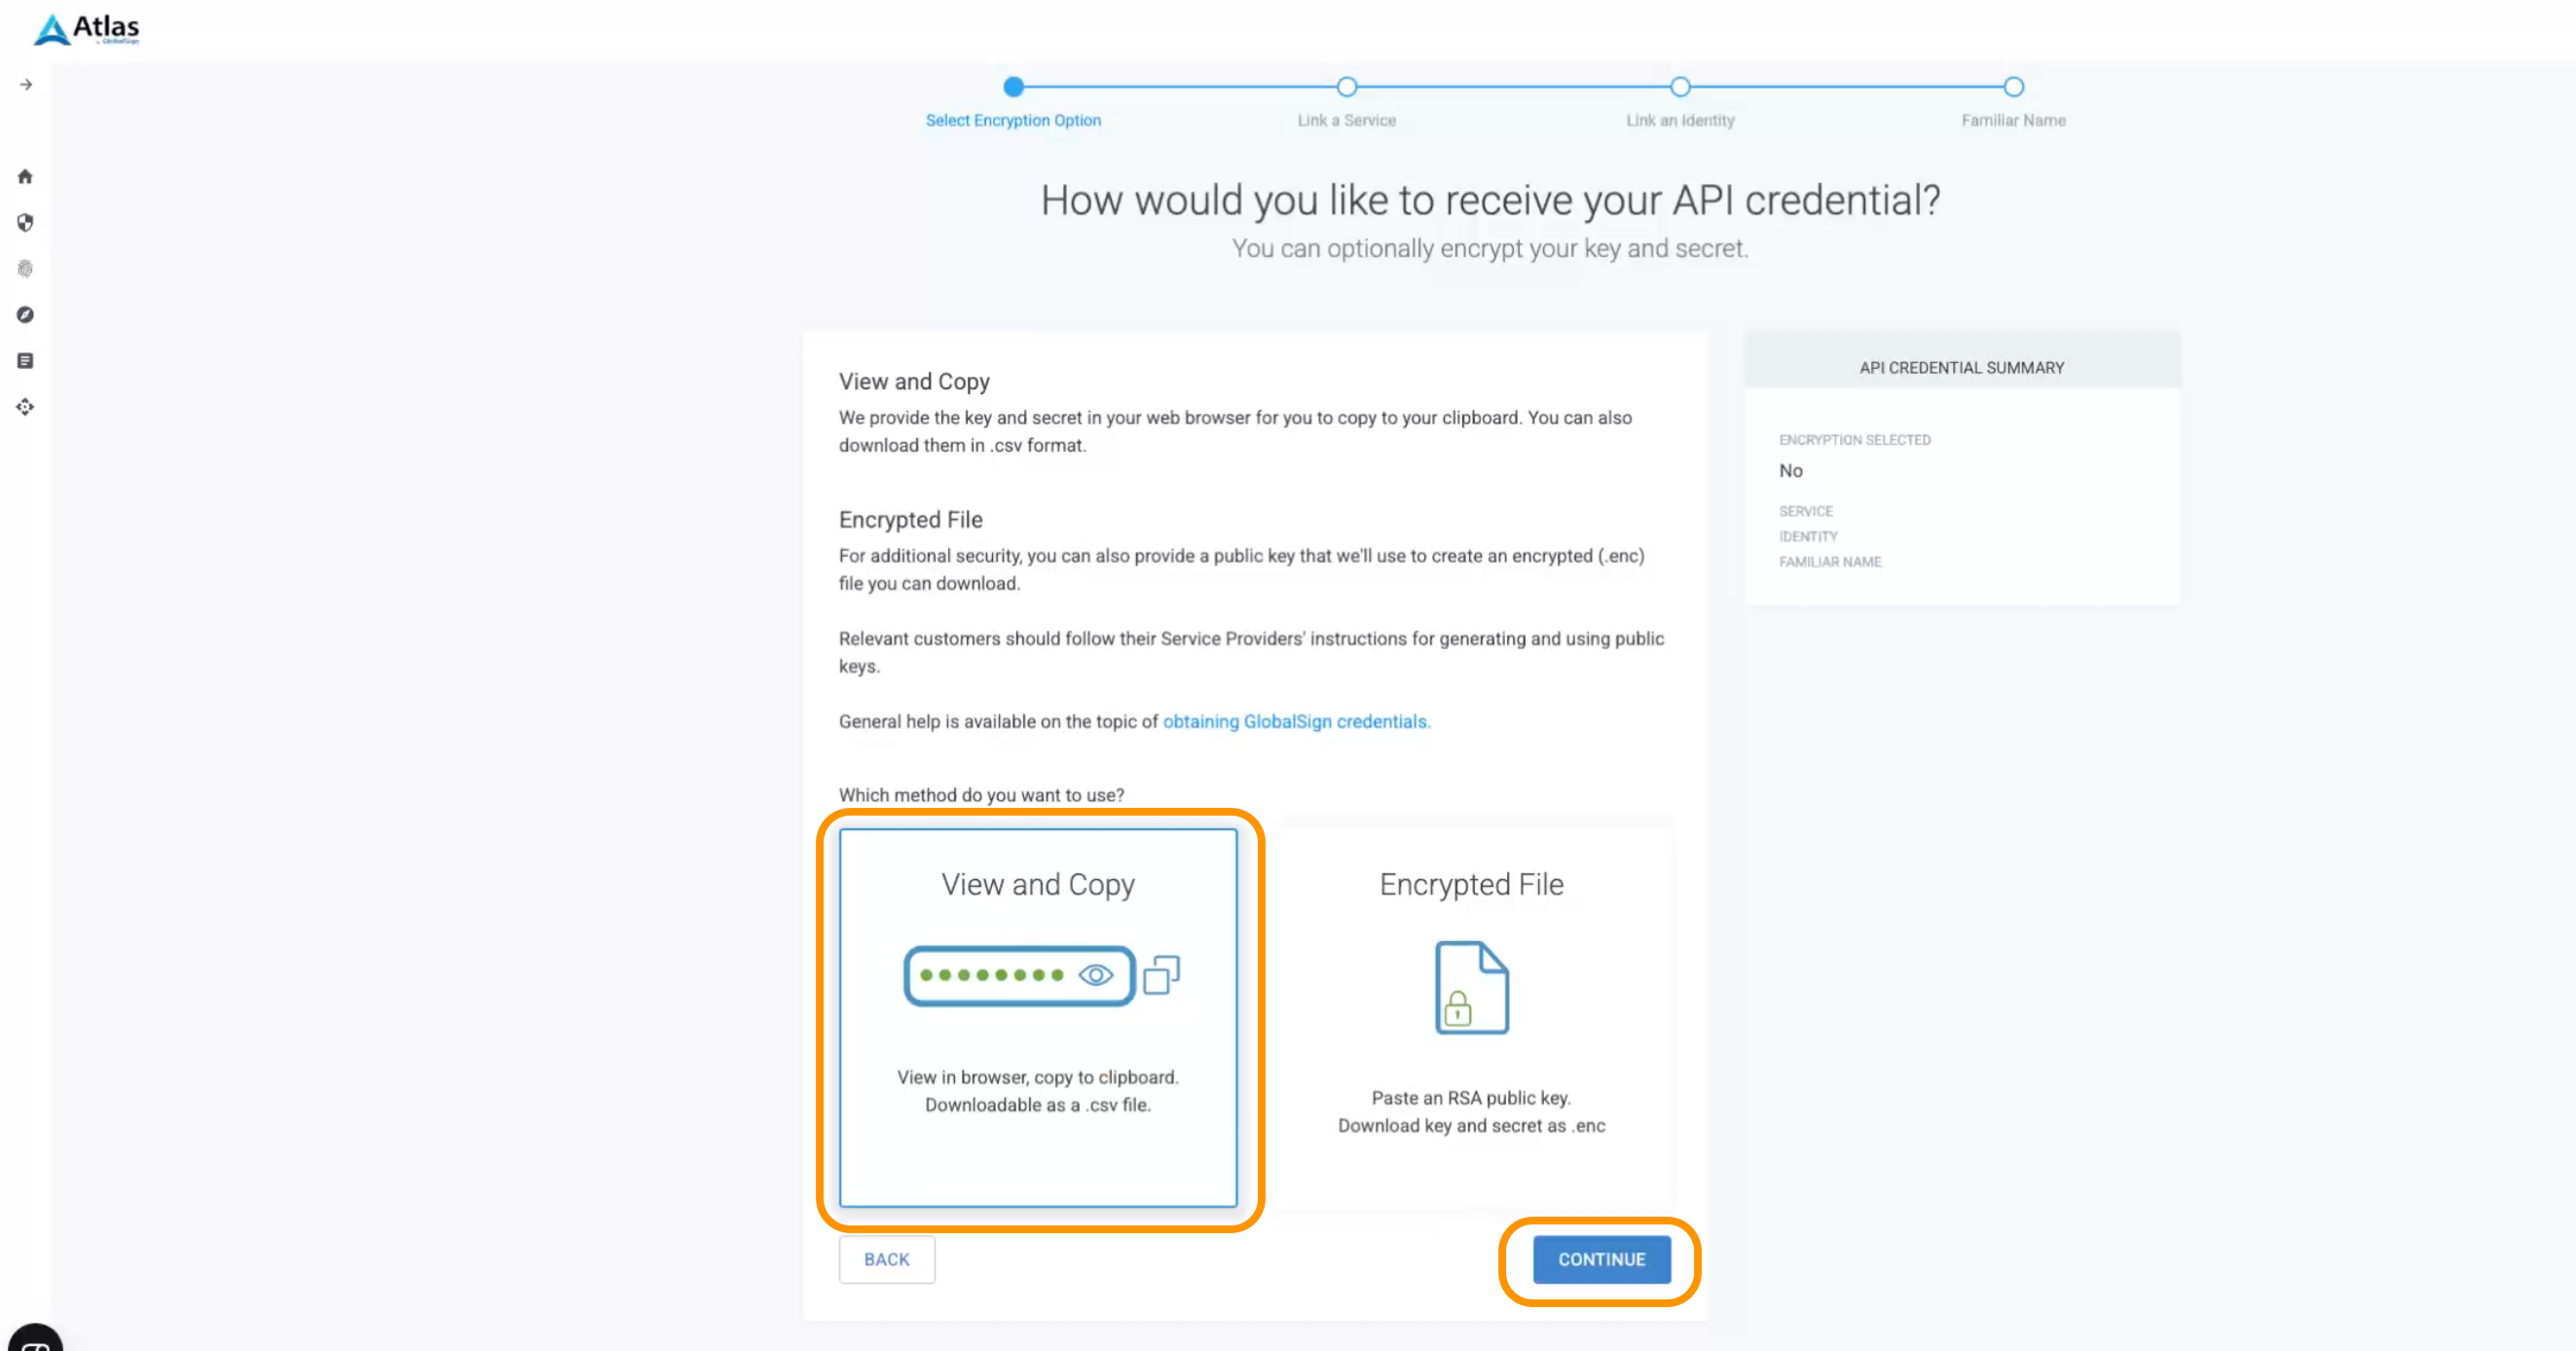
Choose how you want to receive your credentials and click Continue.
-
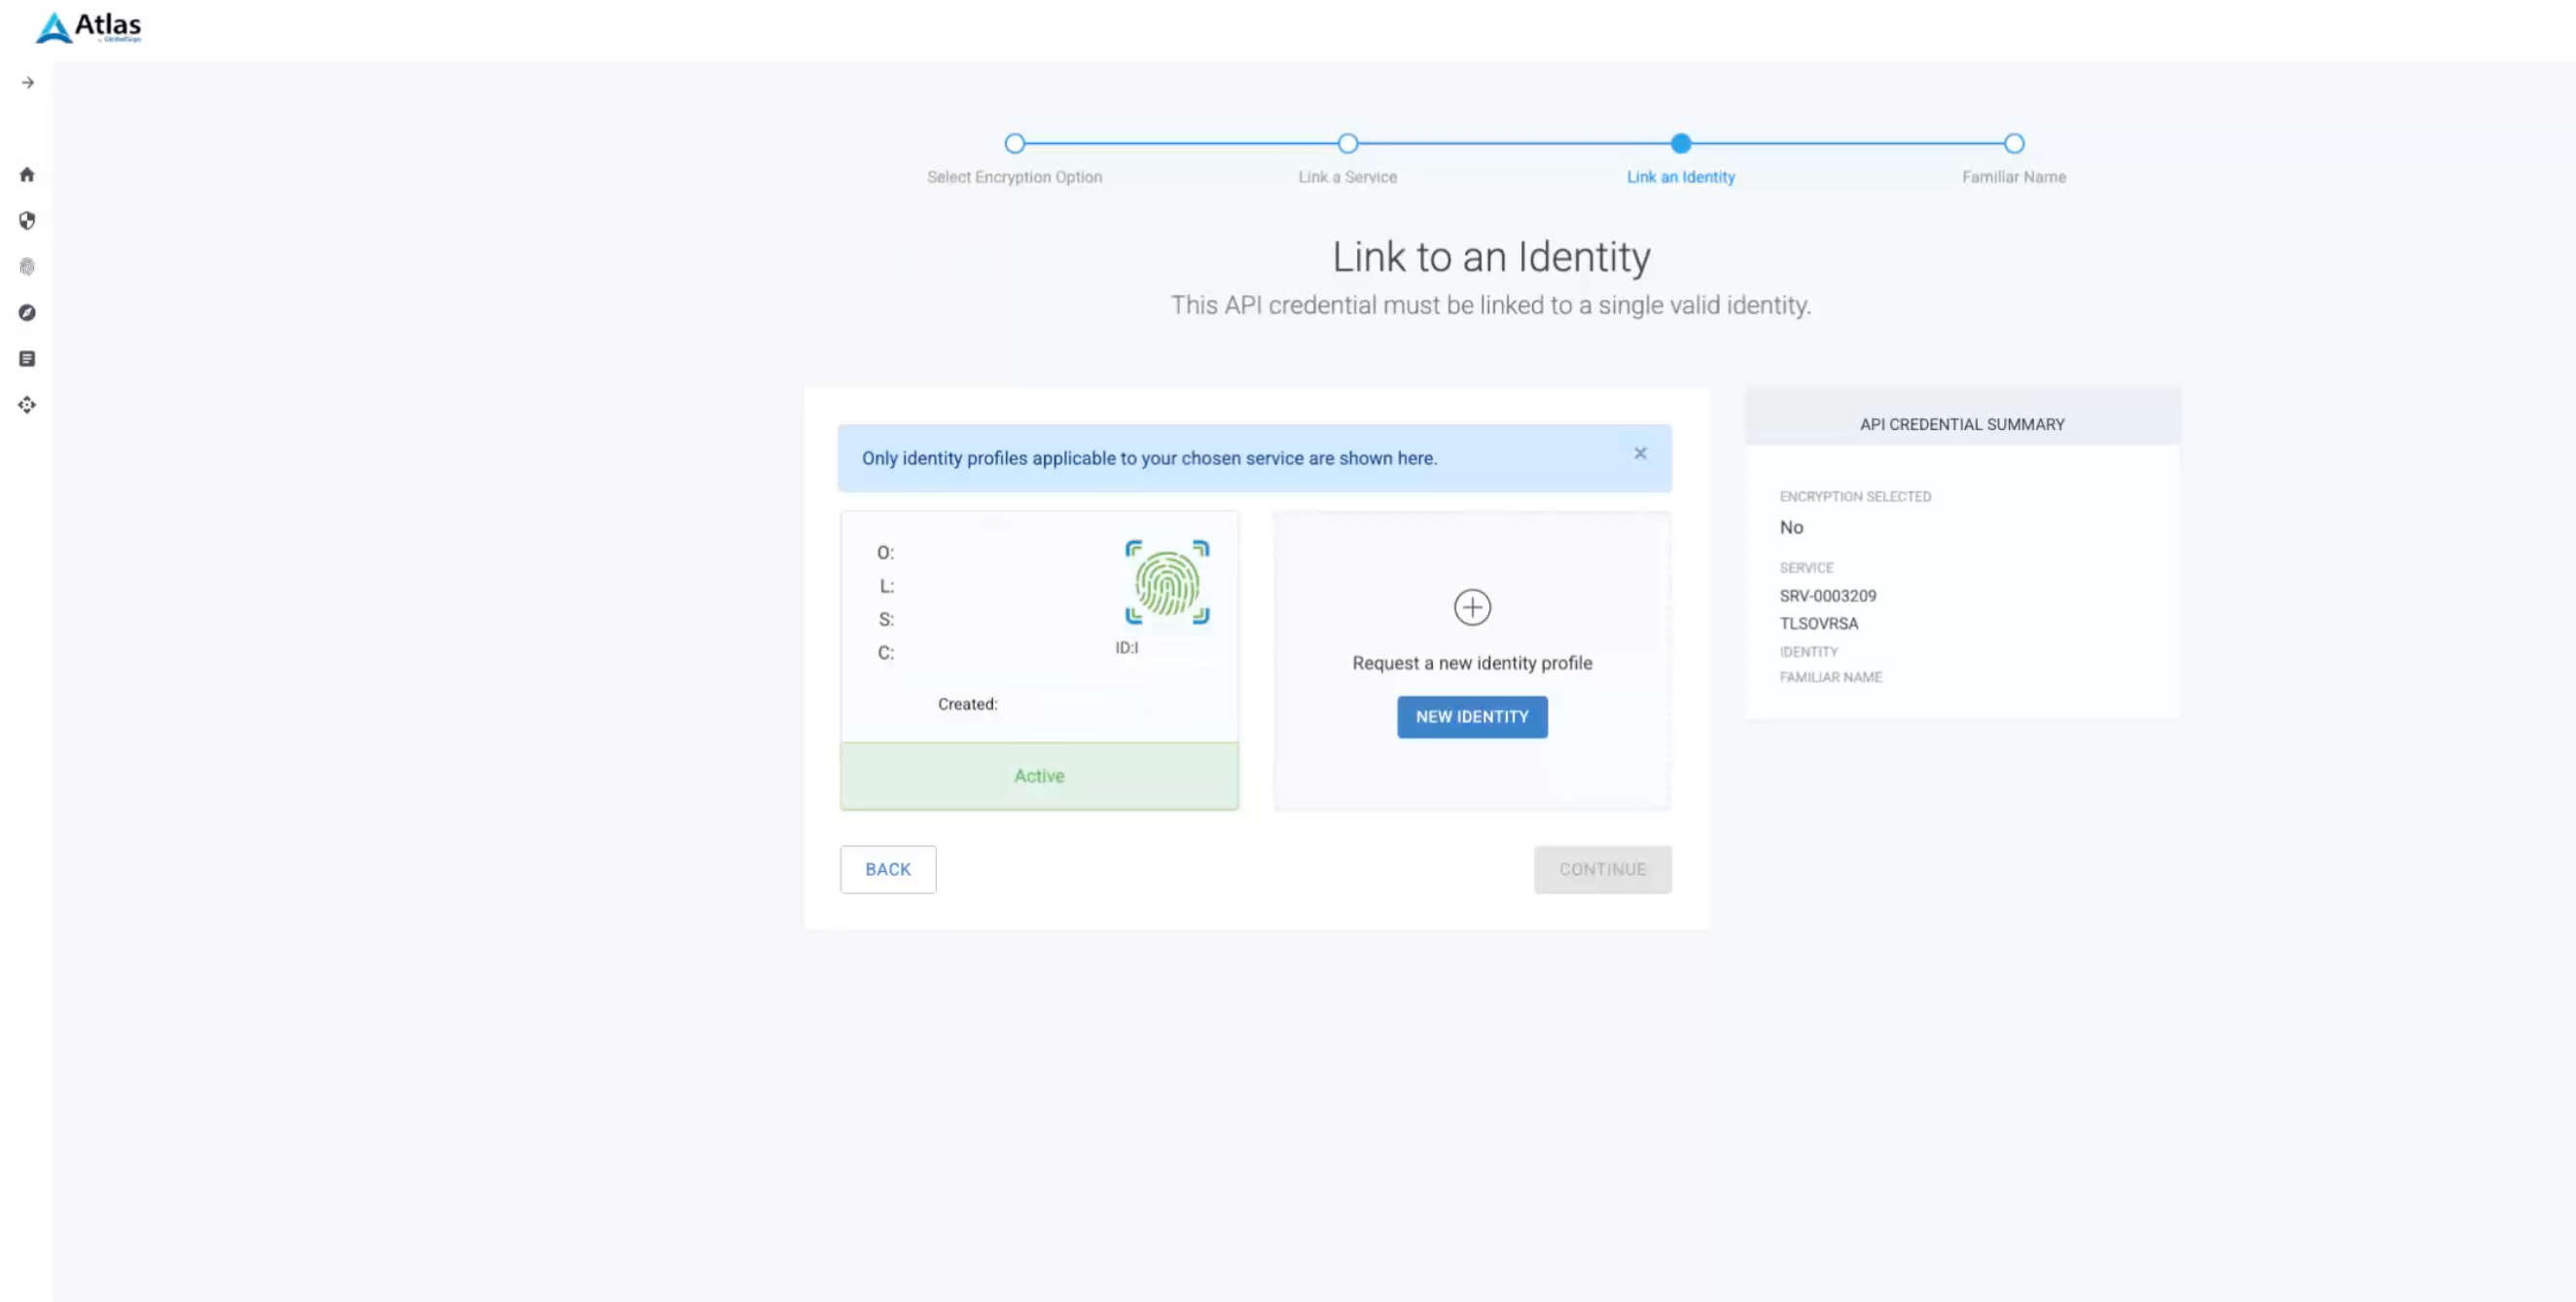
Select the GlobalSign service to be connected with the credentials and click Continue.
This will also influence the type of services you can use with these credentials. 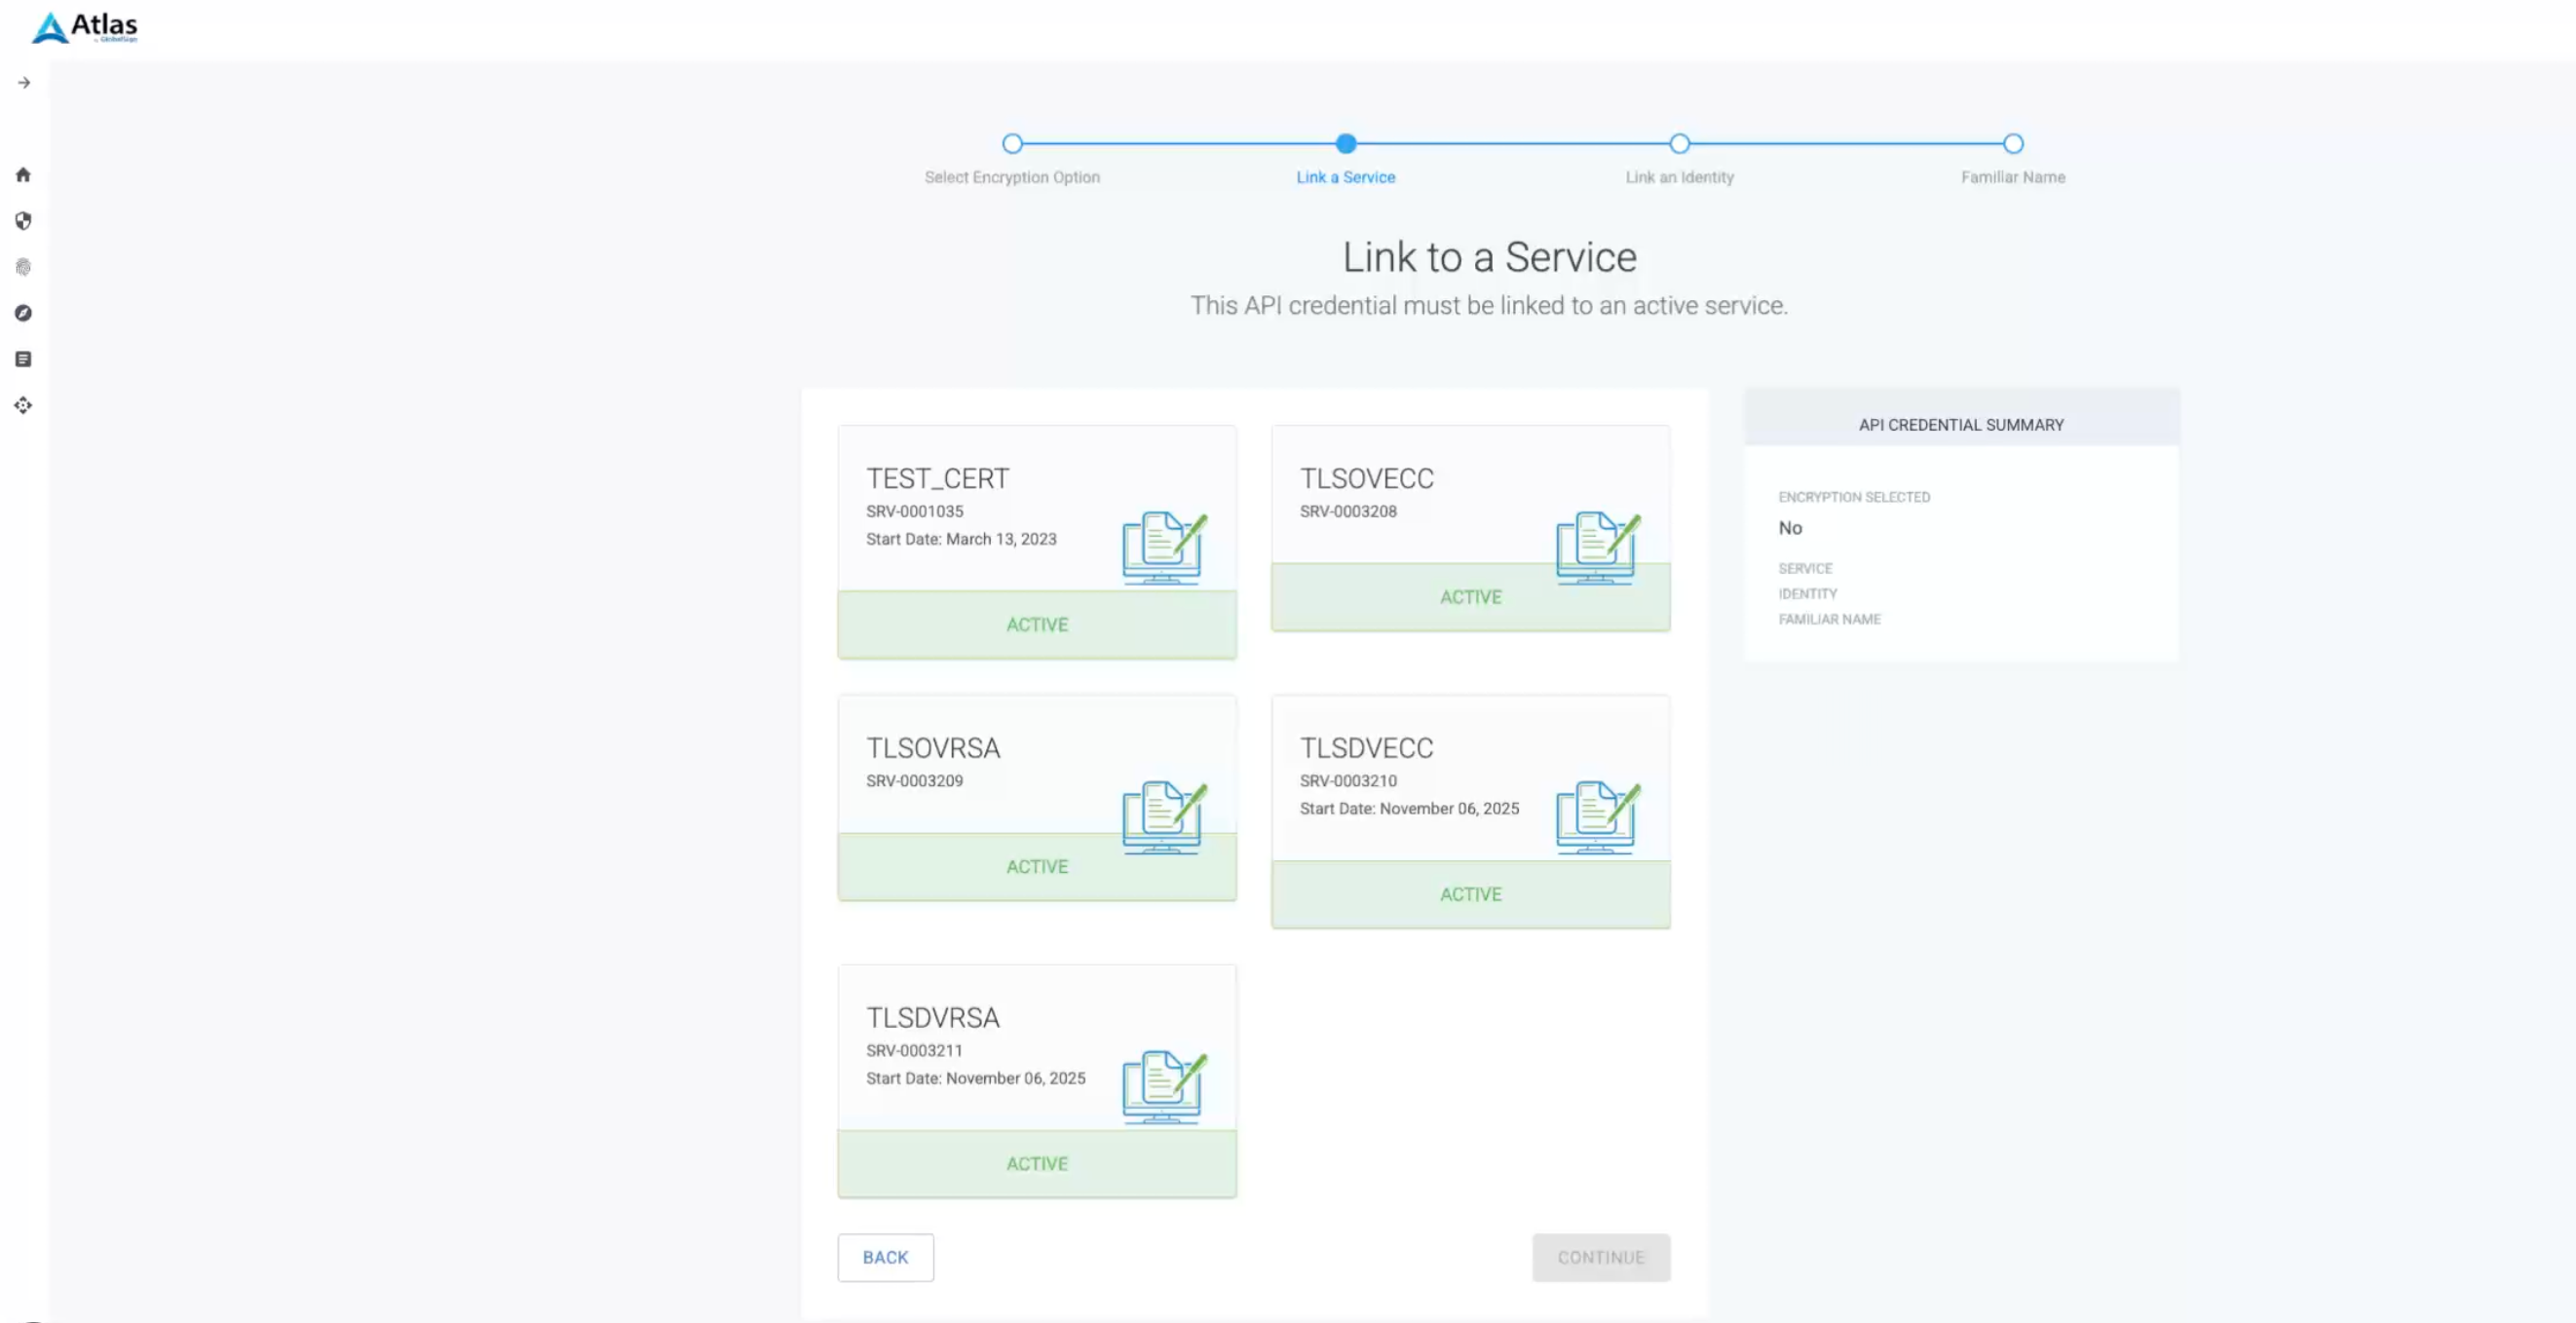
-
According to your previous choice of services type you will be prompted to choose an Organization. Choose and click Continue.
-
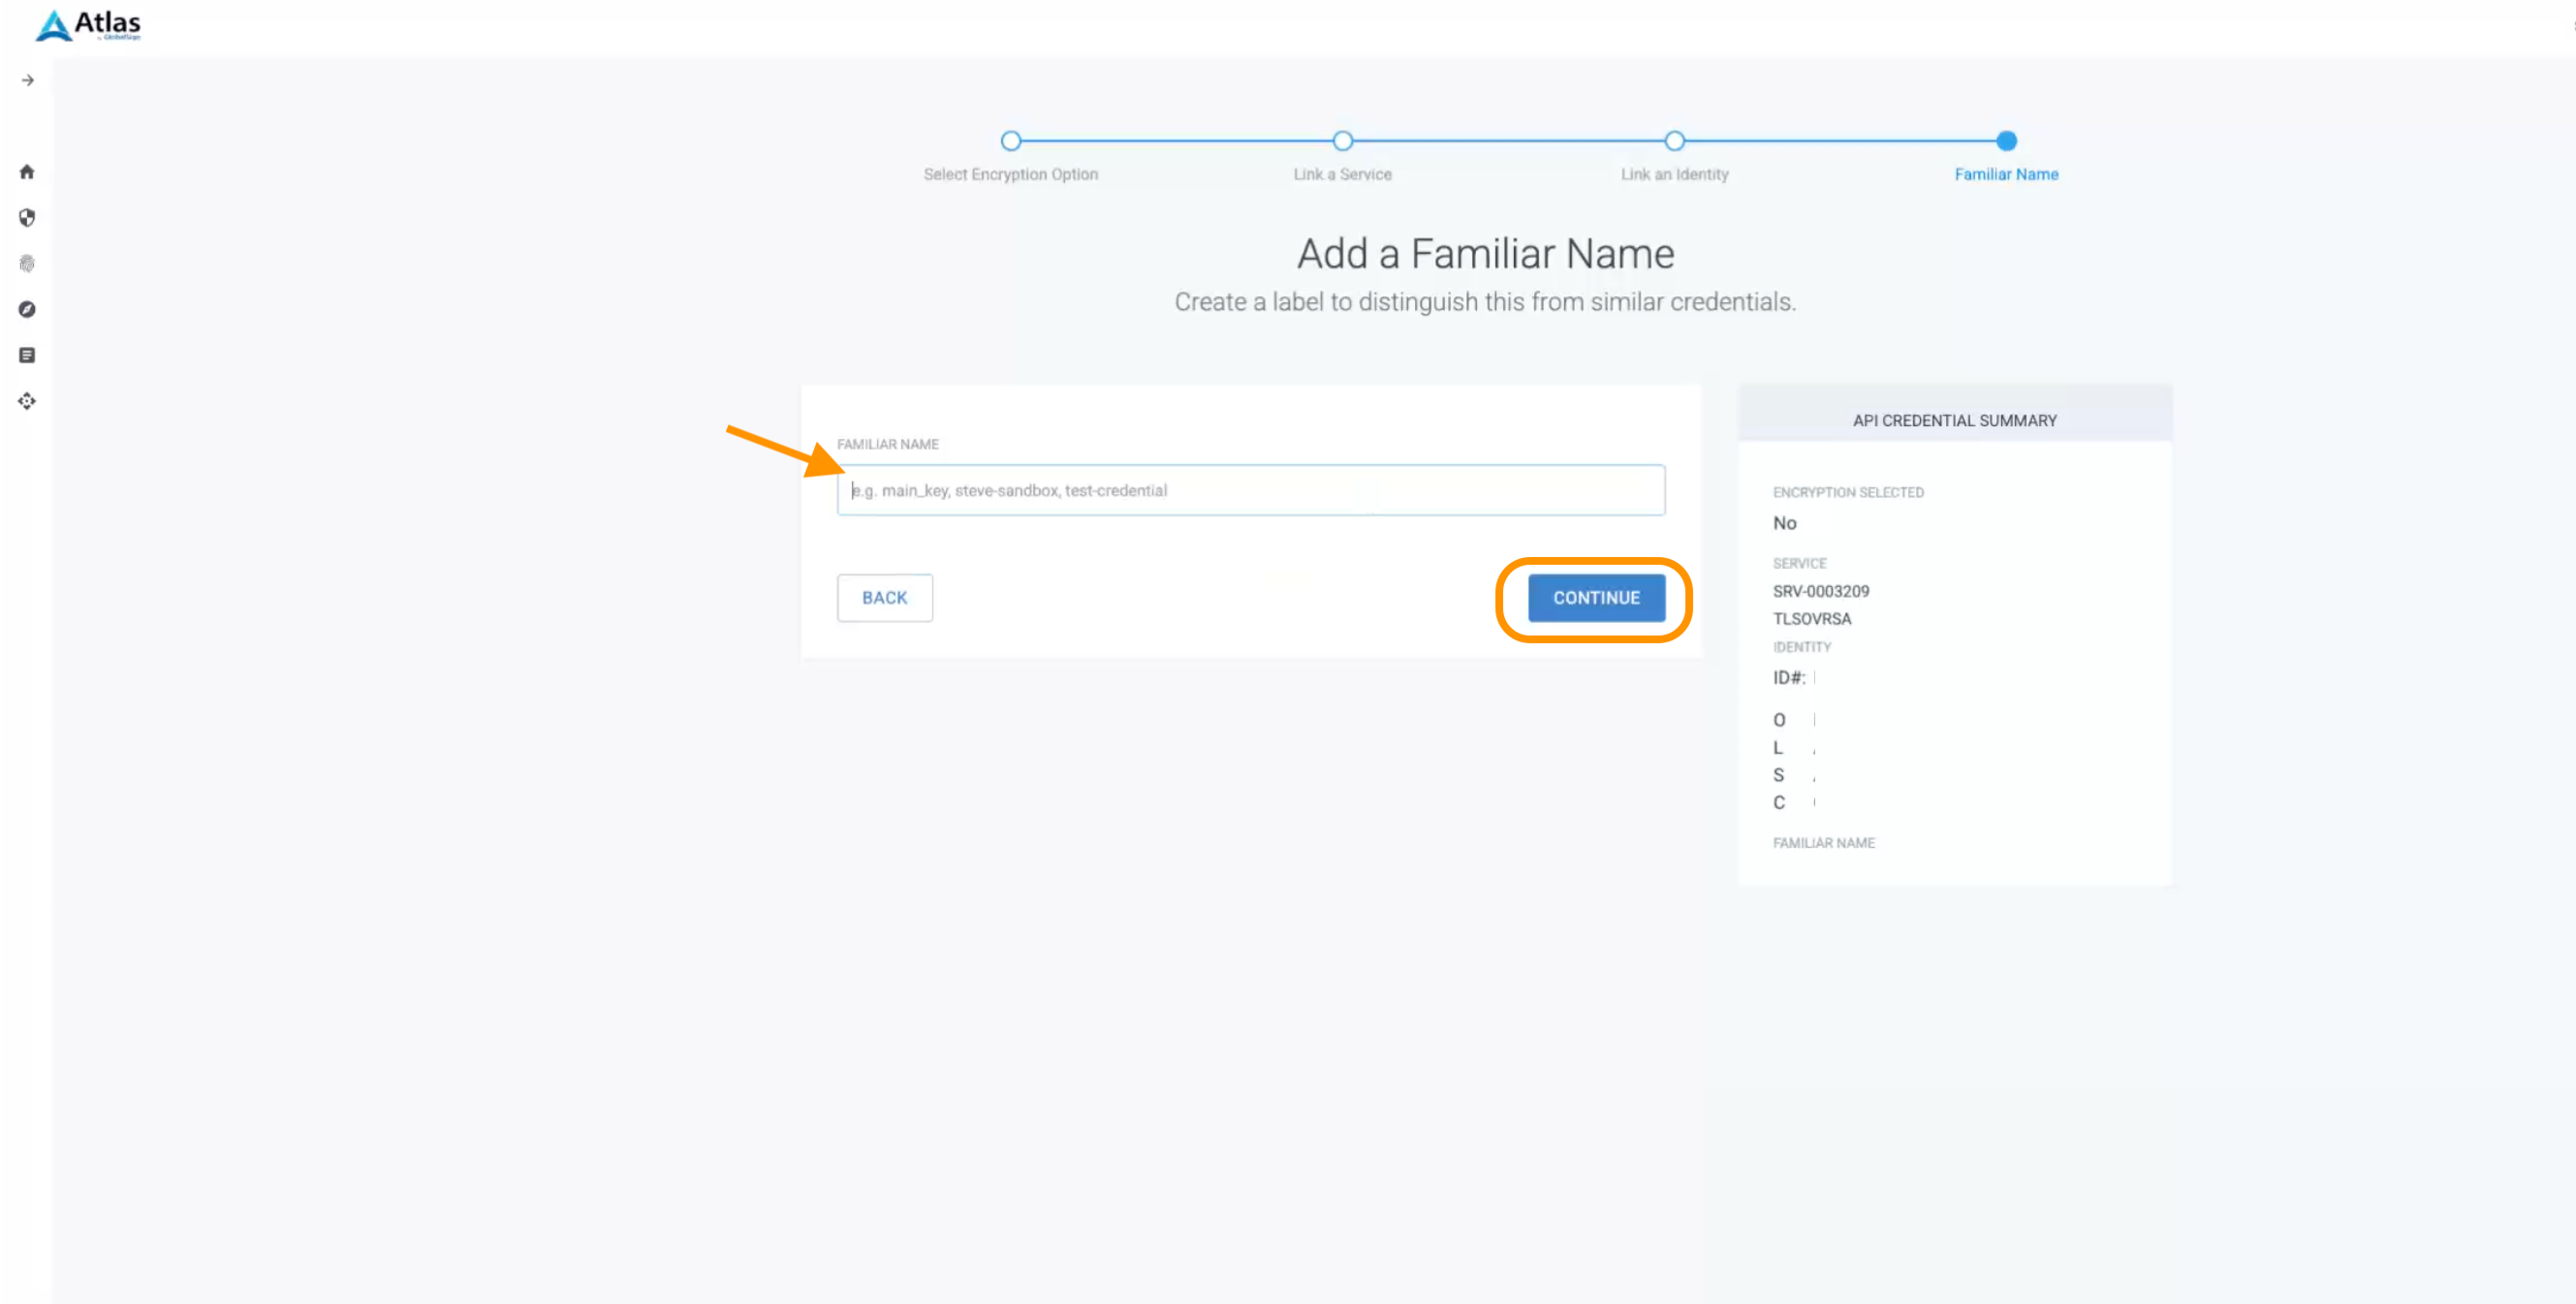
Name your credentials set and click Continue.
-
Copy your credentials over to MTG CLM UI into their respective fields.
To avoid losing the credentials set due to possible browser session timeouts in either platforms, downloading it as .csv file is advised. 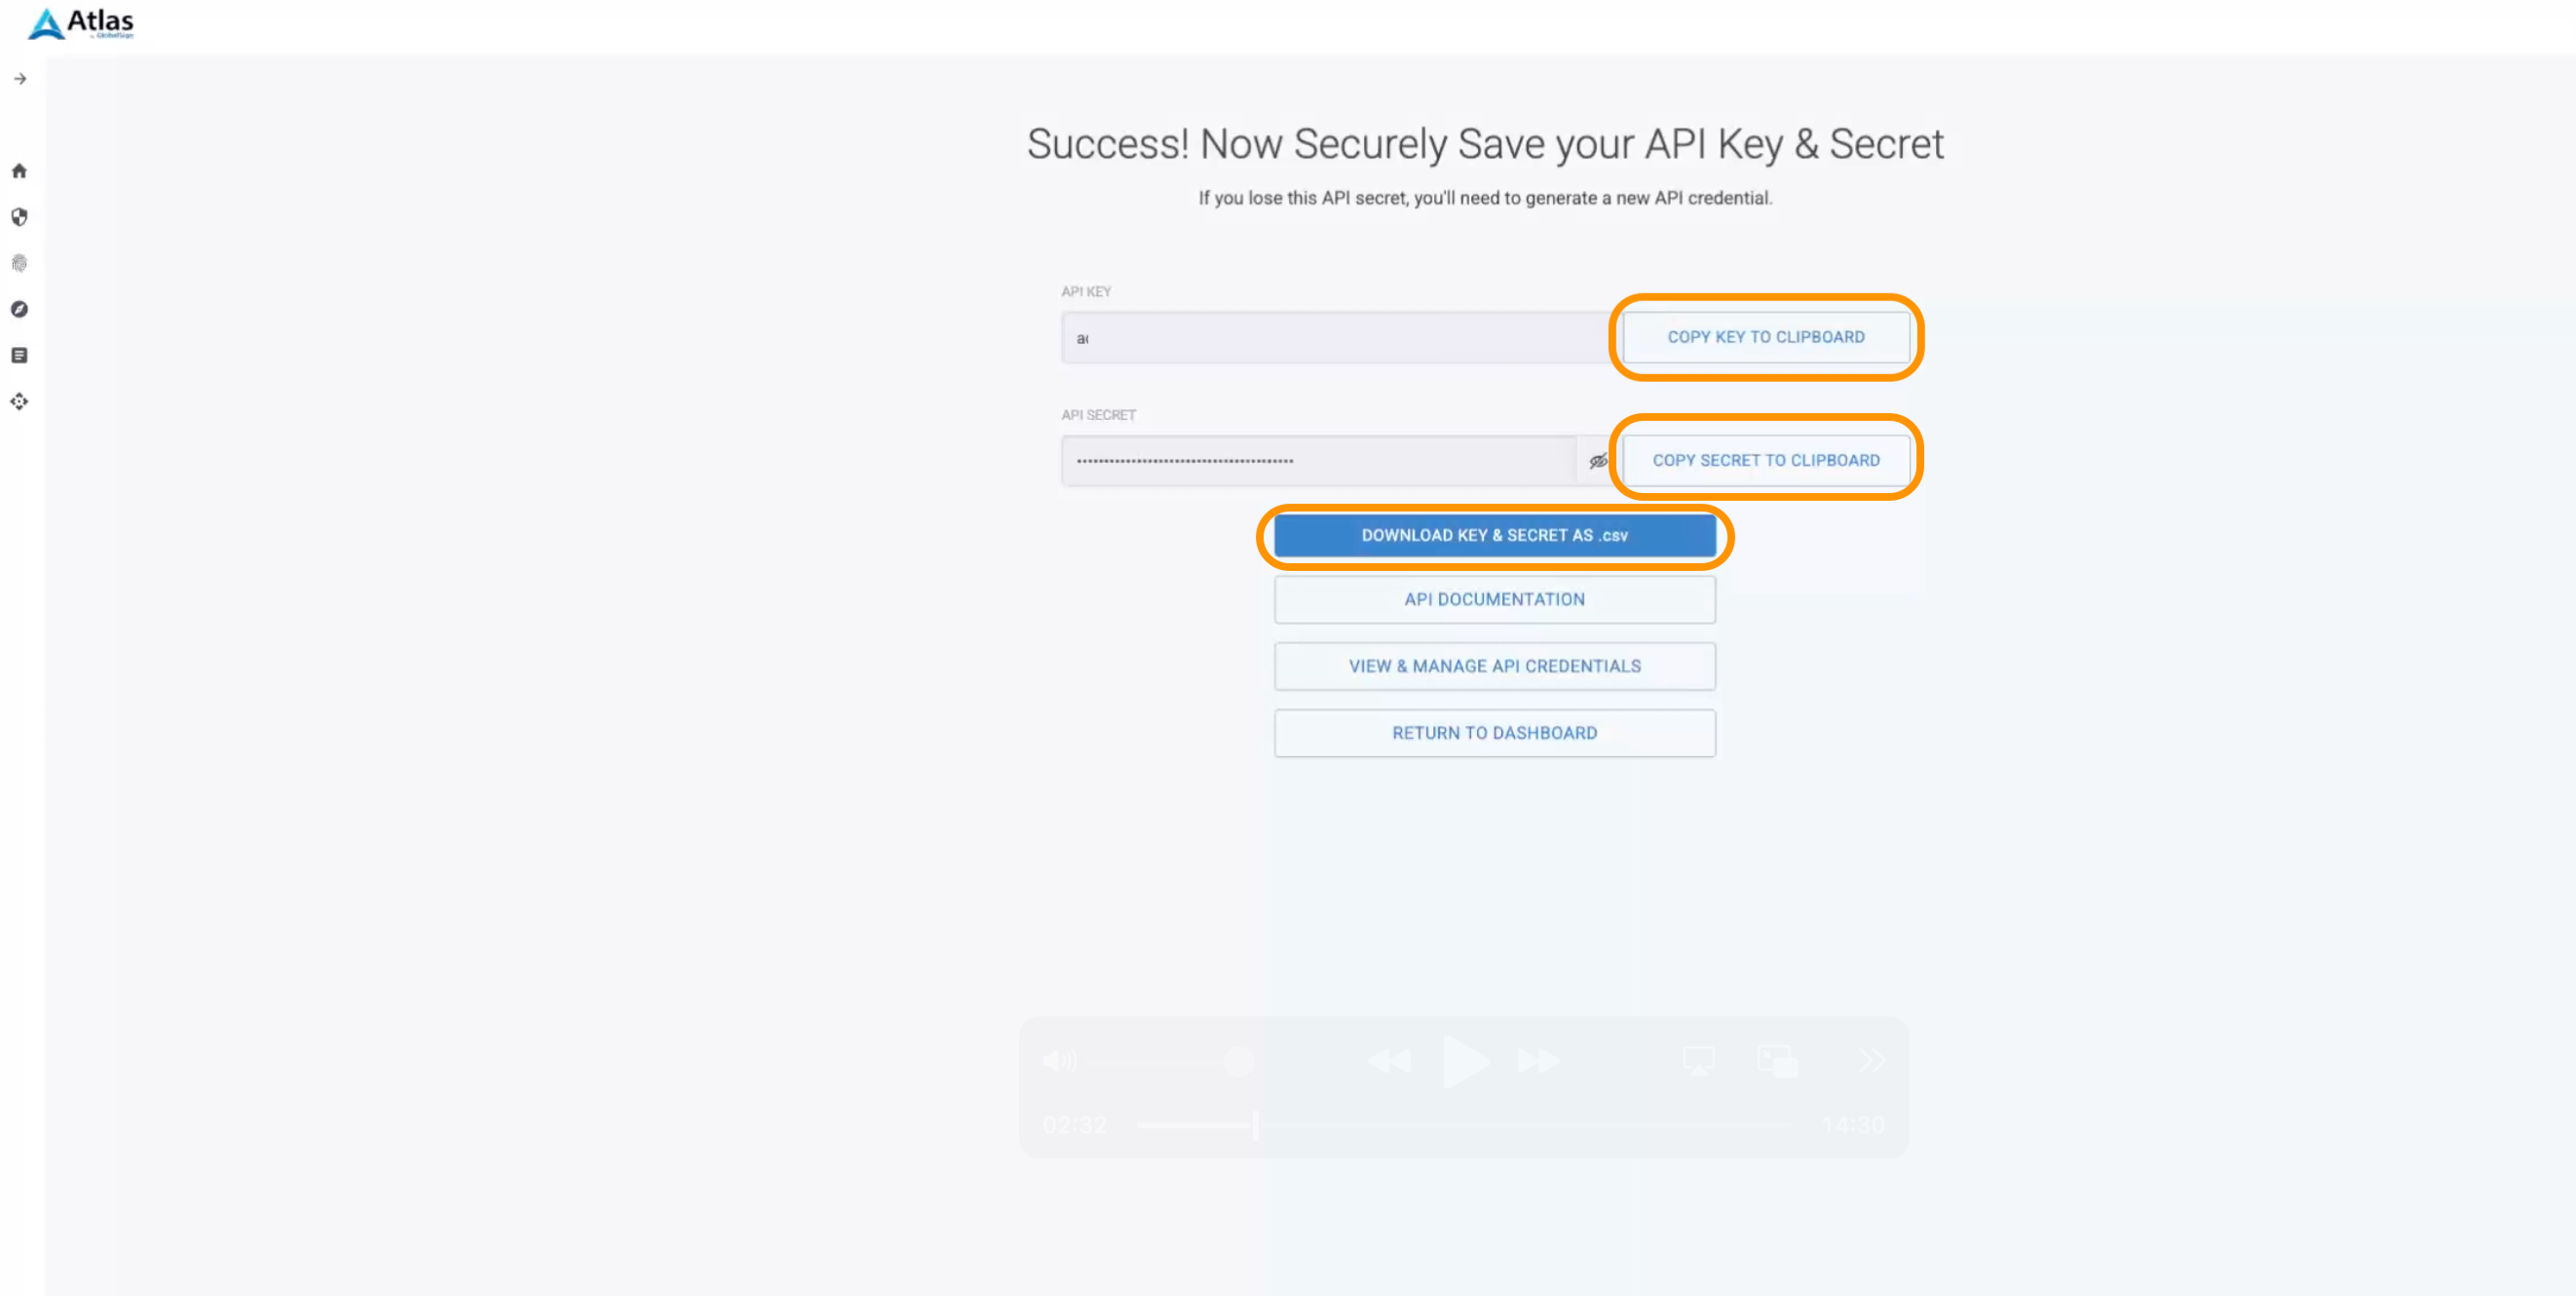
Create mTLS Certificate
-
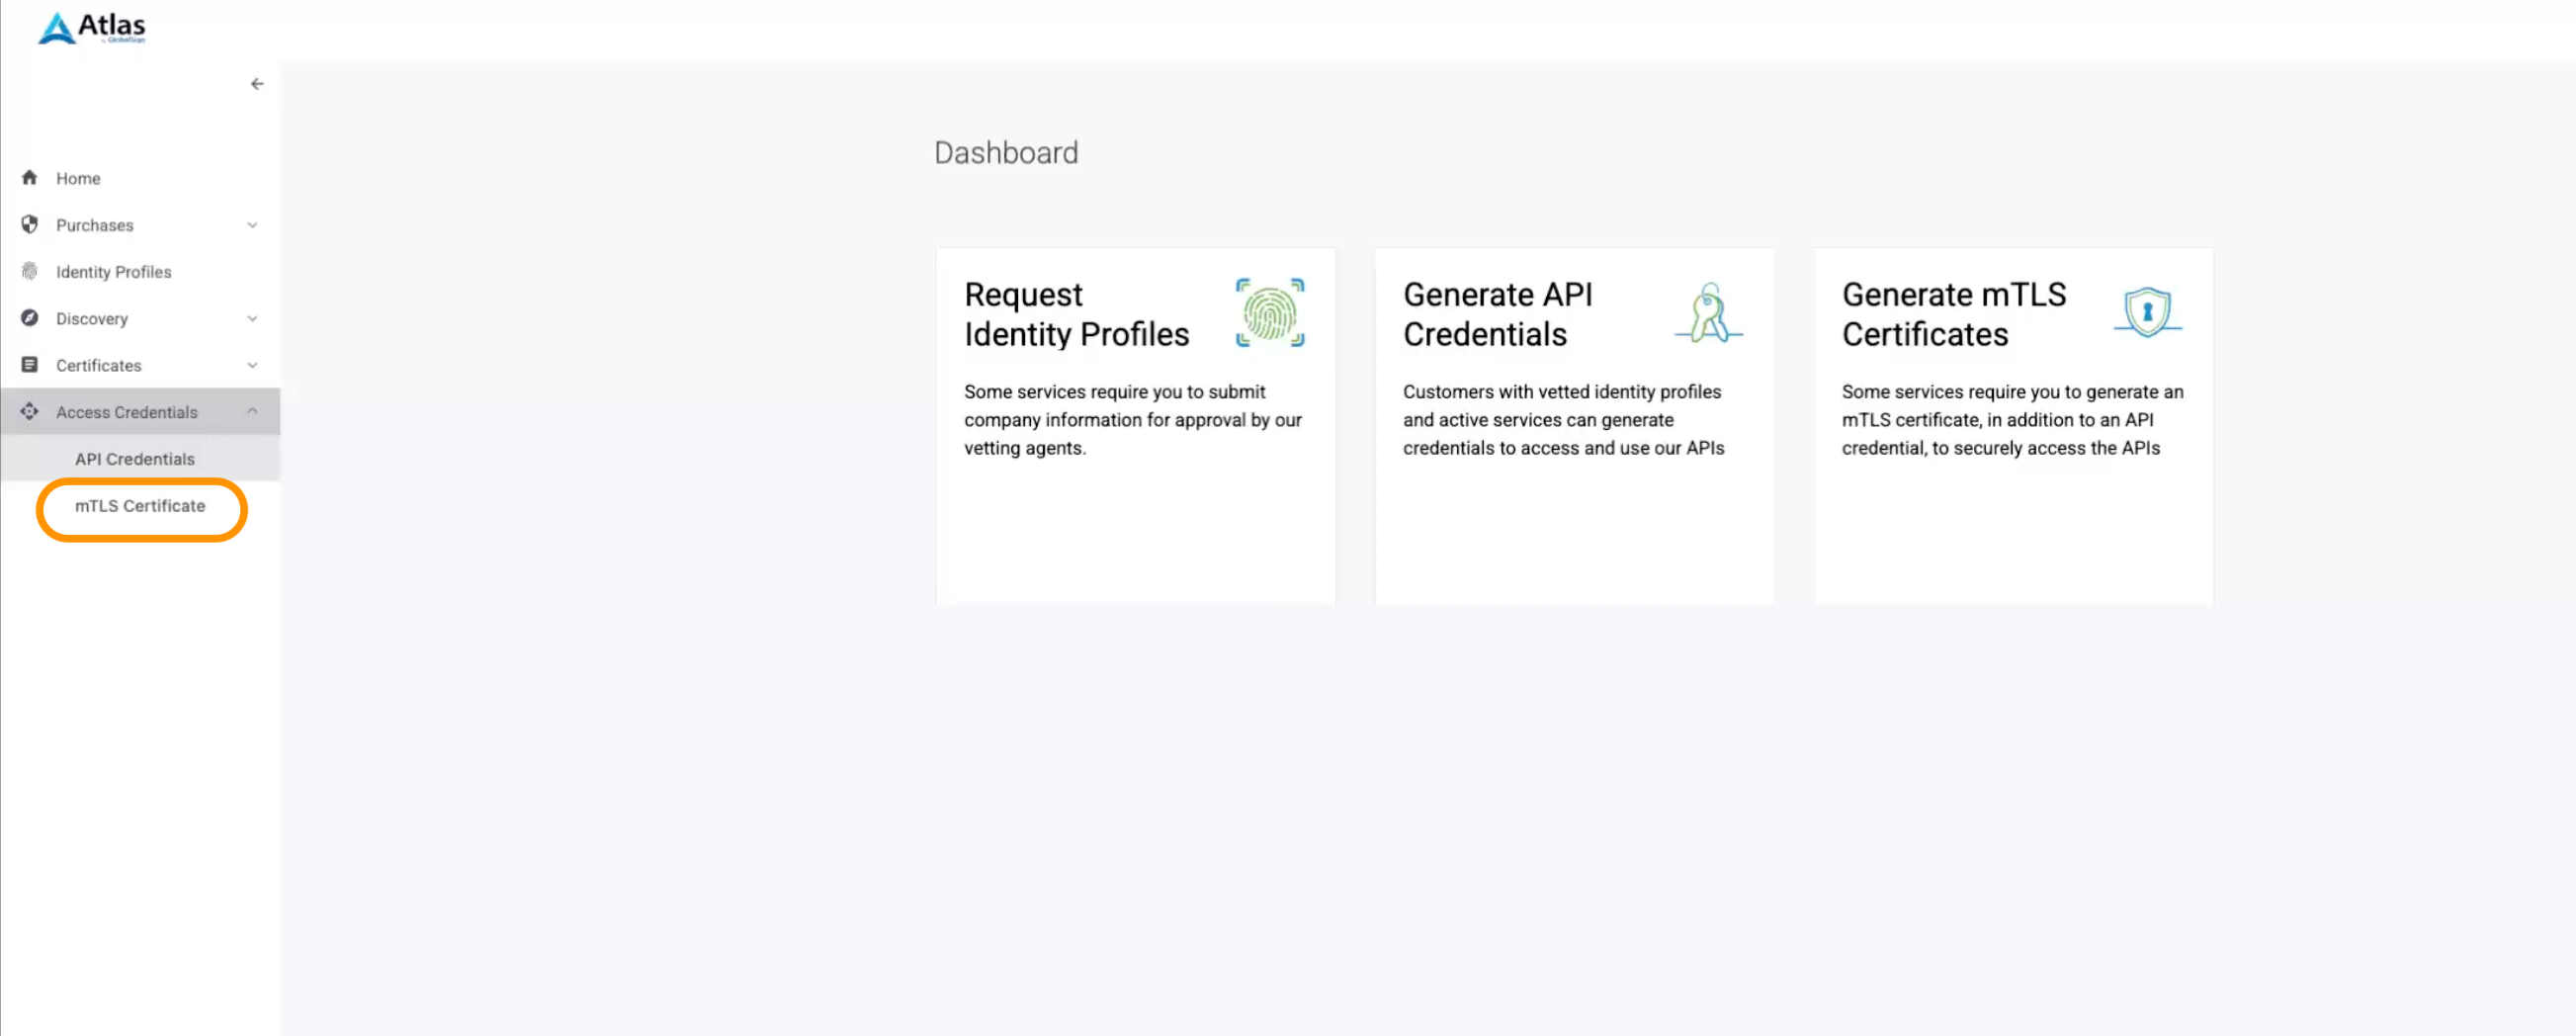
In your GlobalSign Atlas Dashboard navigate to Access Credentials → mTLS Certificate using the sidebar.
-
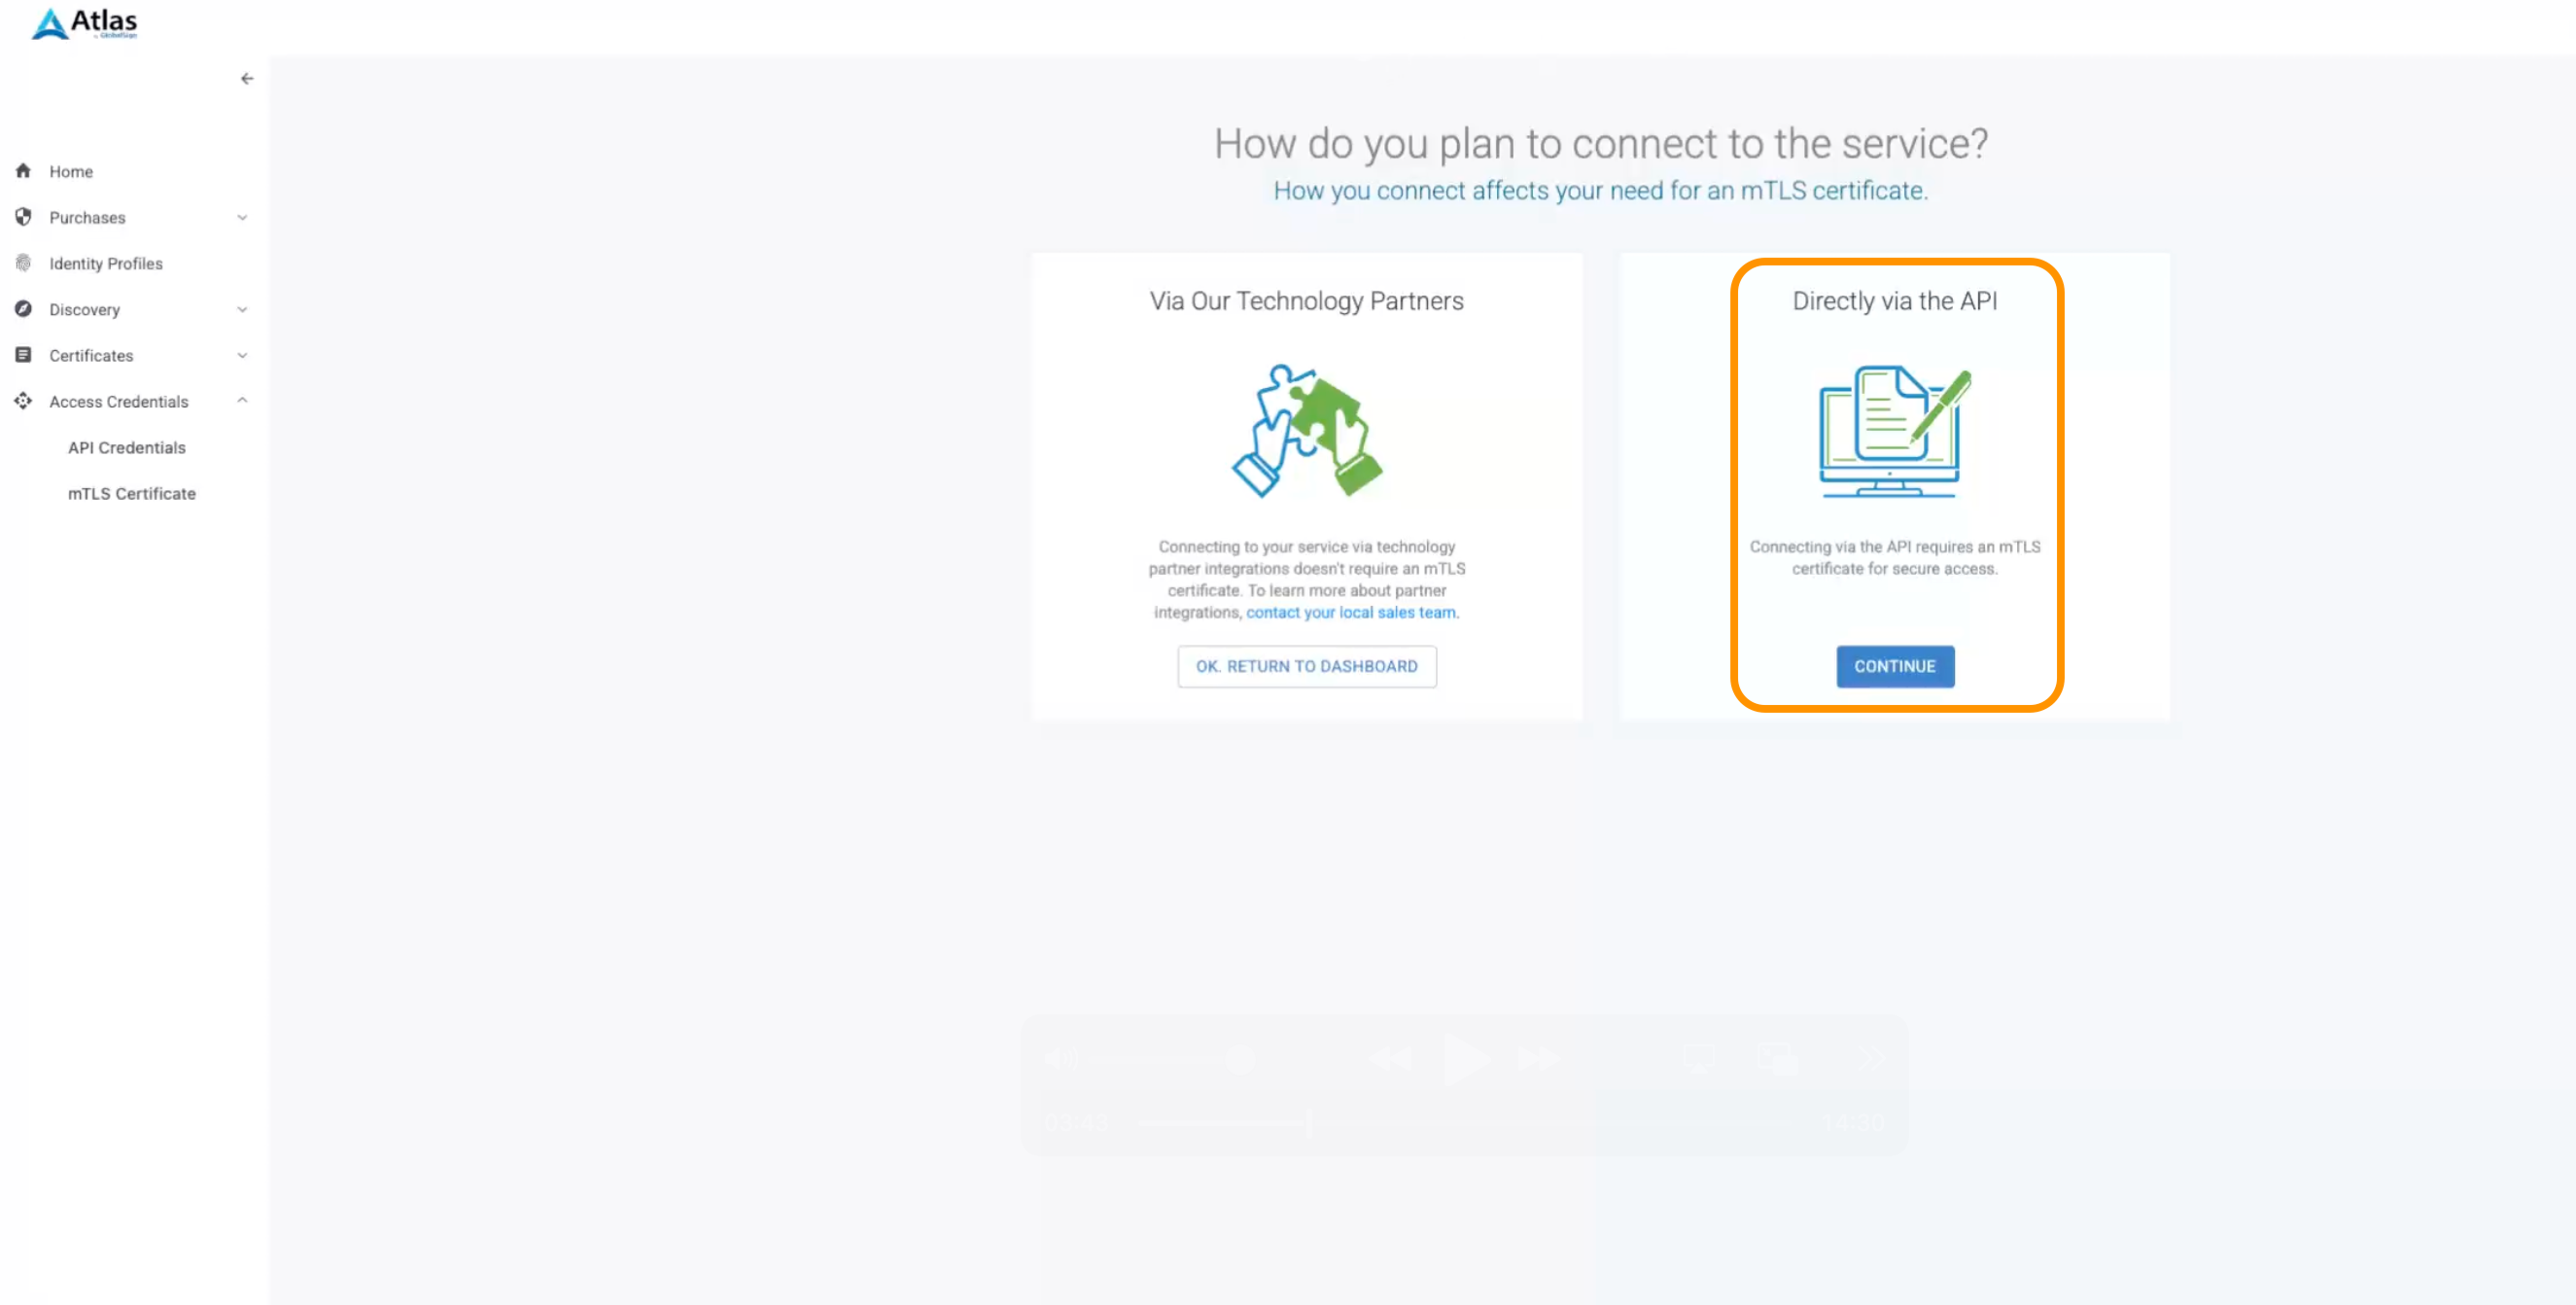
Select Generate an mTLS Certificate.

-
Choose Directly via the API and click Continue.
-
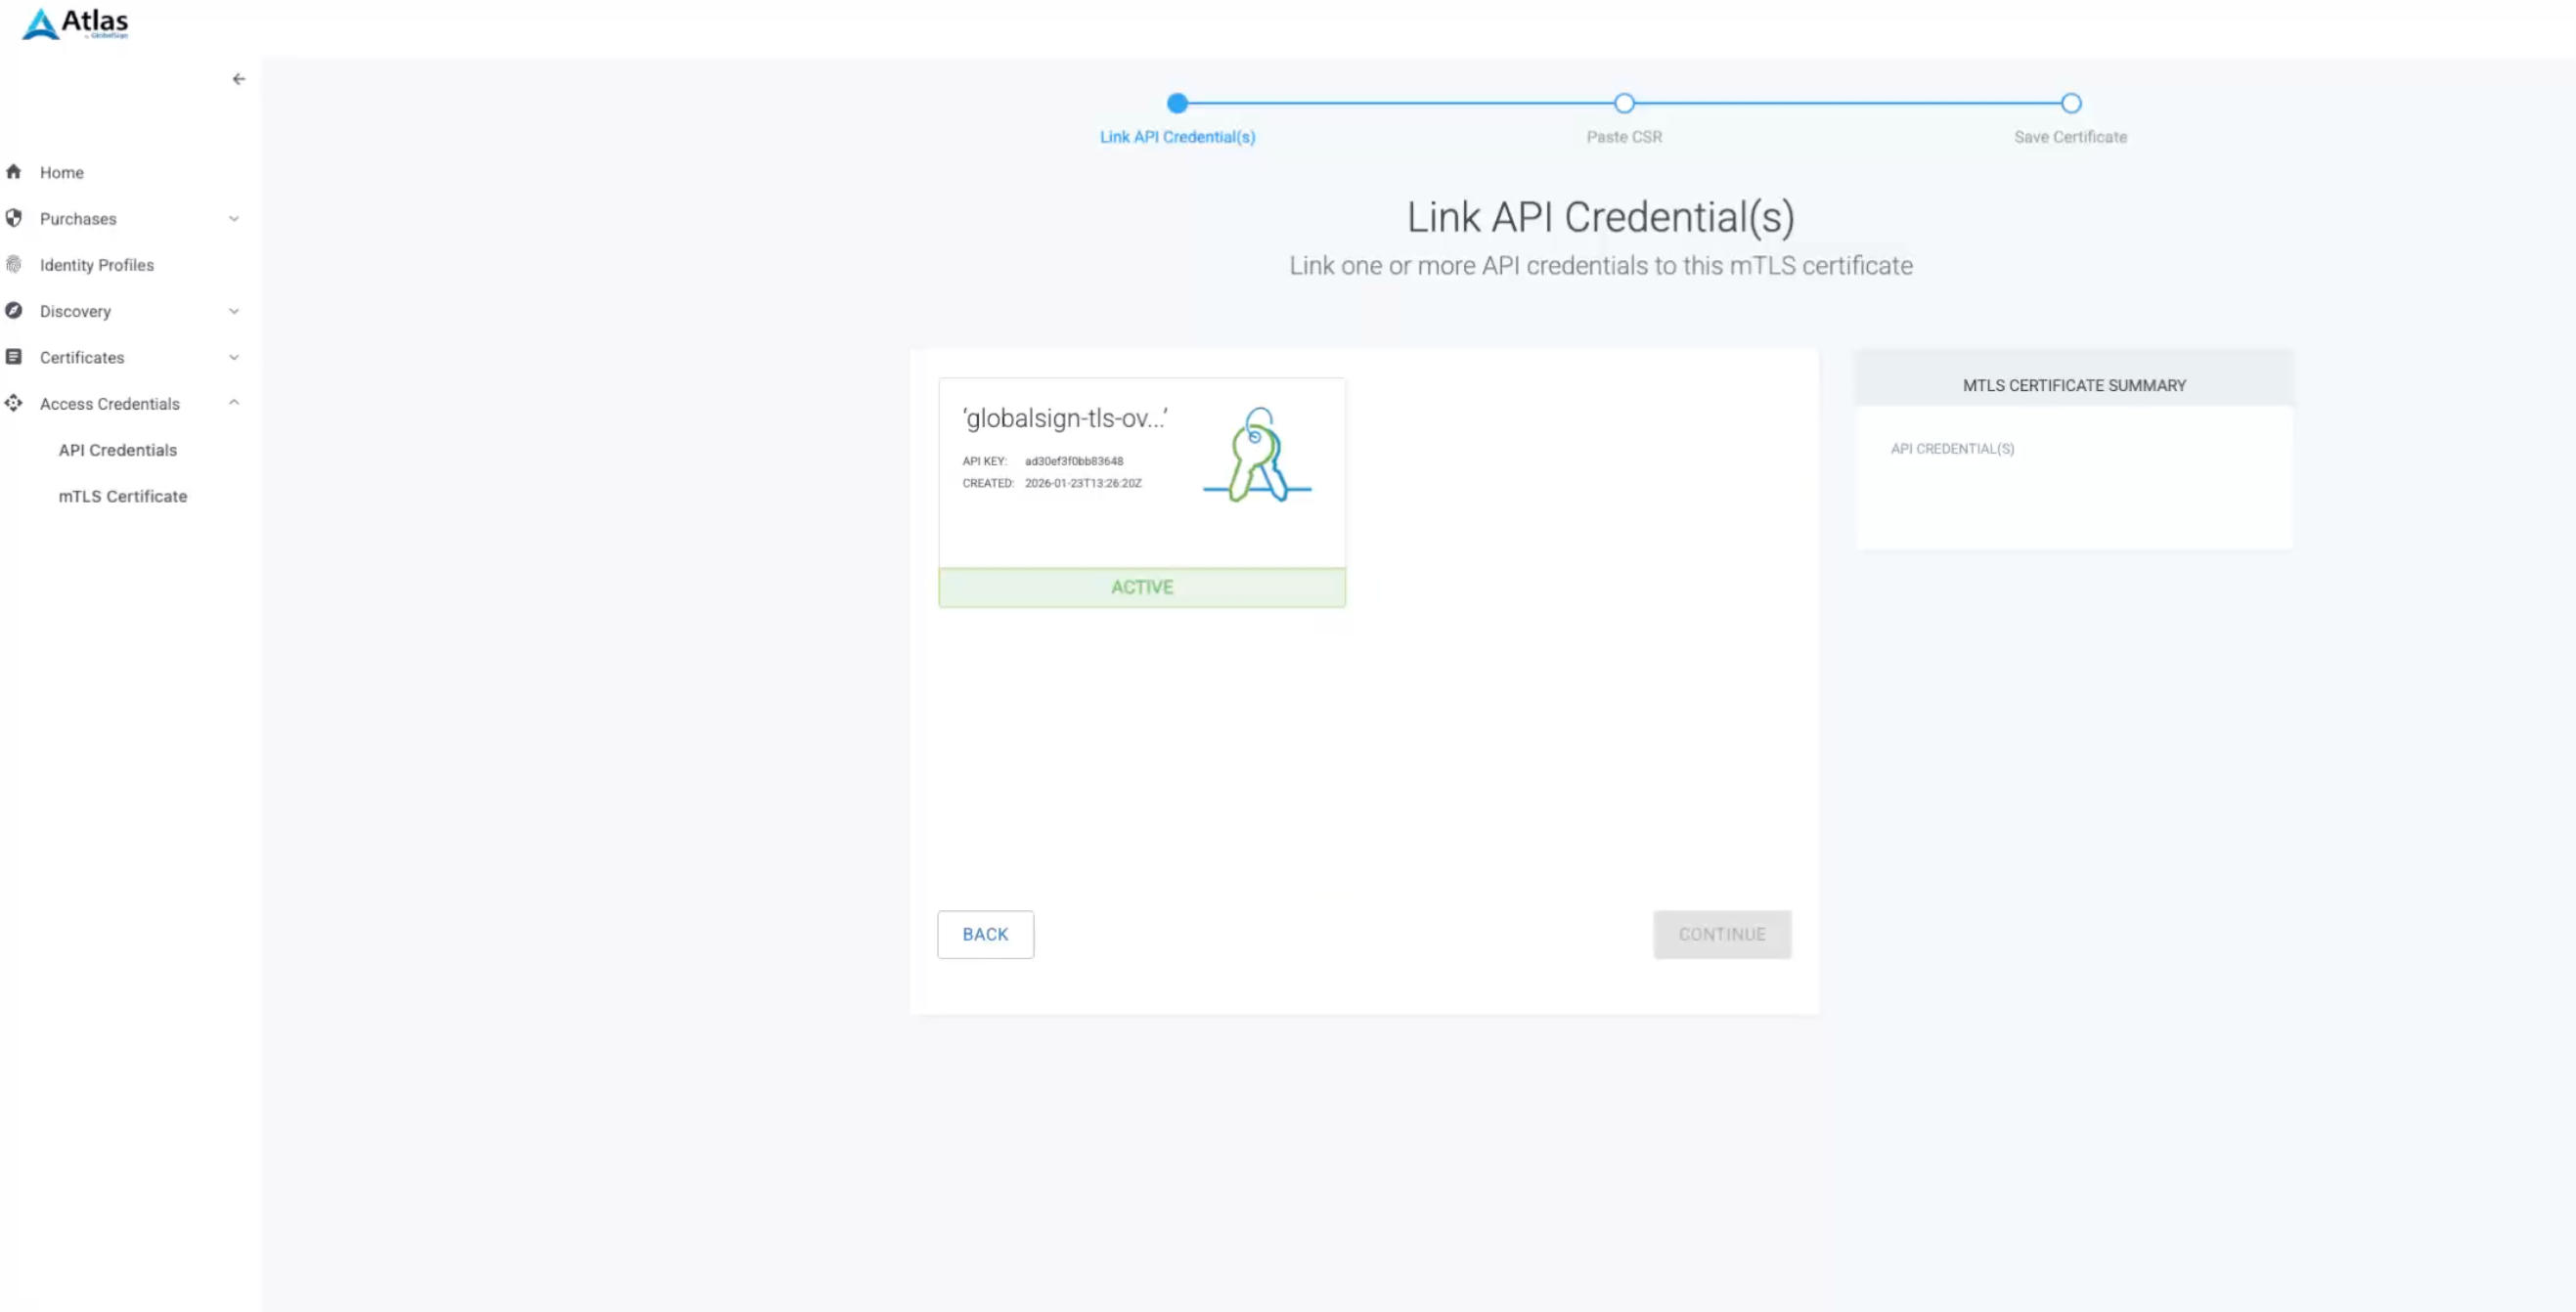
You must now connect the mTLS Certificate to the API Credential set you created before. Select it and click Continue.
-
Paste a CSR to proceed. You may create it using MTG CLM or another tool of your choice (such as OpenSSL).
Refer to the Create PKCS10 Request using MTG CLM subsection on how to create it using MTG CLM. 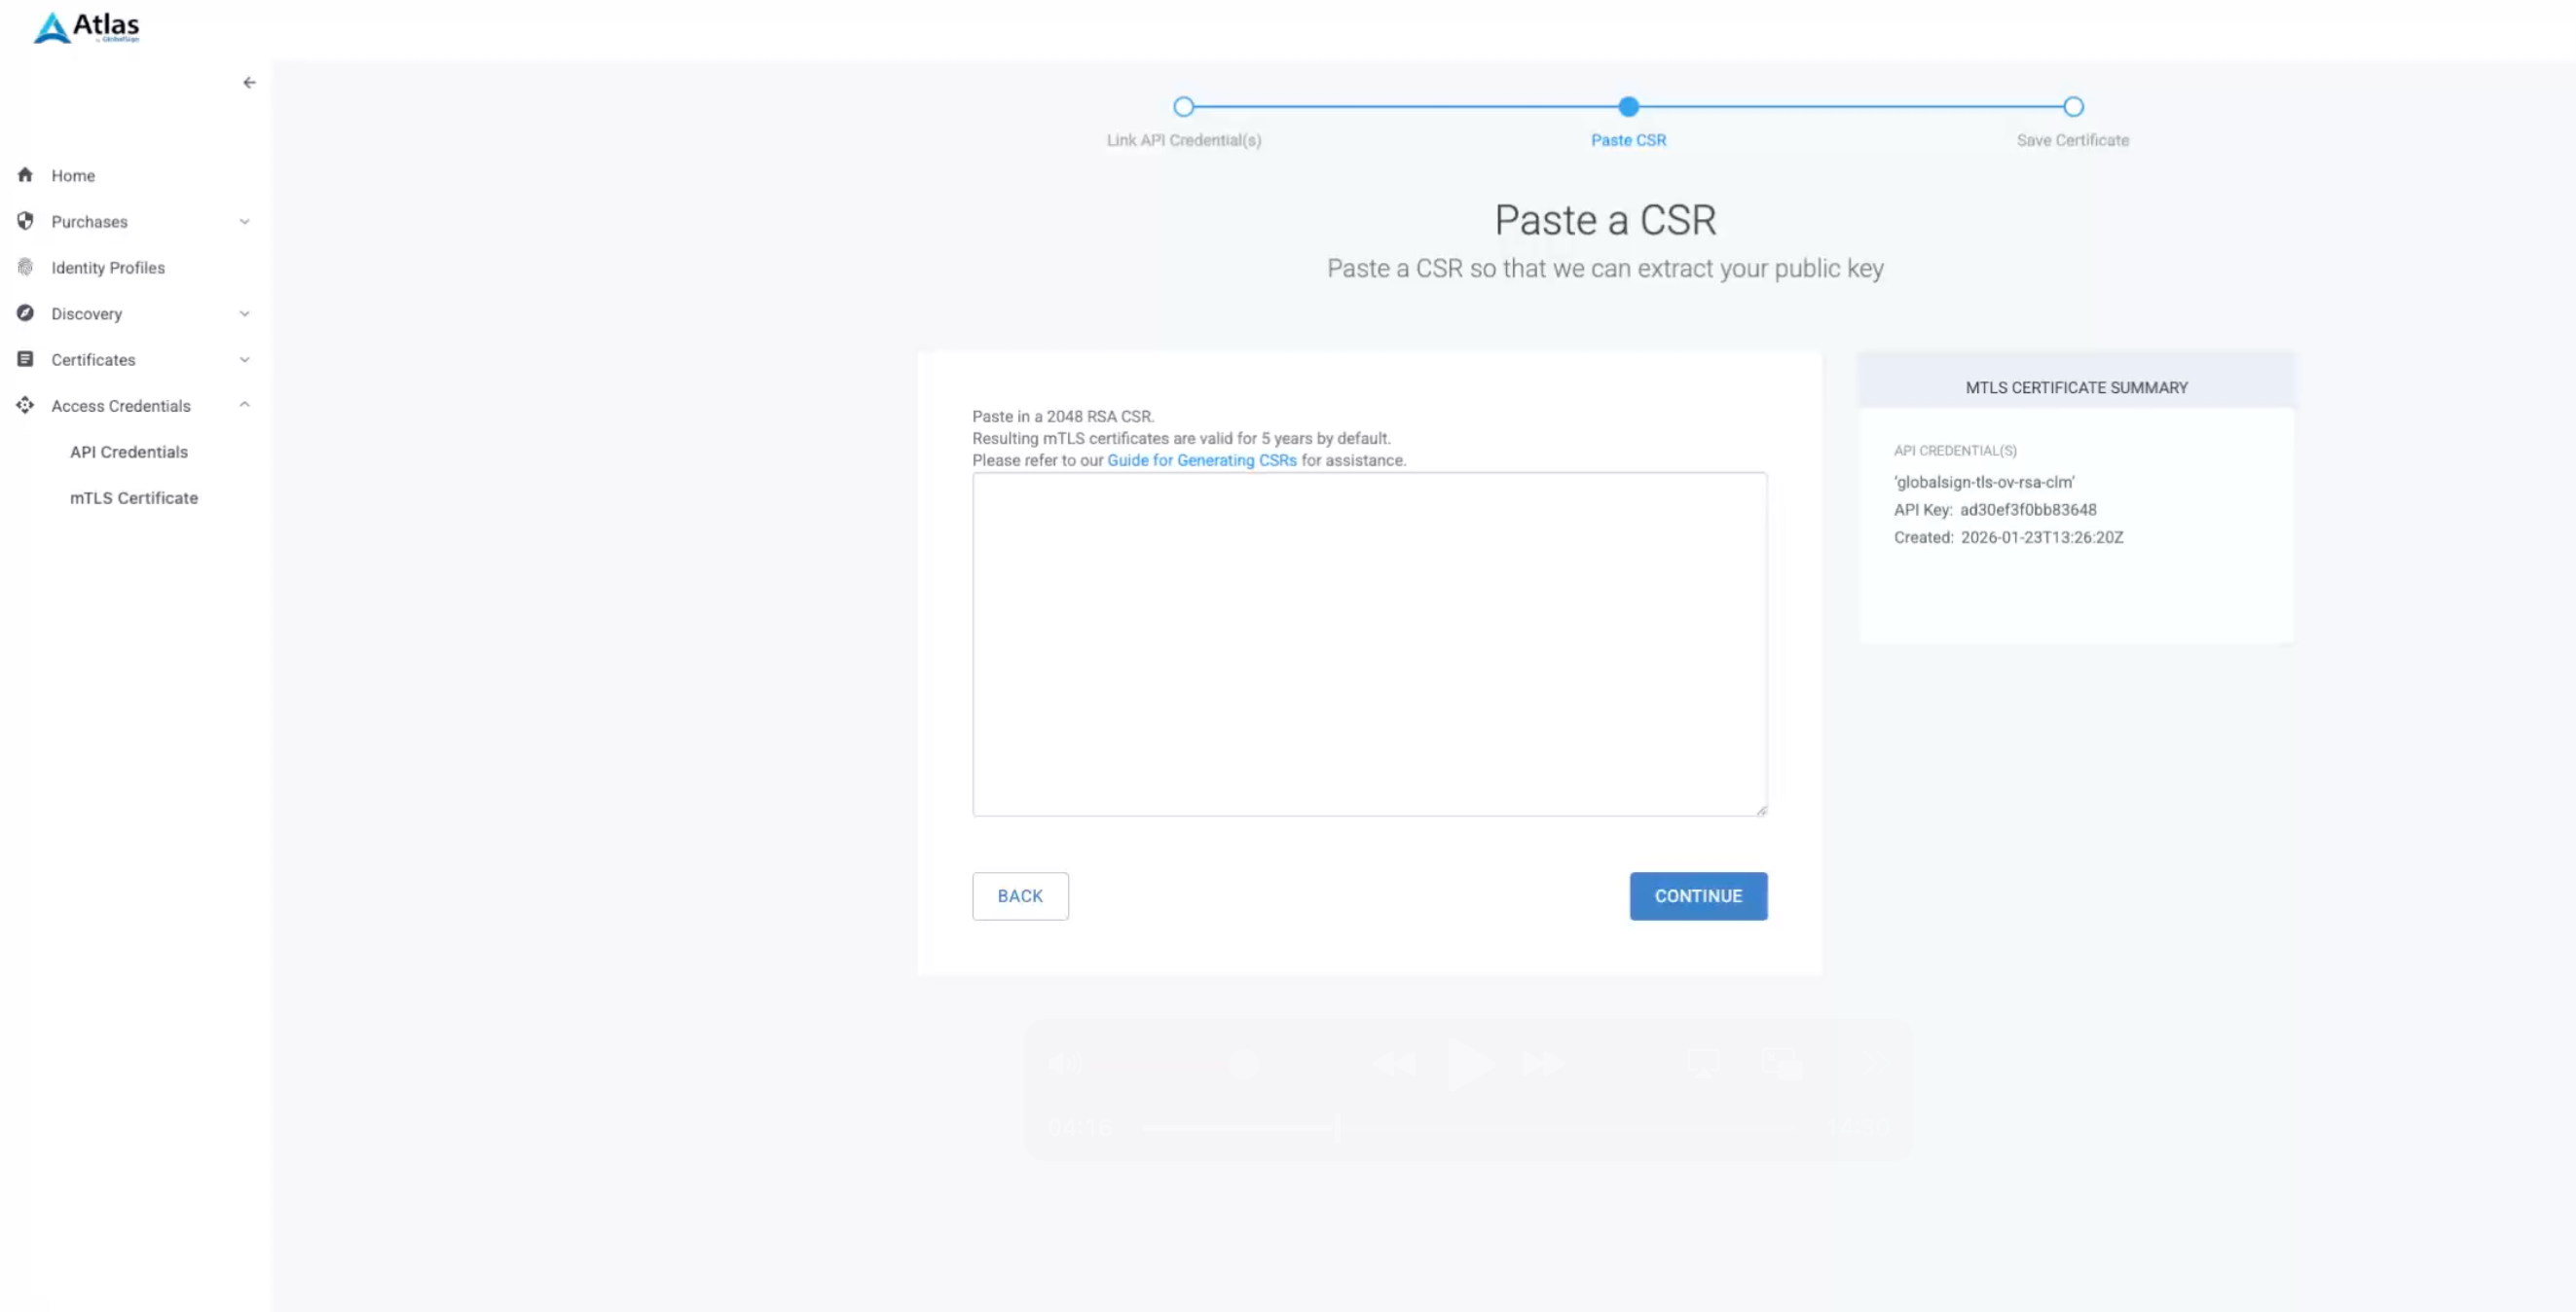
-
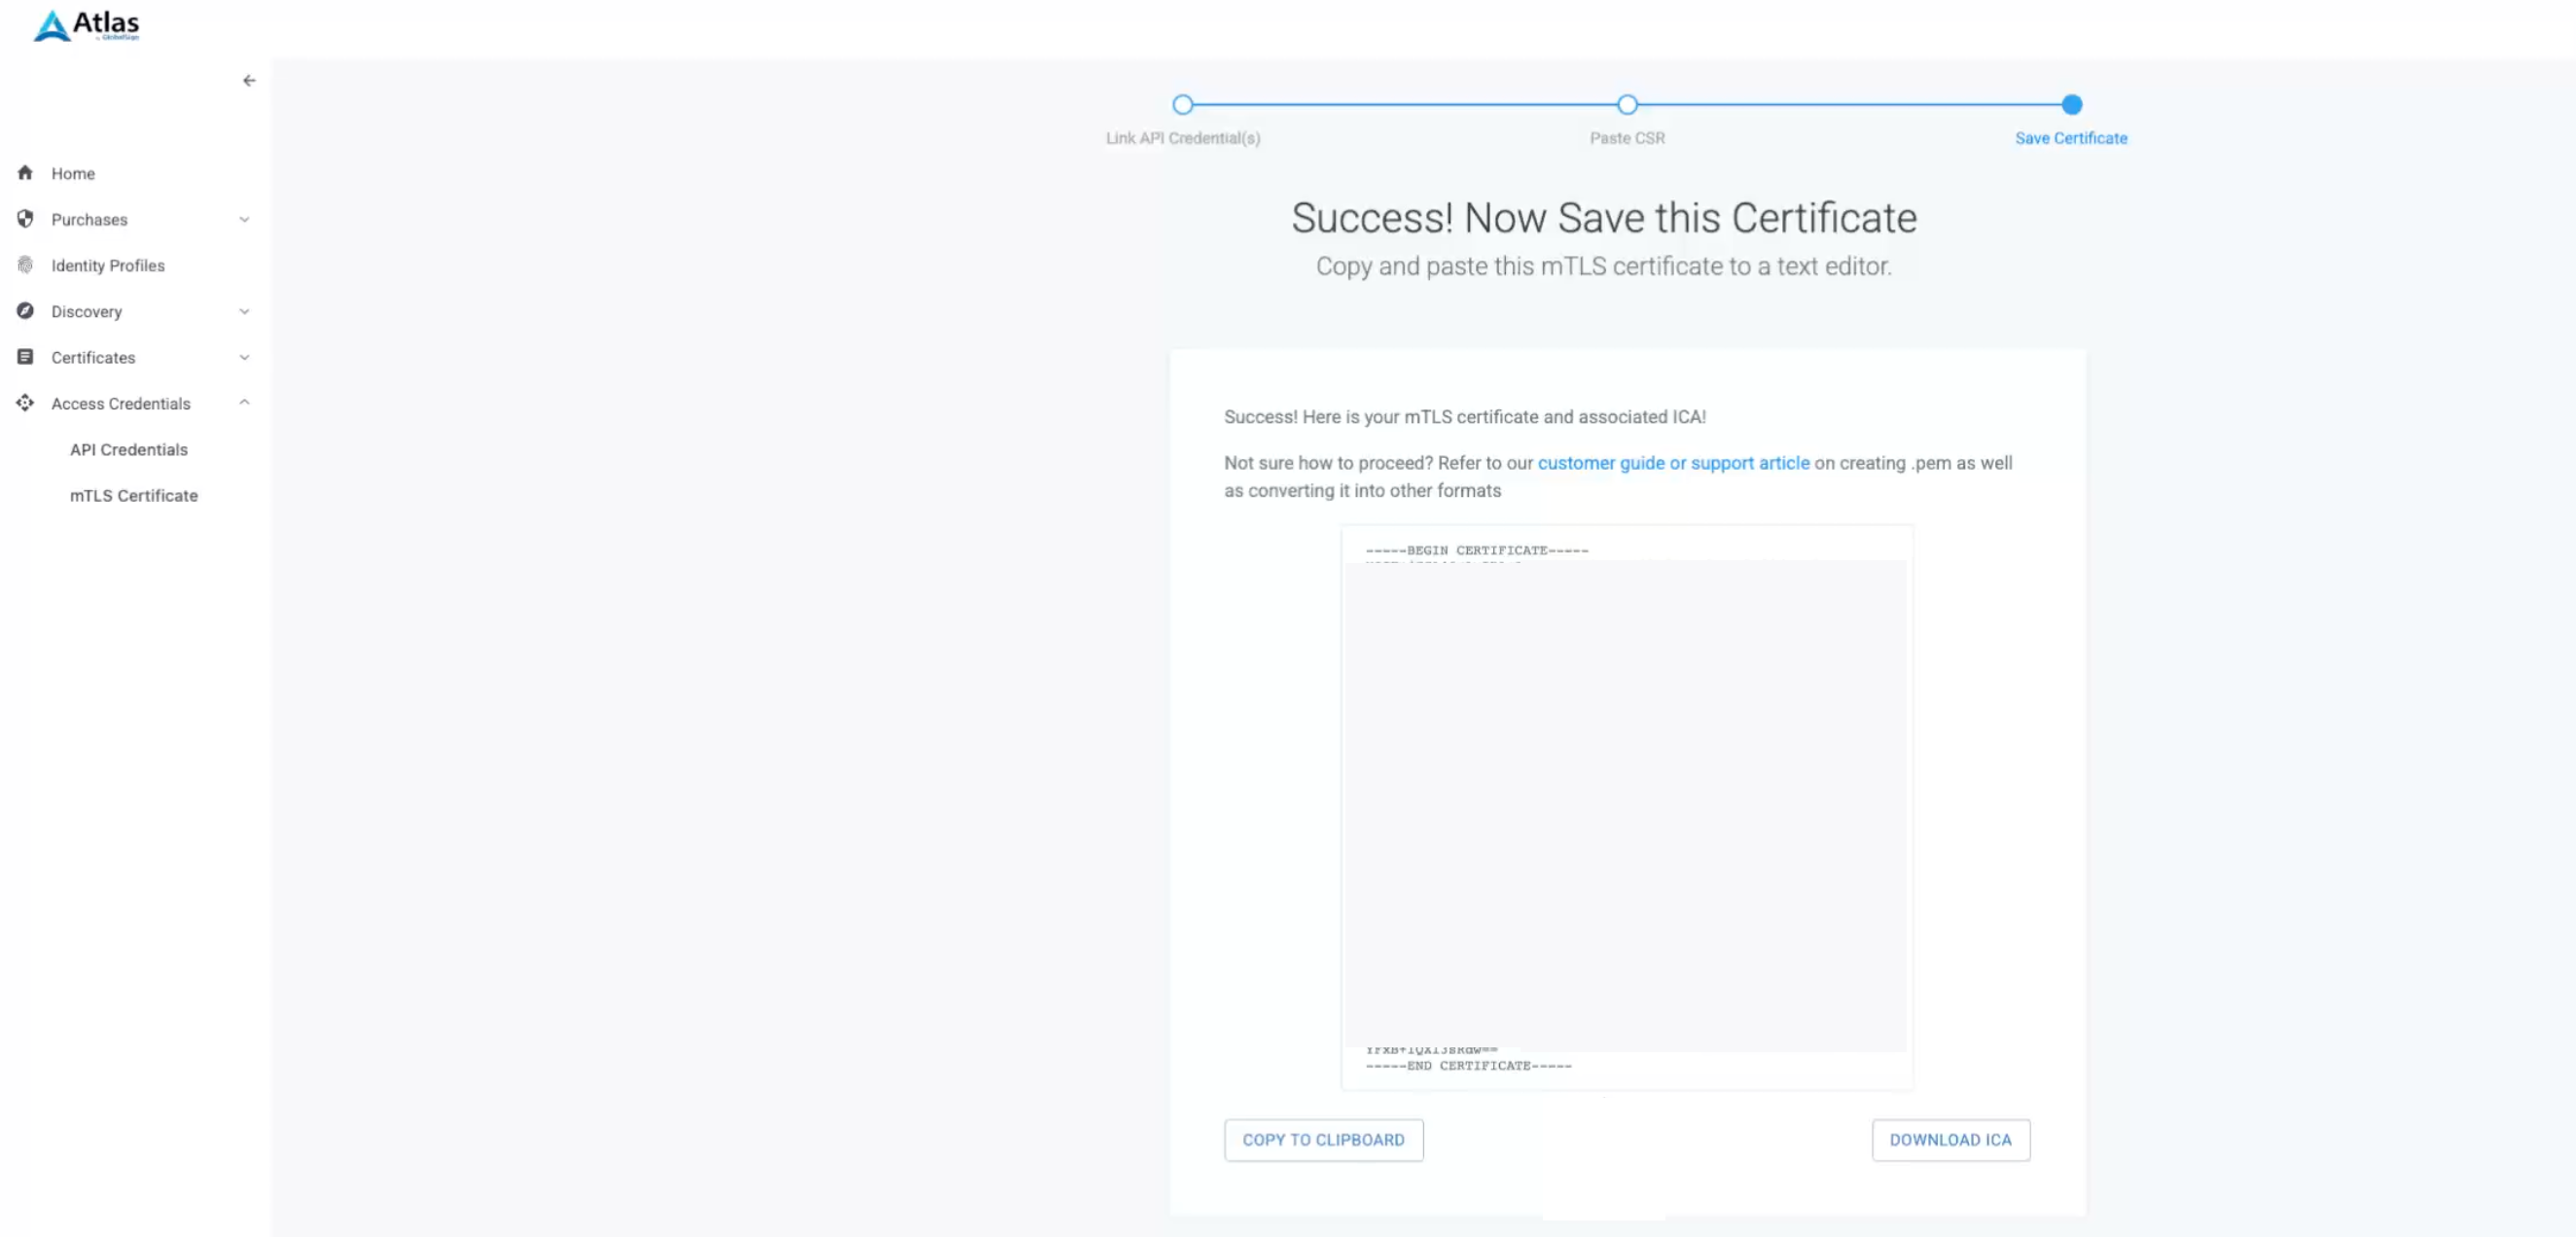
A Success! message will be shown.
Create PKCS10 Request using MTG CLM
| To complete this interim flow, open a second tab of your MTG CLM UI instance in your browser so you do not lose your current progress. |
-
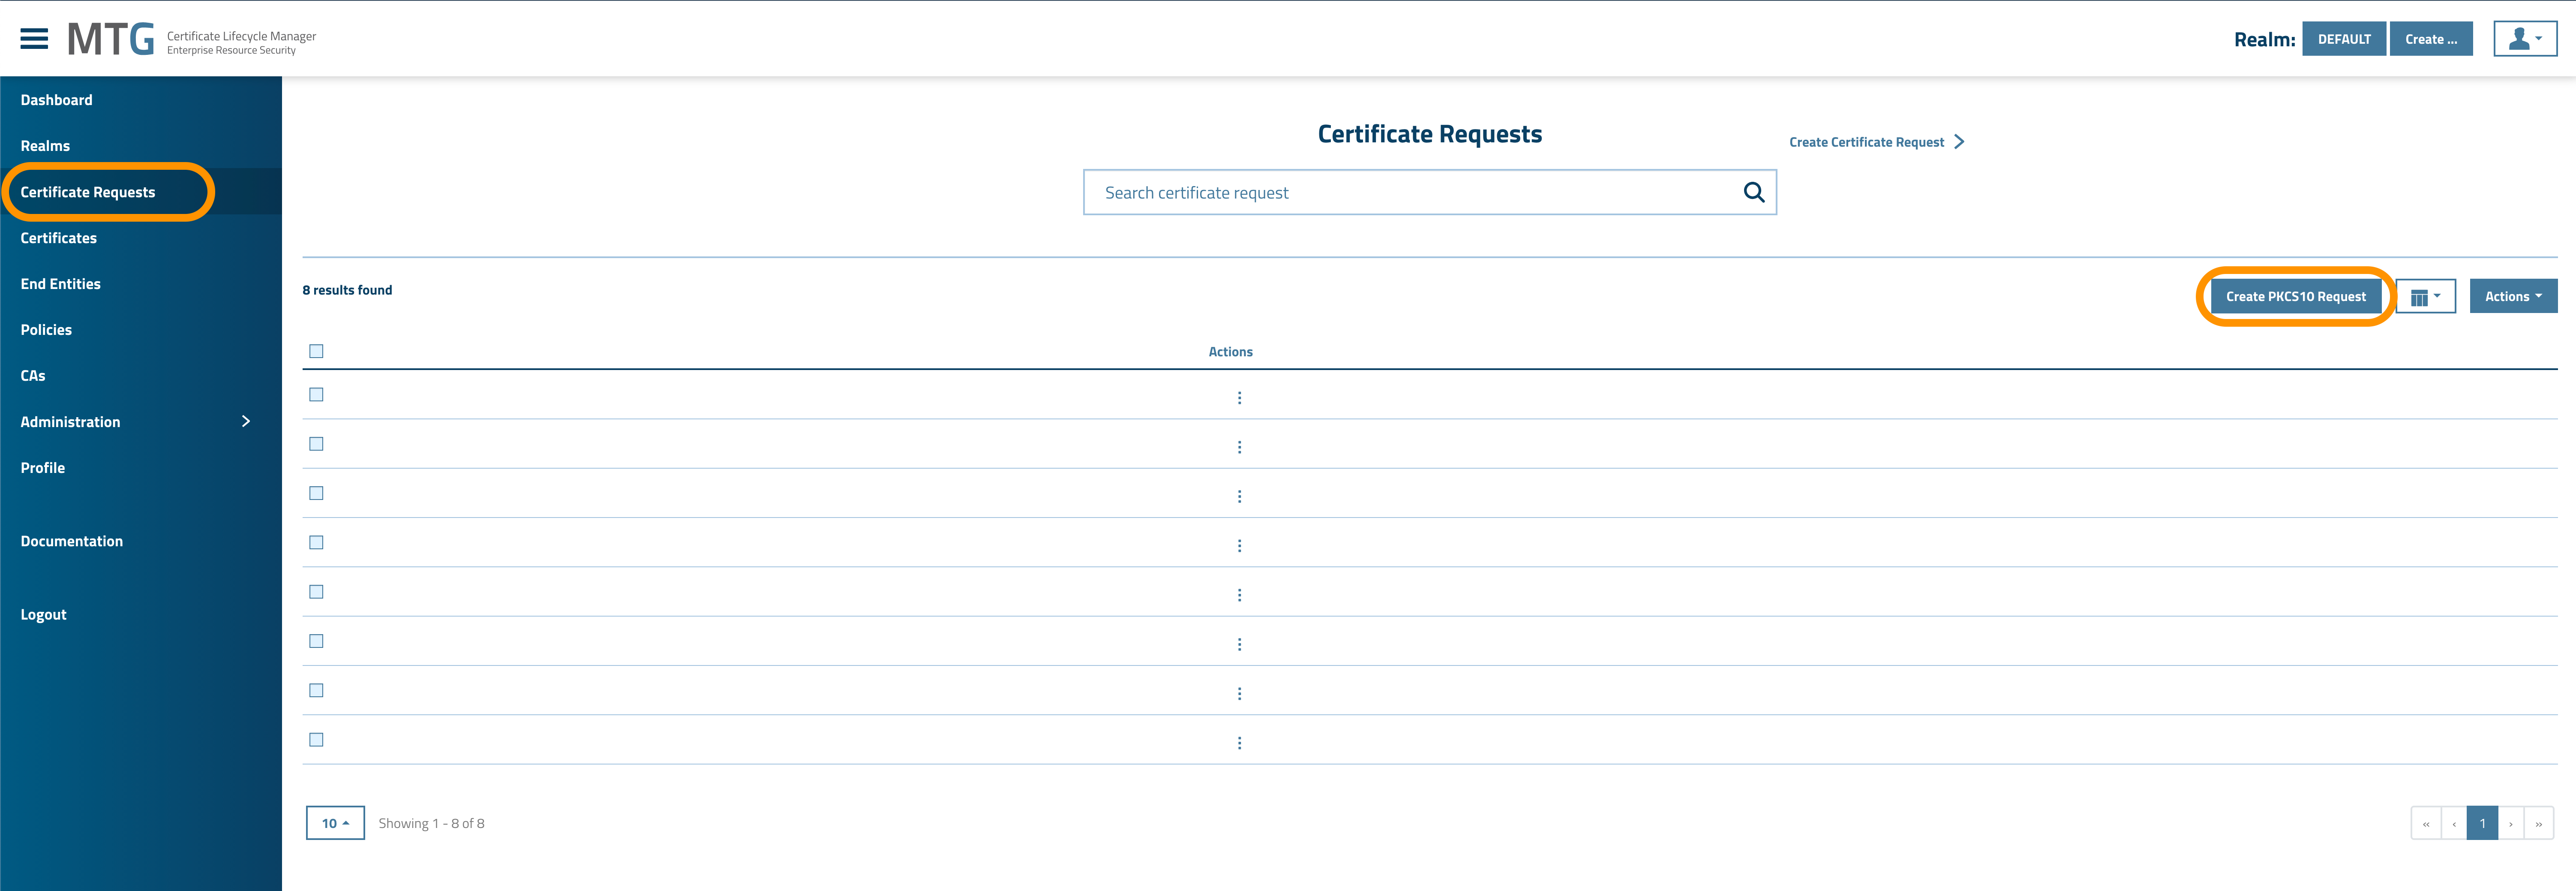
Navigate to Certificate Requests and select Create PKCS10 Request.
-
Fill in the PKCS10 Request Subject and hit Apply:
-
Common Name: Add the URL of your instance (without https or slashes).
-
Country:
DE -
Organization: Add your organization.
-
Domain Names: Add your domain names and click the Add button before proceeding.
-
-
Choose RSA as Public Key Algorithm and 2048 as RSA Key Size. Hit Apply, to proceed.
2048 is the only RSA Key Size GlobalSign accepts. 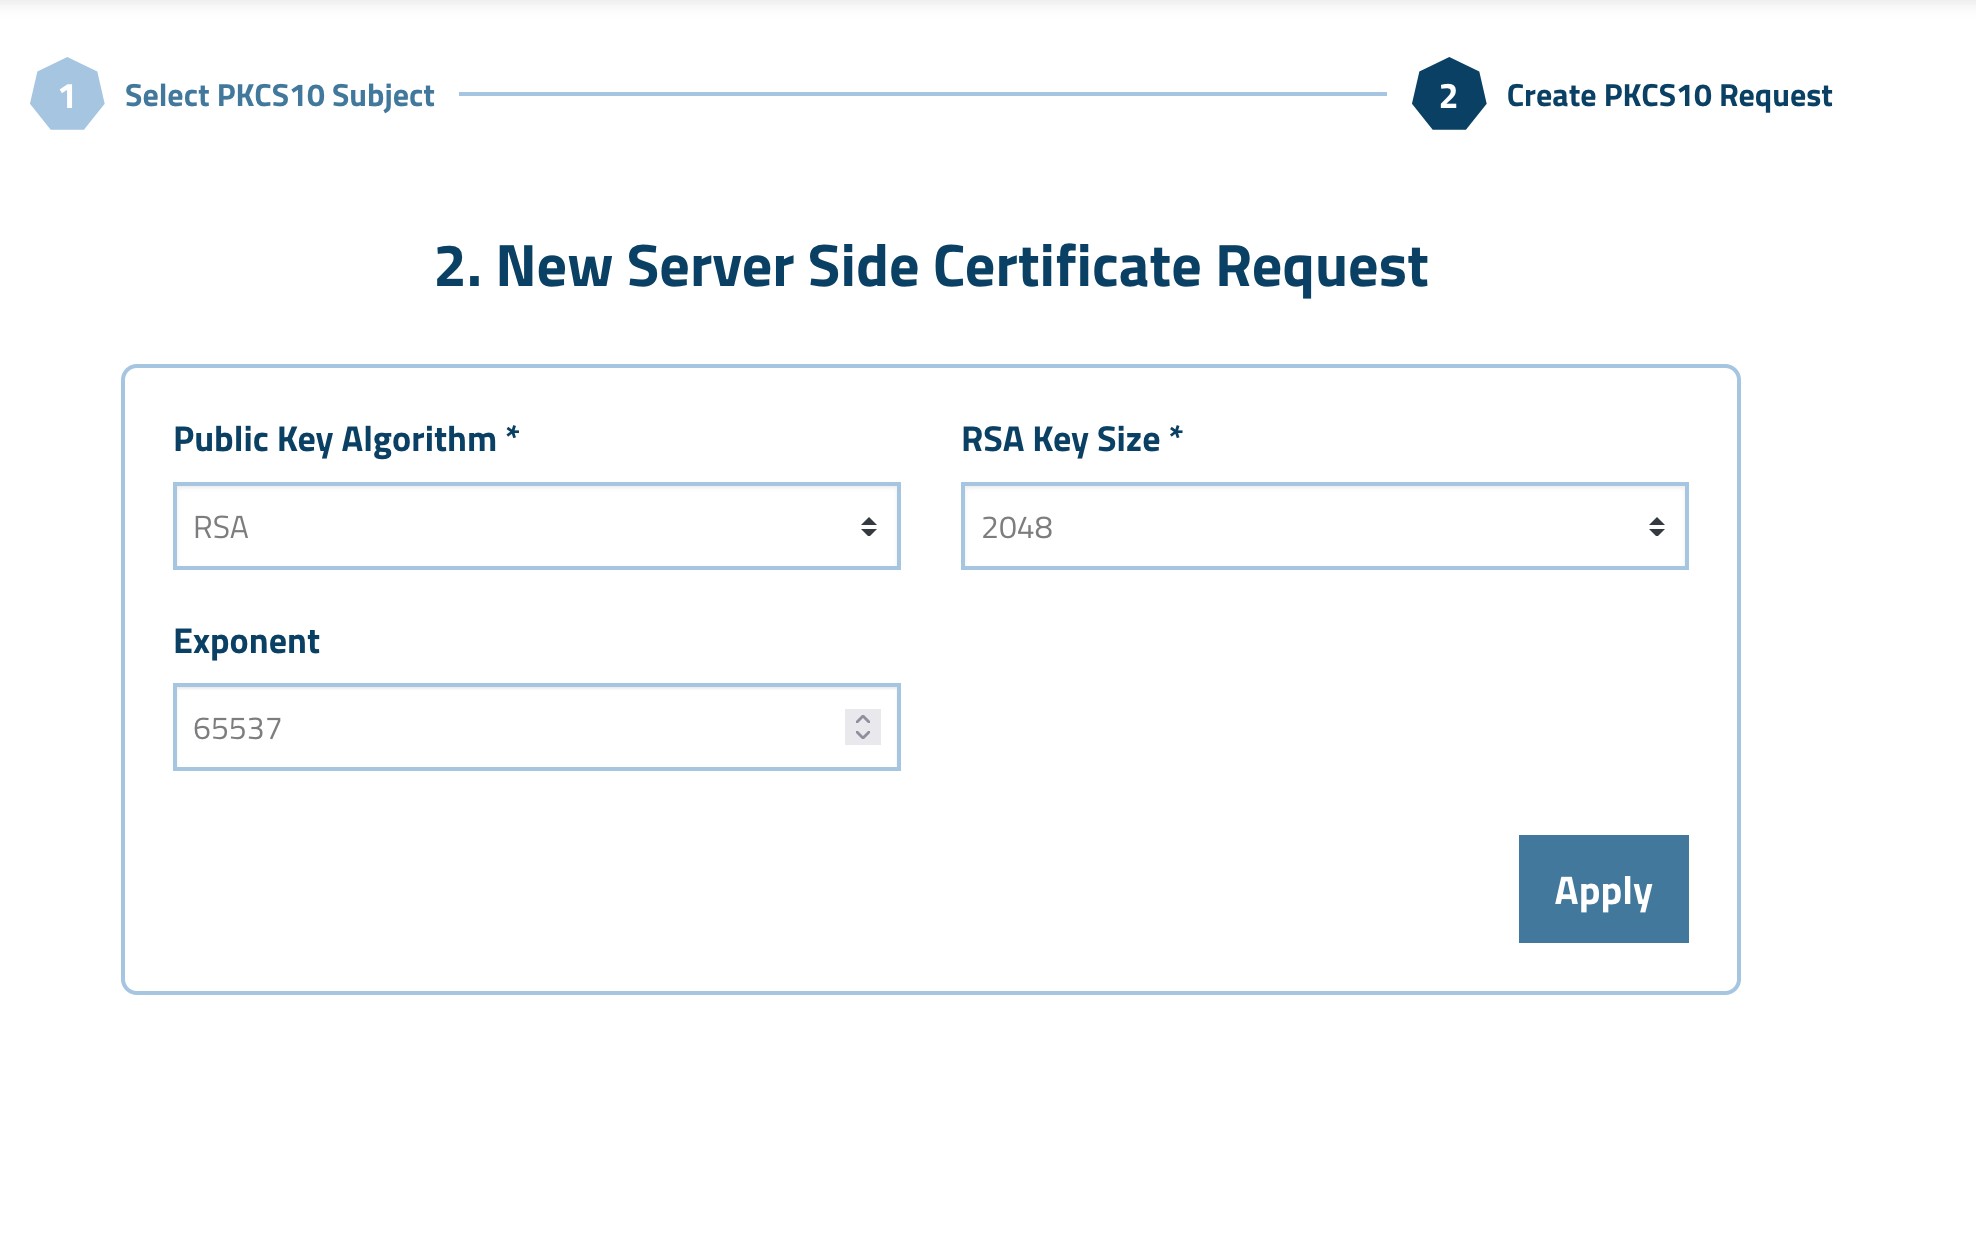
-
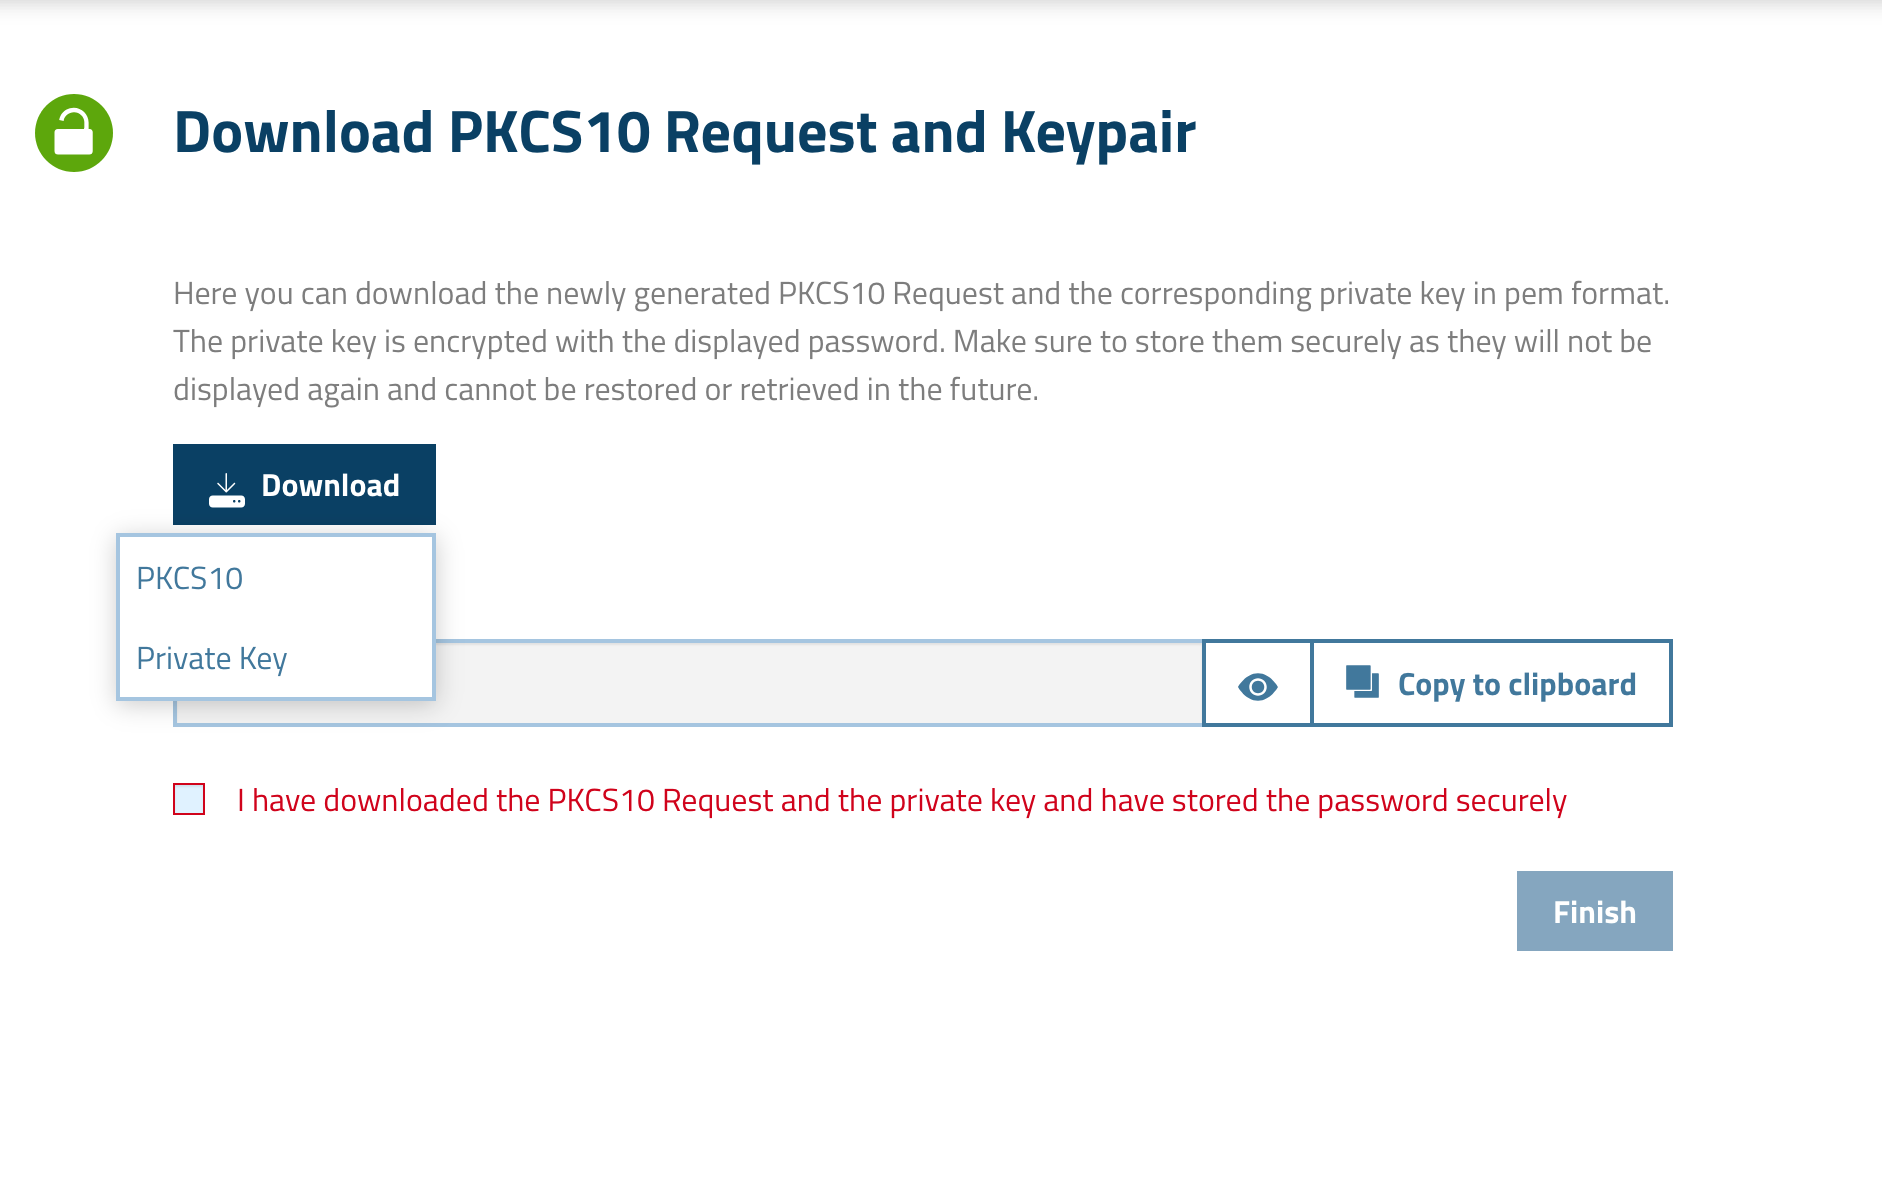
Download both the PKCS10 request (needed for GlobalSign) and the private key (needed for MTG CLM). Make sure to also store the Password, which is also gonna be needed later.
-
Confirm that your downloads are complete, fill the checkbox and hit Finish. You may now close this instance.
Combine Certificate and Private Key into PKCS12
Now that you have a certificate and you also have the private key that you got before from MTG CLM, you must combine them into a PKCS12 file so that you can use it within MTG CLM for the credential field.
-
Copy the certificate you got during Step 6 of Create mTLS Certificate.
-
In your file browser create a new text file with this content and give a descriptive name to it (e.g., certificate.crt).
-
Cd to your files folder and using OpenSSL combine the PKCS8 file you got during Step 4 of Create PKCS10 Request using MTG CLM and certificate.crt. The command is as follows:
$openssl pkcs12 -export \
-in certificate.crt
-inkey your-pkcs8.pem
-out certificate-and-private-key.p12
-
Once you run the above command you will be asked for the password protecting the private key (the one copied over from MTG CLM during Step 4 of Create PKCS10 Request using MTG CLM). You will also be asked to create a new password (or use the same one) for the .p12 file you are currently creating.
Create the GlobalSign Certificate Provider
| To perform the steps below, admin rights are required. |
-
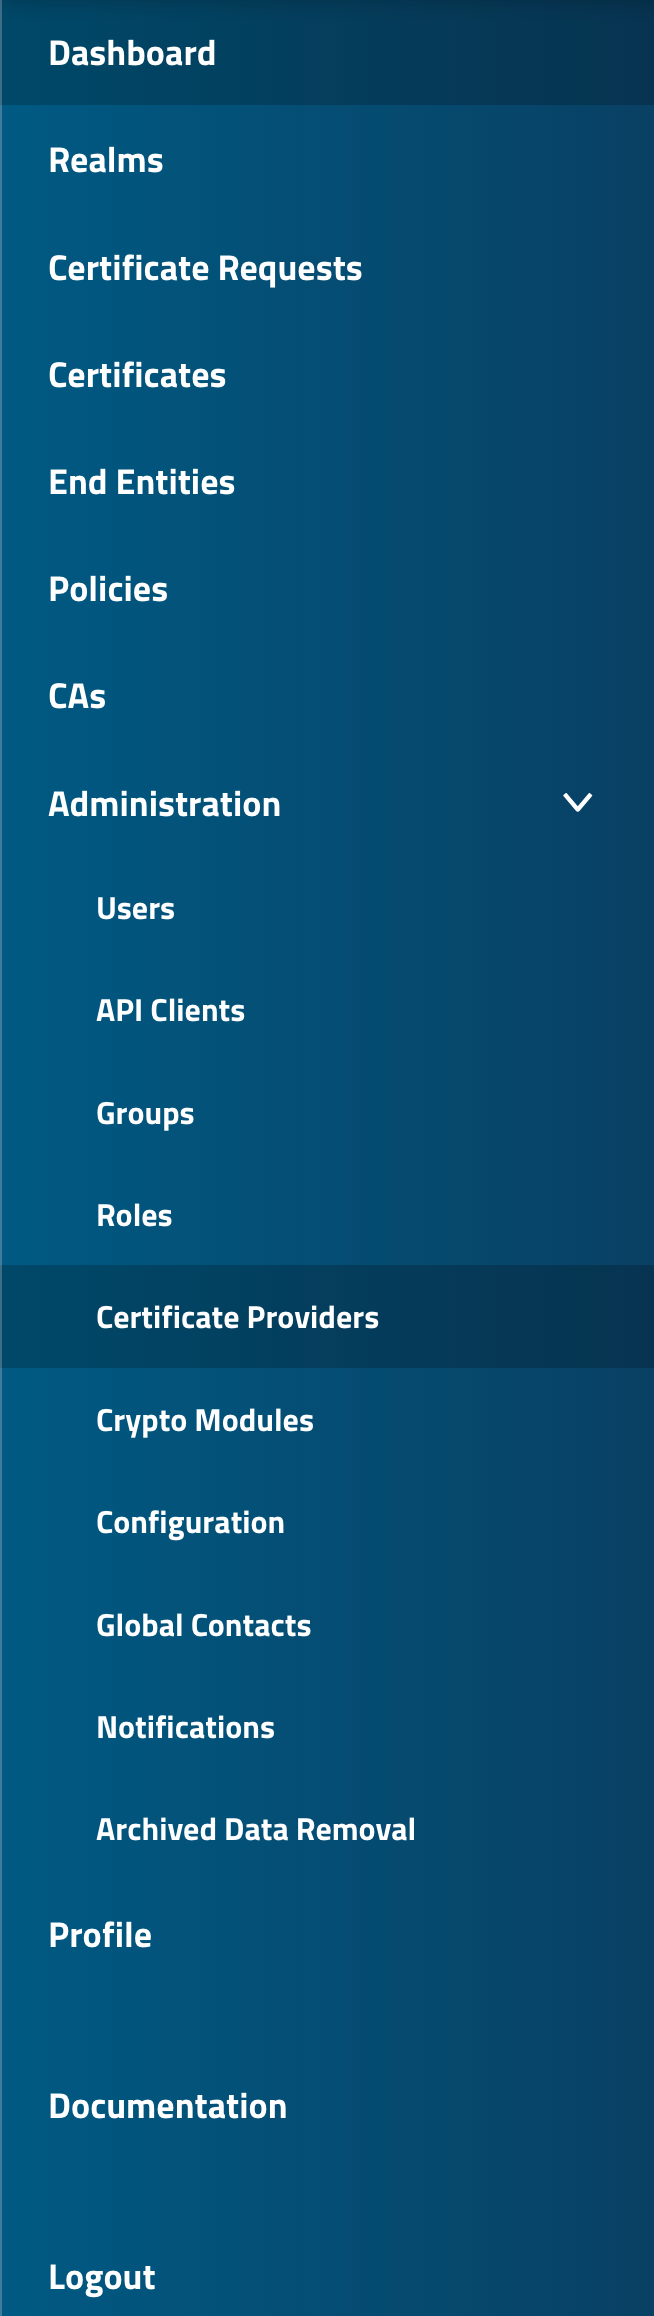
Log in to MTG CLM UI and navigate from the sidebar to Administration → Certificate Providers.
-
Create a new certificate provider of Type: GlobalSign and give a descriptive name to it (e.g., GlobalSign SSL/TLS).
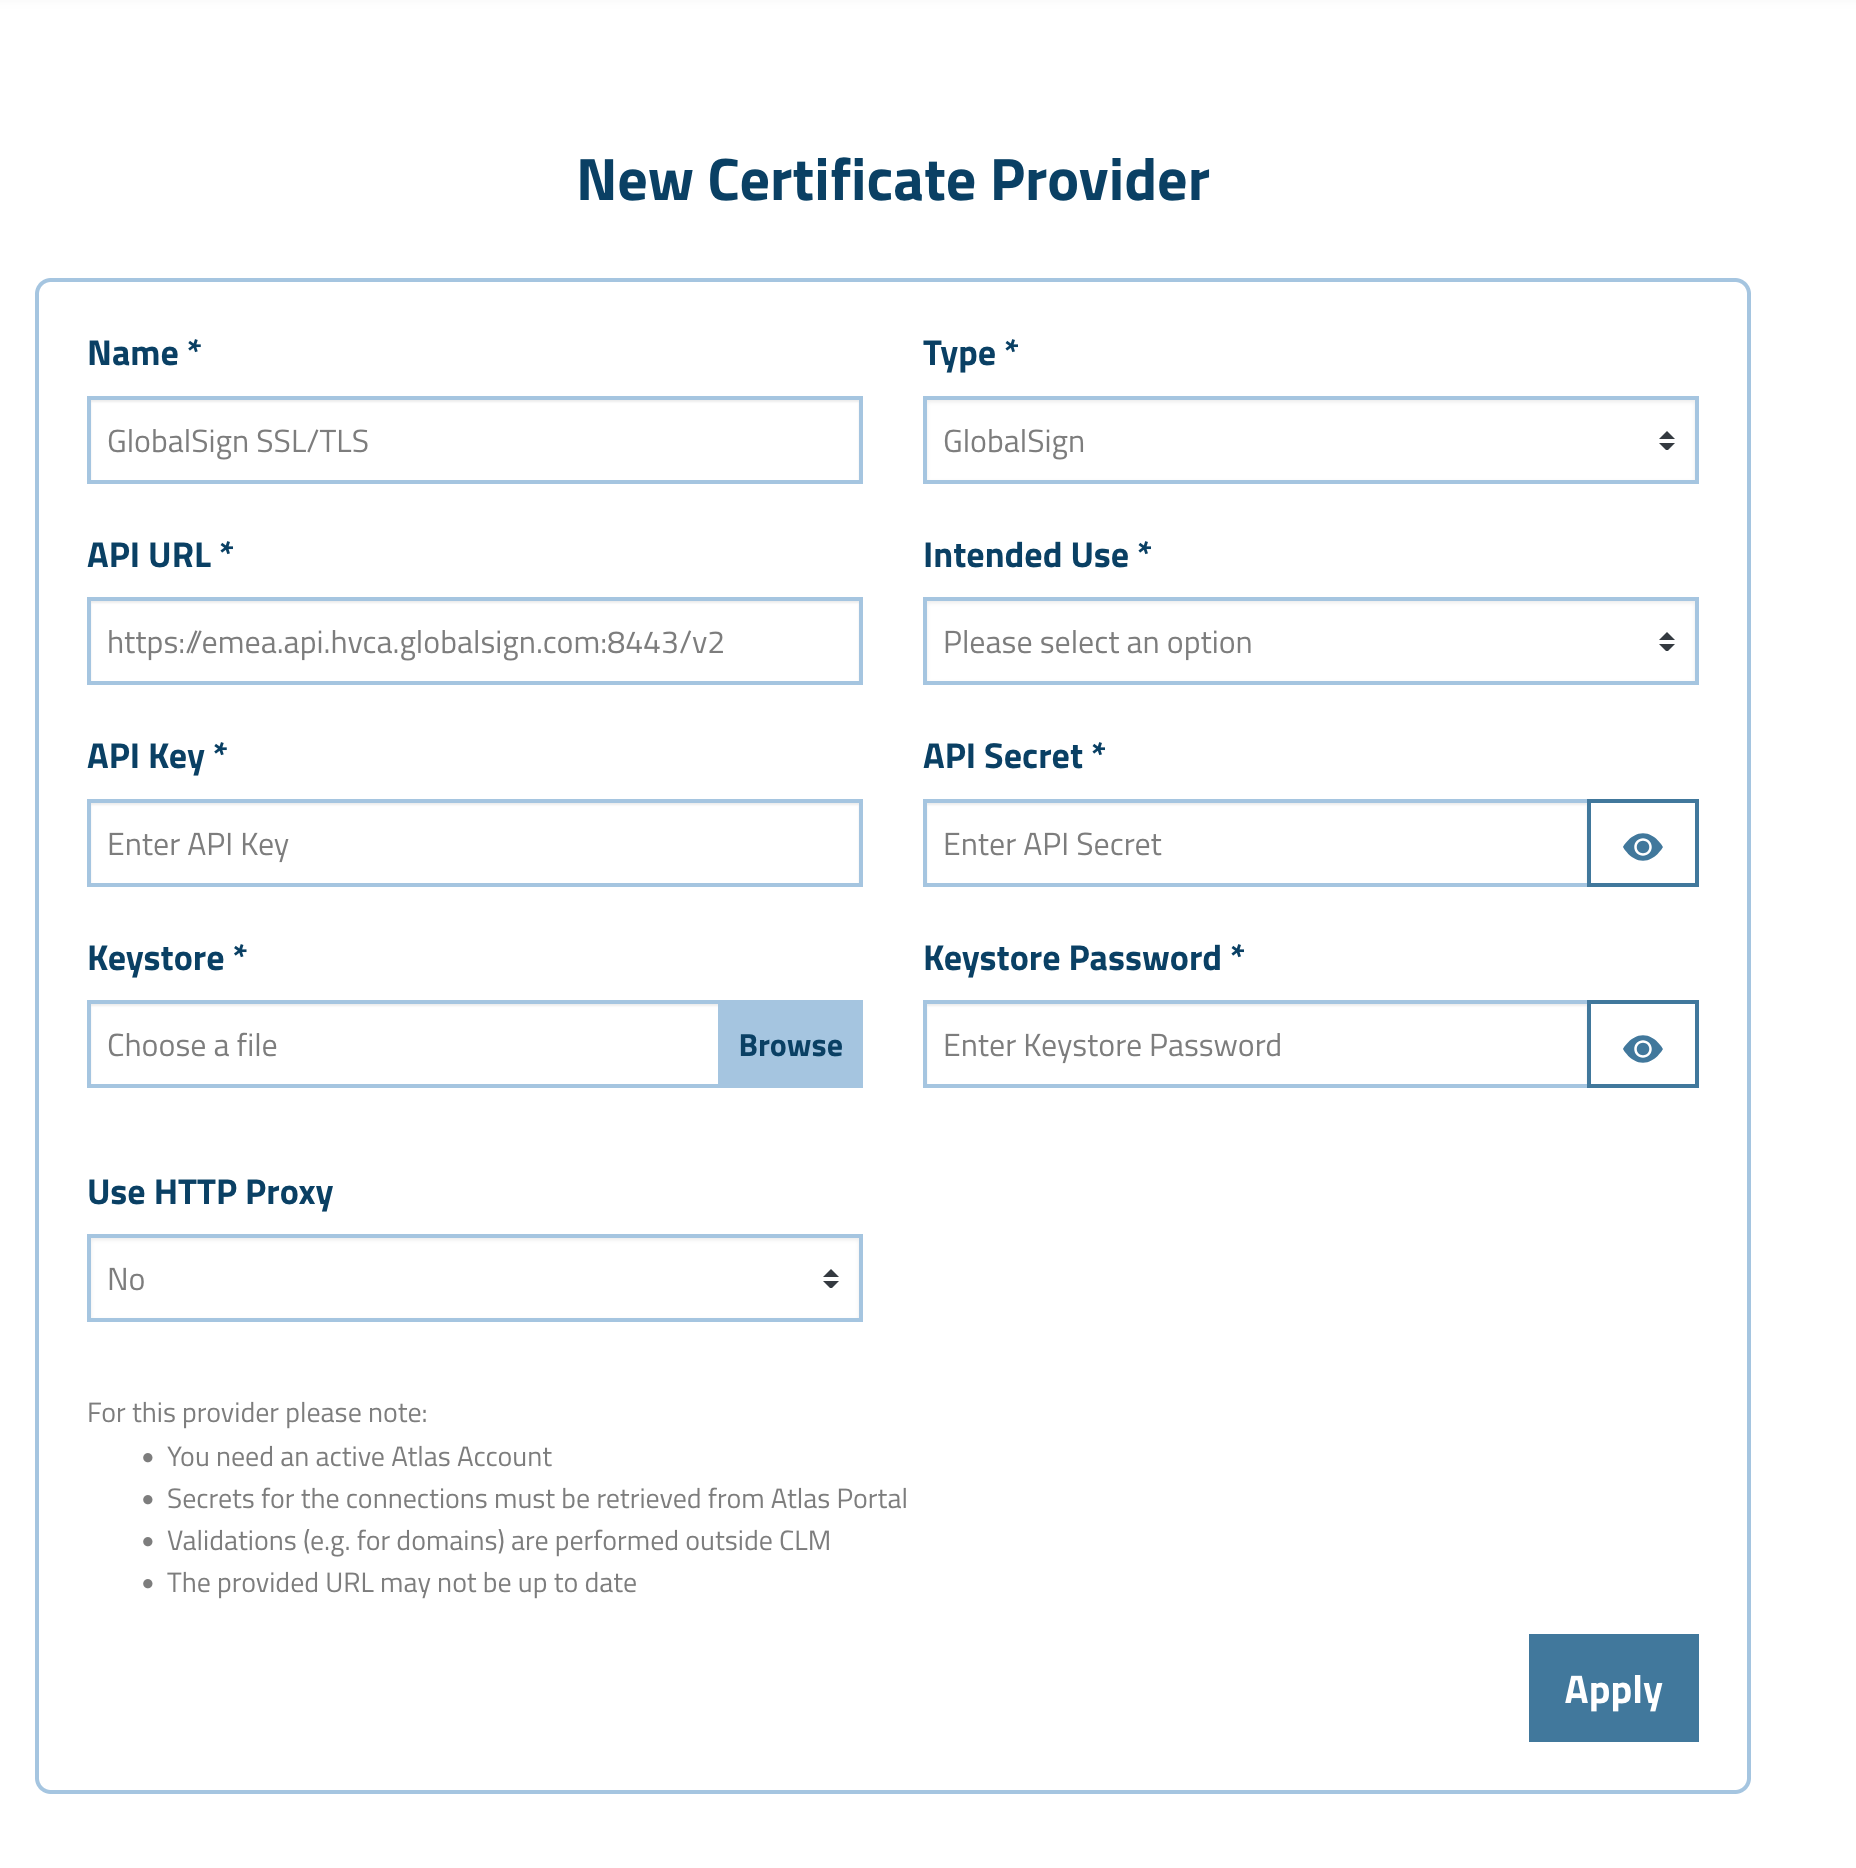
-
The chosen Type: GlobalSign enables the following specific GlobalSign fields that must be filled out for the connection to be successful:
-
API URL: The GlobalSign API URL. This field comes already pre-filled.
-
Intended Use: The different types of certificates GlobalSign can issue.
-
API Key & API Secret: The API Key and Secret you created before, in Create API Credentials.
-
Keystore and Keystore Password: The Keystore and Keystore Password you created before, in Create mTLS Certificate and Combine Certificate and Private Key into PKCS12.
-
Proxy Host & Proxy Port: If your instance is behind an enterprise proxy you need to fill those accordingly.
-
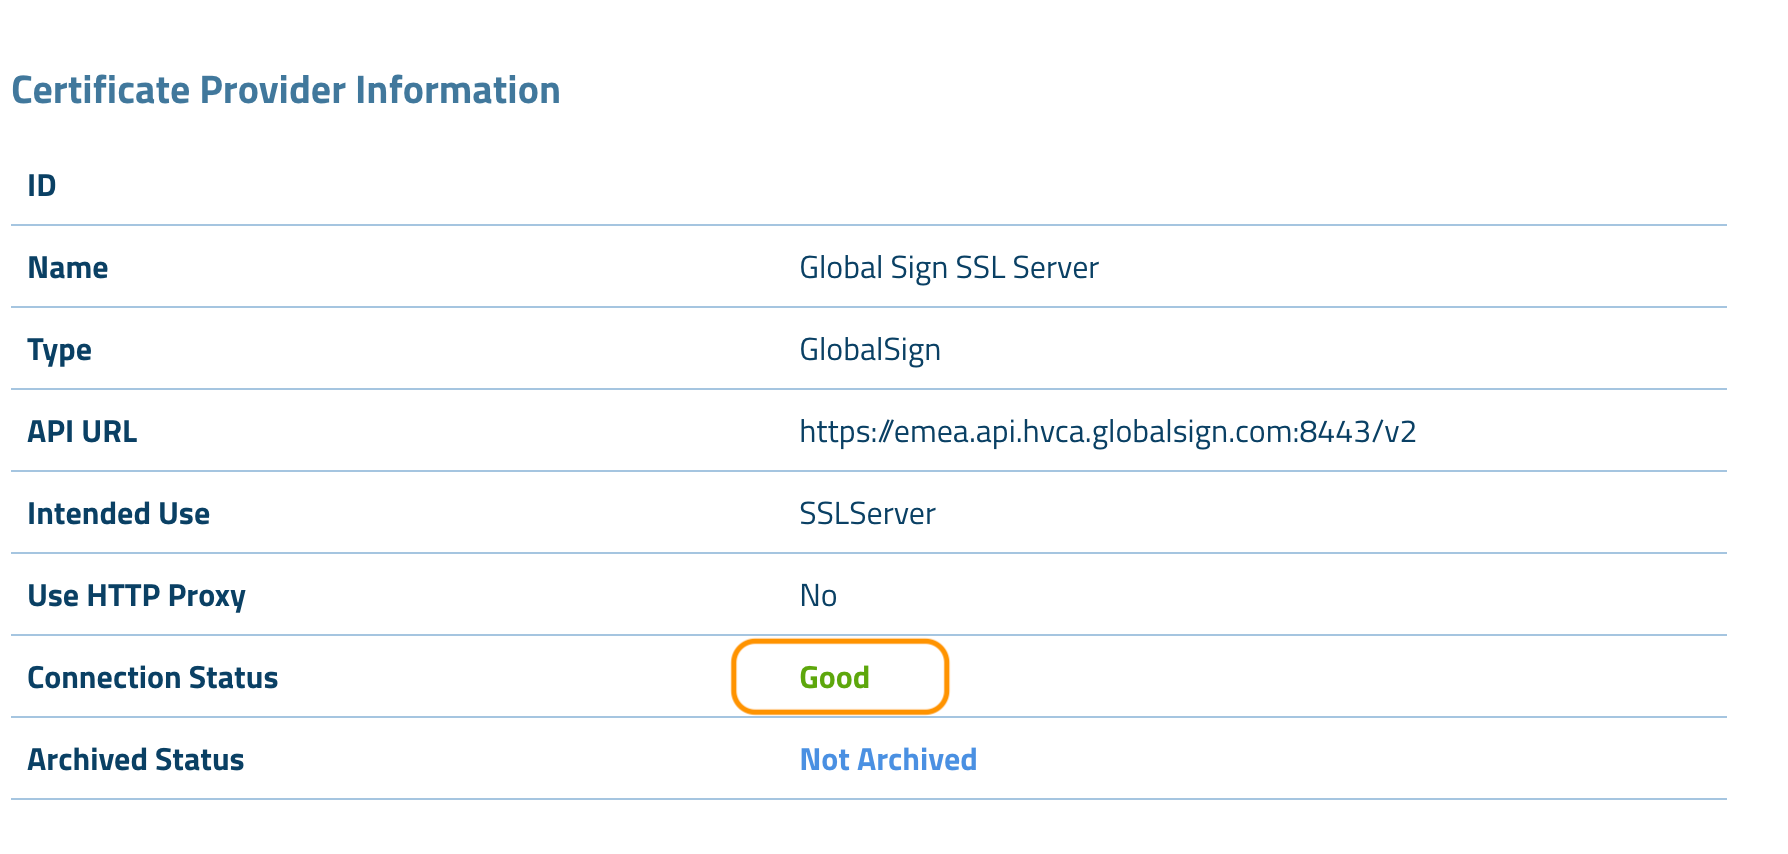
If everything went according to plan you should be seeing a Connection Status: Good indicator in the next page like below:
Activate GlobalSign Certificate Provider
Provided you have already completed the necessary steps described above, you are all set to activate the GlobalSign certificate provider within your realm of choice.
To do so:
-
Navigate to MTG CLM UI → Realms and click on your preferred realm name to edit its details.
-
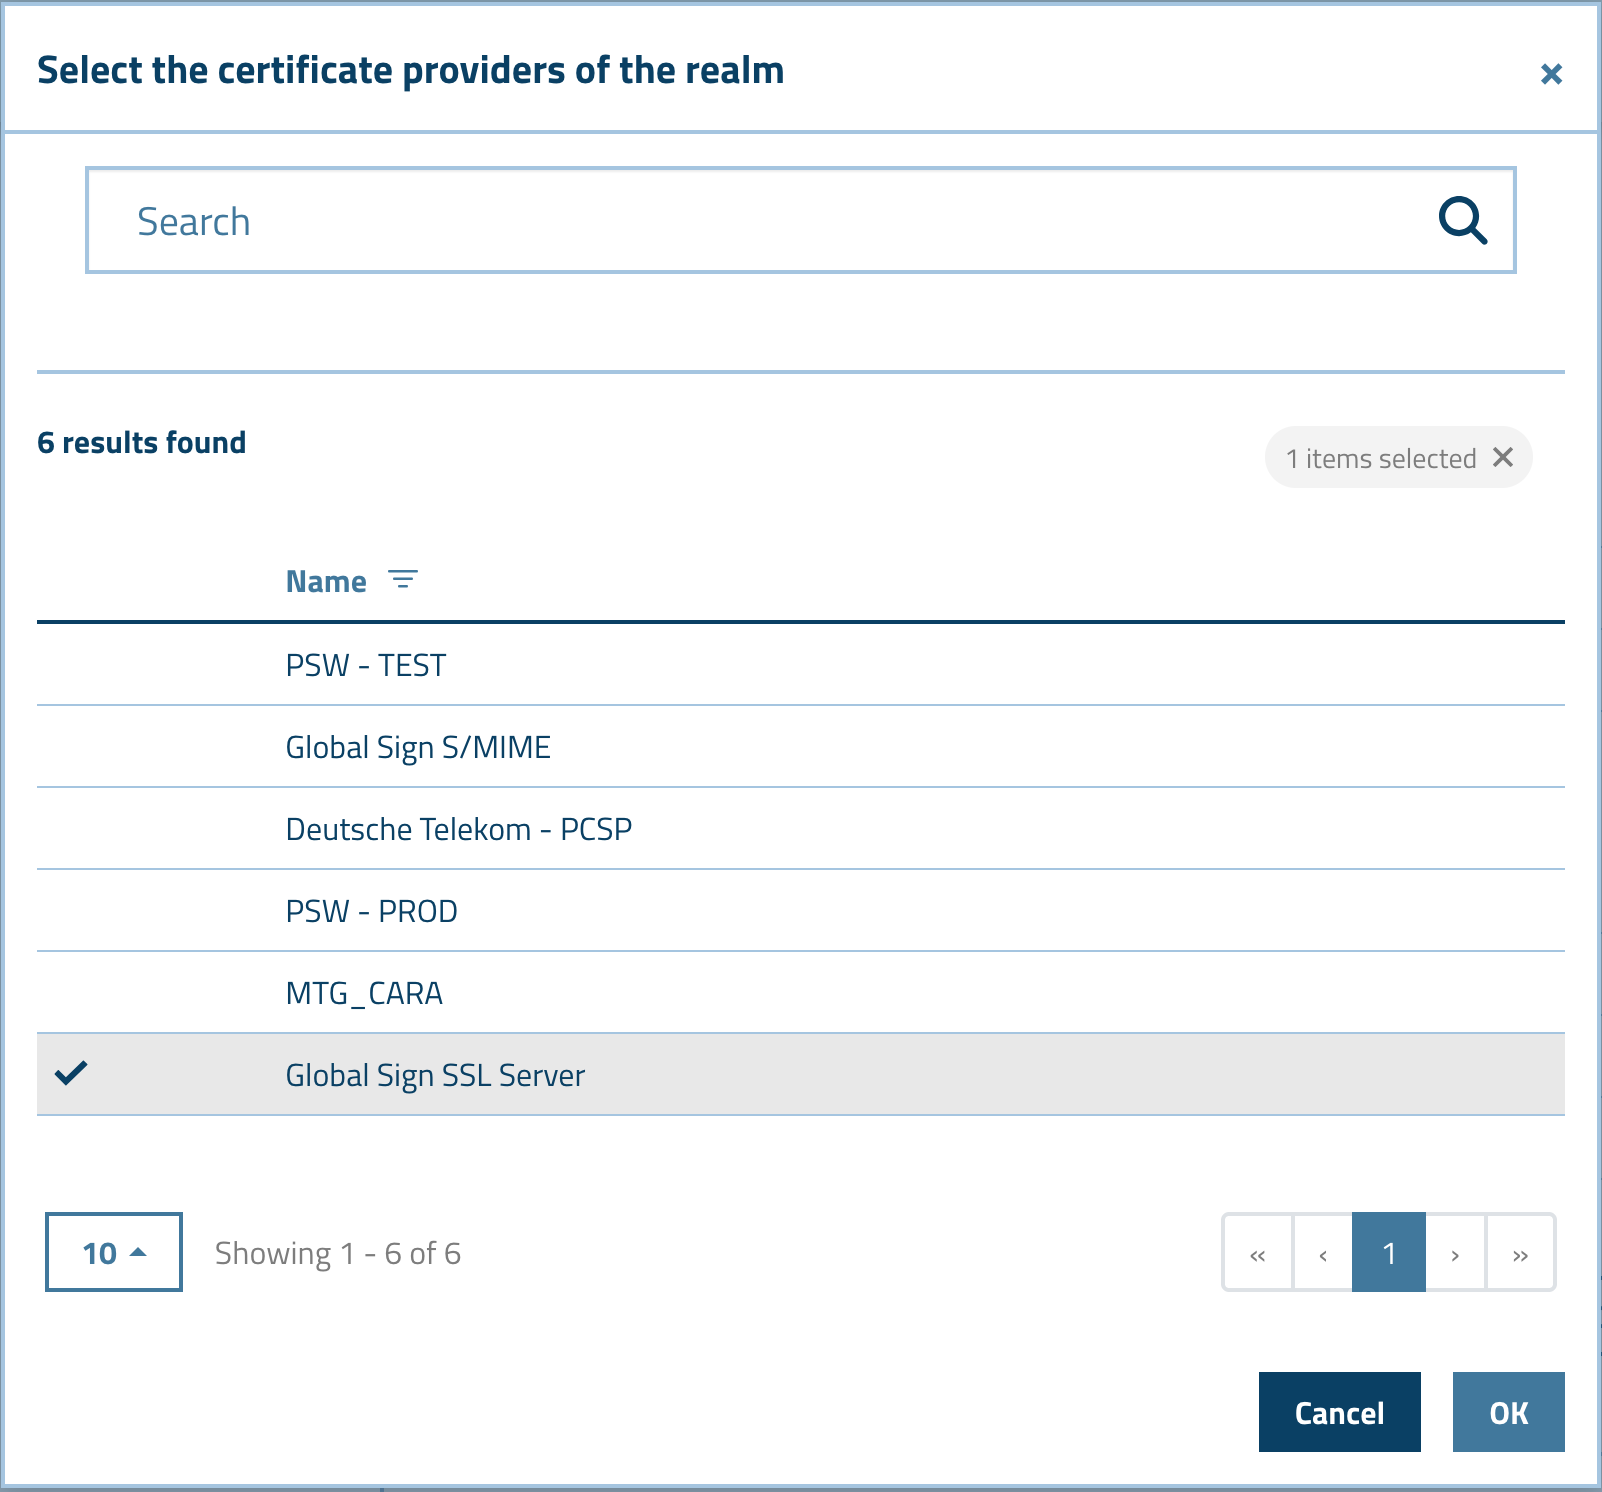
In the Realm Certificate Providers panel click Edit.
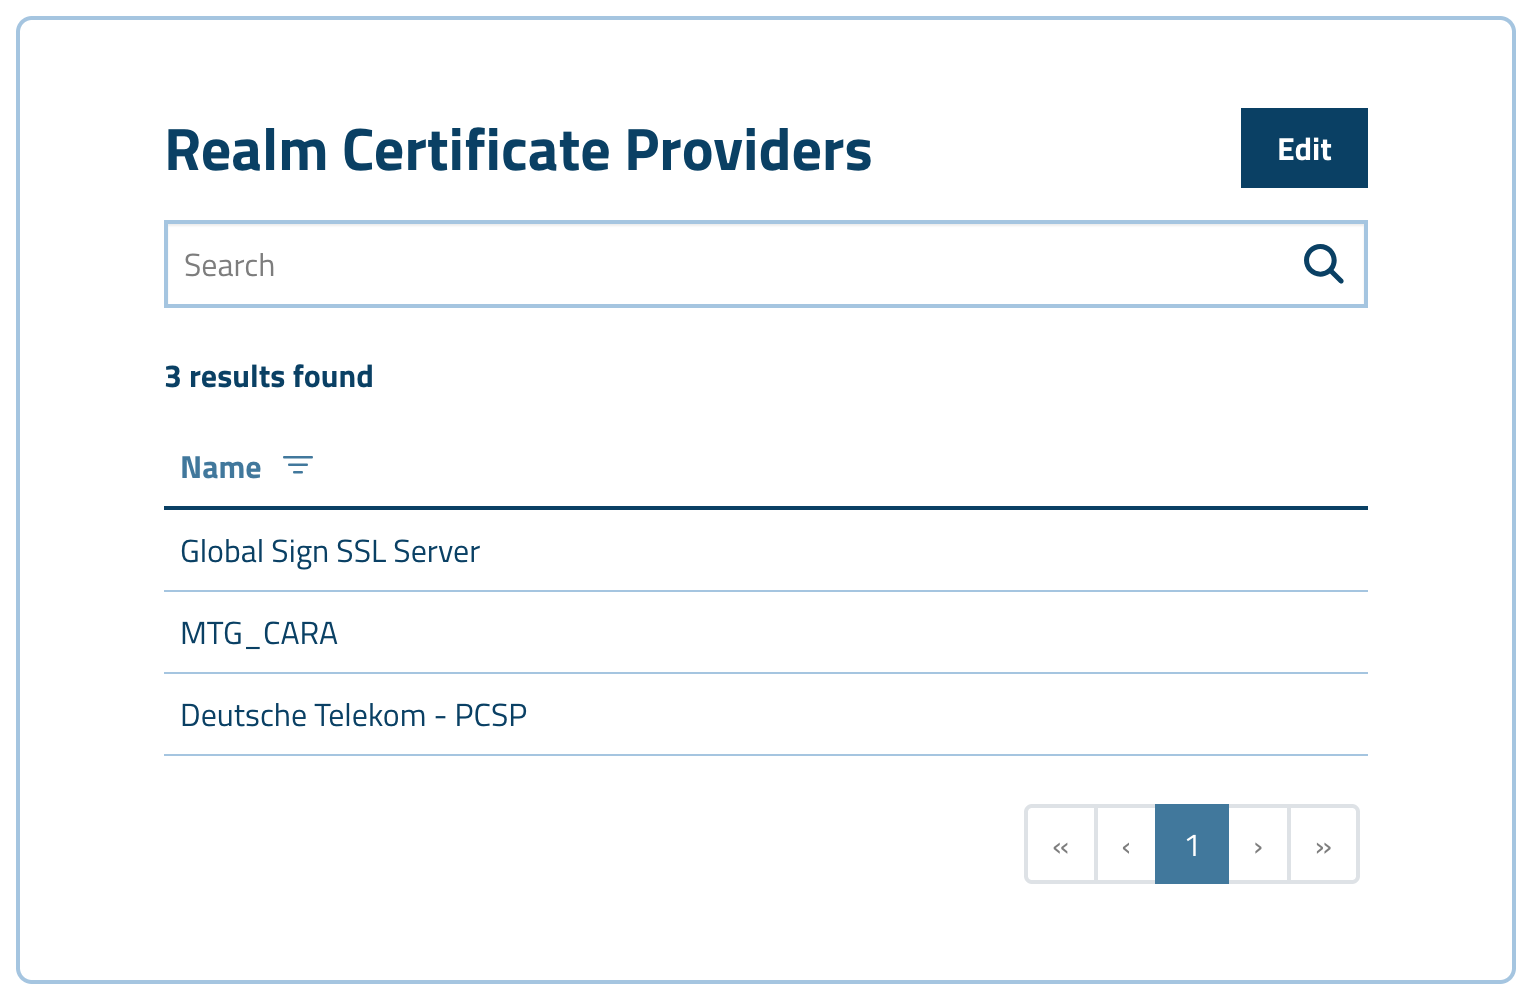
-
Add the GlobalSign certificate provider.
DNS Validation
MTG CLM supports DNS TXT validation for GlobalSign certificates. This validation method requires creating DNS TXT records for your domain, in order to prove domain ownership. DNS TXT validation enables certificate issuance for wildcard domains and scenarios where HTTP-based validation cannot be performed.
| Domain validation and other validations are performed outside the CLM platform. CLM serves solely to request the certificate. For a successful certificate request, the requirements regarding validation must be met. |