PSW Public CAs Integration Instructions
This page walks you through the integration method to create certificates using PSW certificate provider within MTG CLM. It covers the initial steps needed within the PSW console, as well as those to be completed within MTG CLM.
PSW Console Integration Steps
-
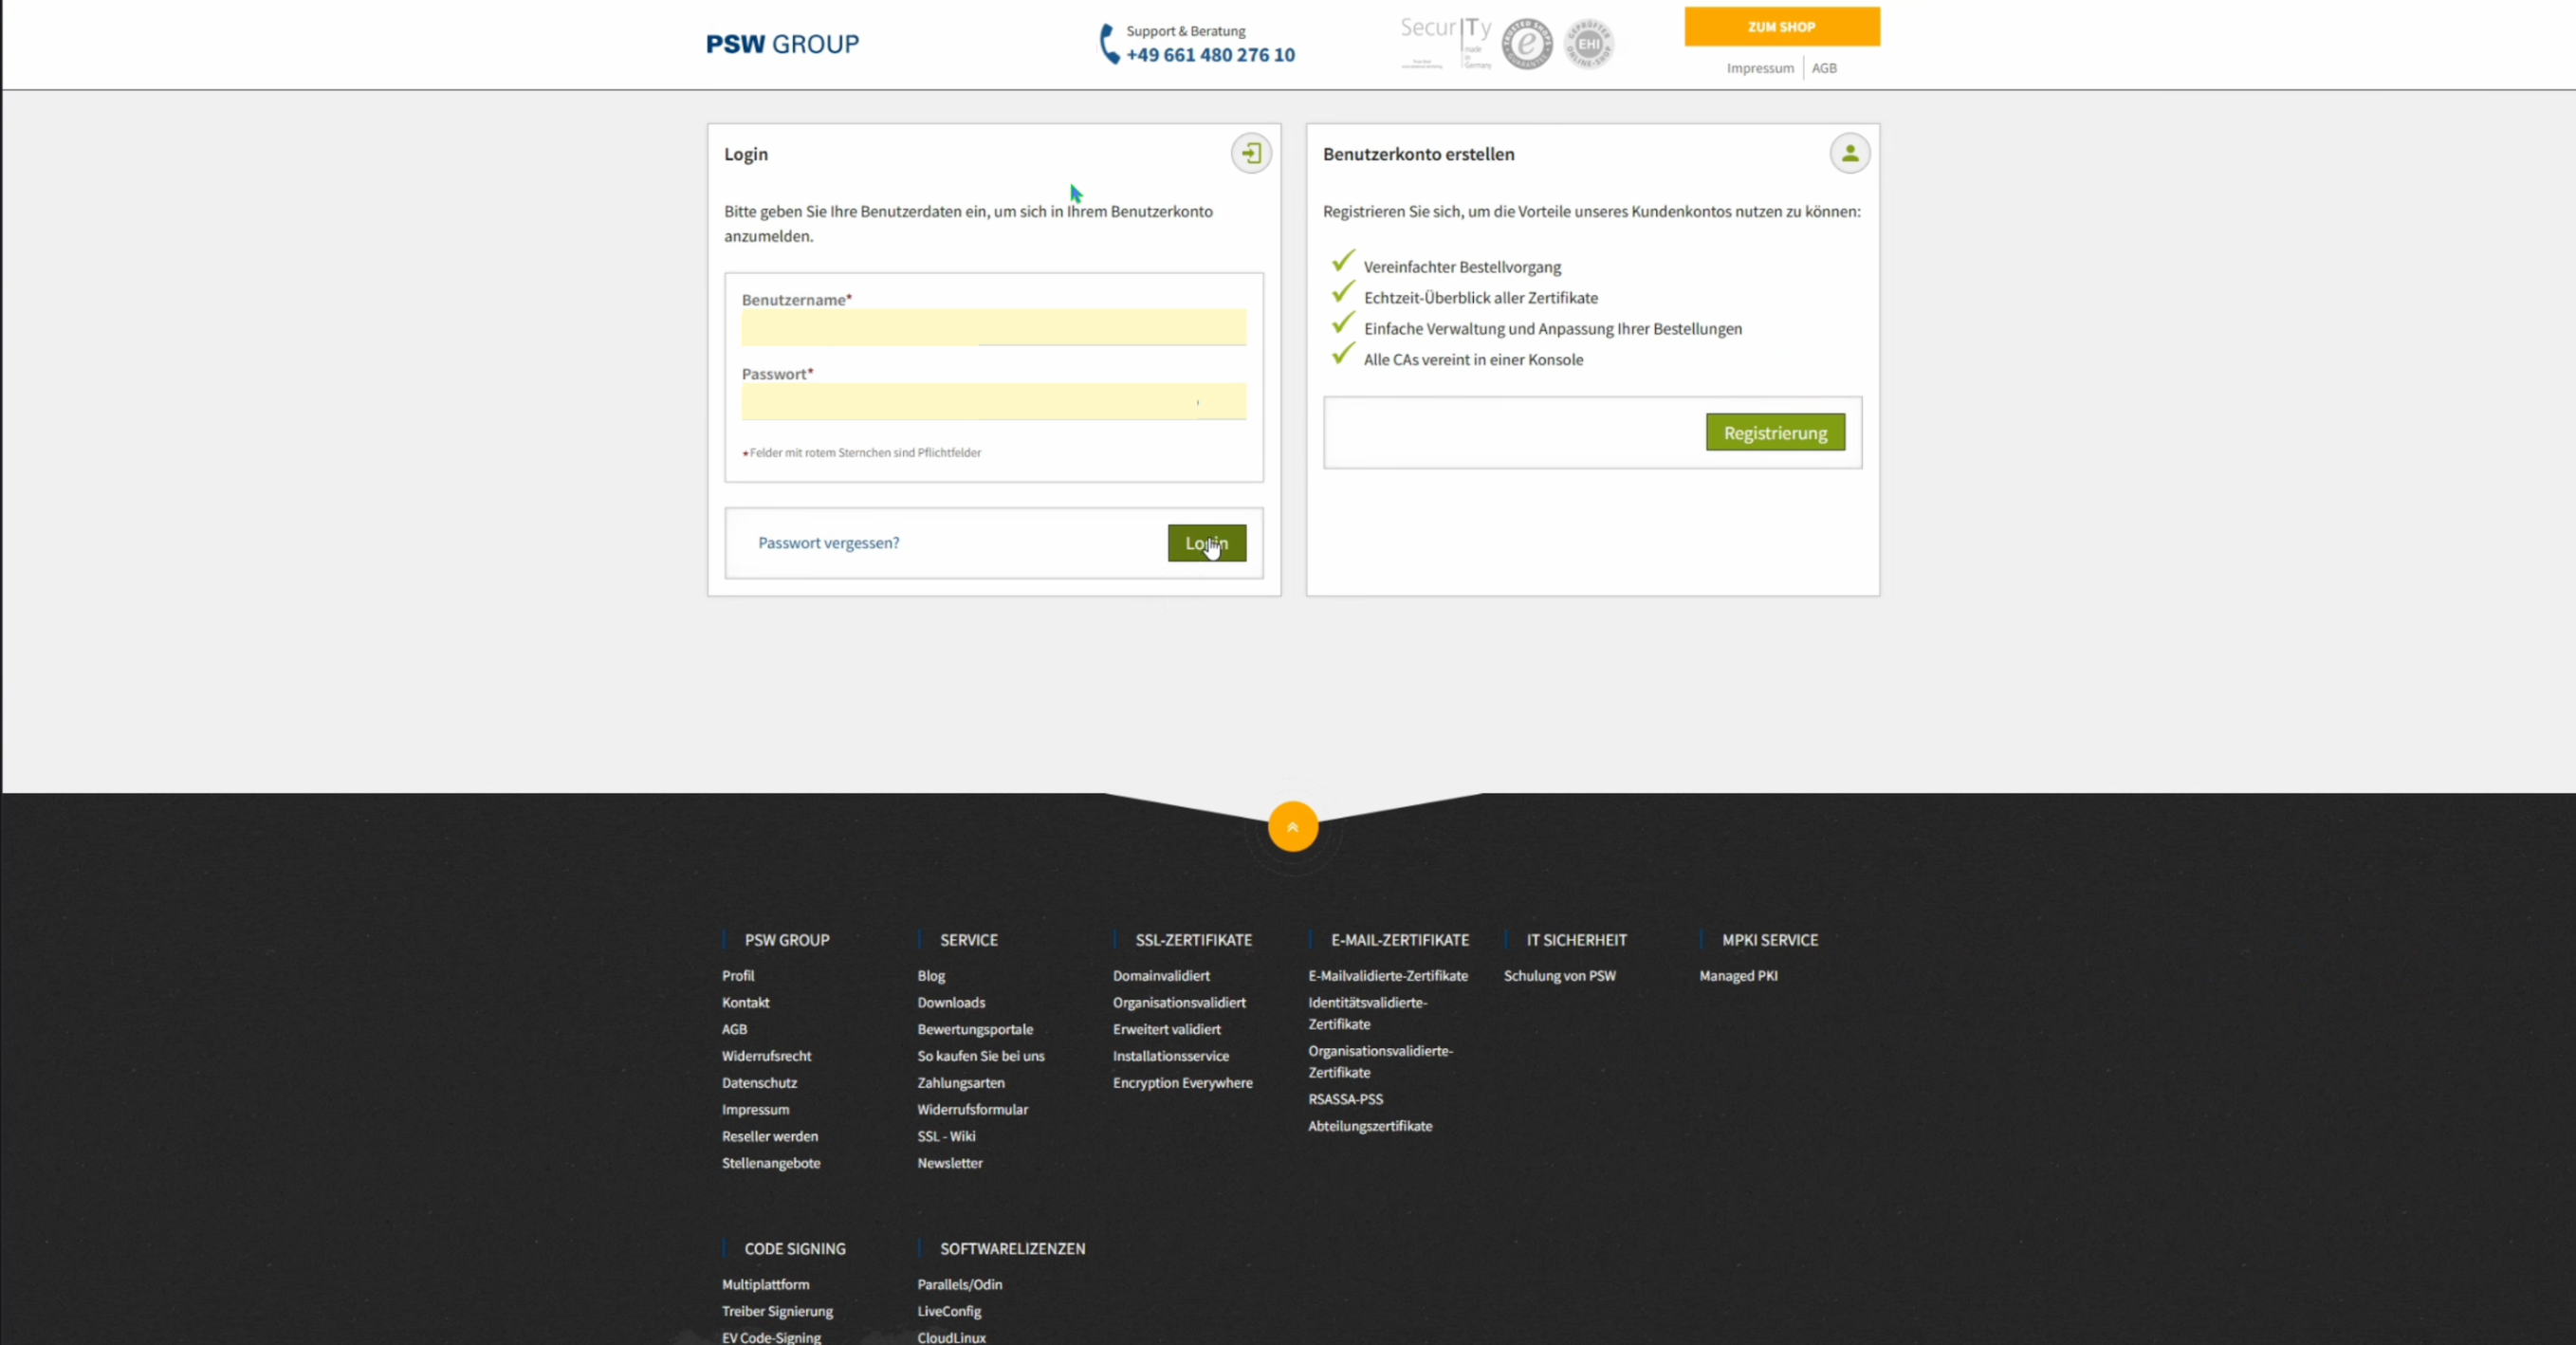
Log in with your account details at www.psw-group.de/console/login.
Click to reveal screenshot
-
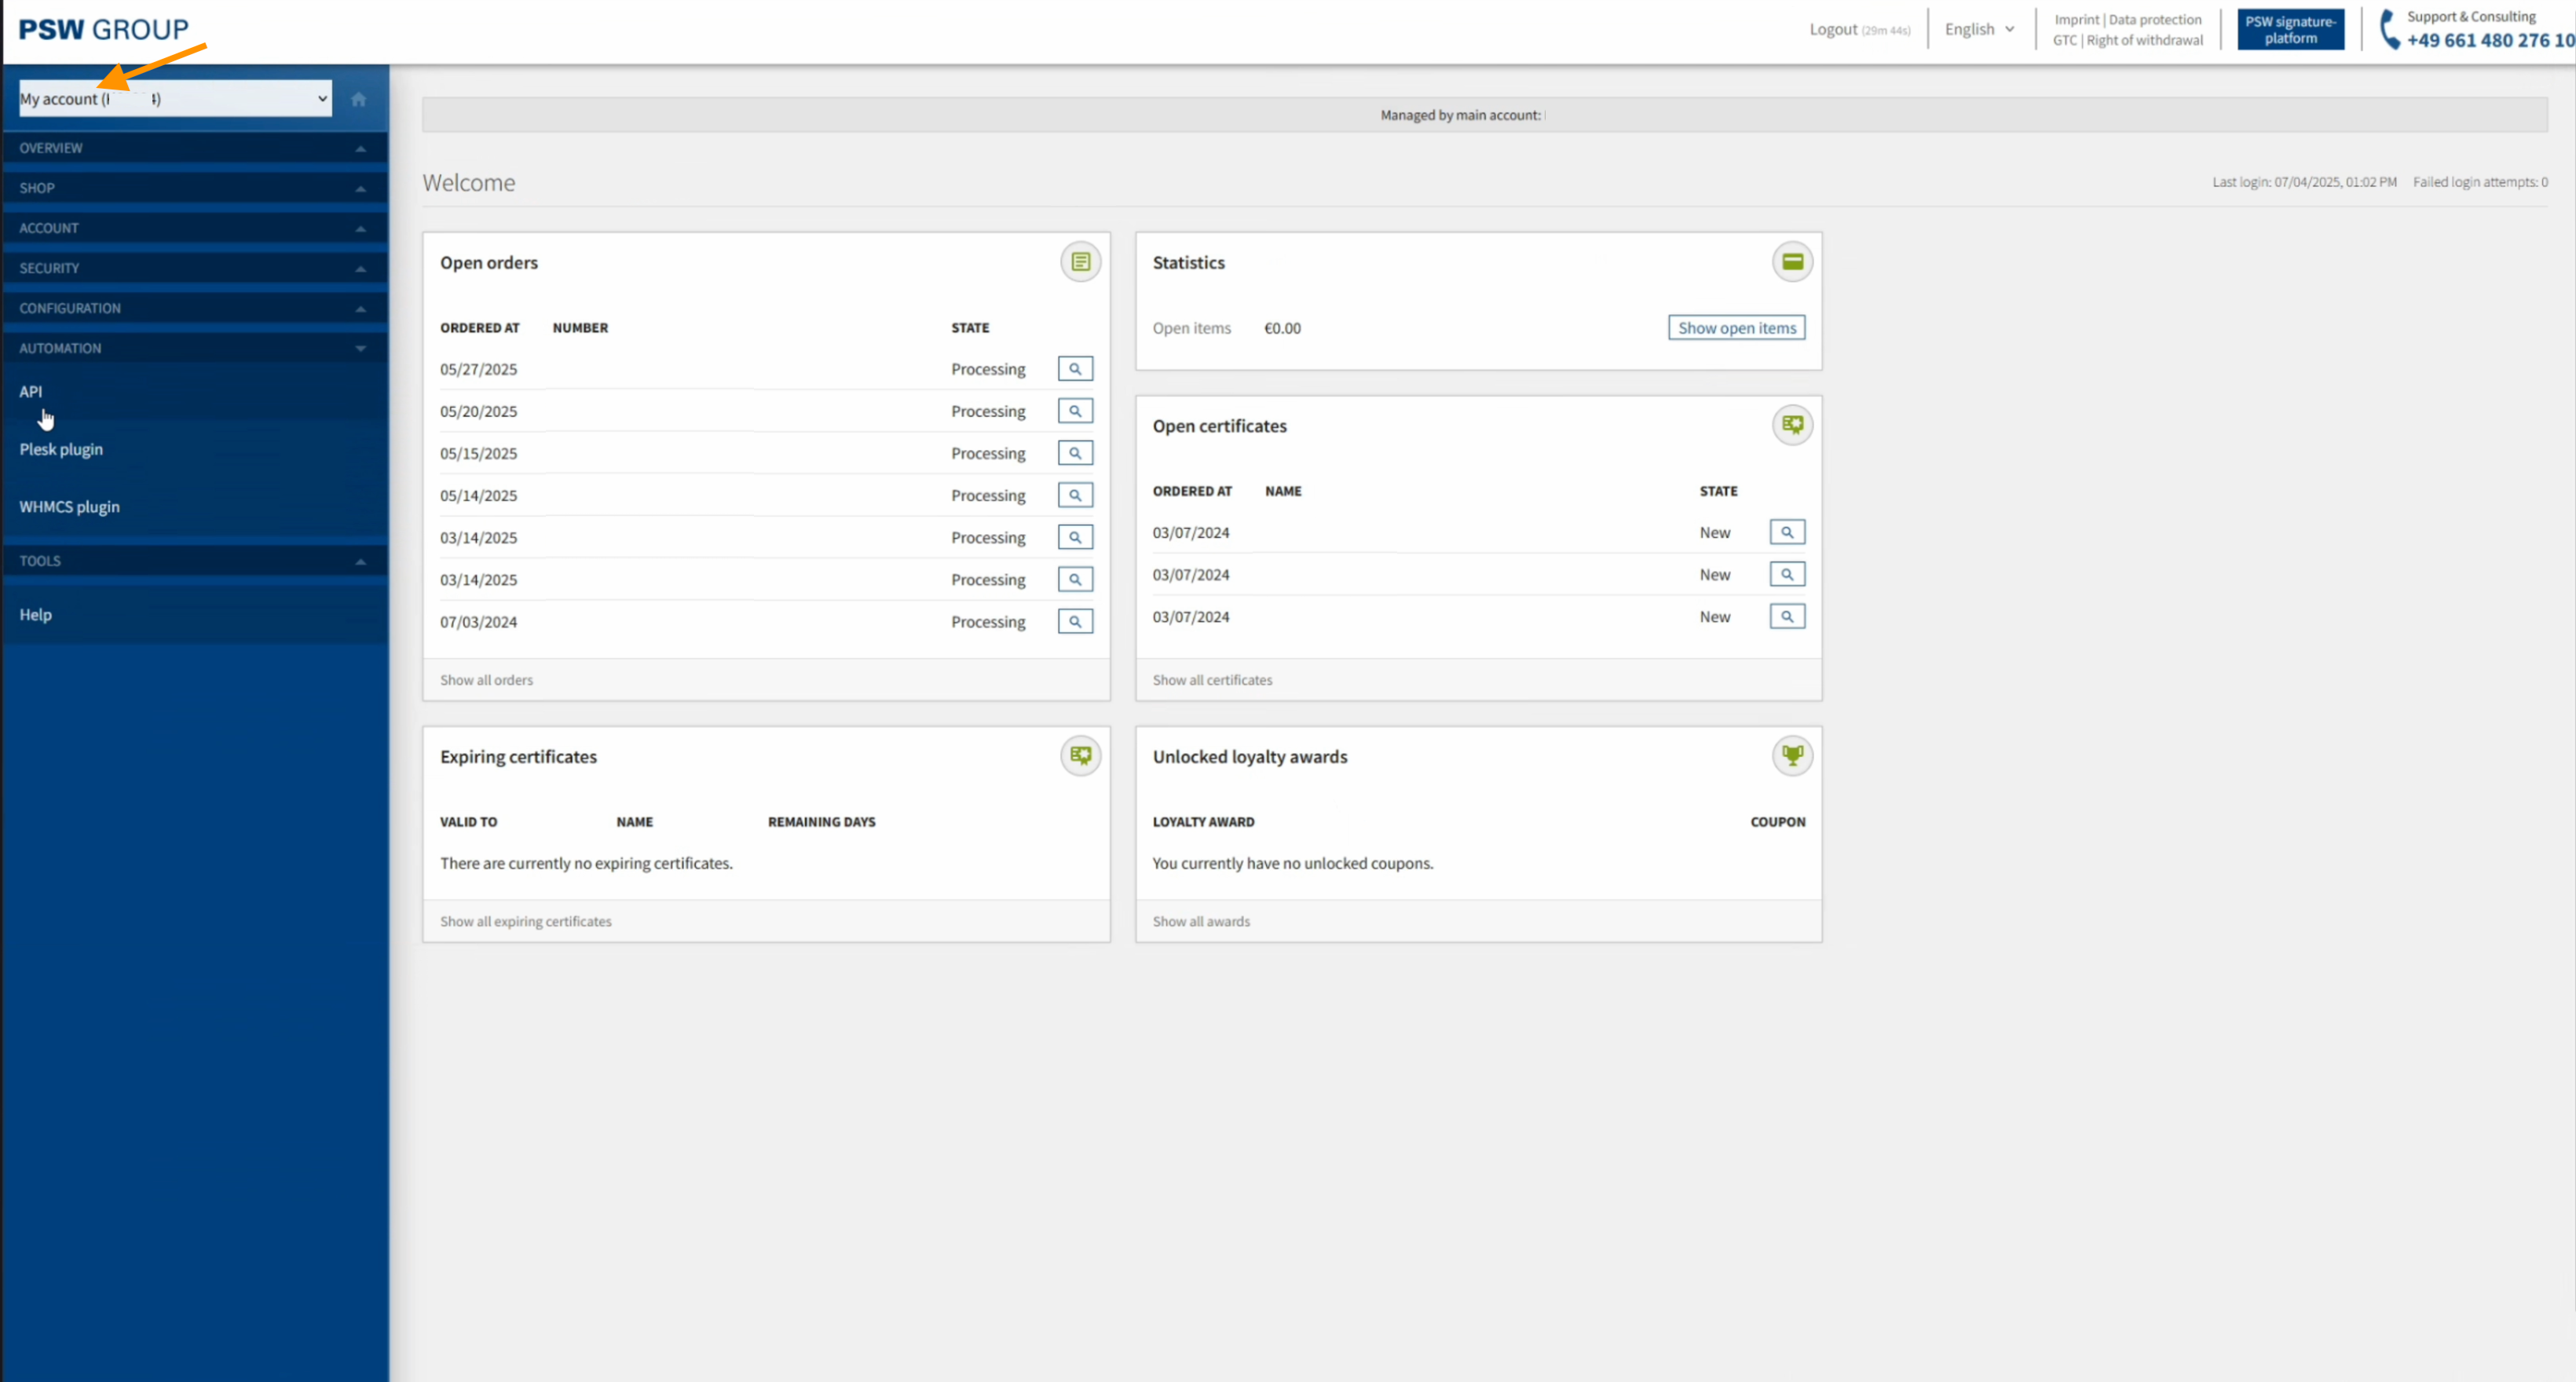
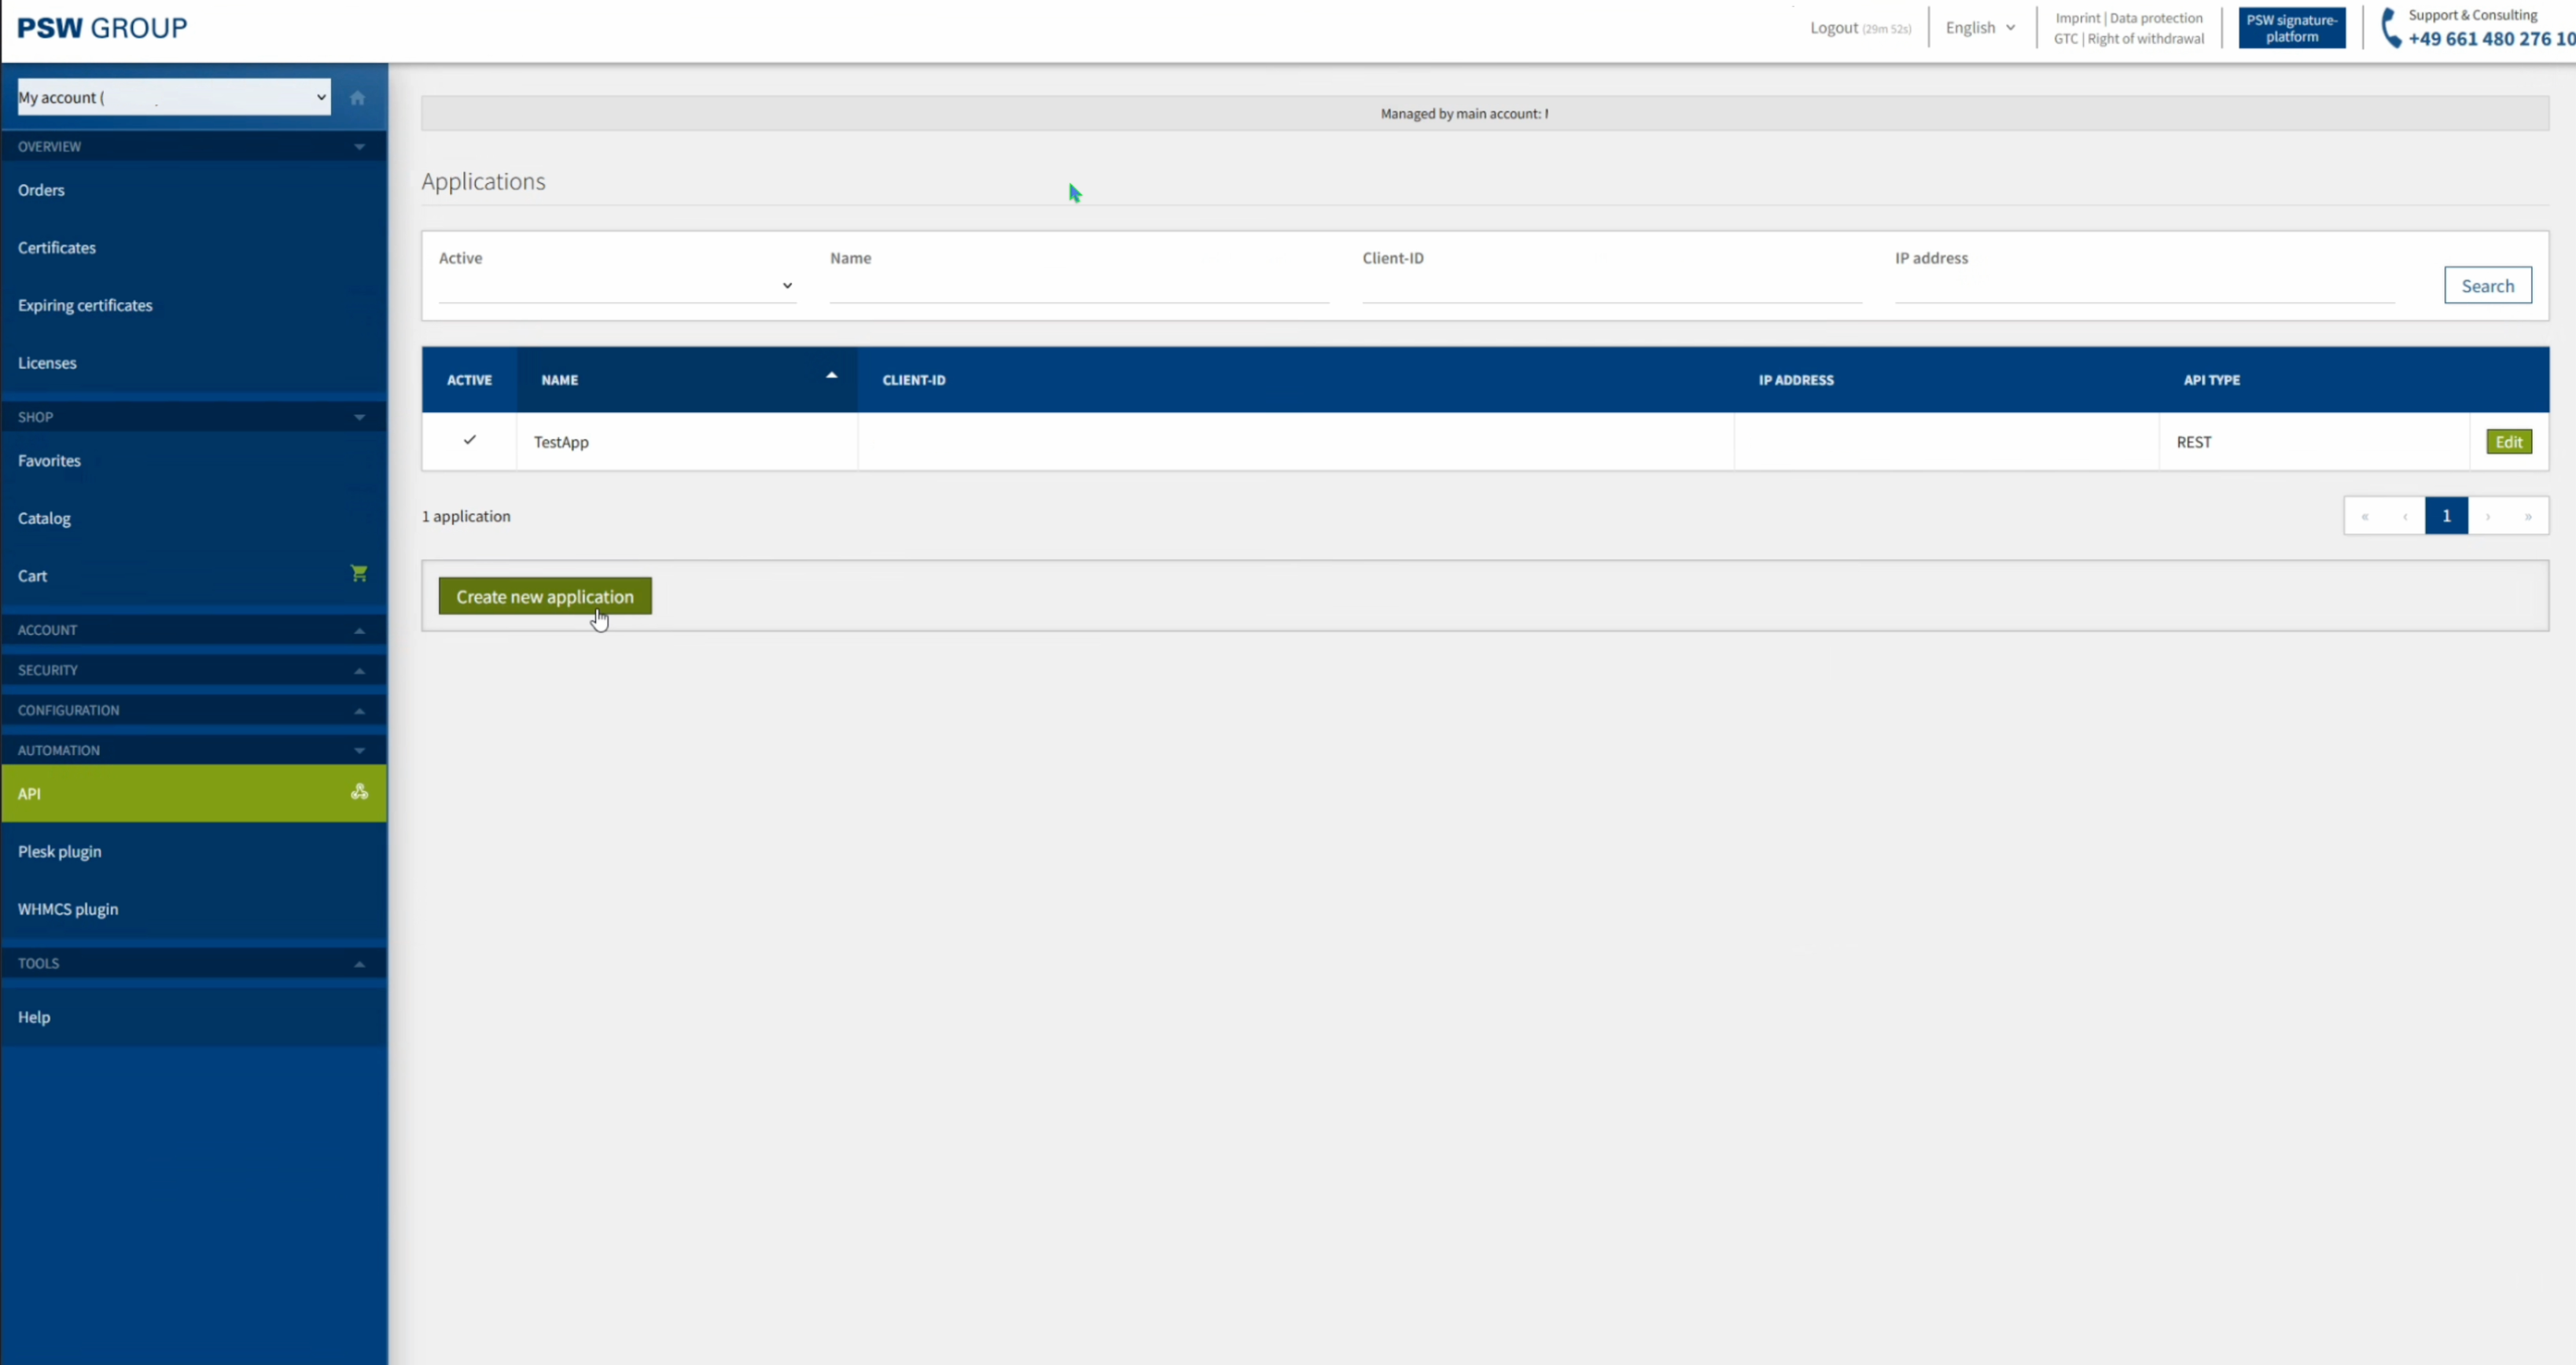
The 'My Account' option should be selected on the top left. Click API, under Automation in the left sidebar.
Click to reveal screenshot
-
Click on the Create new application button.
Click to reveal screenshot
-
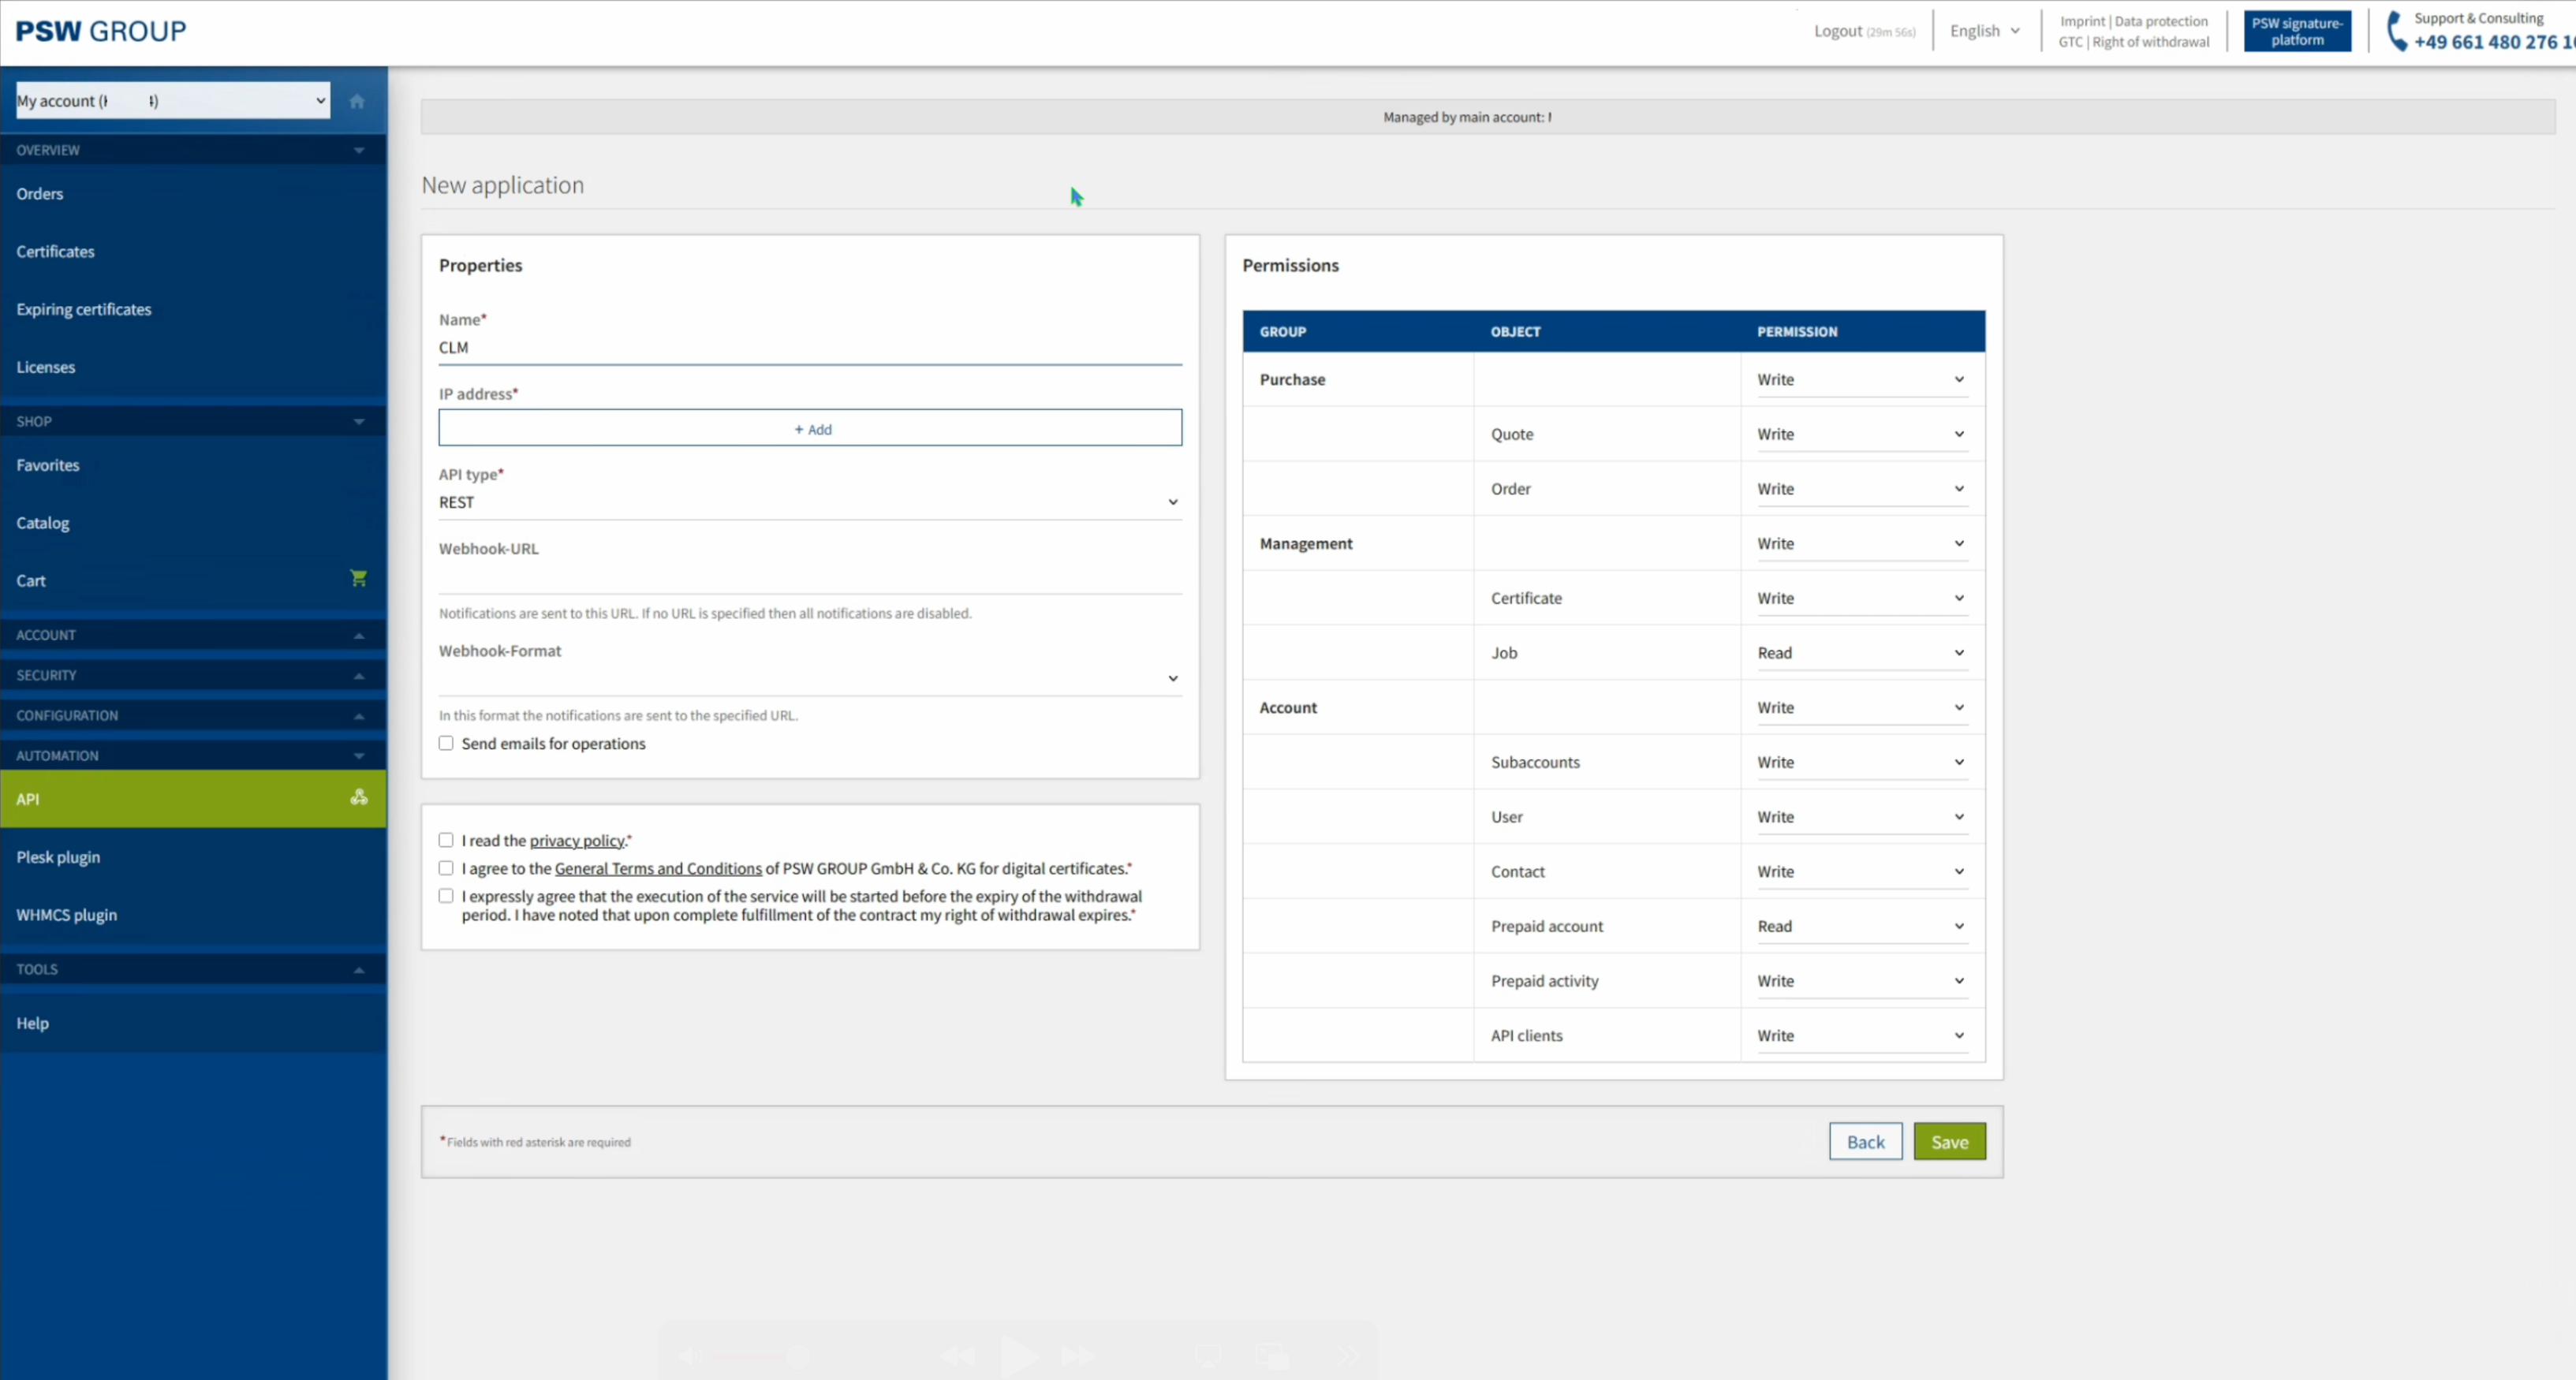
Fill in a Name and a source IP Address for your application. Also, select the API type.
Make sure the IP you fill in is already shared between you and PSW so that it becomes positive listed. Click to reveal screenshot
Click Save
-
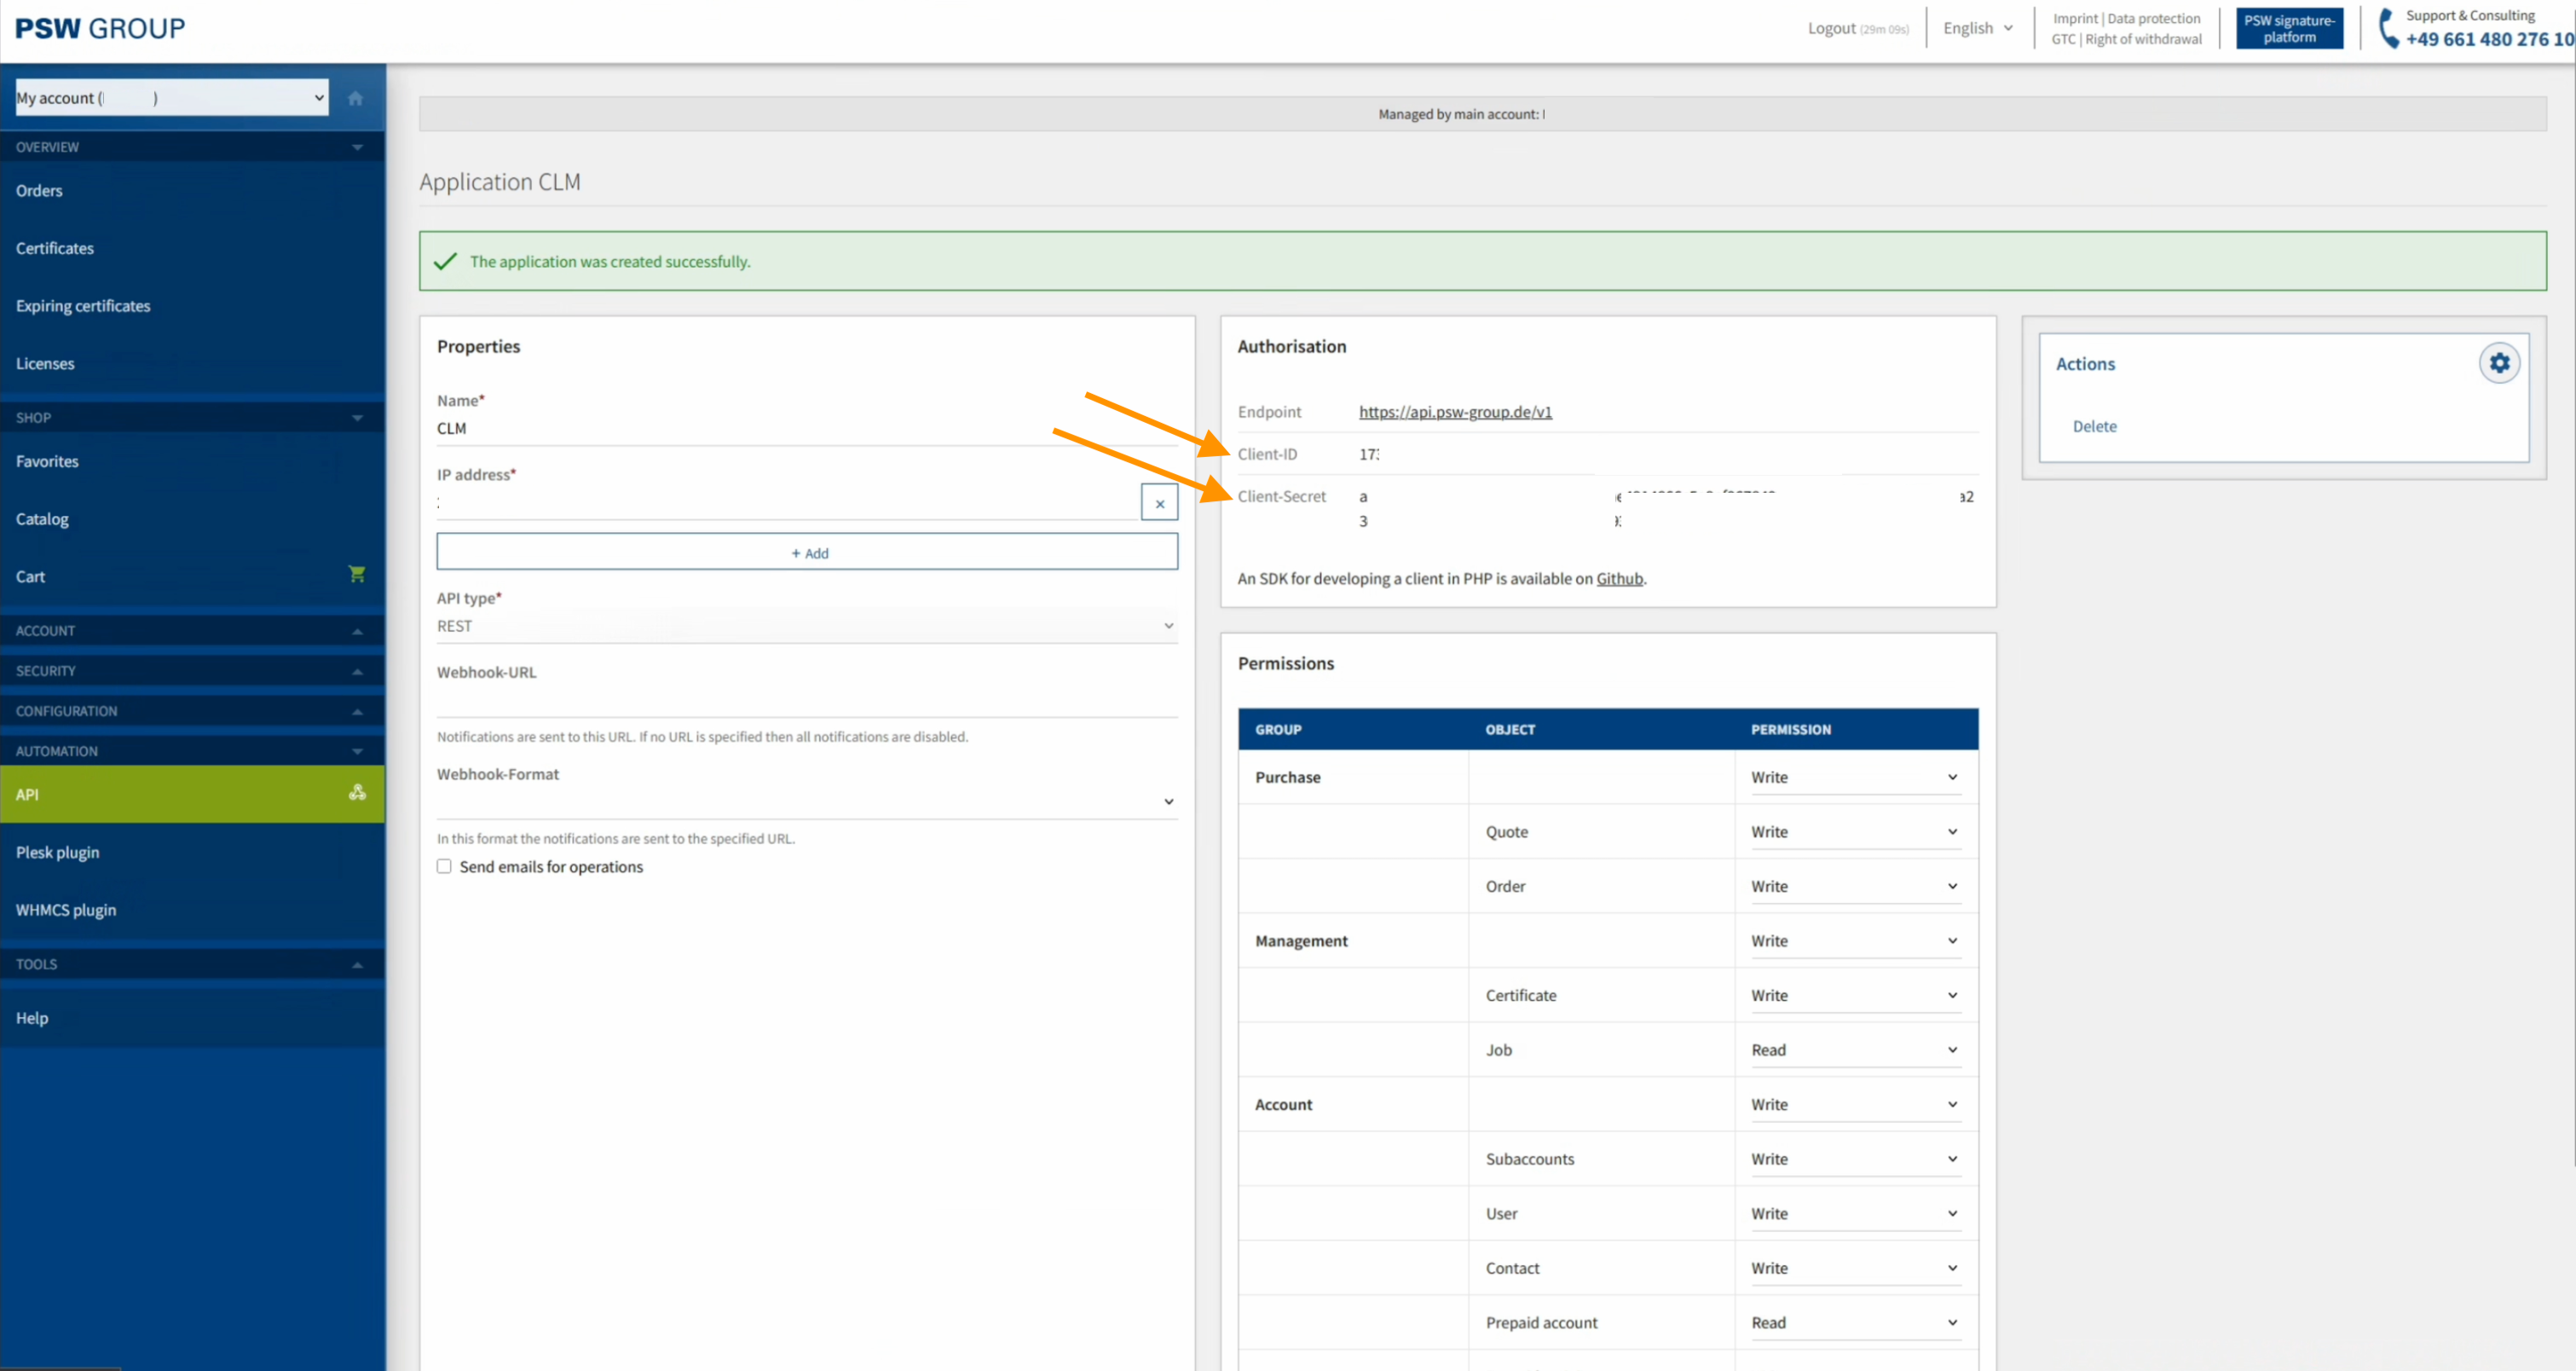
Your Client ID and Secret are now ready to use.
Click to reveal screenshot
MTG CLM Integration Steps
1. Creating a new Certificate Provider
In the Create Certificate Provider page, under Type, select PSW - Public CAs.
Click to reveal screenshot
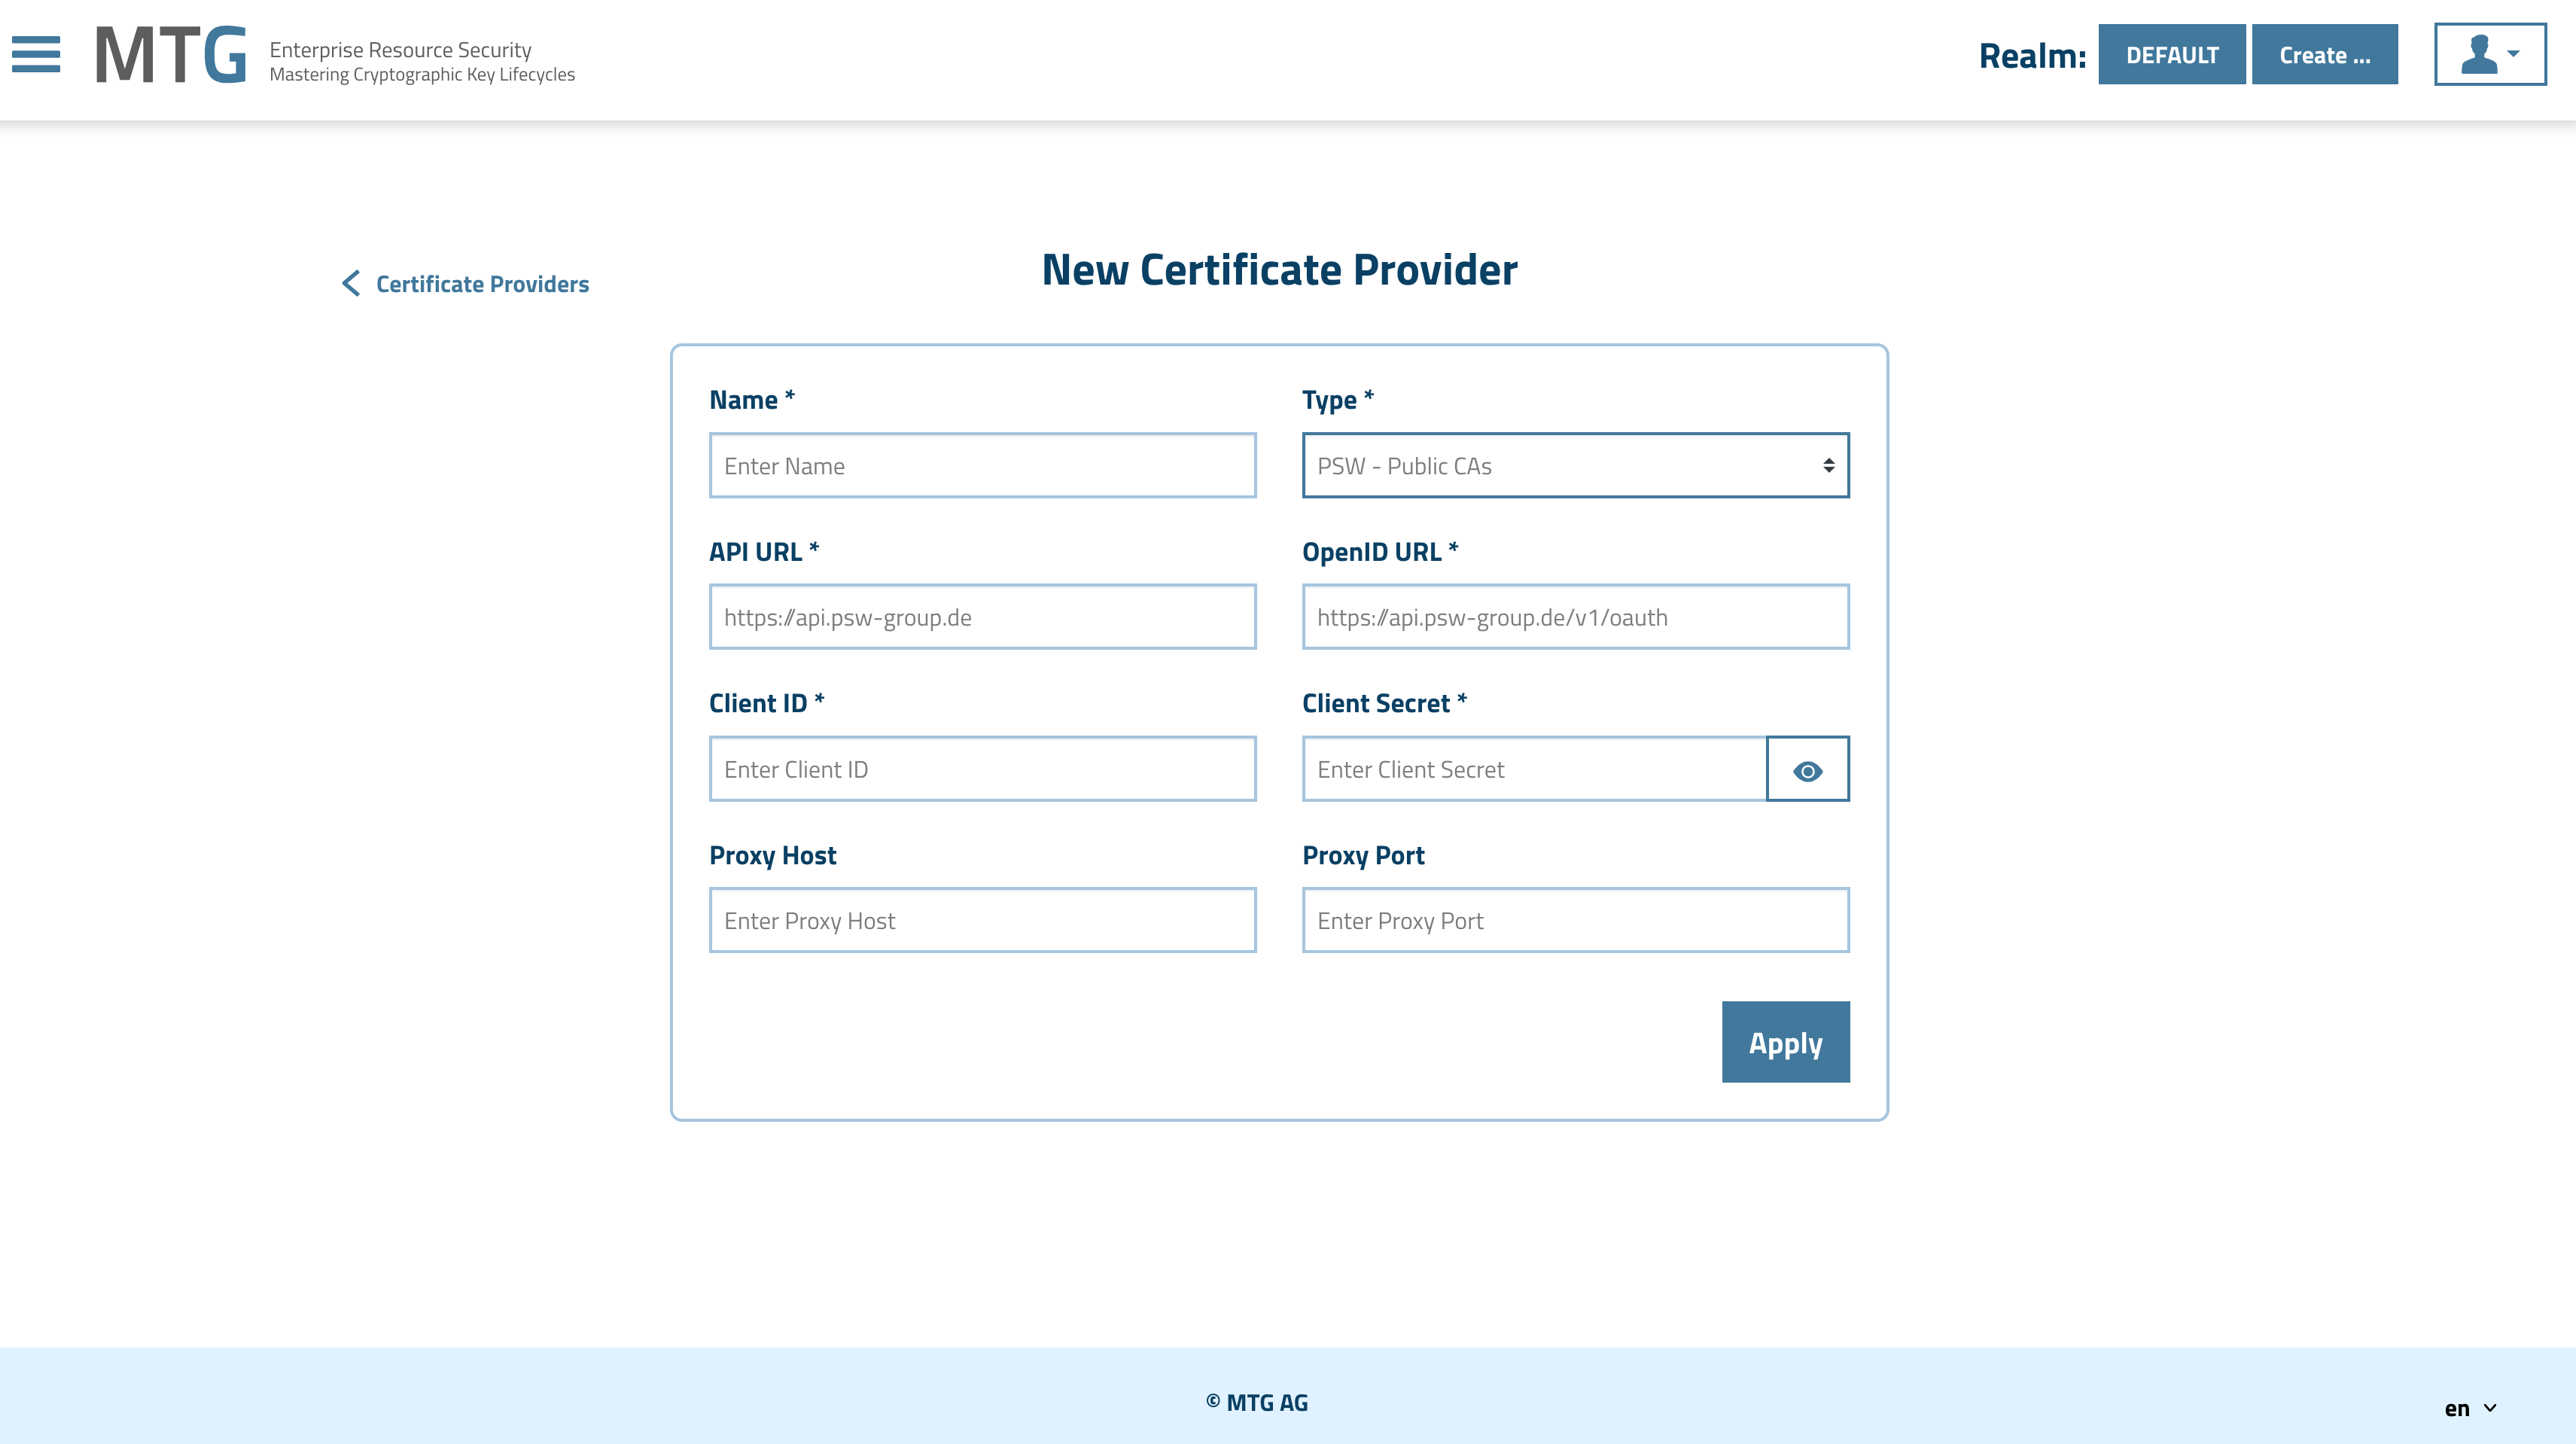
| Make sure to add the Client ID and Client Secret you created during the first part of the guide. |
2. Checking the Connection Status
In the next menu page the Connection Status should be indicated as "Good".
Click to reveal screenshot

3. Creating a Certificate
In the certificate creation wizard, create a new policy.
Click to reveal screenshot
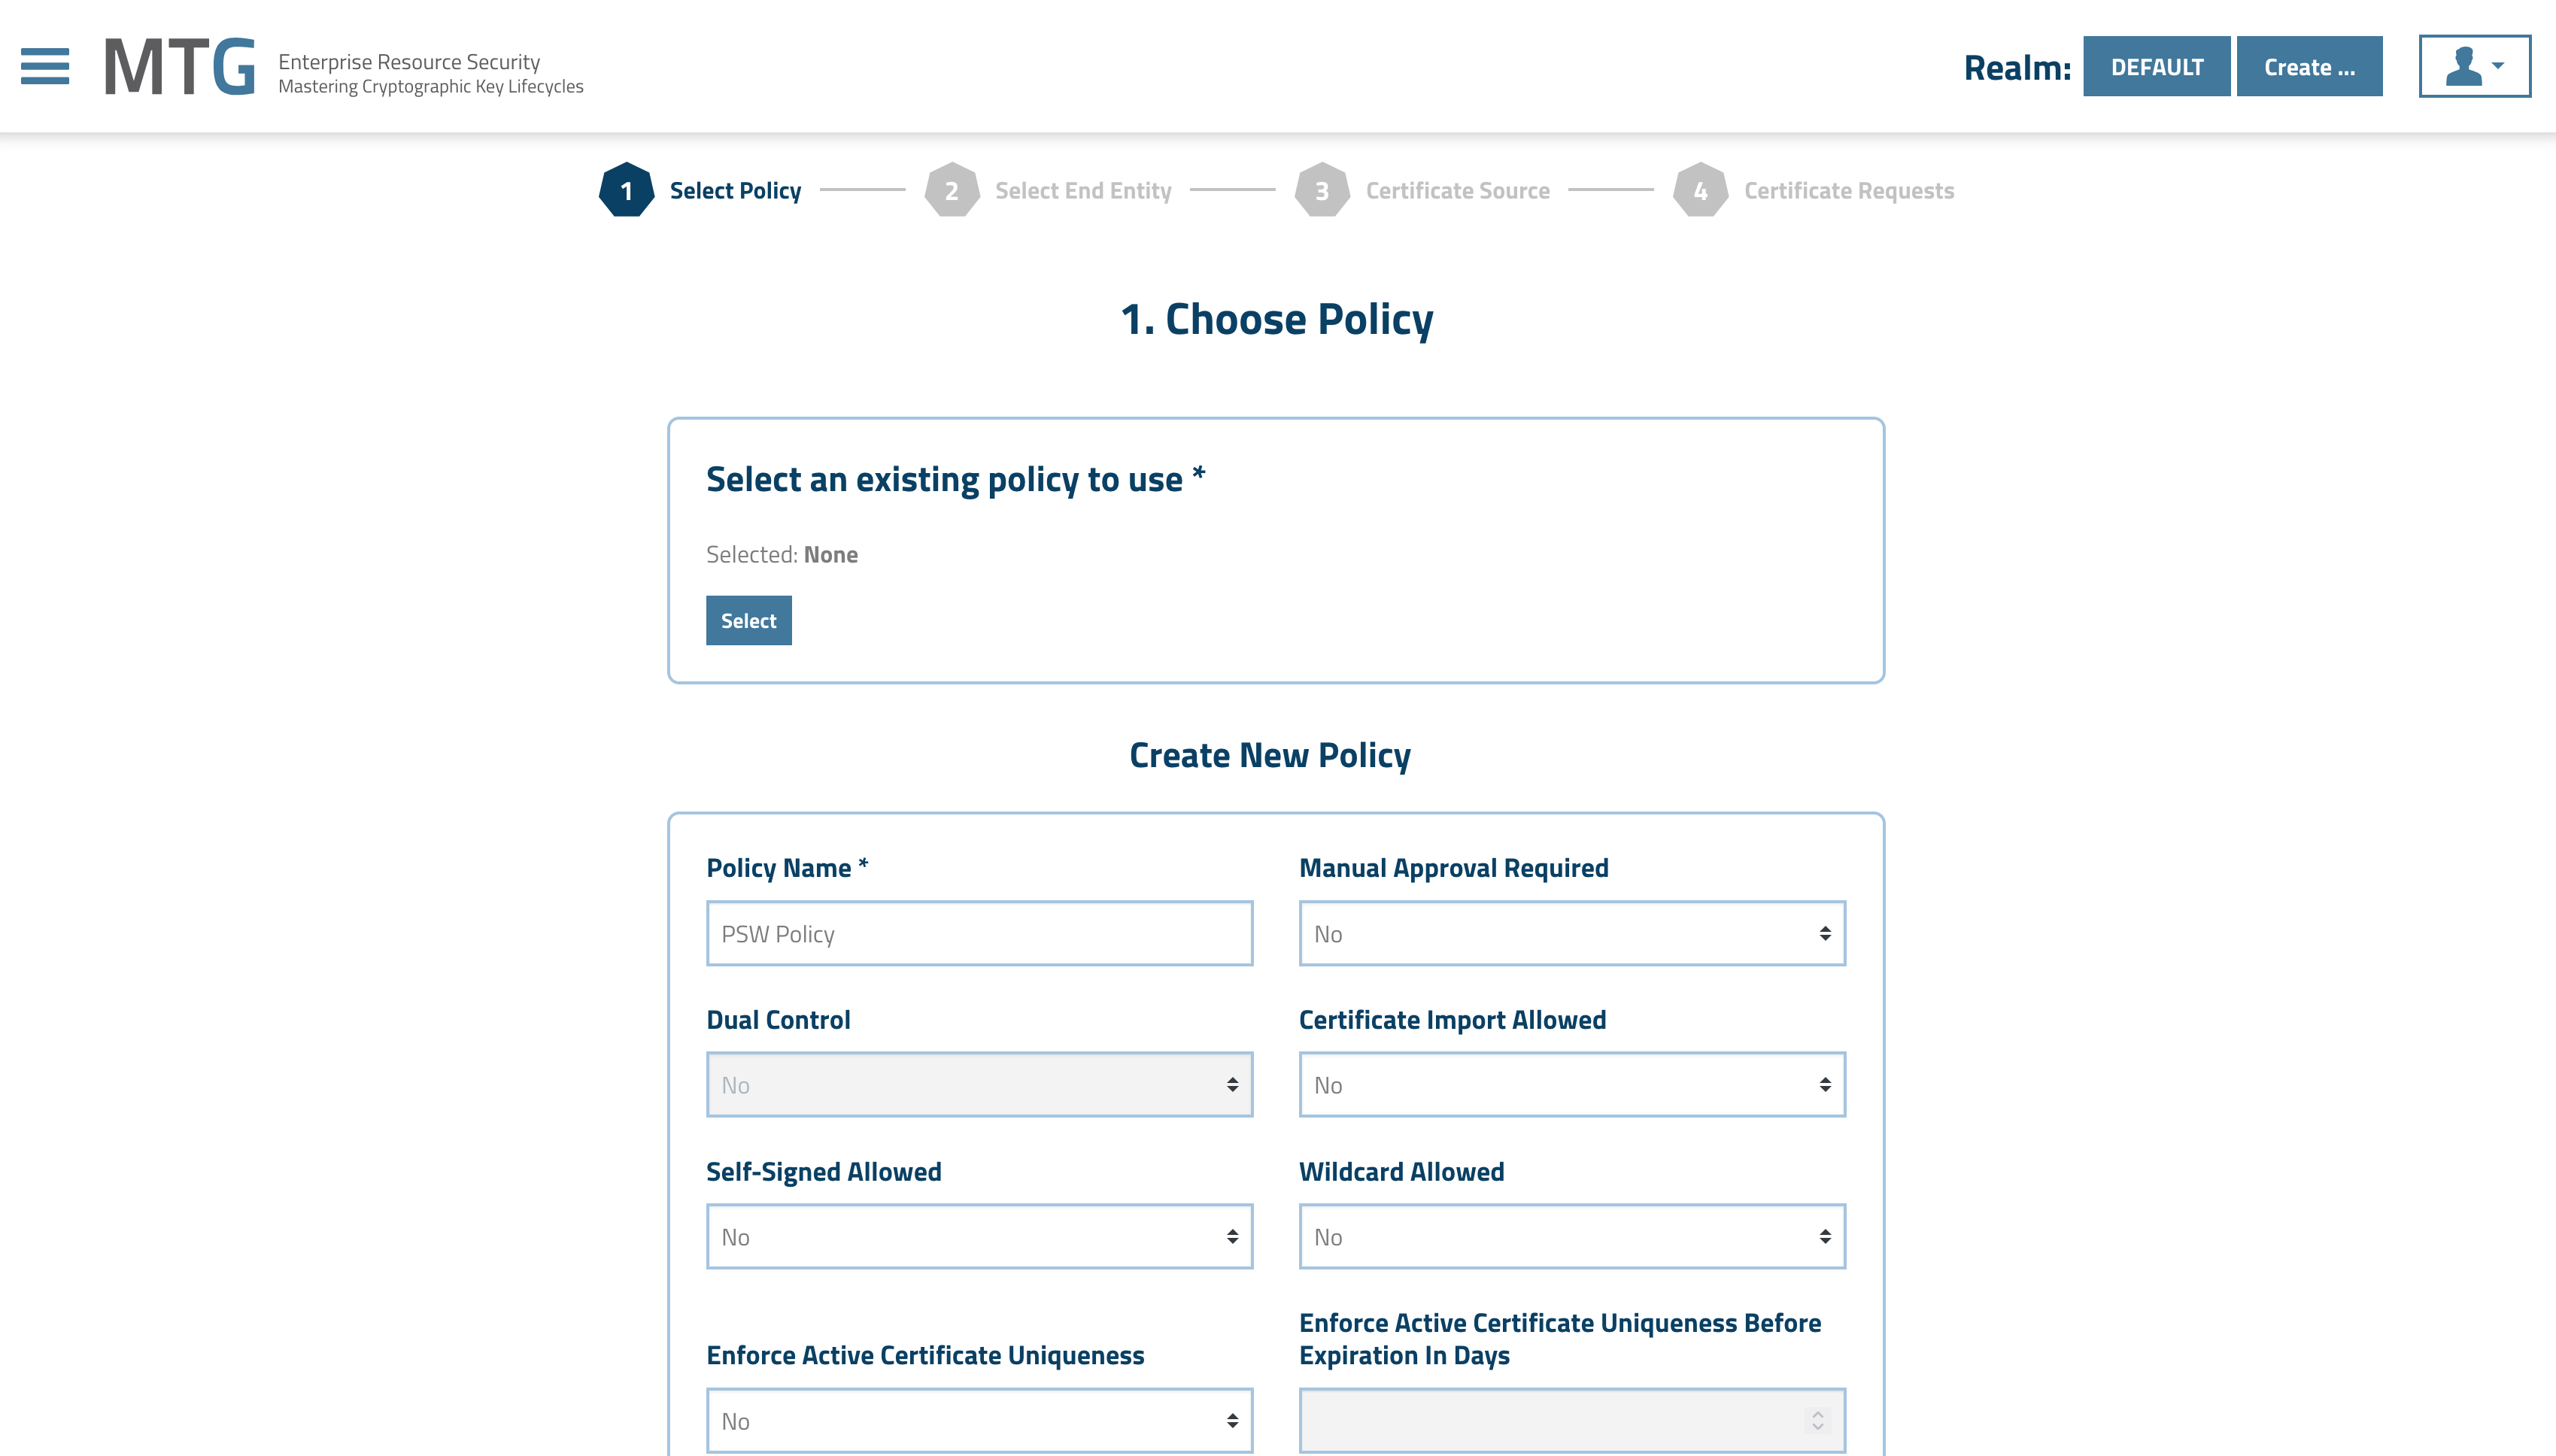
| This policy should be PSW specific and not the default one. |
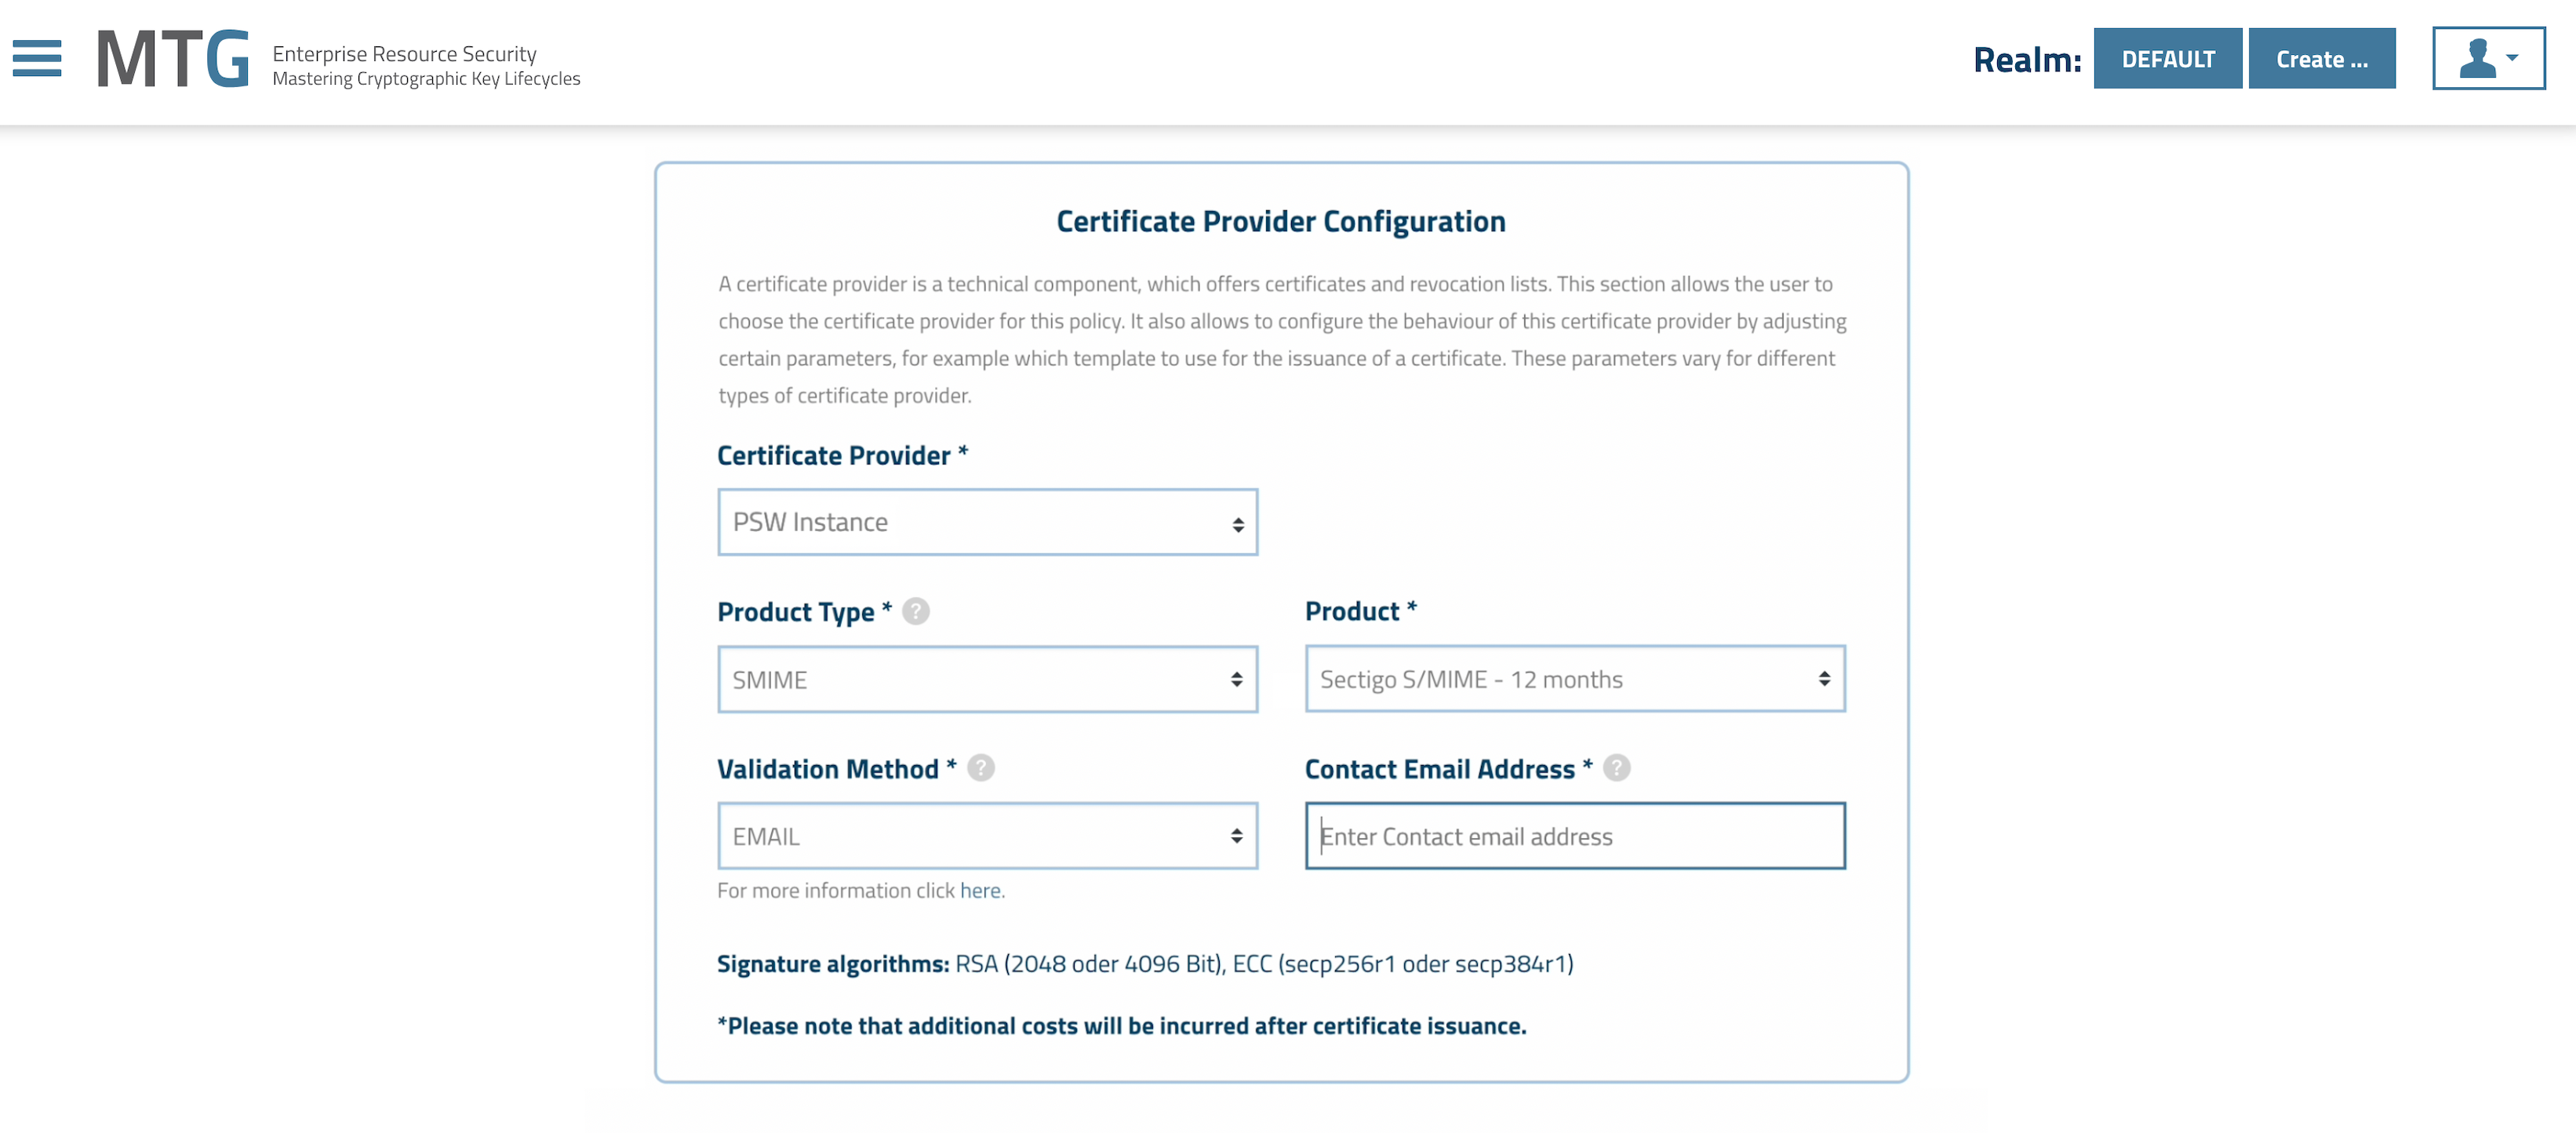
In the Certificate Provider Configuration section choose the PSW related certificate provided you created before and select the parameters according to your needs. Also, make sure you enter your e-mail address for verification purposes.
Click to reveal screenshot
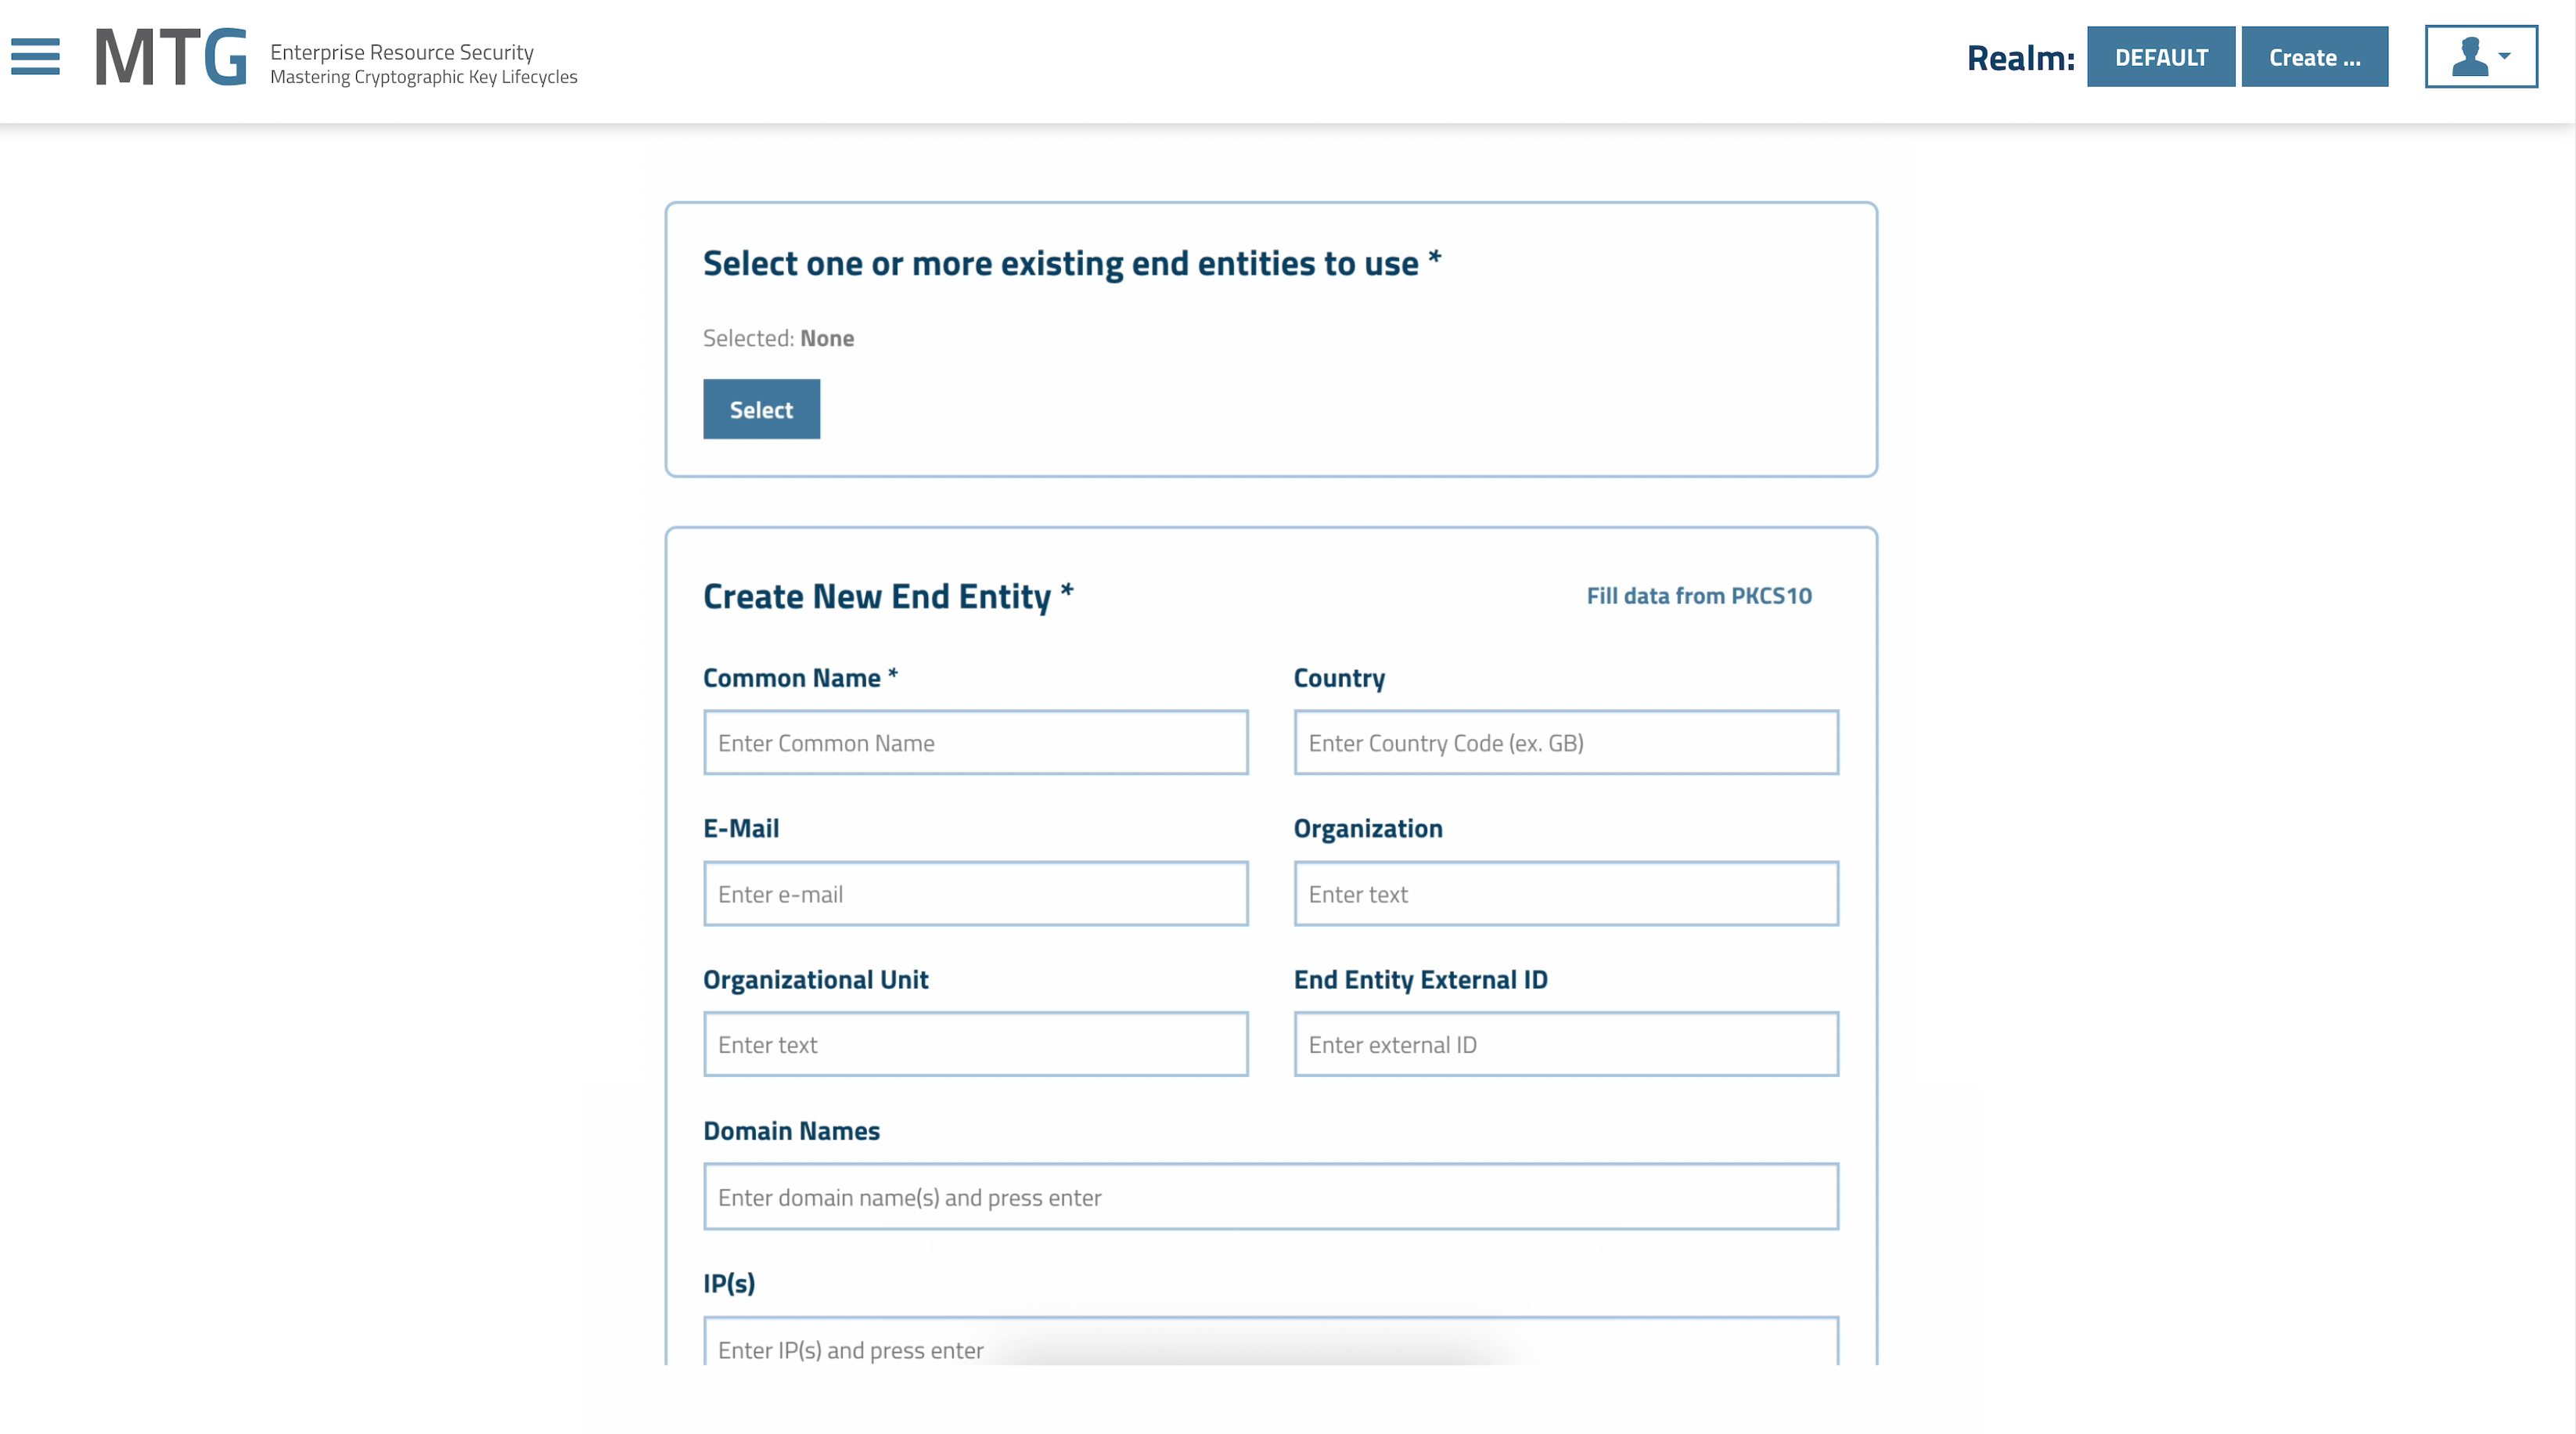
Fill in all appropriate fields.
Click to reveal screenshot
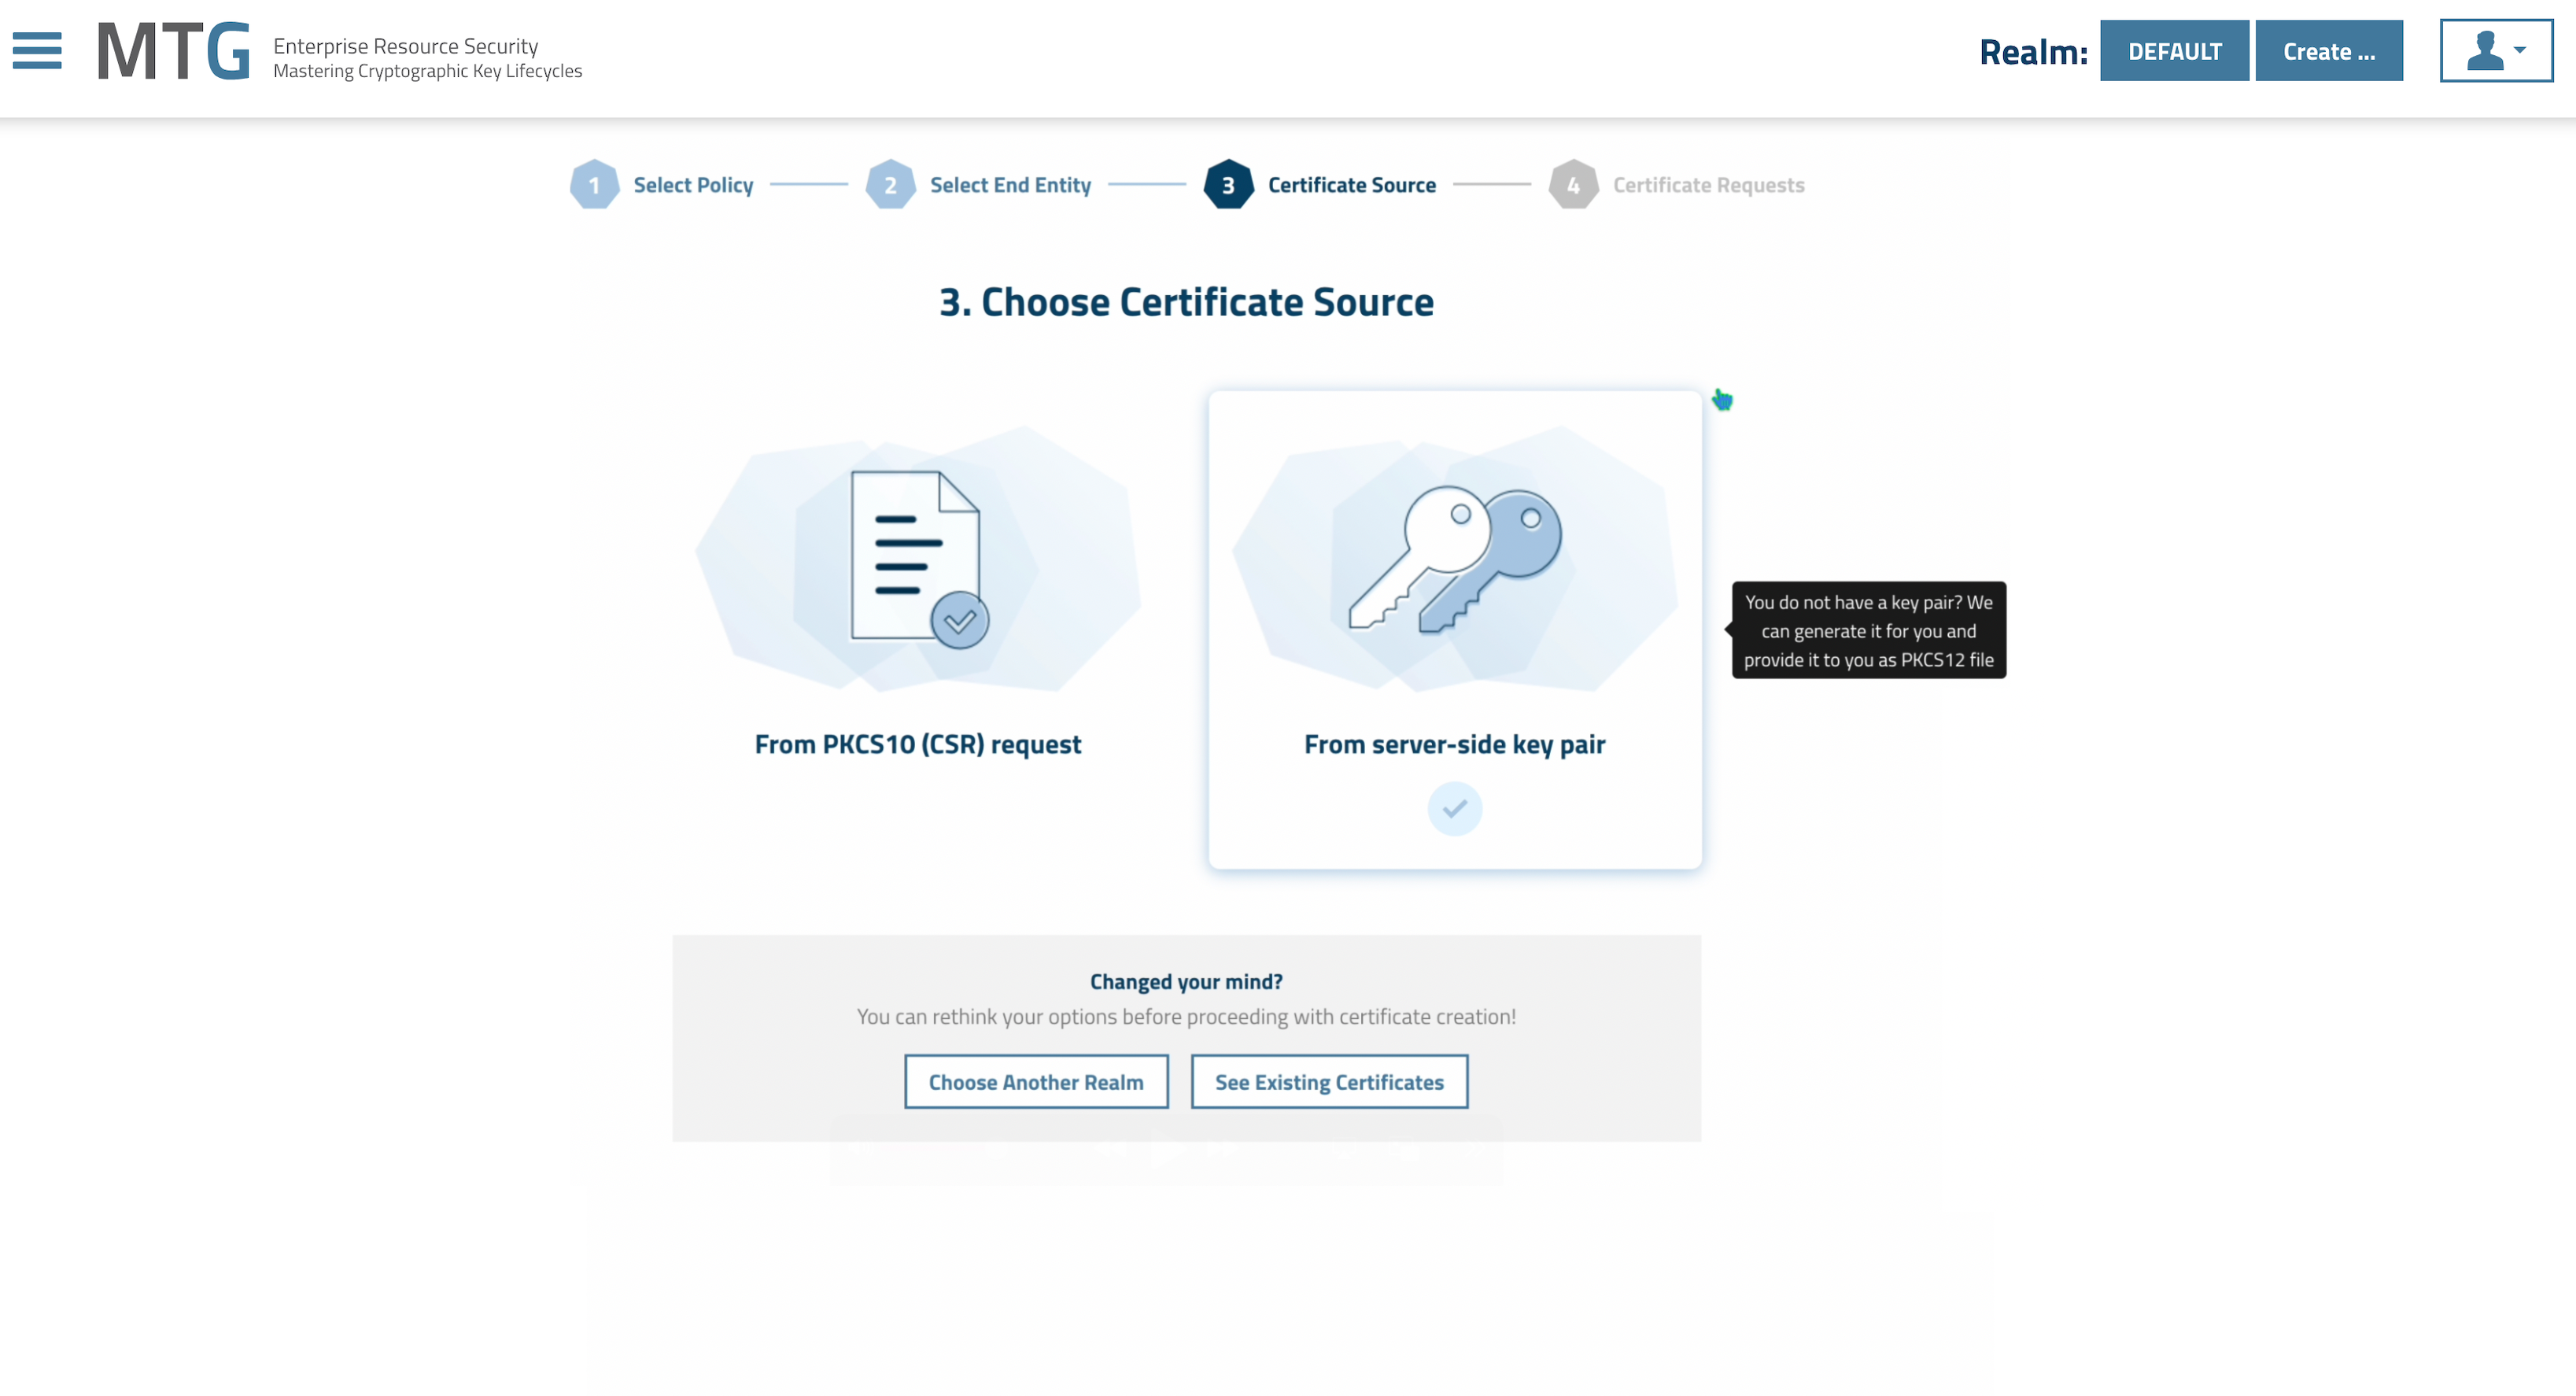
In the Choose Certificate Source menu choose From server-side key pair.
Click to reveal screenshot
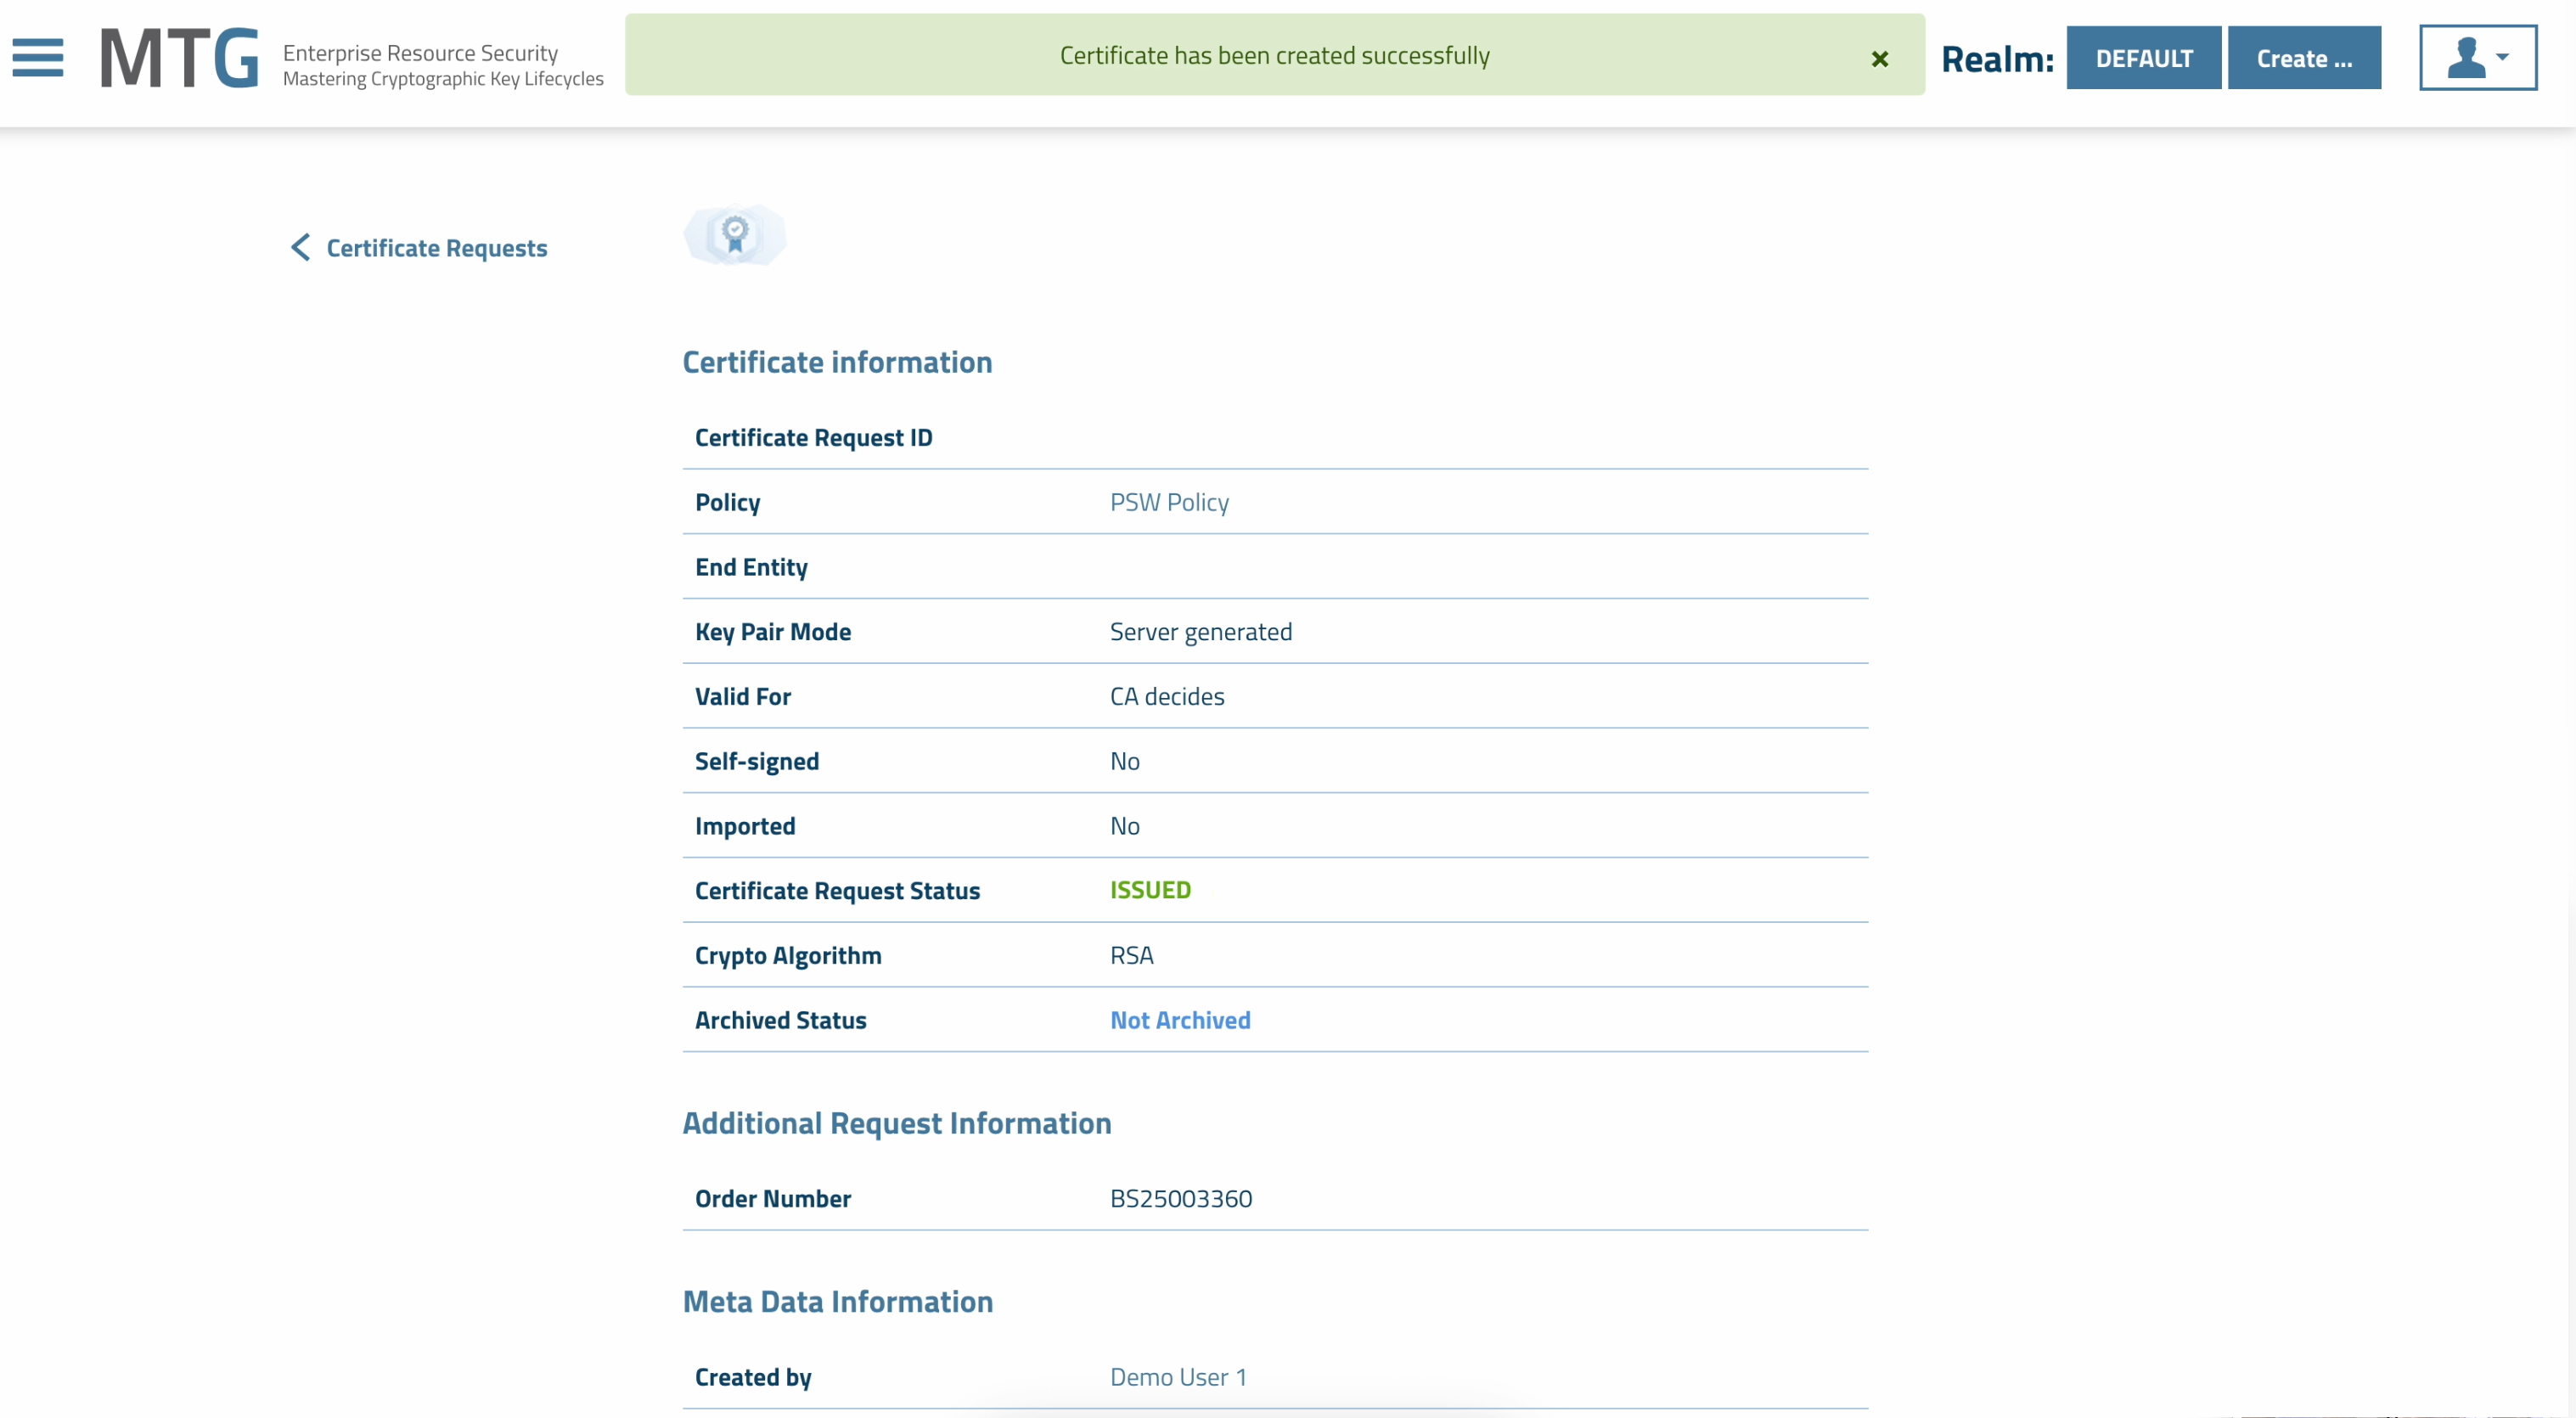
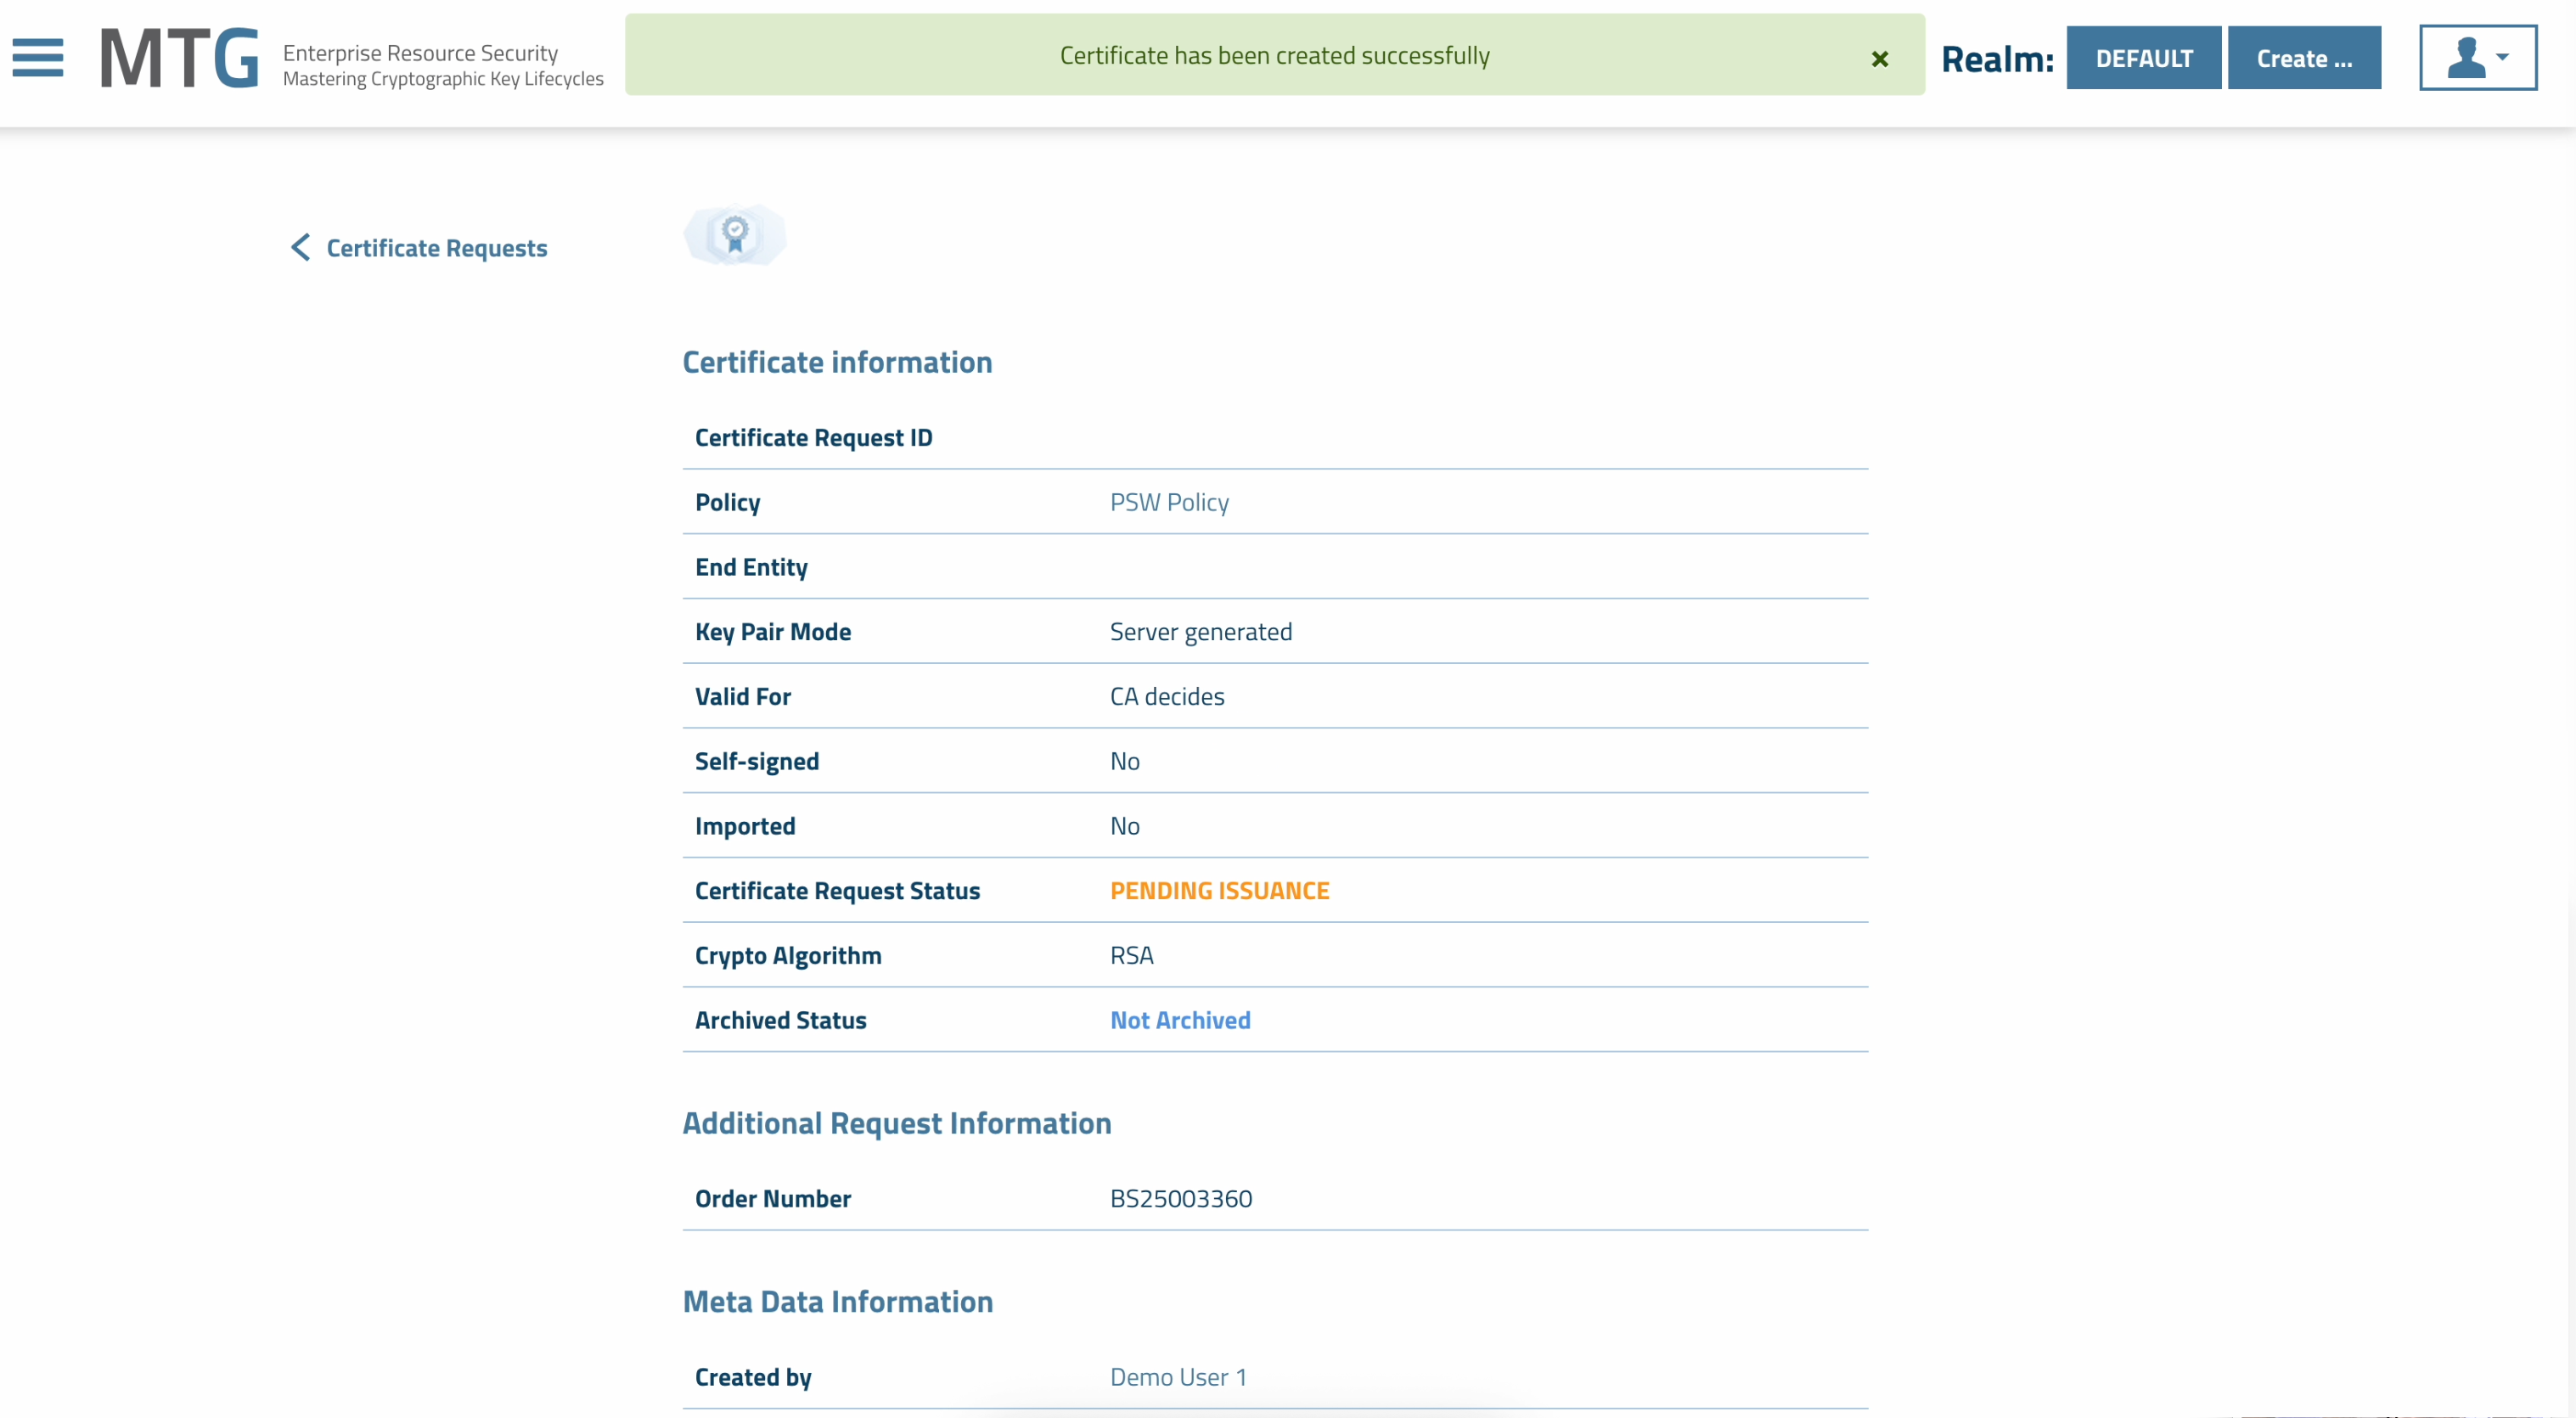
In the New Server Side Certificate Request menu select your Public Key Algorithm and click Apply to proceed.
You should be now seeing a similar screen to the above, with an order number and a Certificate Request Status. MTG CLM checks regularly and updates this Status automatically.
Click to reveal screenshot
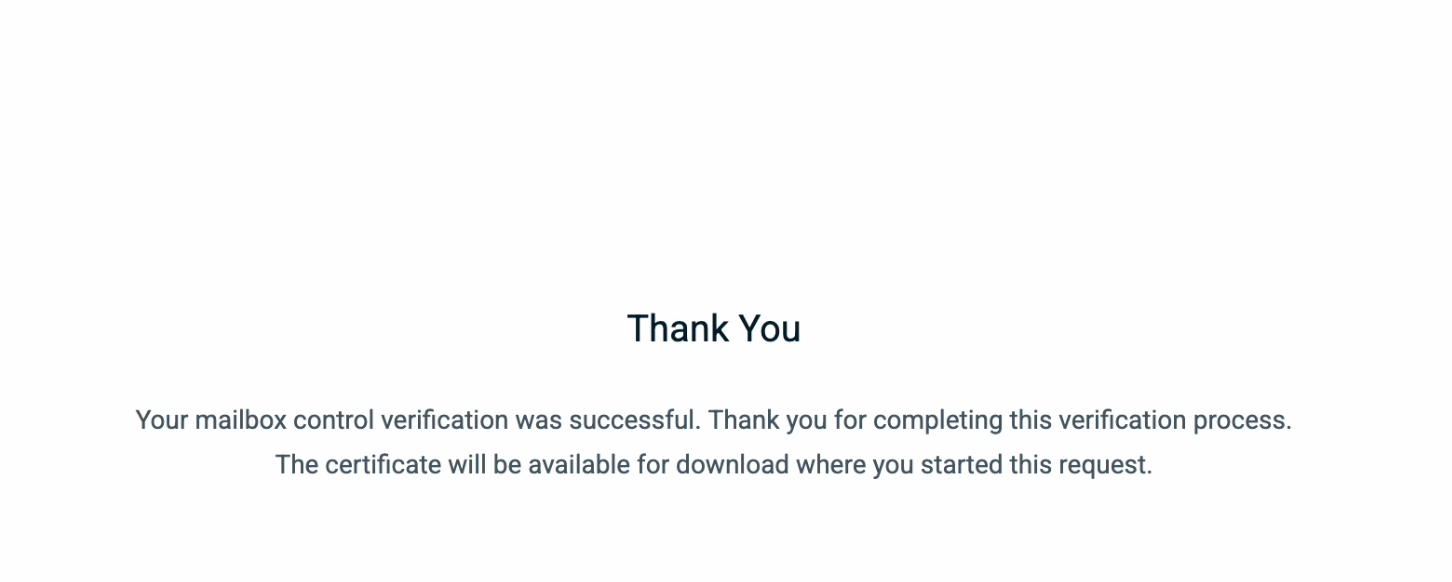
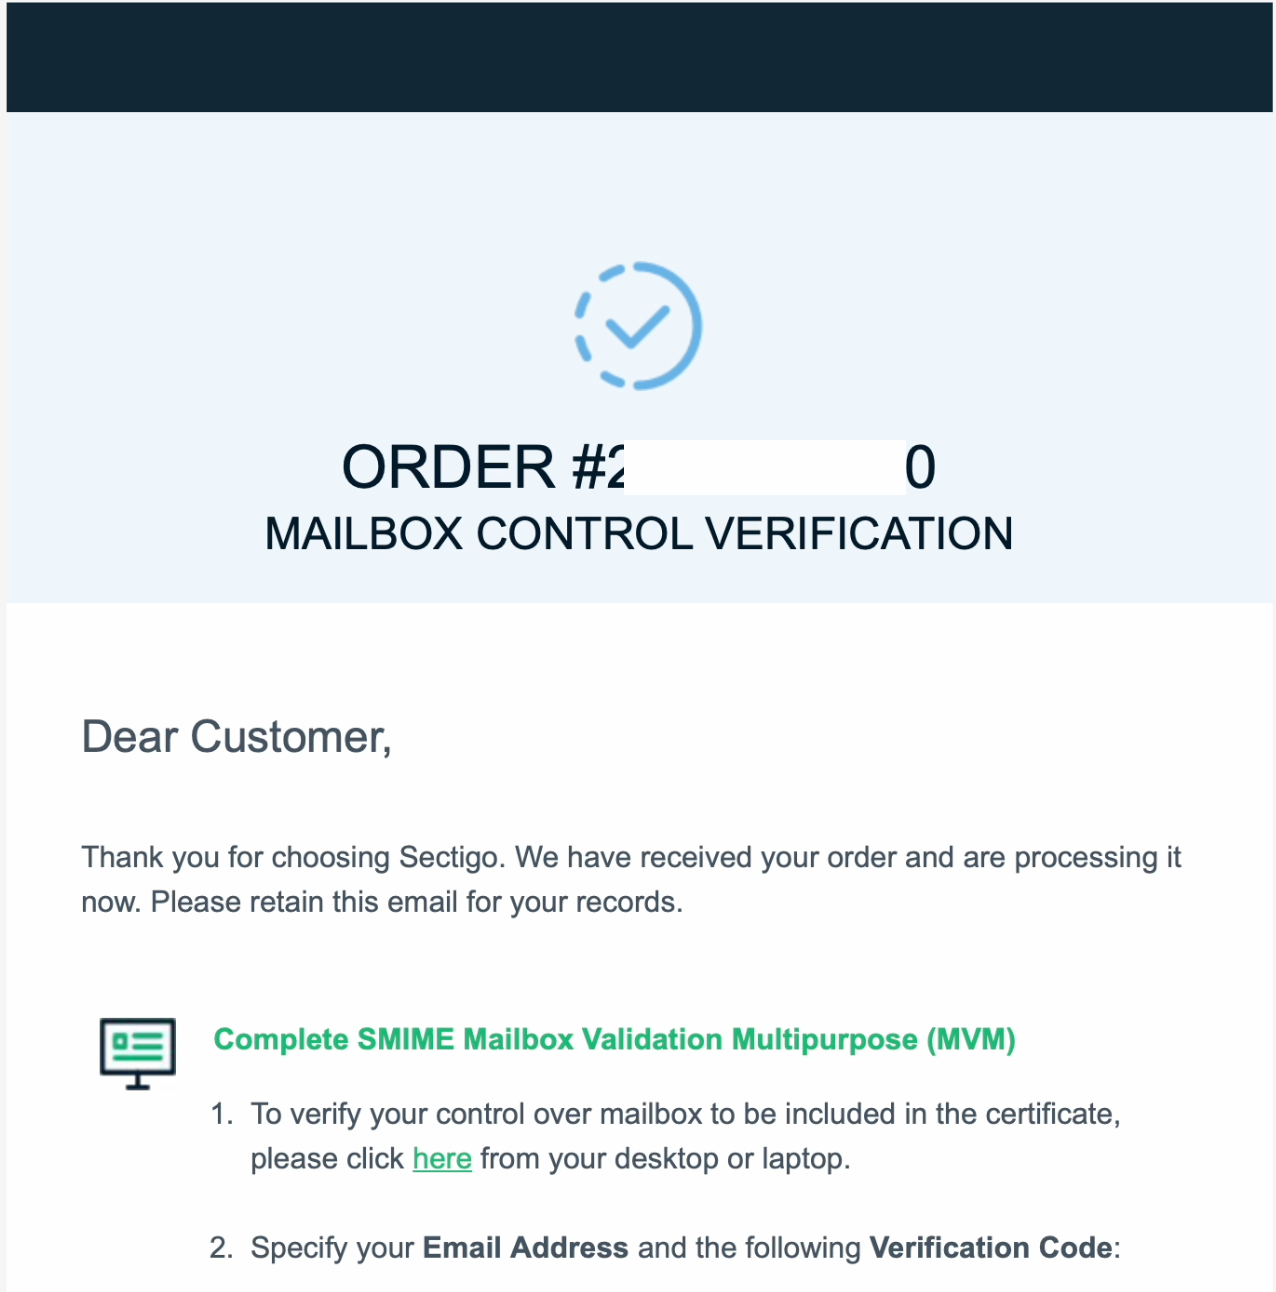
4. Checking the validation e-mail
After a few minutes you should get a verification e-mail from Sectigo.
Click on the link for verification.
Click to reveal screenshot
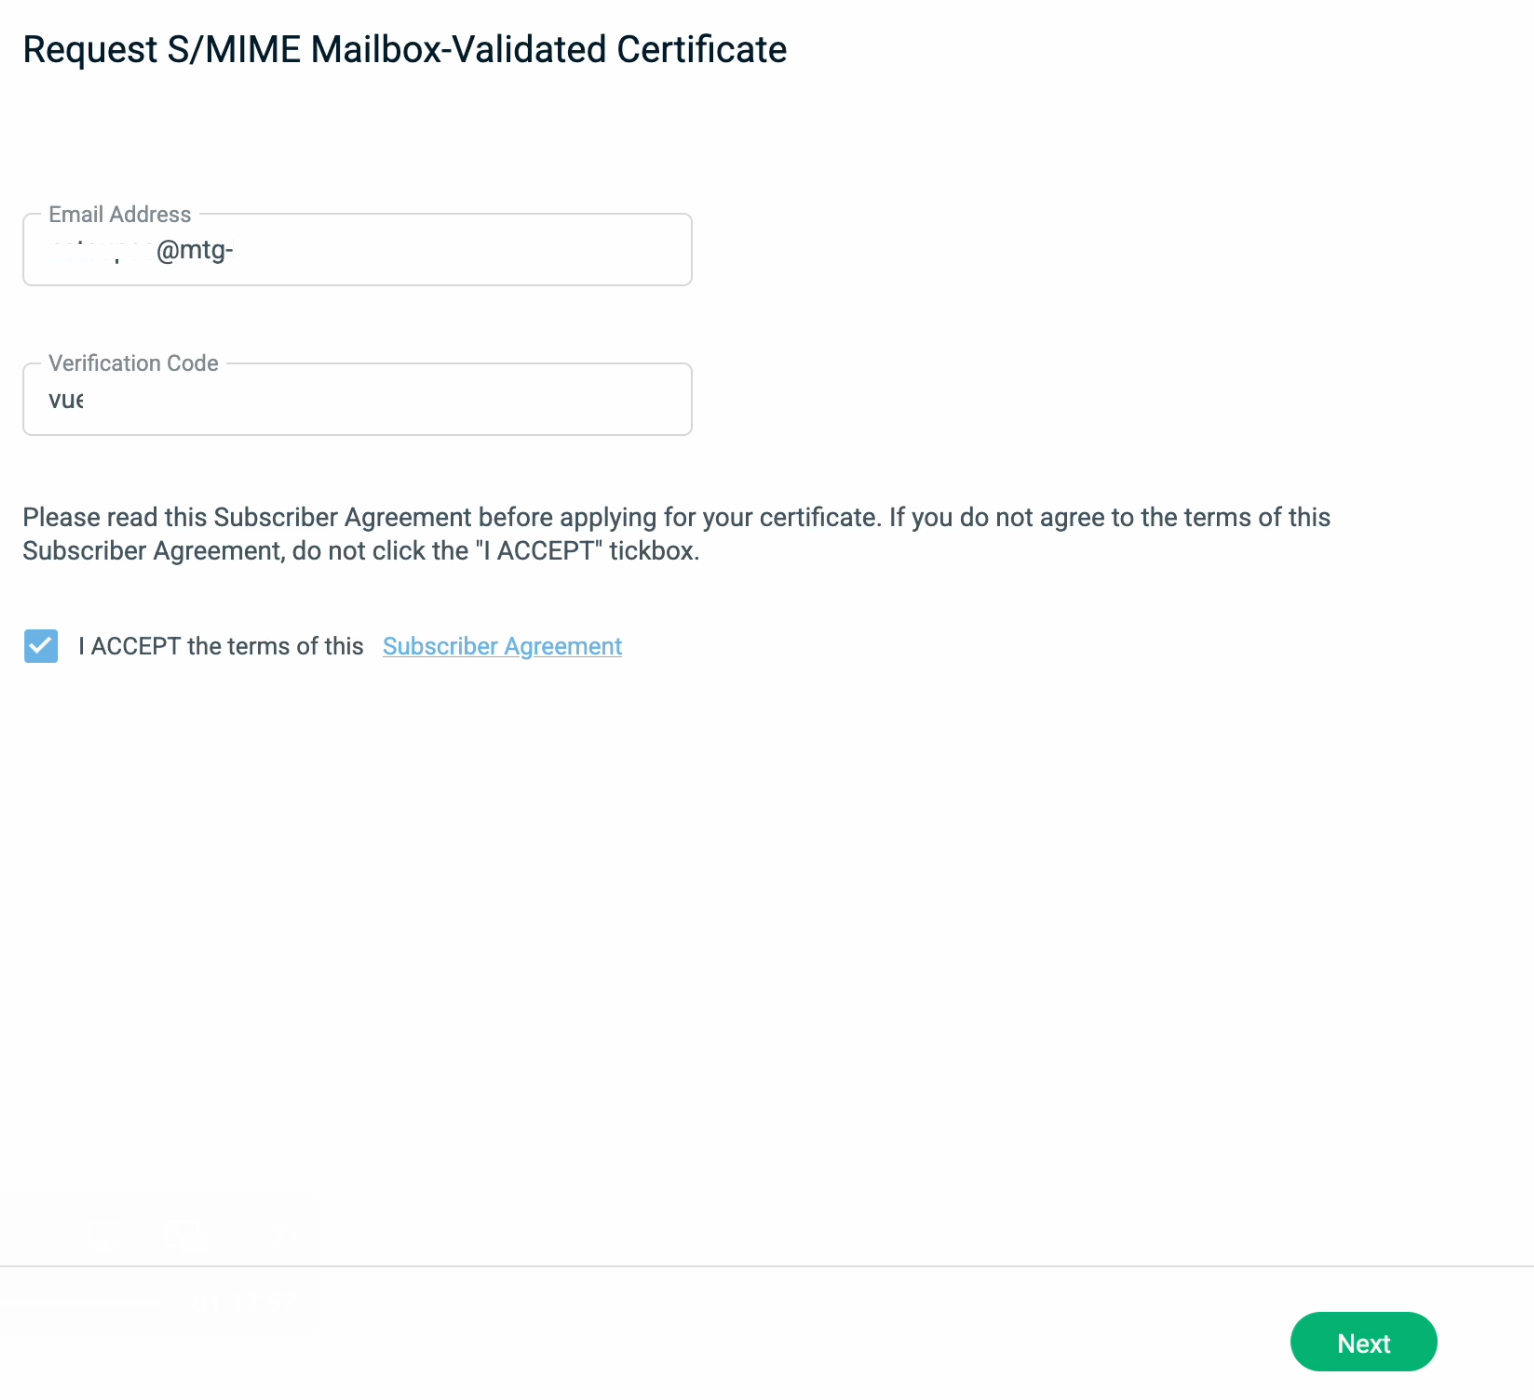
On the following screen click Next.
Click to reveal screenshot
The 'Thank you' screen appears, meaning the verification was completed successfully.
Click to reveal screenshot