|
For the latest version, please use Certificate Lifecycle Manager 6.3.0! |
Integrating Microsoft Entra ID with Keycloak for MTG CLM Authentication
This guide walks you through configuring Microsoft Entra ID (formerly Azure AD) as an identity provider for Keycloak, enabling single sign-on for MTG CLM users.
Prerequisites: Microsoft Entra ID administrative privileges, Keycloak administrative access, and MTG CLM environment access.
Azure AD Application Registration
For the Azure AD configuration steps, refer to our existing guide: Integrating MTG SCEP with Microsoft Intune for Device Certificate Enrollment.
The application registration process is identical, with these specific parameters for Keycloak integration:
-
Application Name: "MTG CLM Keycloak"
-
Redirect URI: Select "Web" as platform and keep URL empty for starters (this will be changed later).
Configure Keycloak Identity Provider
Access Identity Provider Configuration
-
Sign in to your Keycloak administration console.
-
Navigate to your target realm for MTG CLM integration.
-
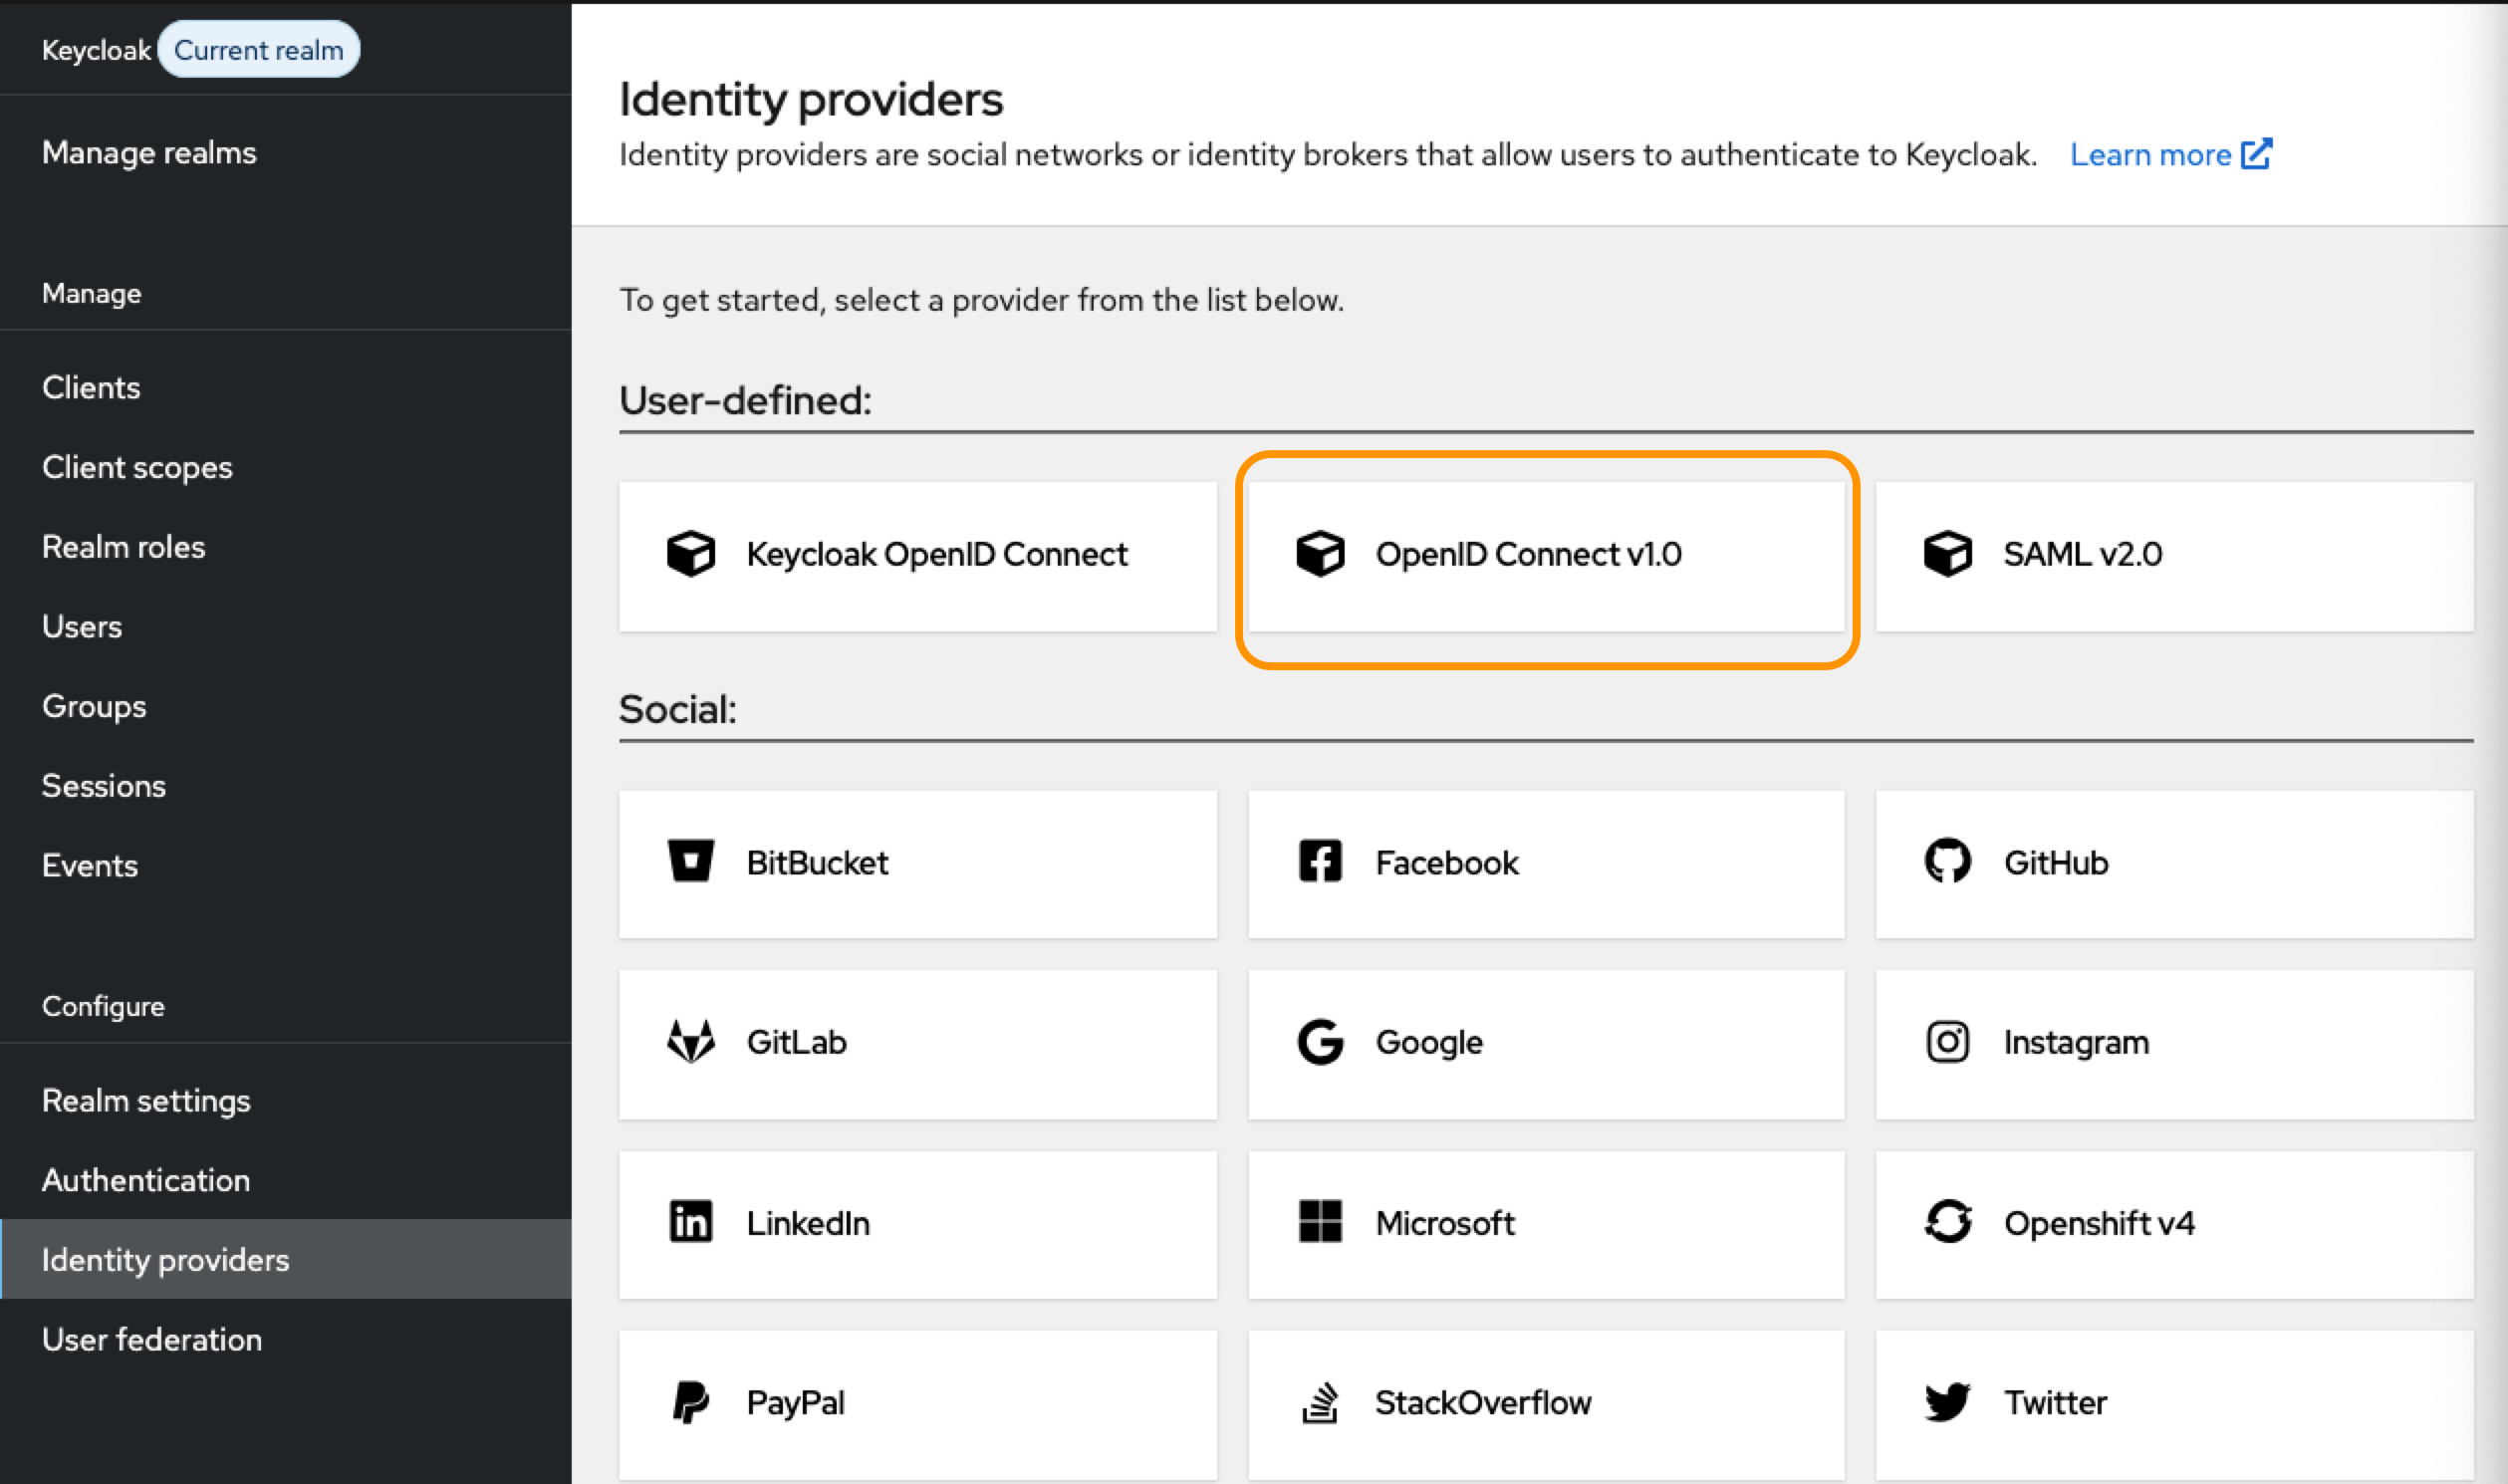
Select Identity Providers from the left navigation menu.
-
Click OpenID Connect v1.0.
Click to reveal screenshot
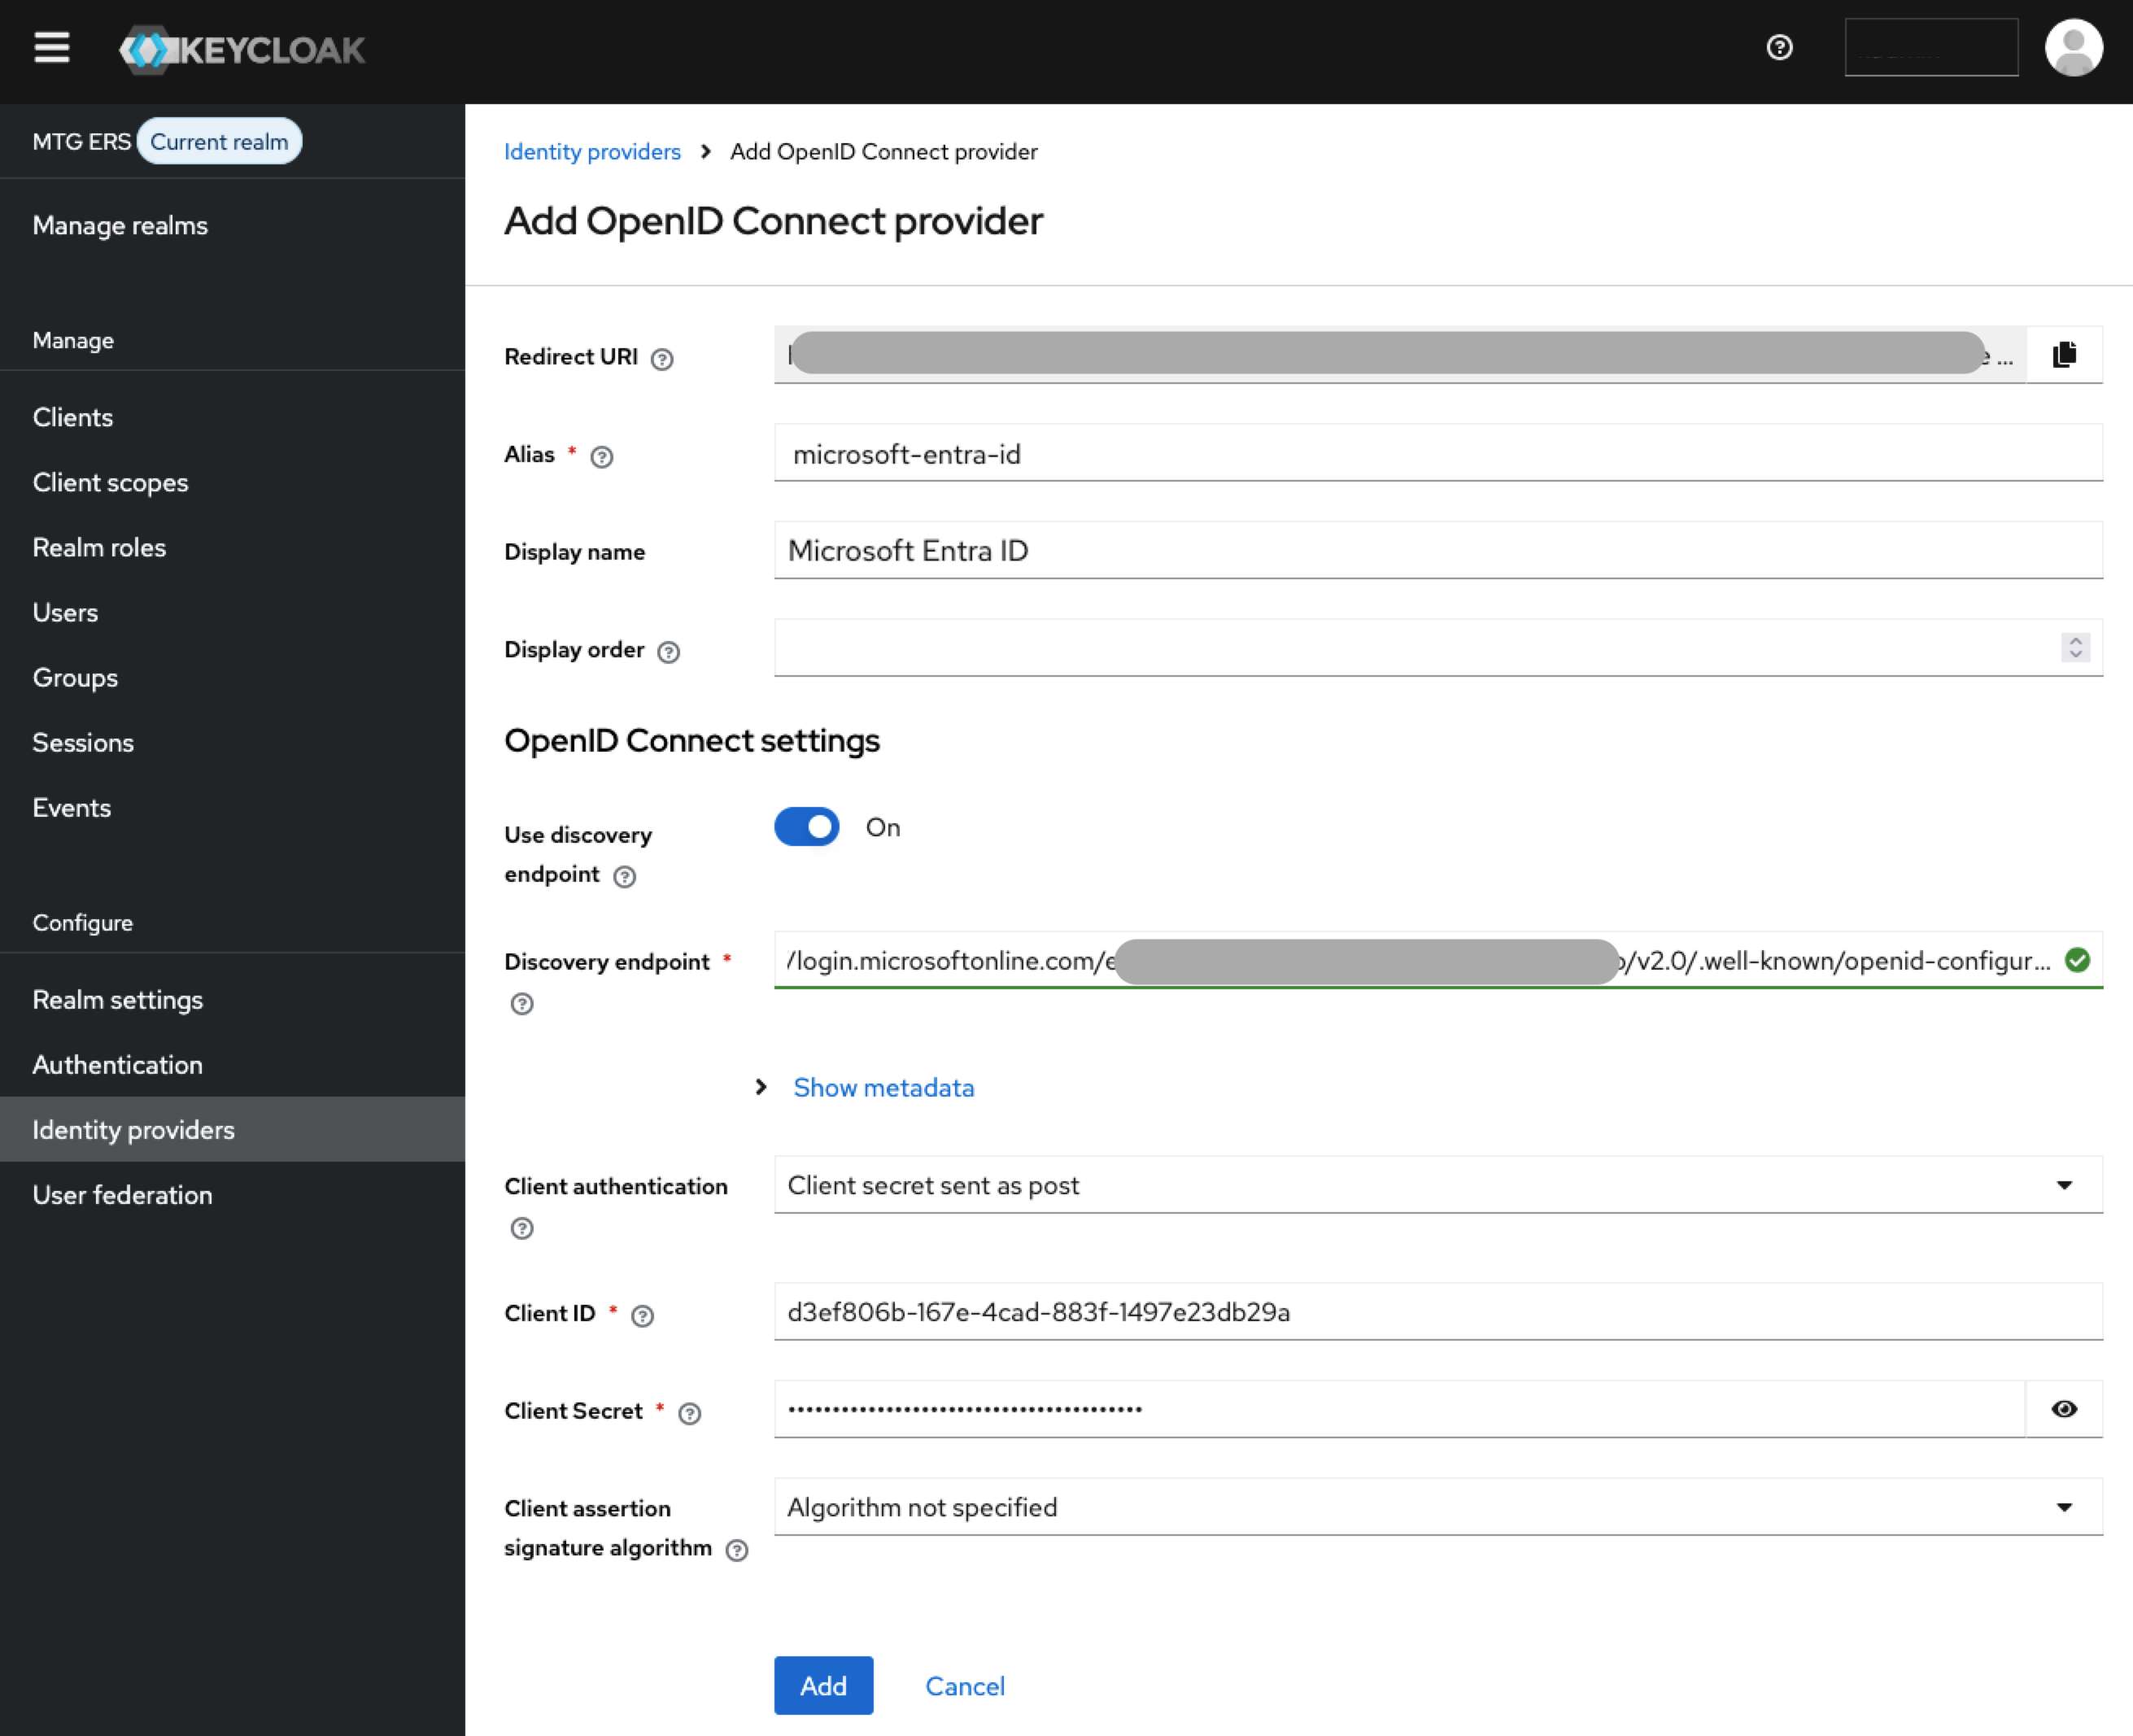
Configure Provider Settings
1. Basic Configuration
-
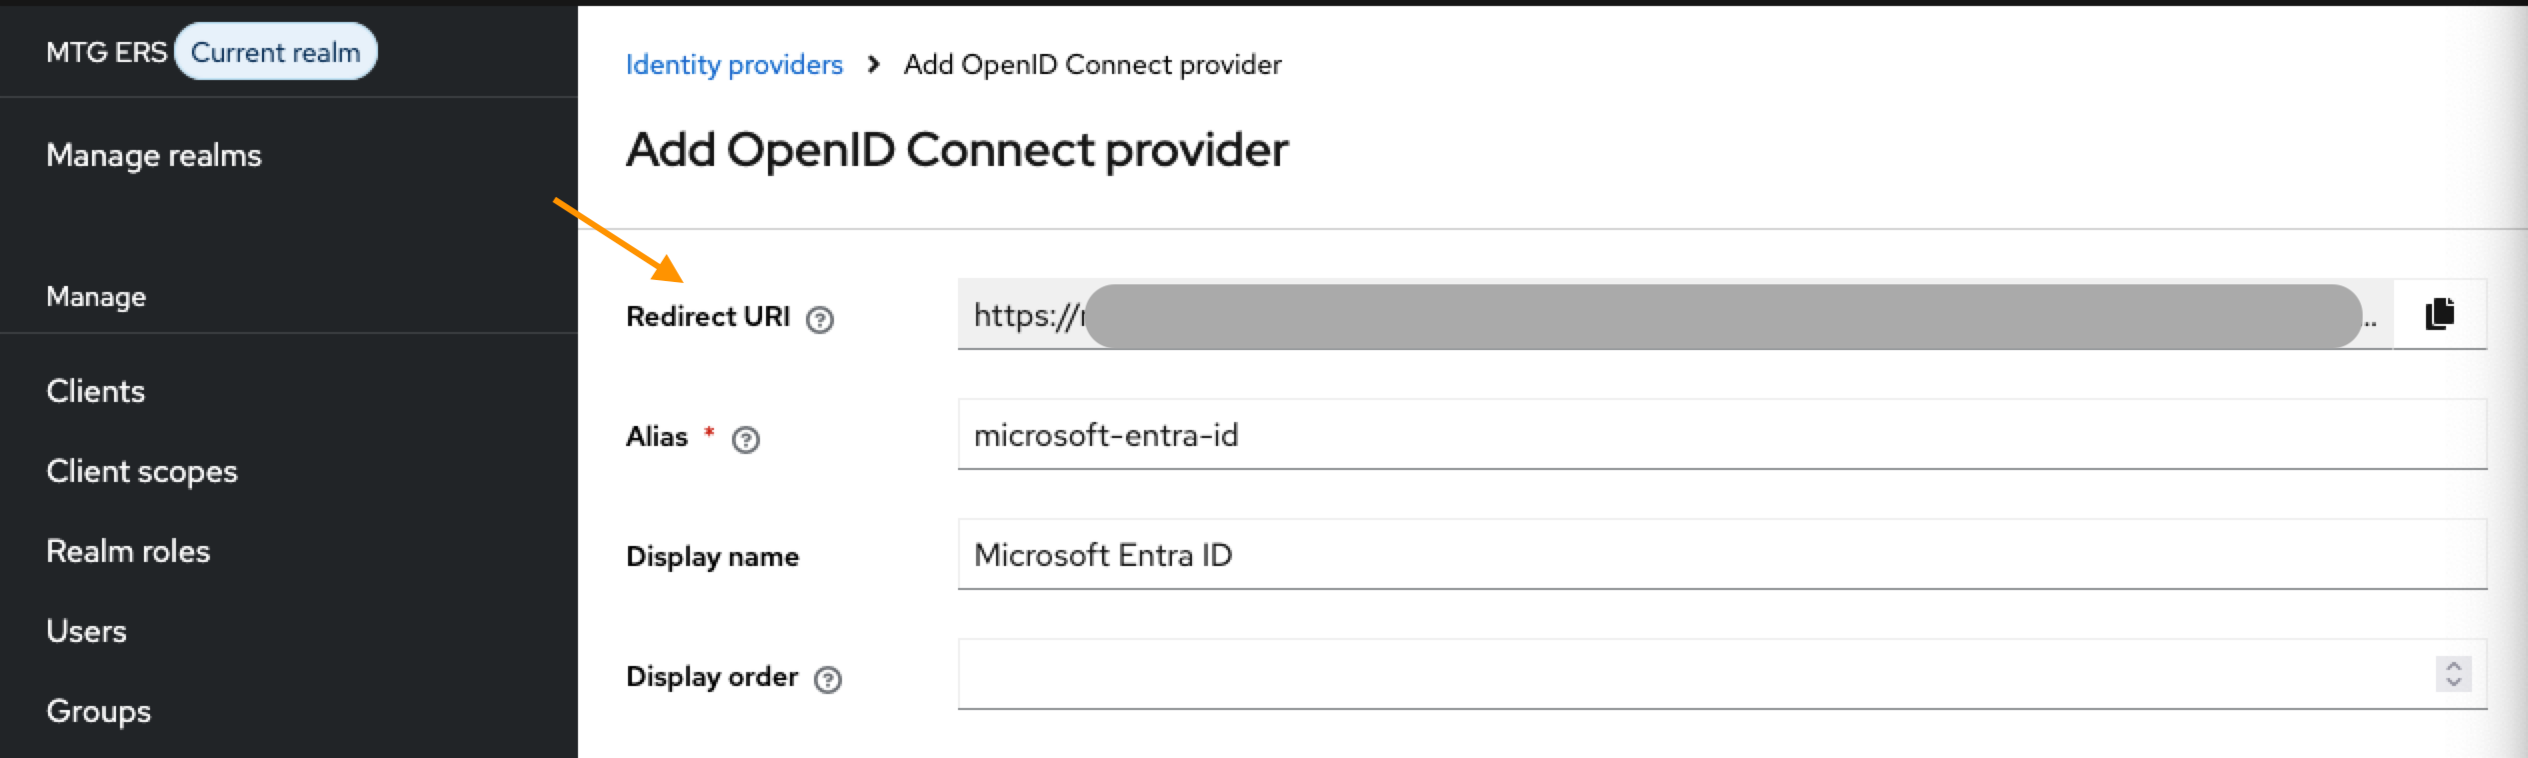
Alias: Enter "microsoft-entra-id" (or organizational standard).
-
Display Name: Enter "Microsoft Entra ID".
| Make sure you store your Redirect URI now. You are going to need it later. |
Click to reveal screenshot
2. OpenID Connect Settings
-
Keep Use discovery endpoint On and retrieve it from portal.azure.com.
Click to reveal screenshot
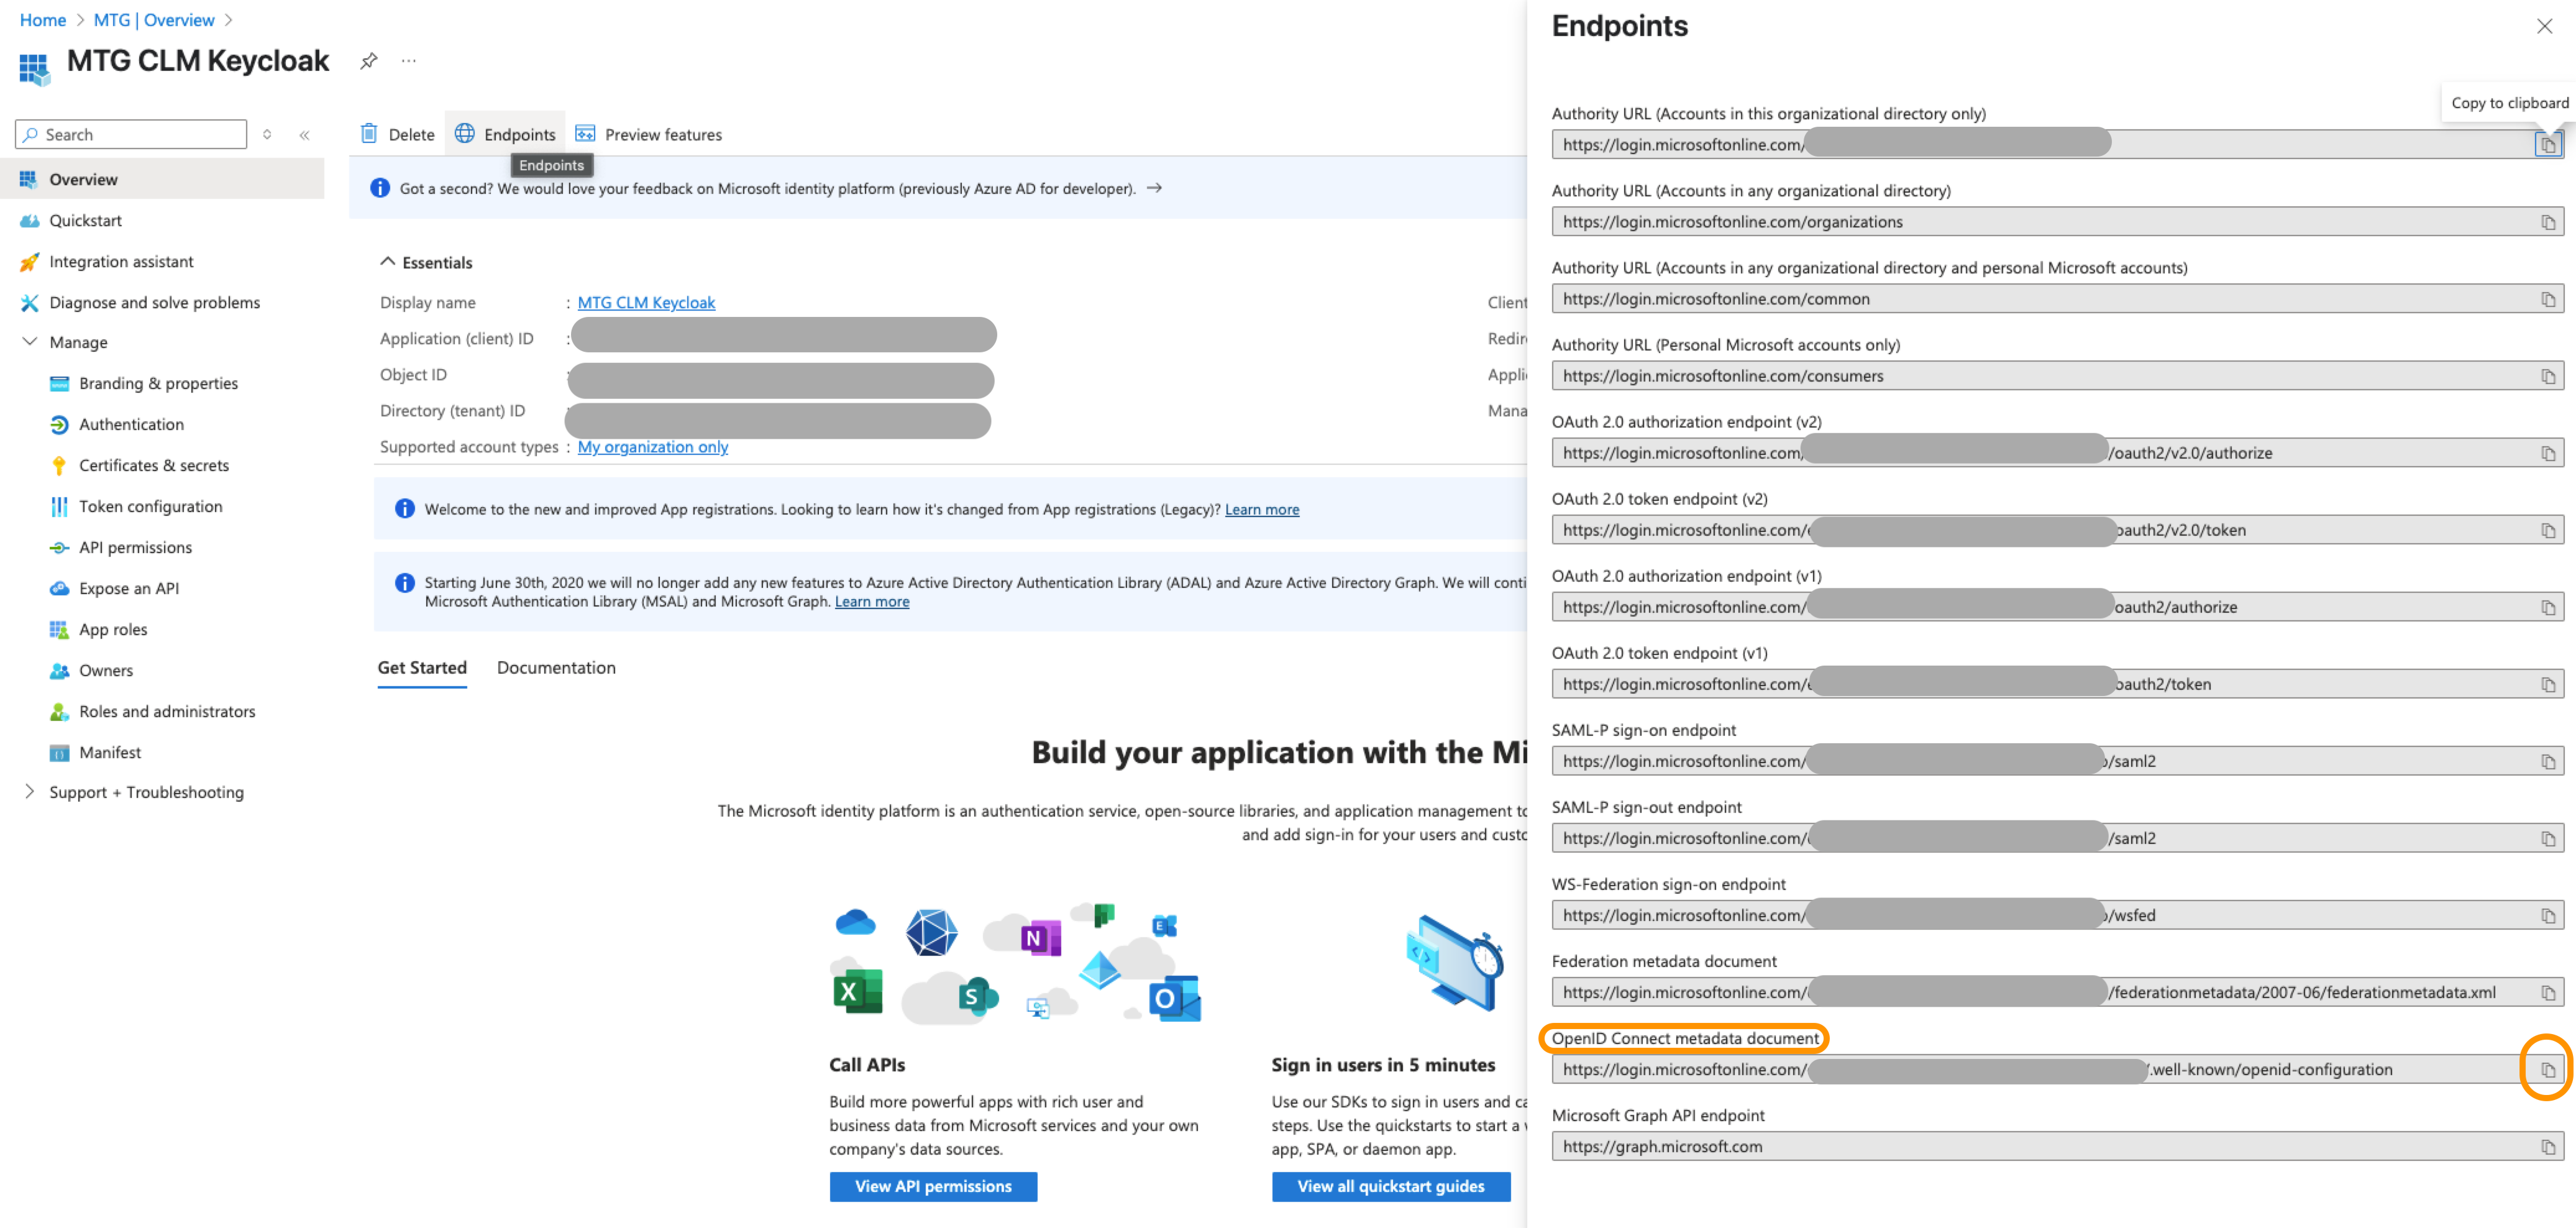
| The metadata fields related to endpoints will be automatically populated upon pasting. |
-
Client Authentication: Select "Client secret sent as post" from the dropdown list.
-
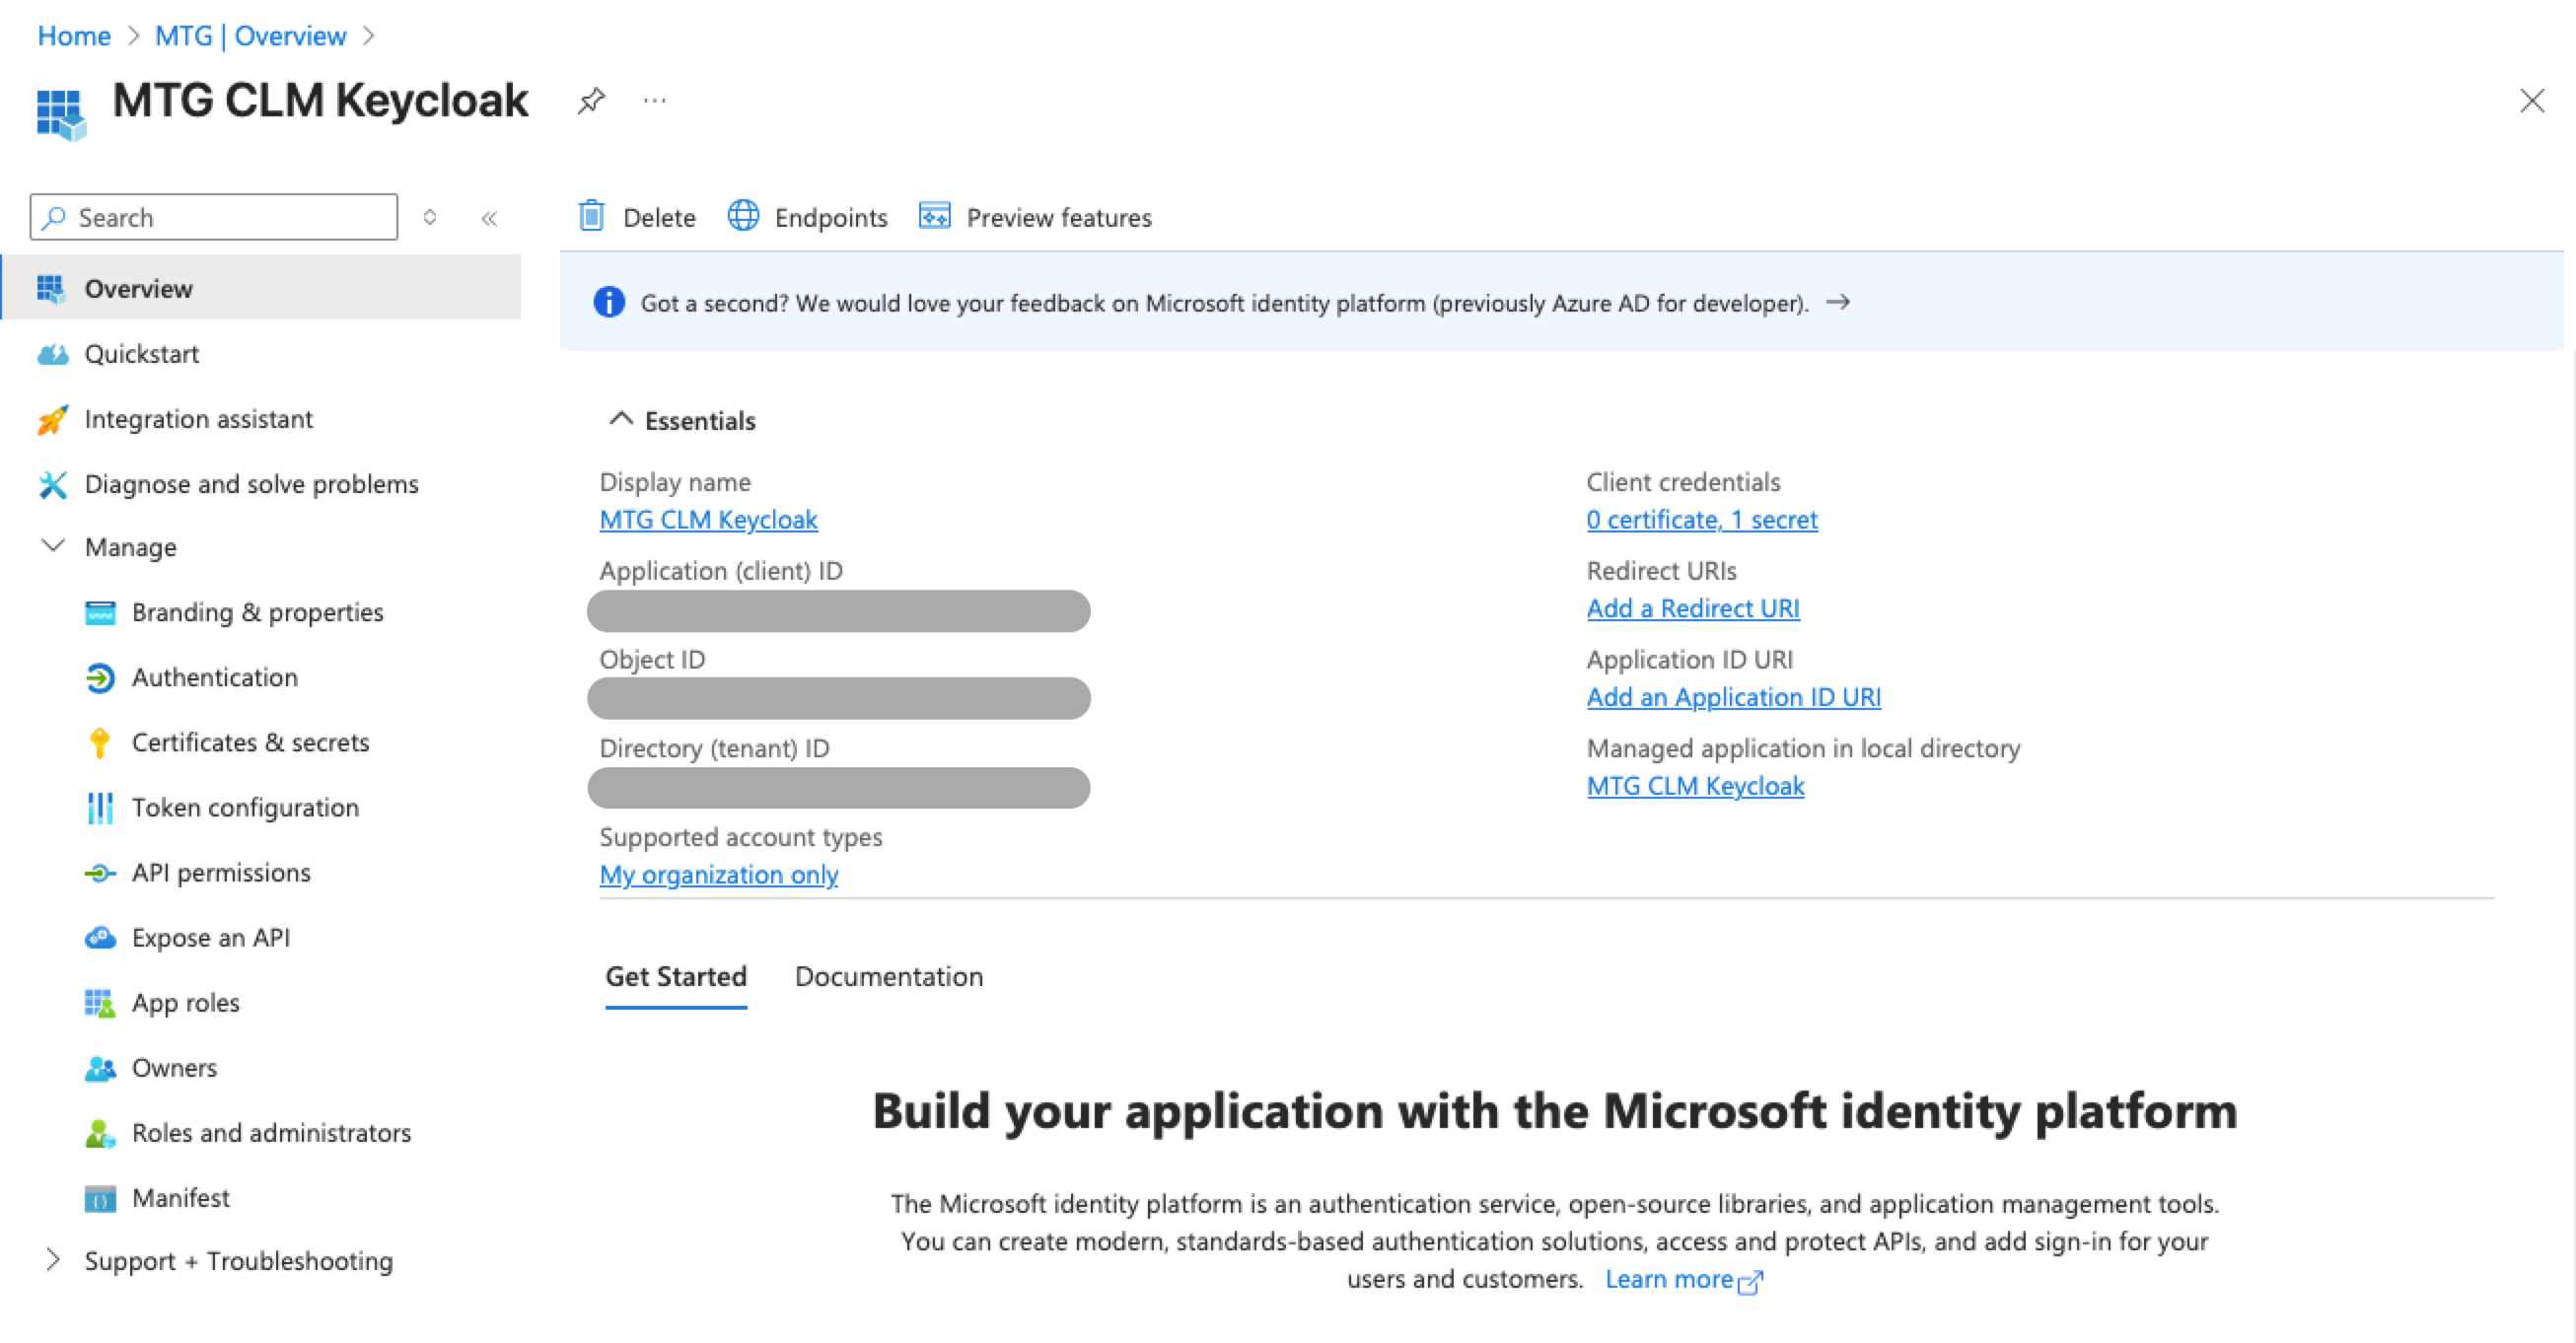
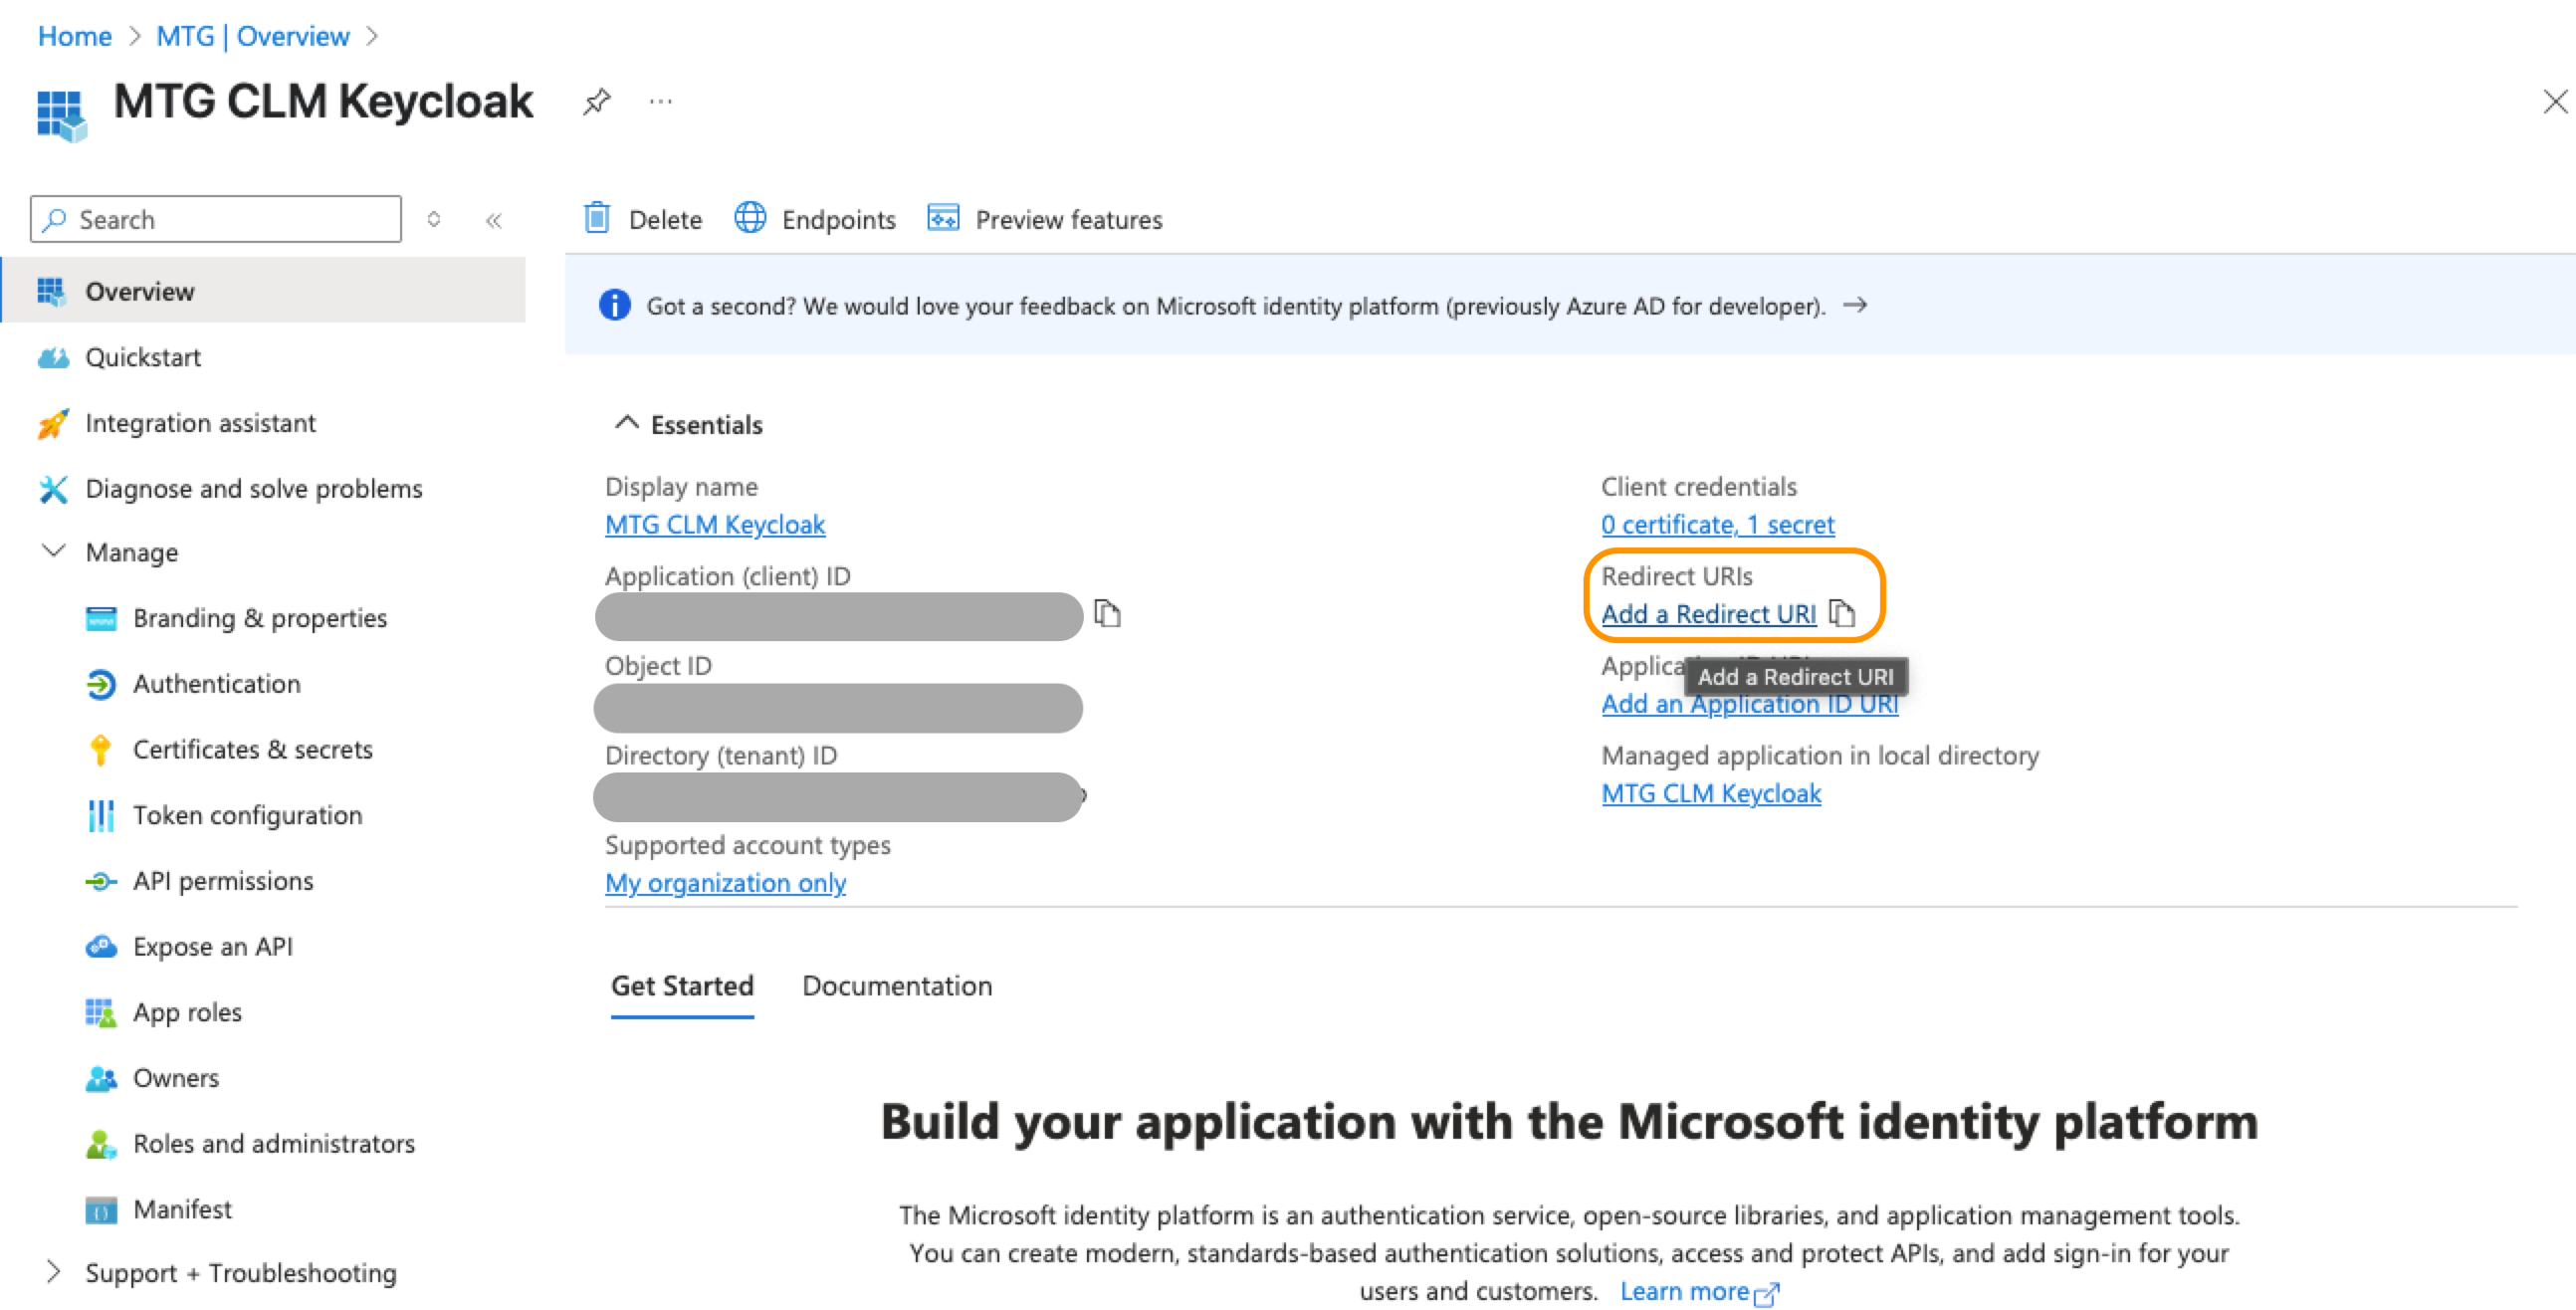
Client ID: Retrieve from portal.azure.com → Overview.
Click to reveal screenshot
-
Client Secret: Retrieve from portal.azure.com → Certificates & secrets Select "Client secret sent as post" from the dropdown list.
Click to reveal screenshot
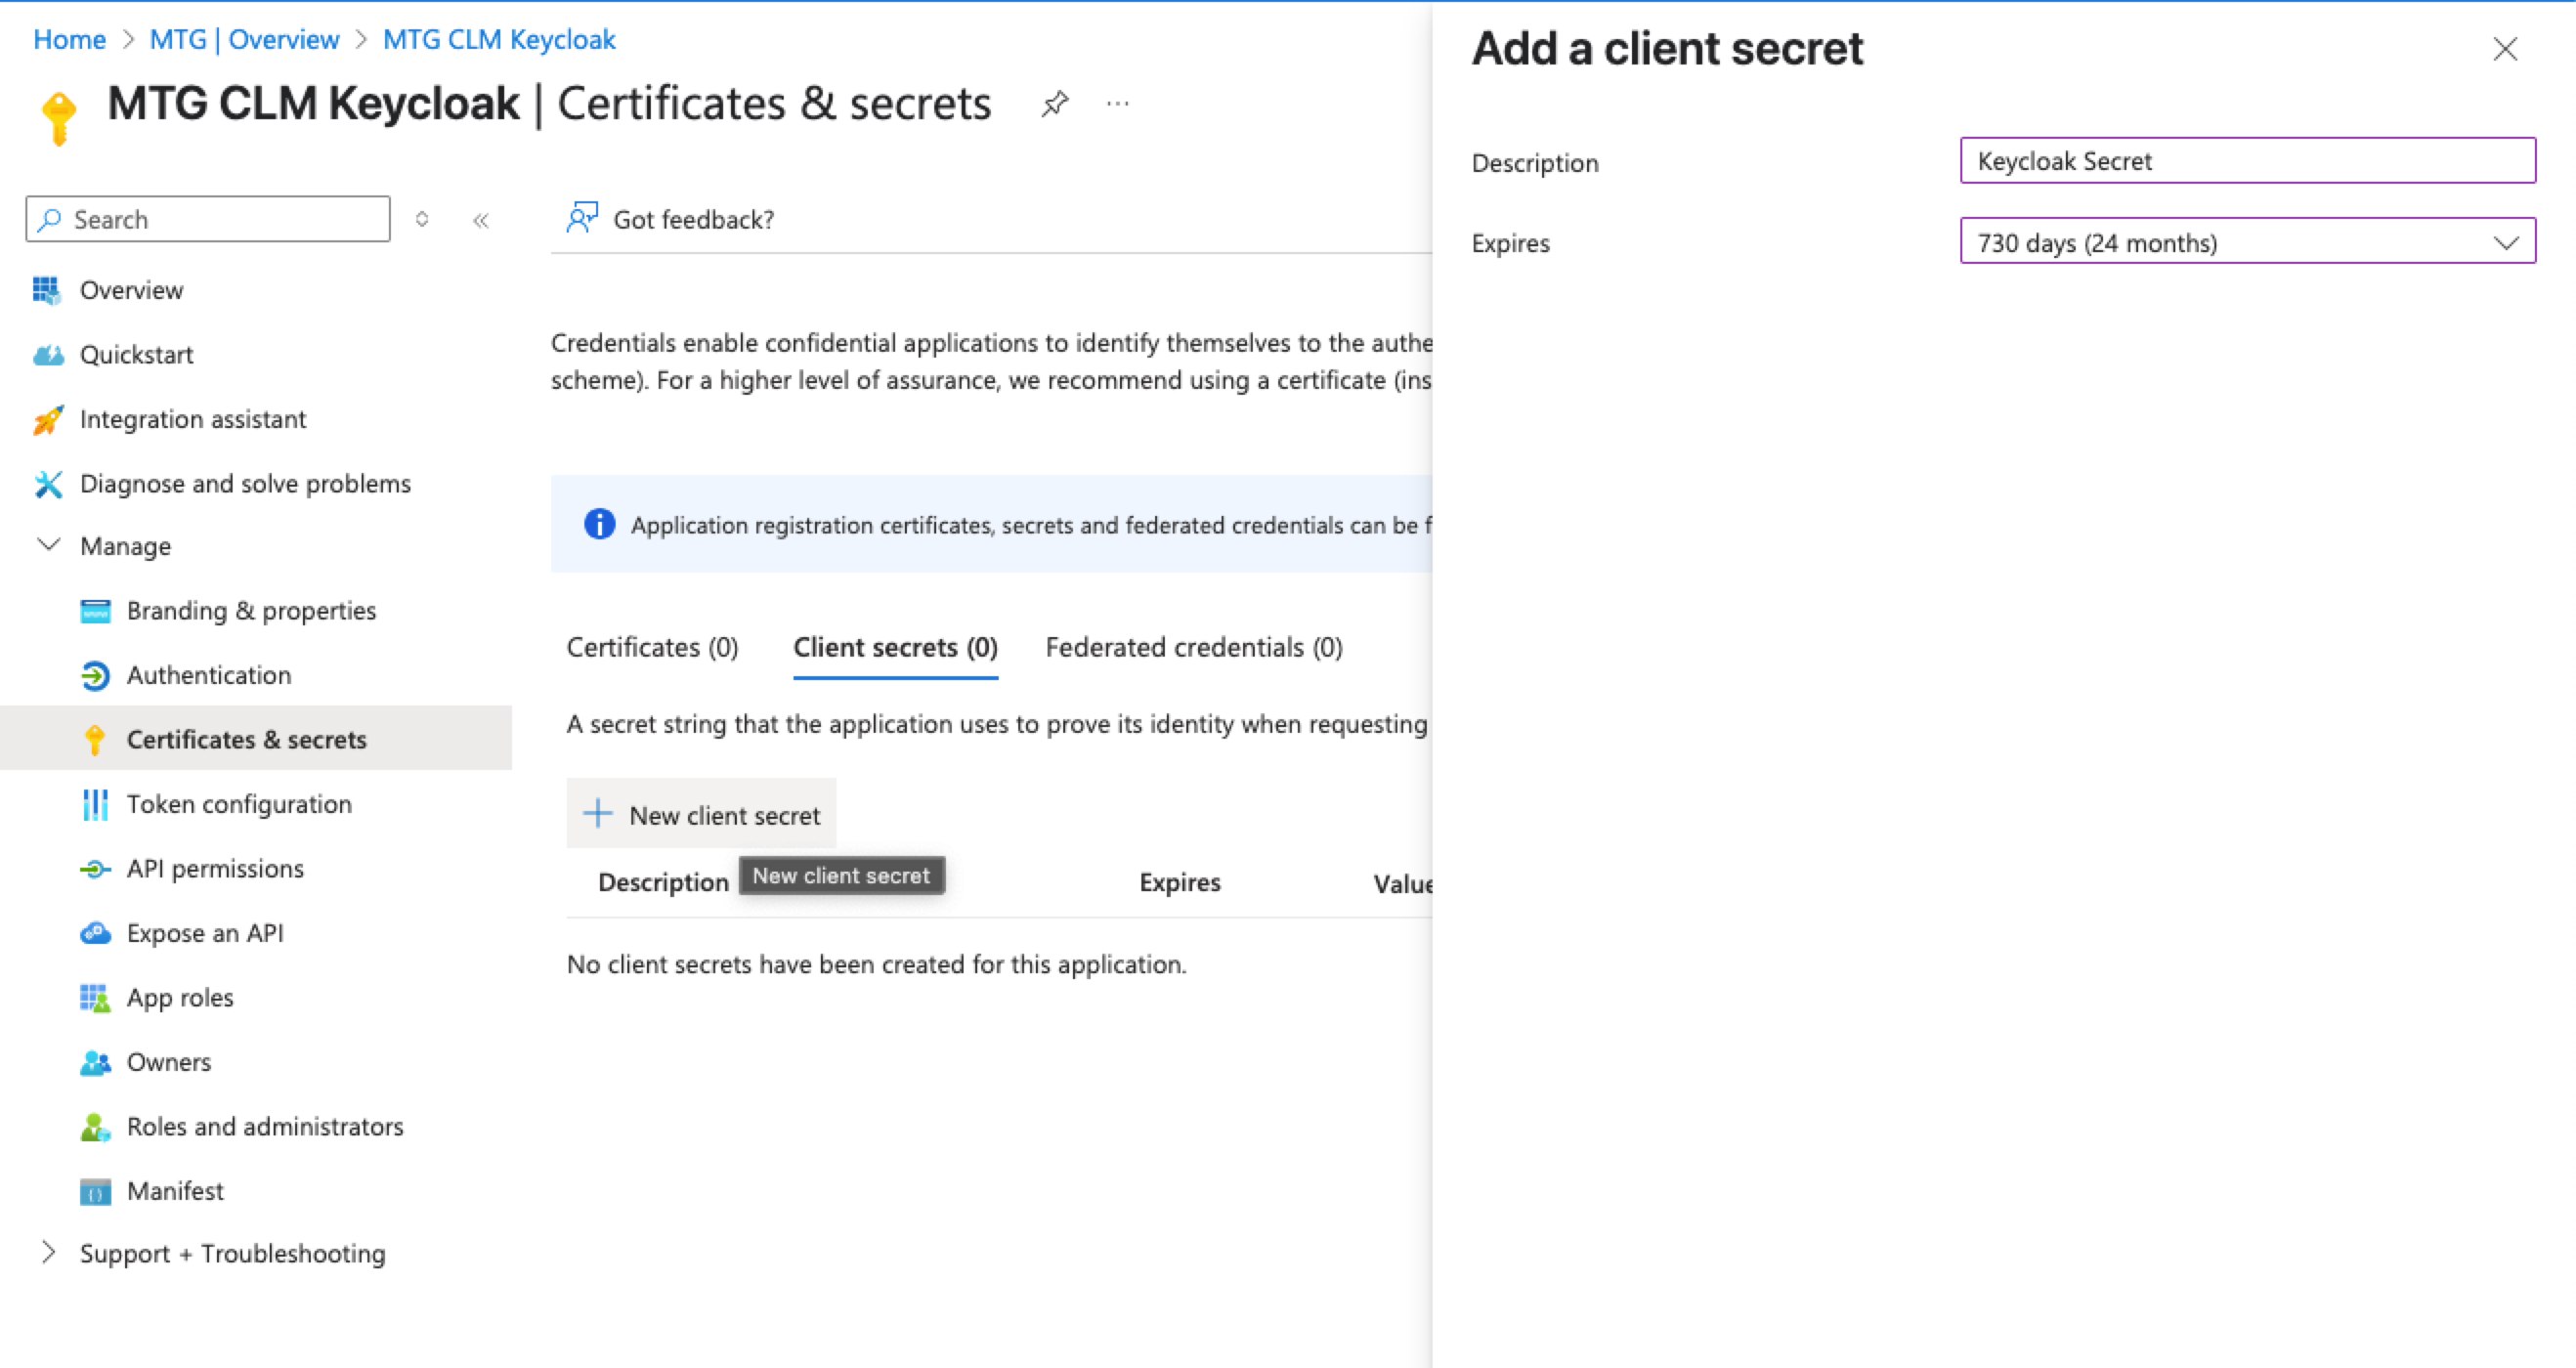
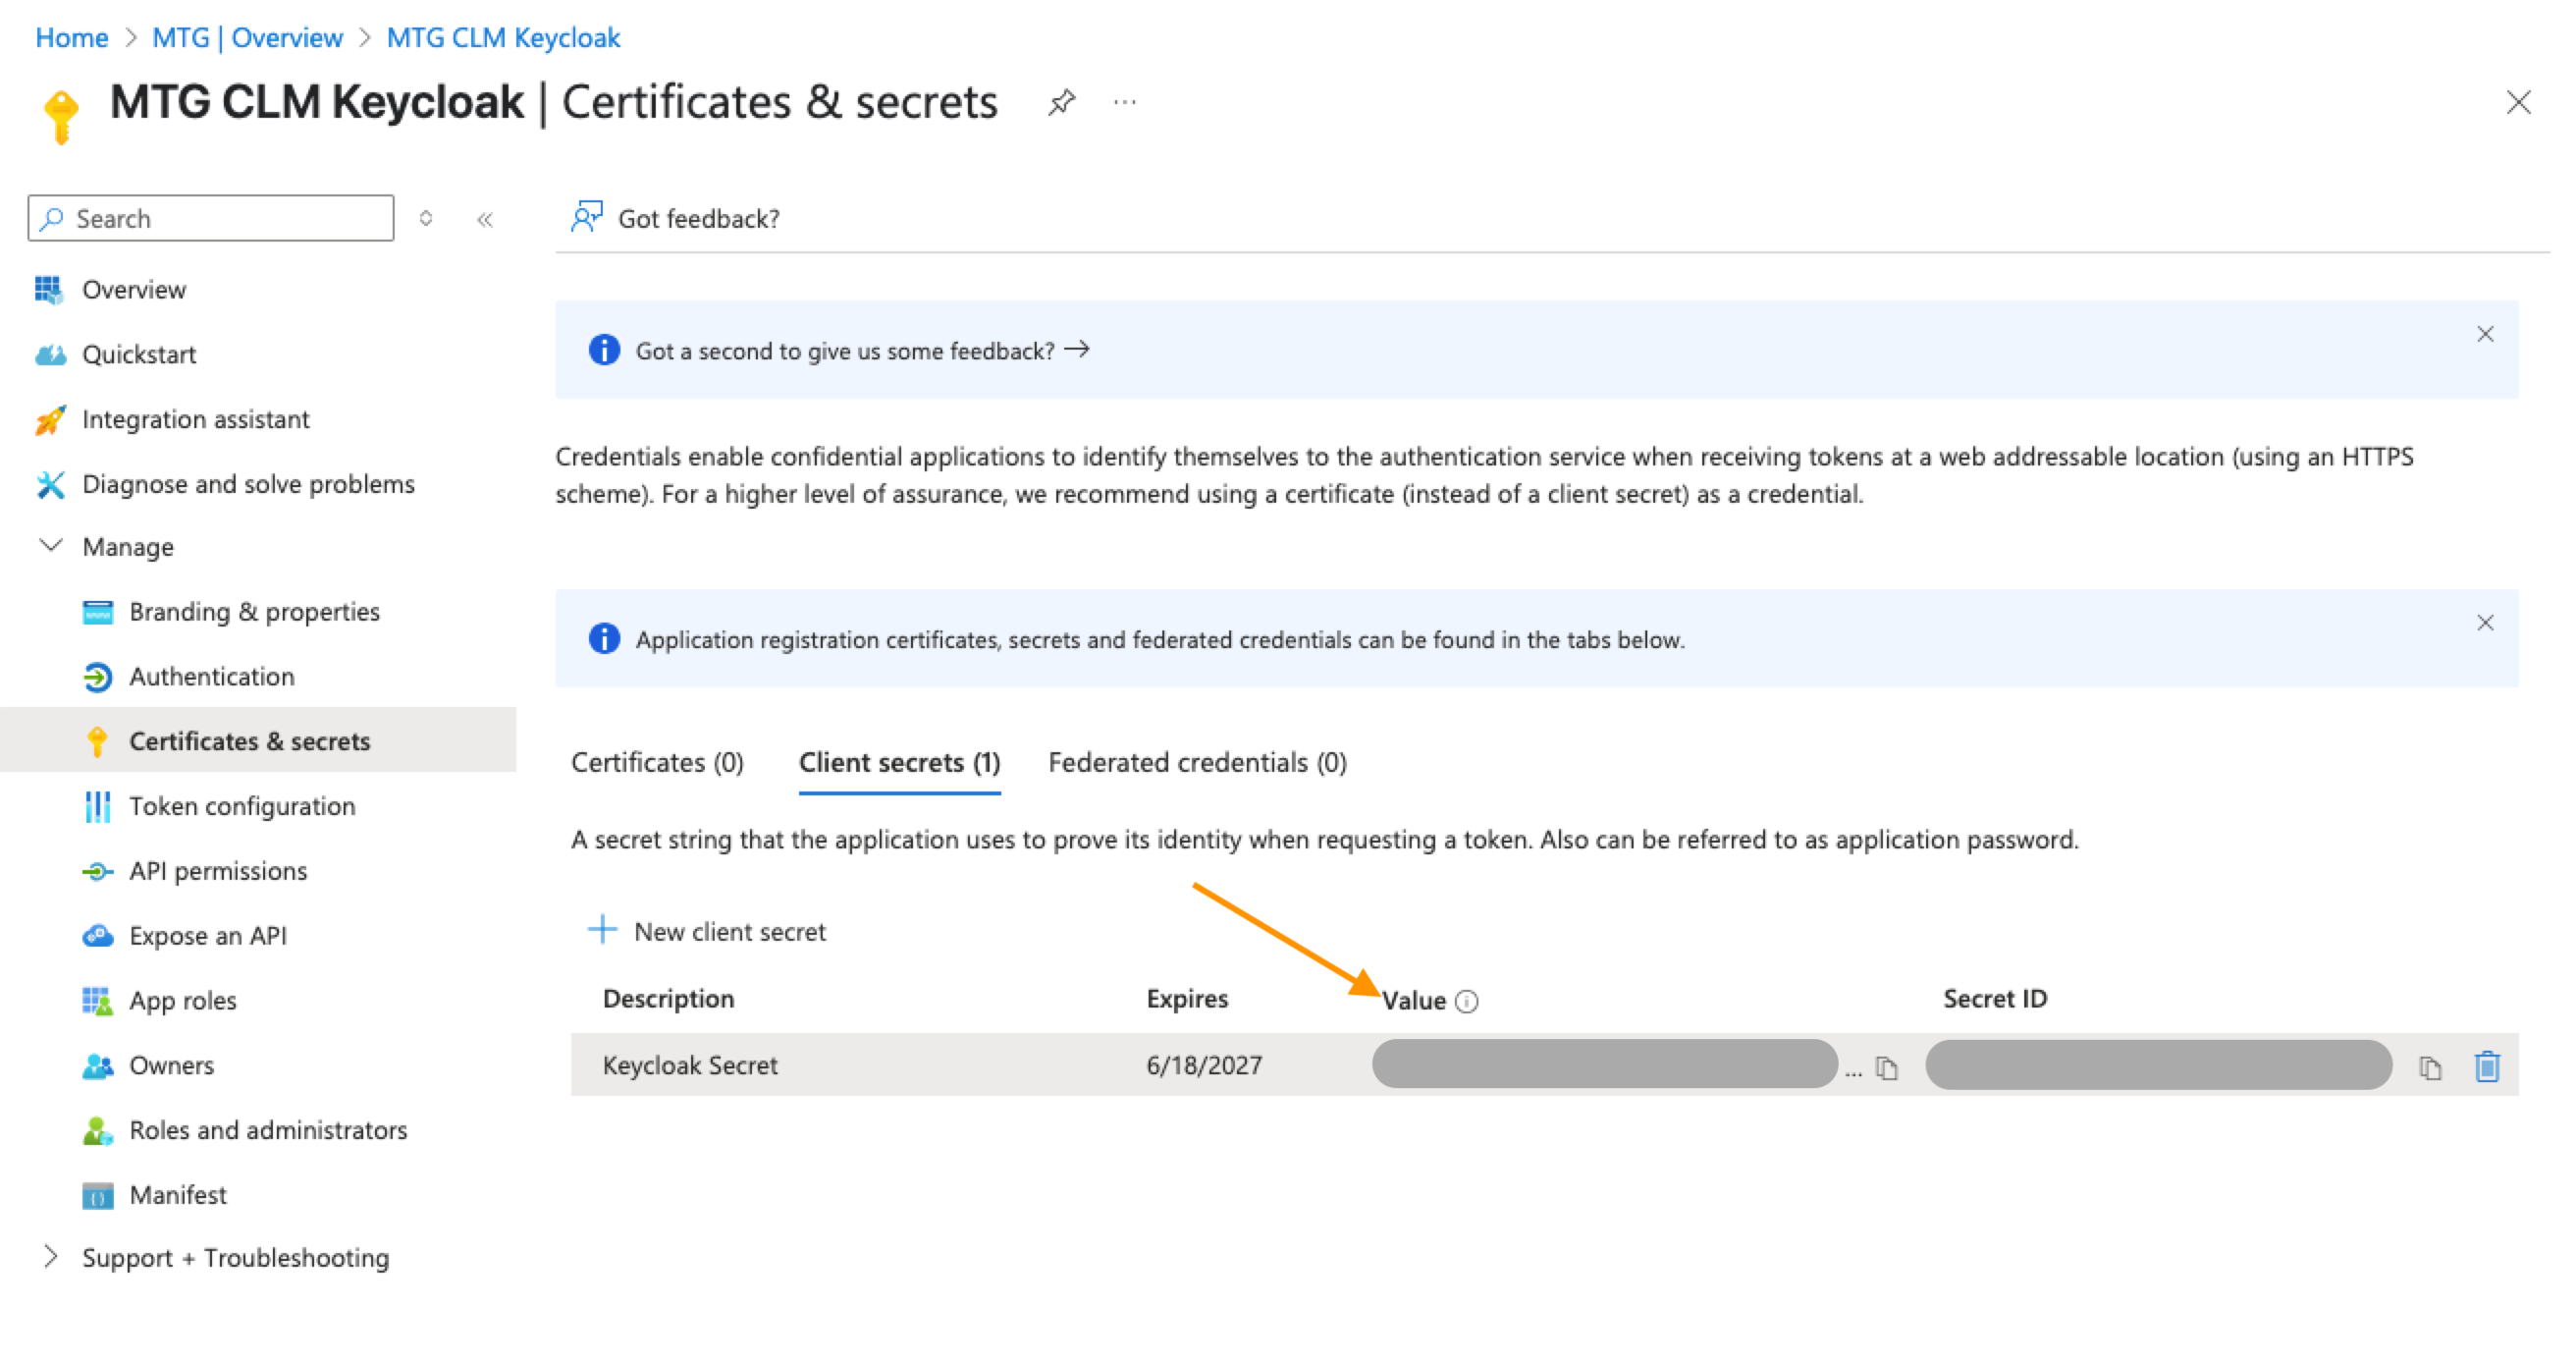
| Make sure to timely renew the client secret before your selected expiration date. |
| Upon creation, you must copy the Client Secret Value and store it to a secure location. You will not be able to access it later! |
Click to reveal screenshot
Paste the Client Secret Value to the appropriate field in Keycloak and keep Client assertion signature algorithm to "Algorithm not specified".
The completed page should now look like this:
Click to reveal screenshot
Click "Add" to proceed.
Now copy your redirect URI and paste it in portal.azure.com
Click to reveal screenshot
Click "Add a platform" and then select "Web".
Click to reveal screenshot
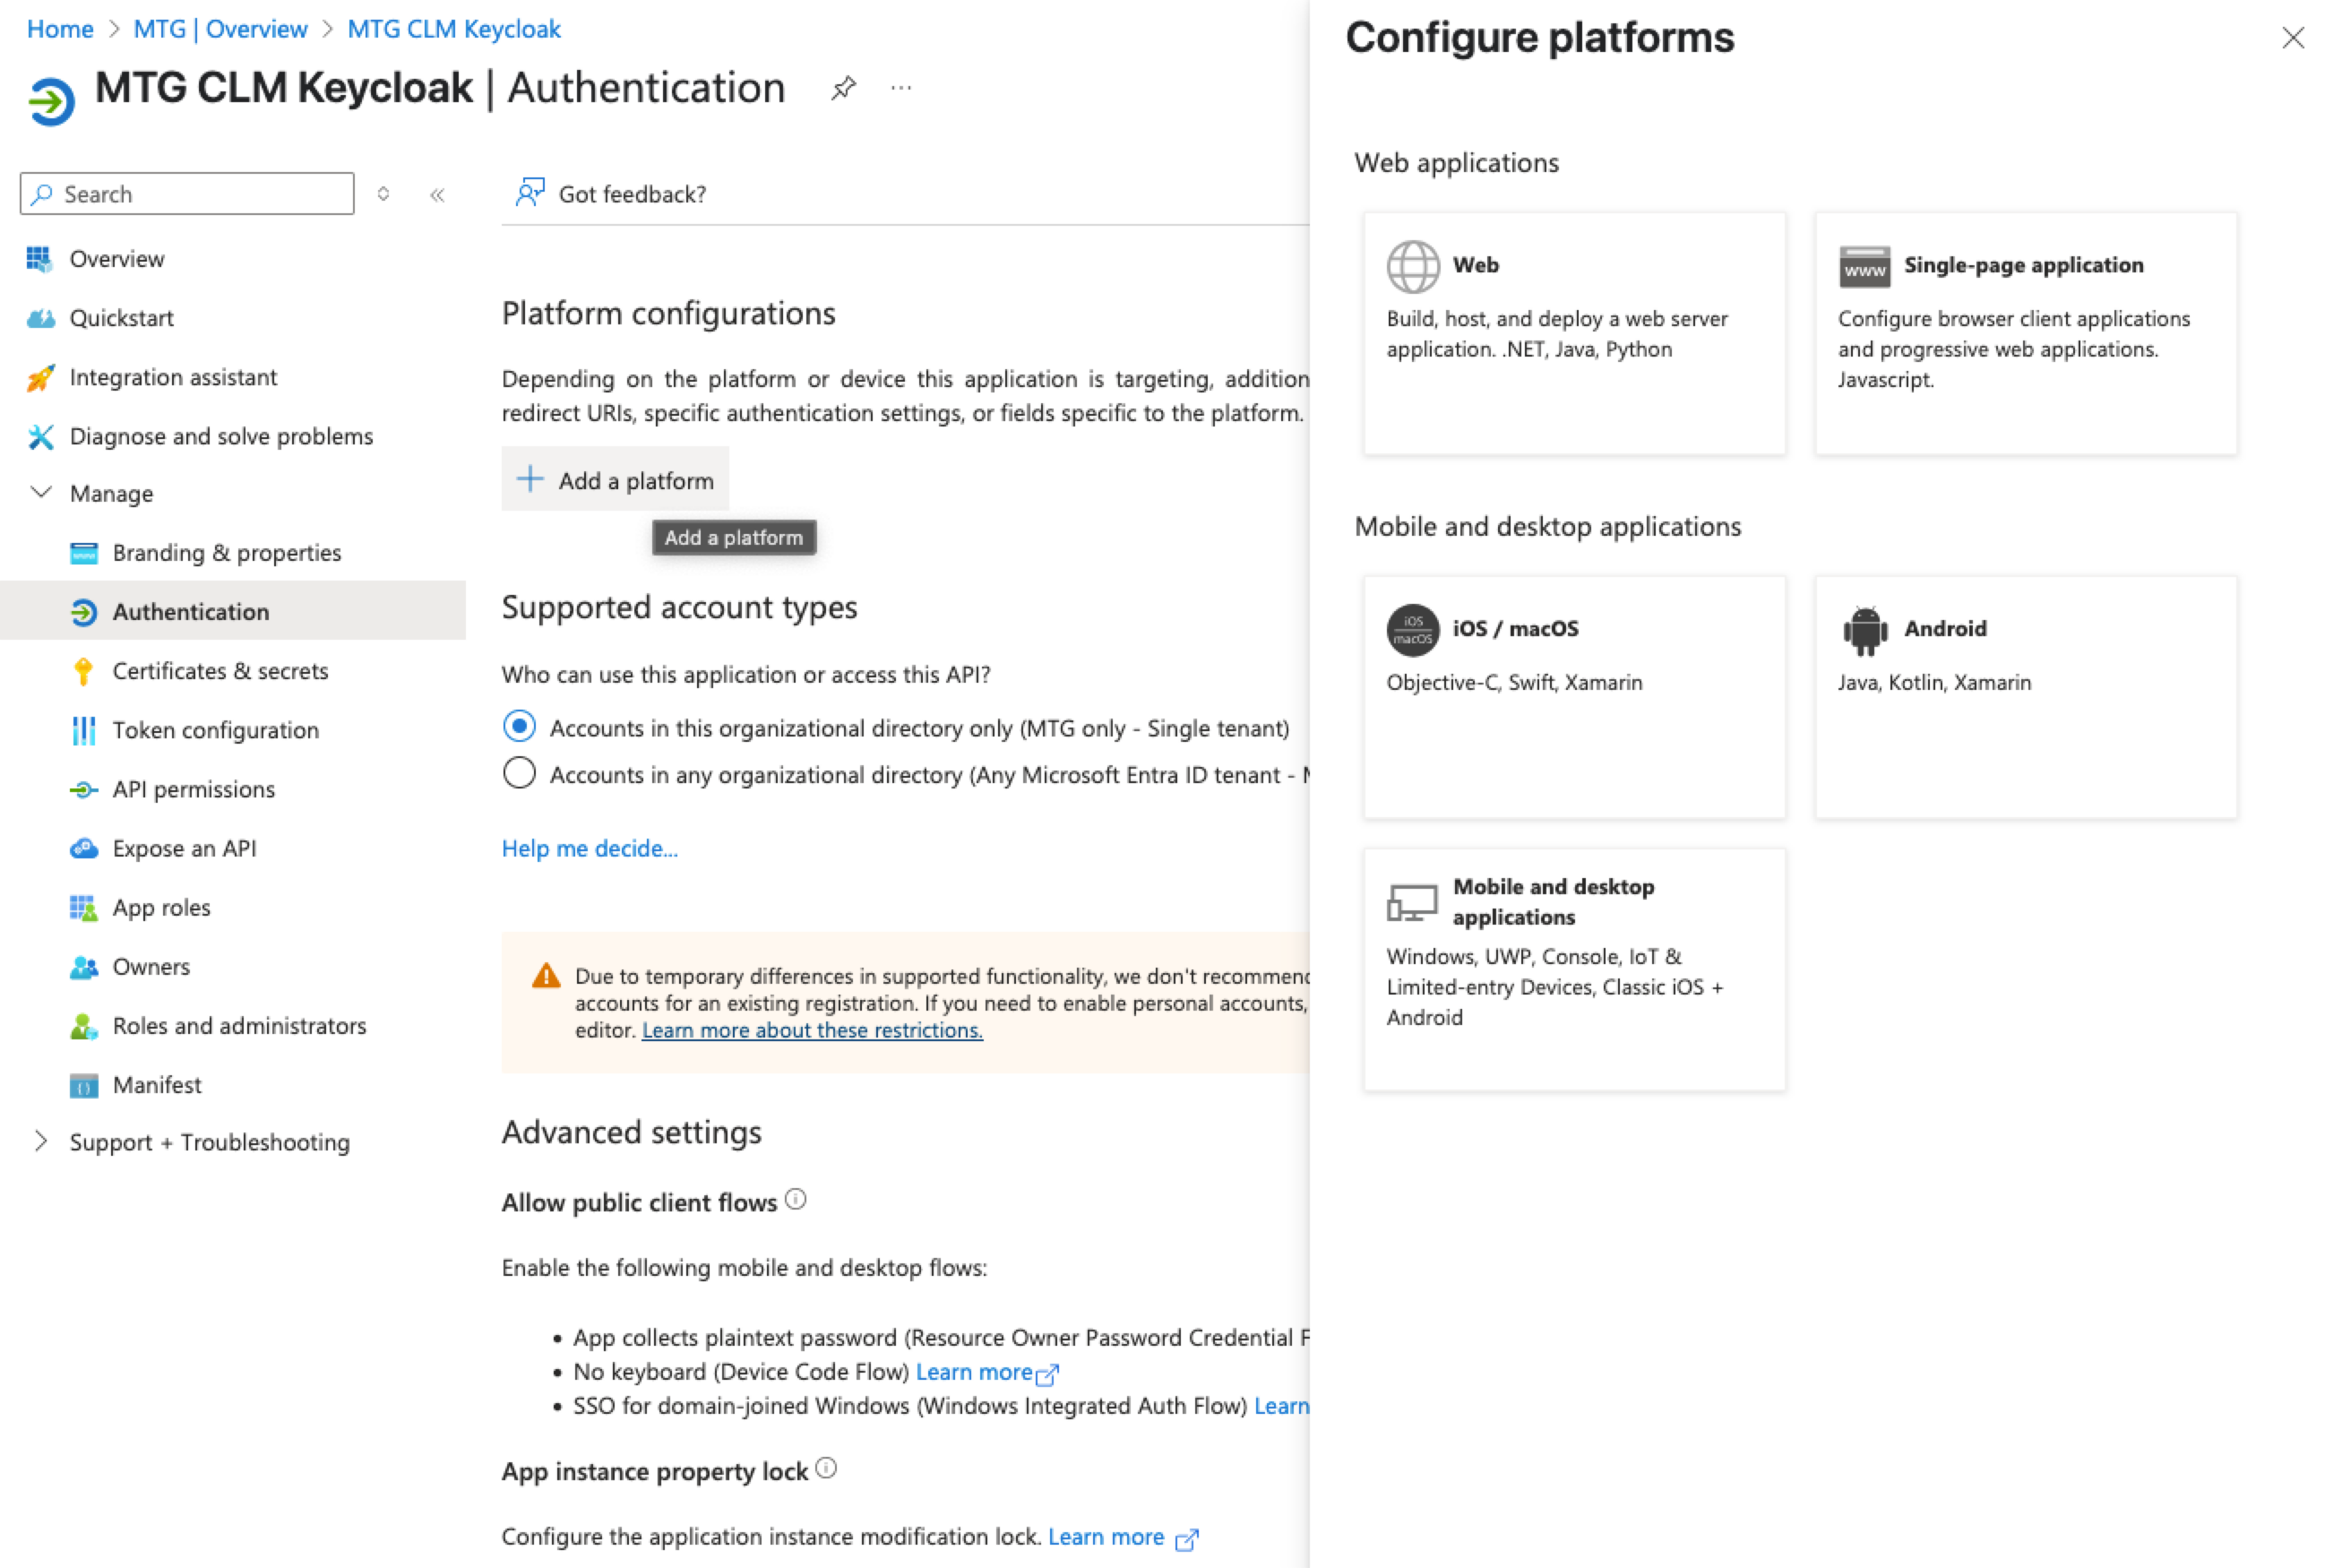
Paste the Redirect URI in the appropriate field and then select "Configure" to finish.
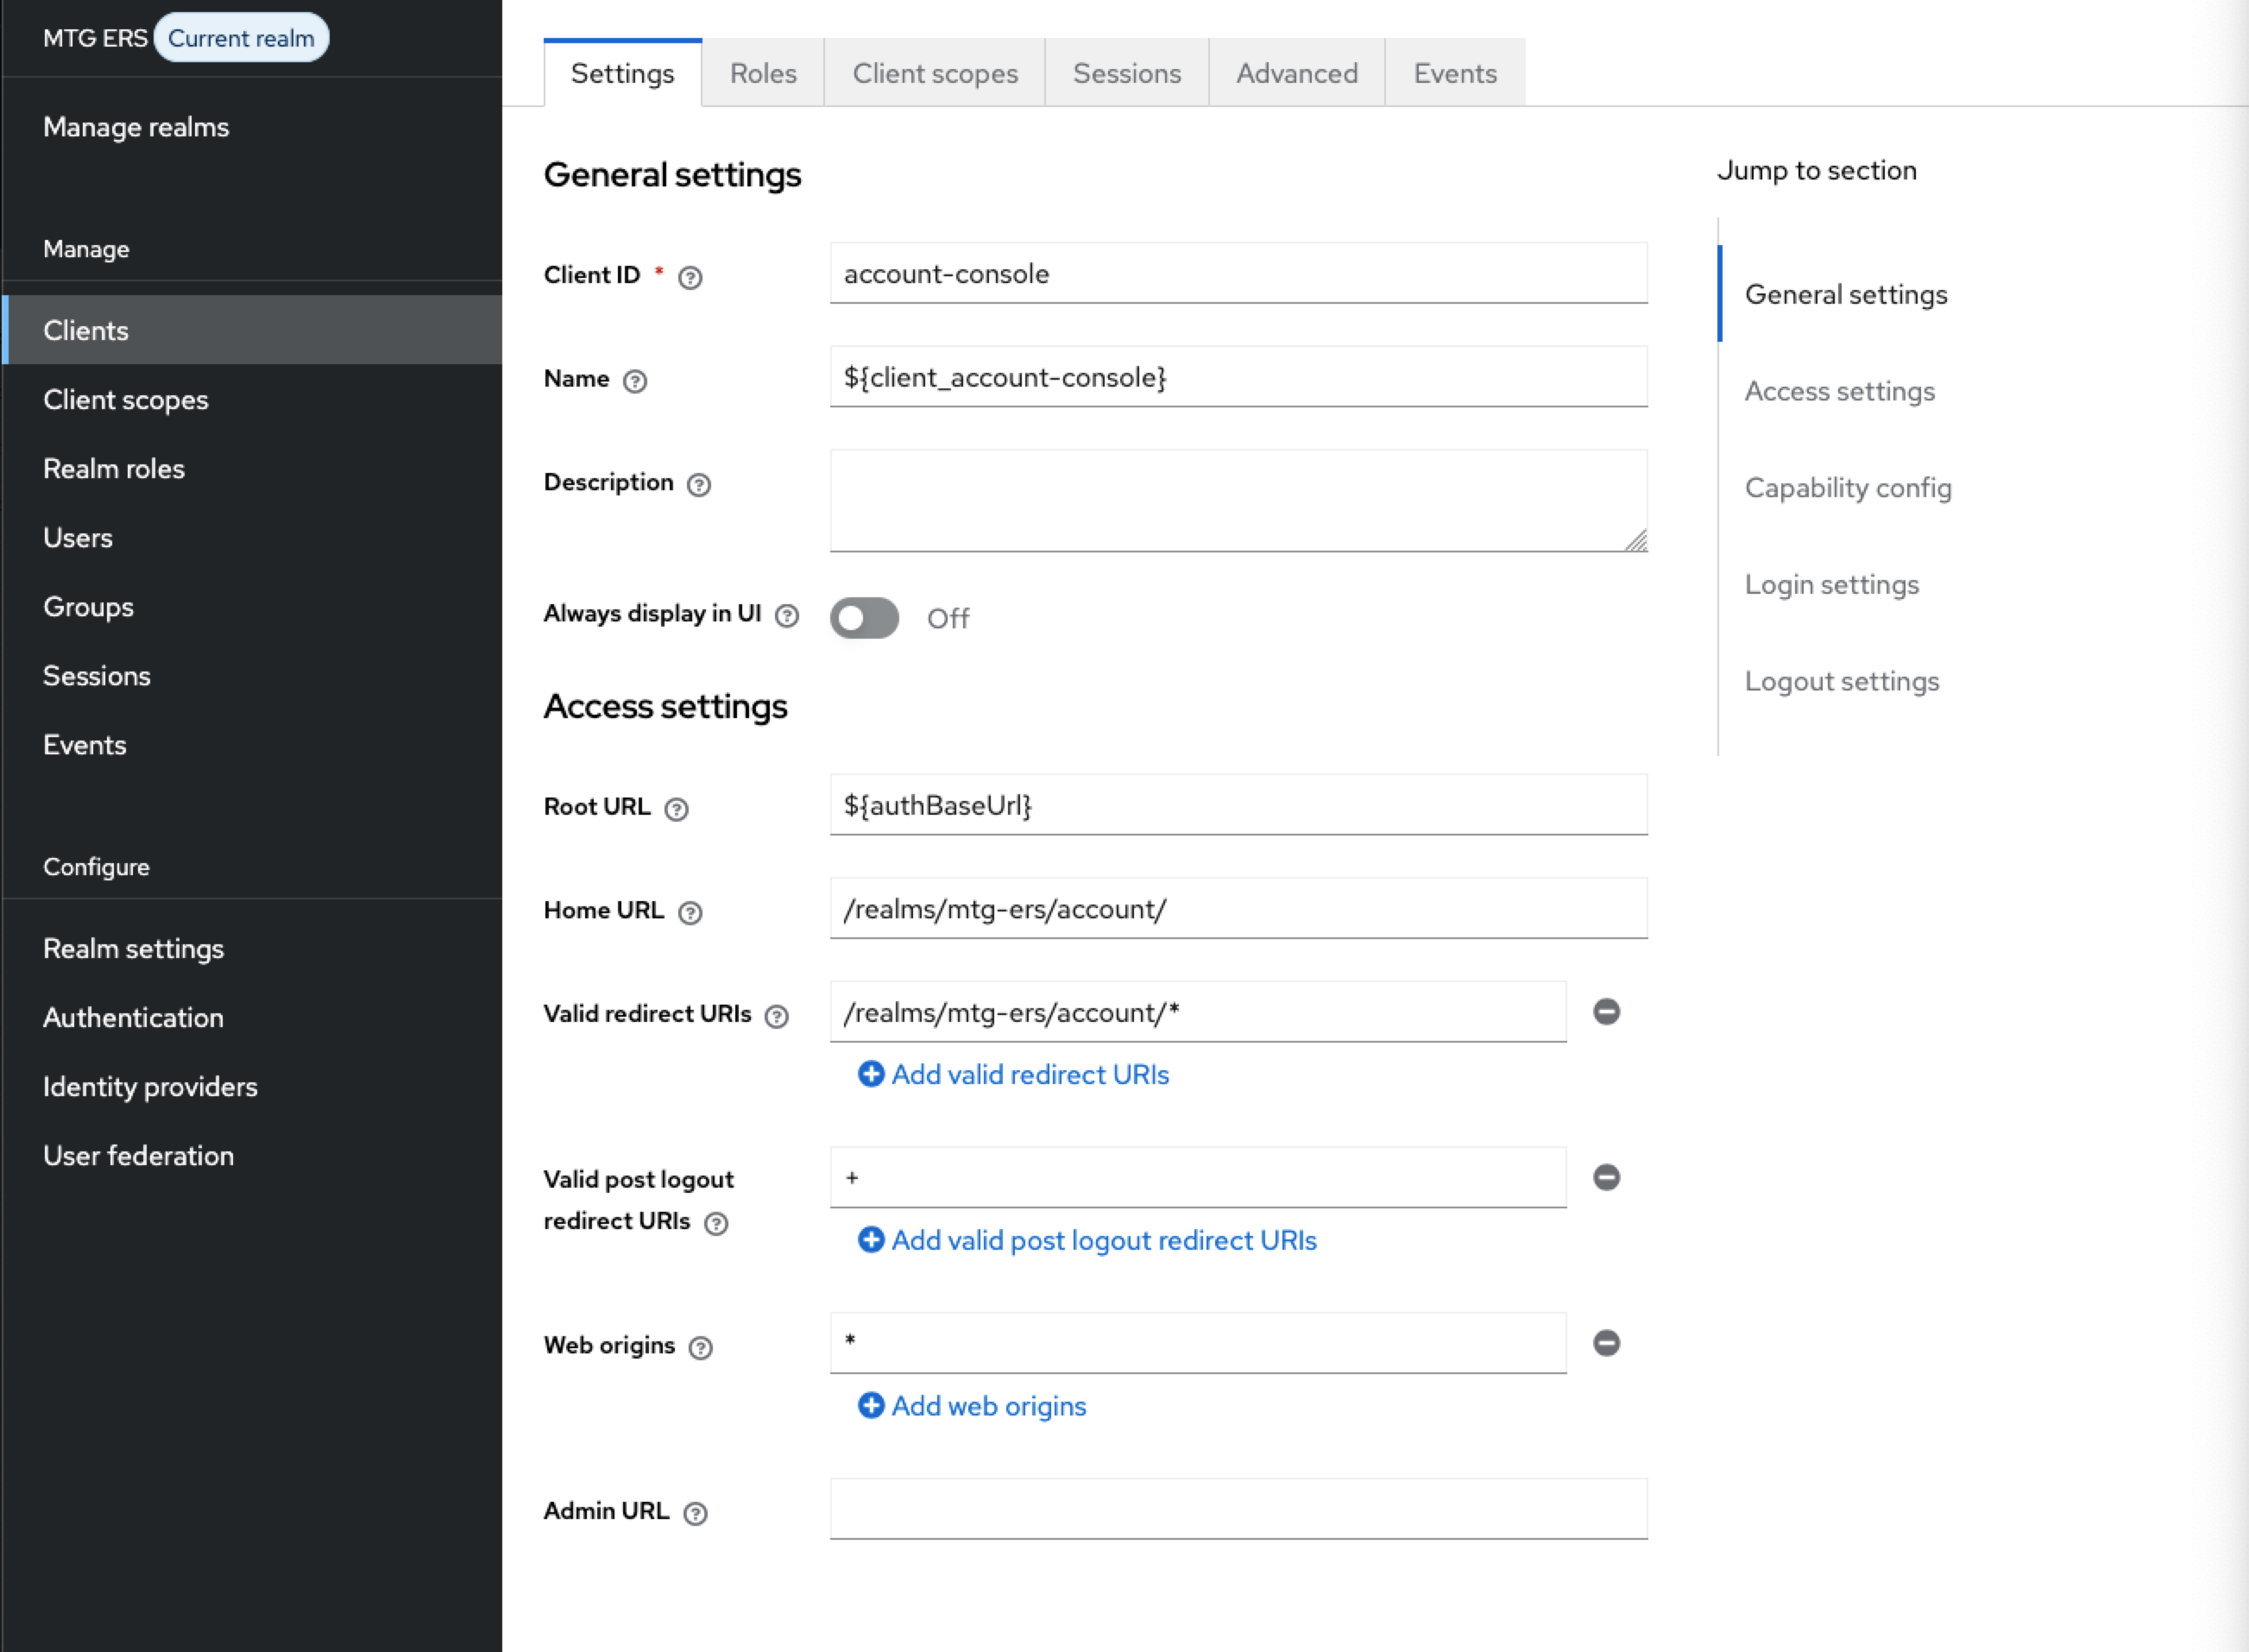
In Keycloak go to Clients (within mtg ers realm) and choose the account-console client.
In Access Settings make sure Web origins is set to "*".
Click to reveal screenshot
Test Authentication Flow
Validate Configuration
1. Test MTG CLM Access
-
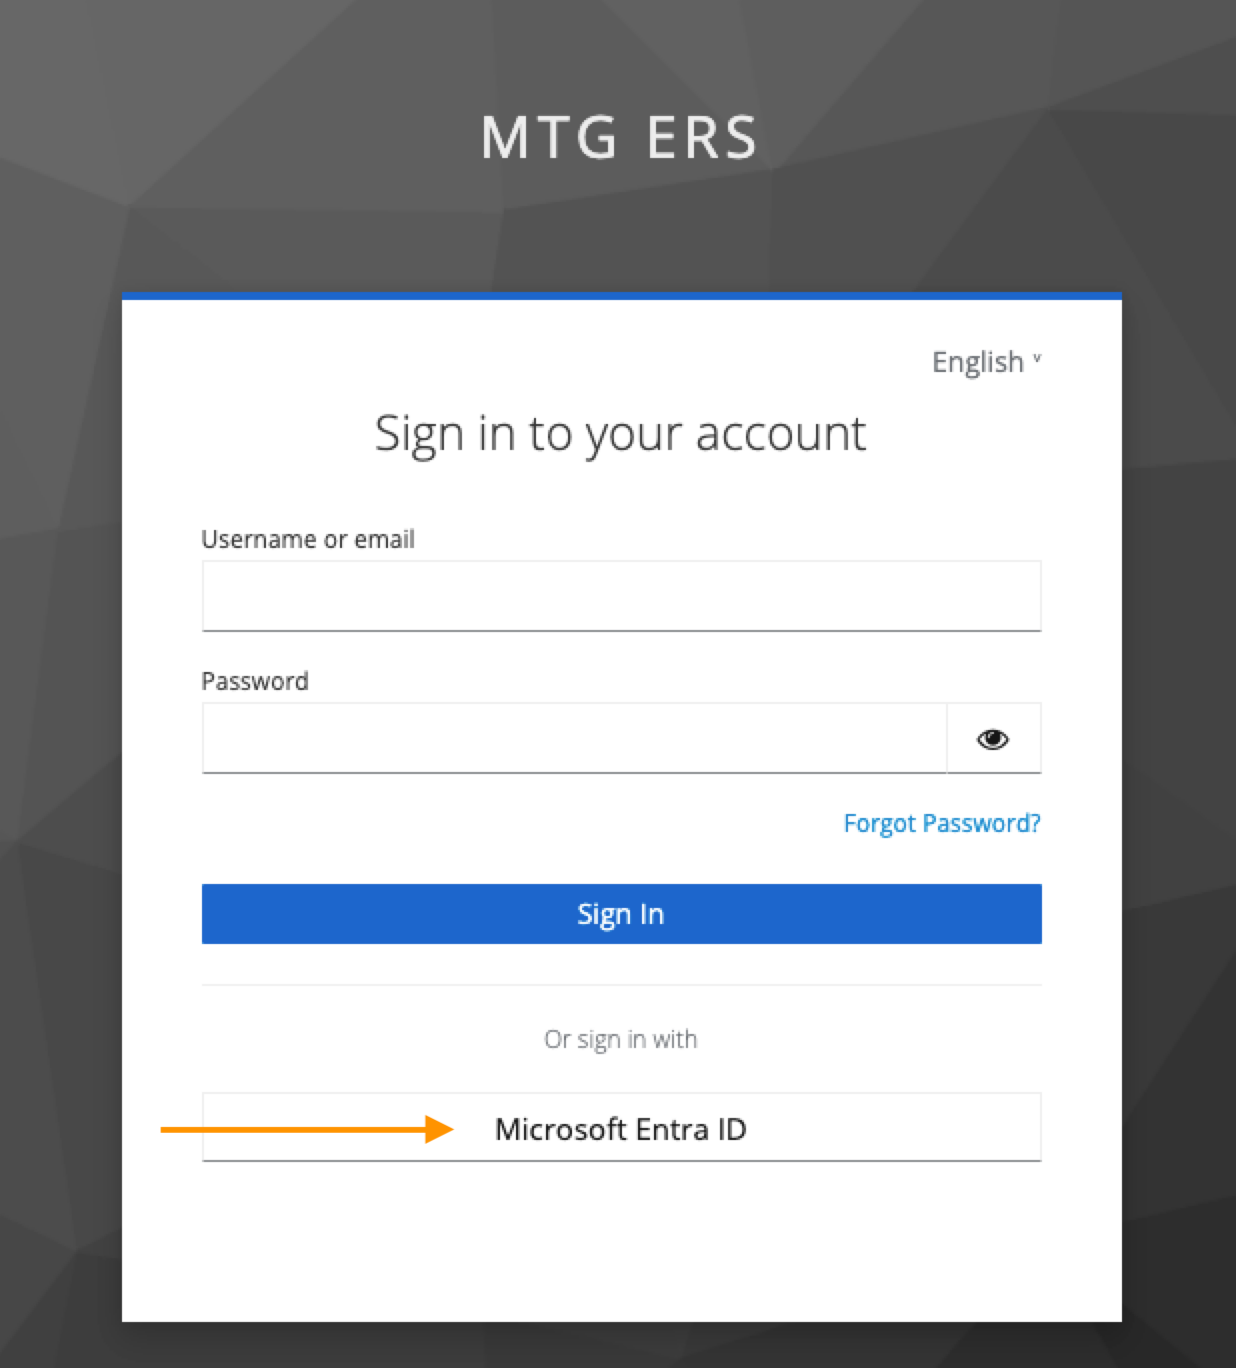
Navigate to MTG CLM login page.
Click to reveal screenshot
-
Click SSO/Keycloak authentication option.
-
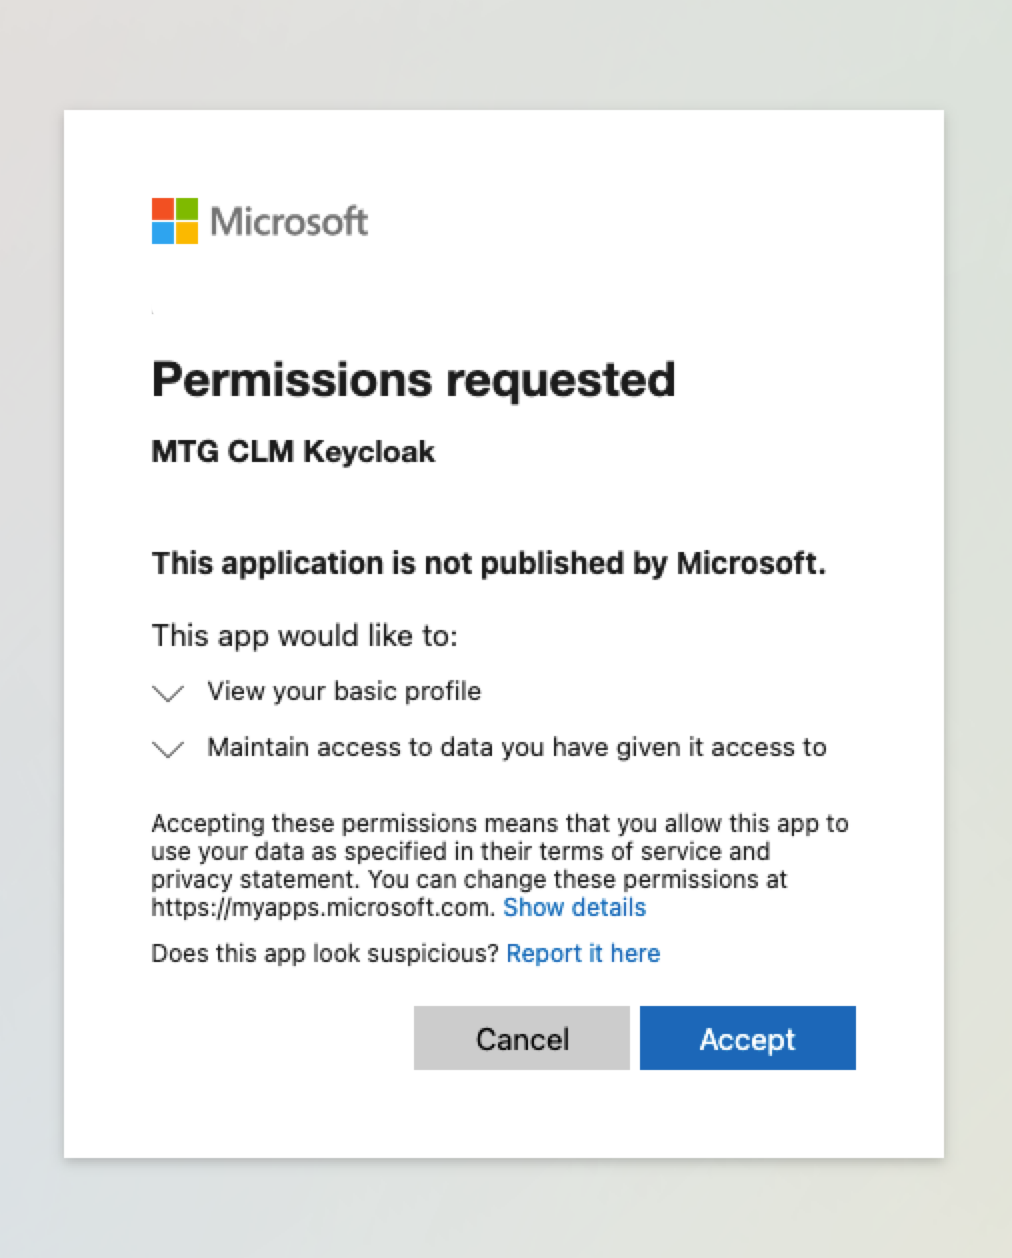
The redirect chain is as follows: MTG CLM → Keycloak → Microsoft → back to MTG CLM.
Click to reveal screenshot
-
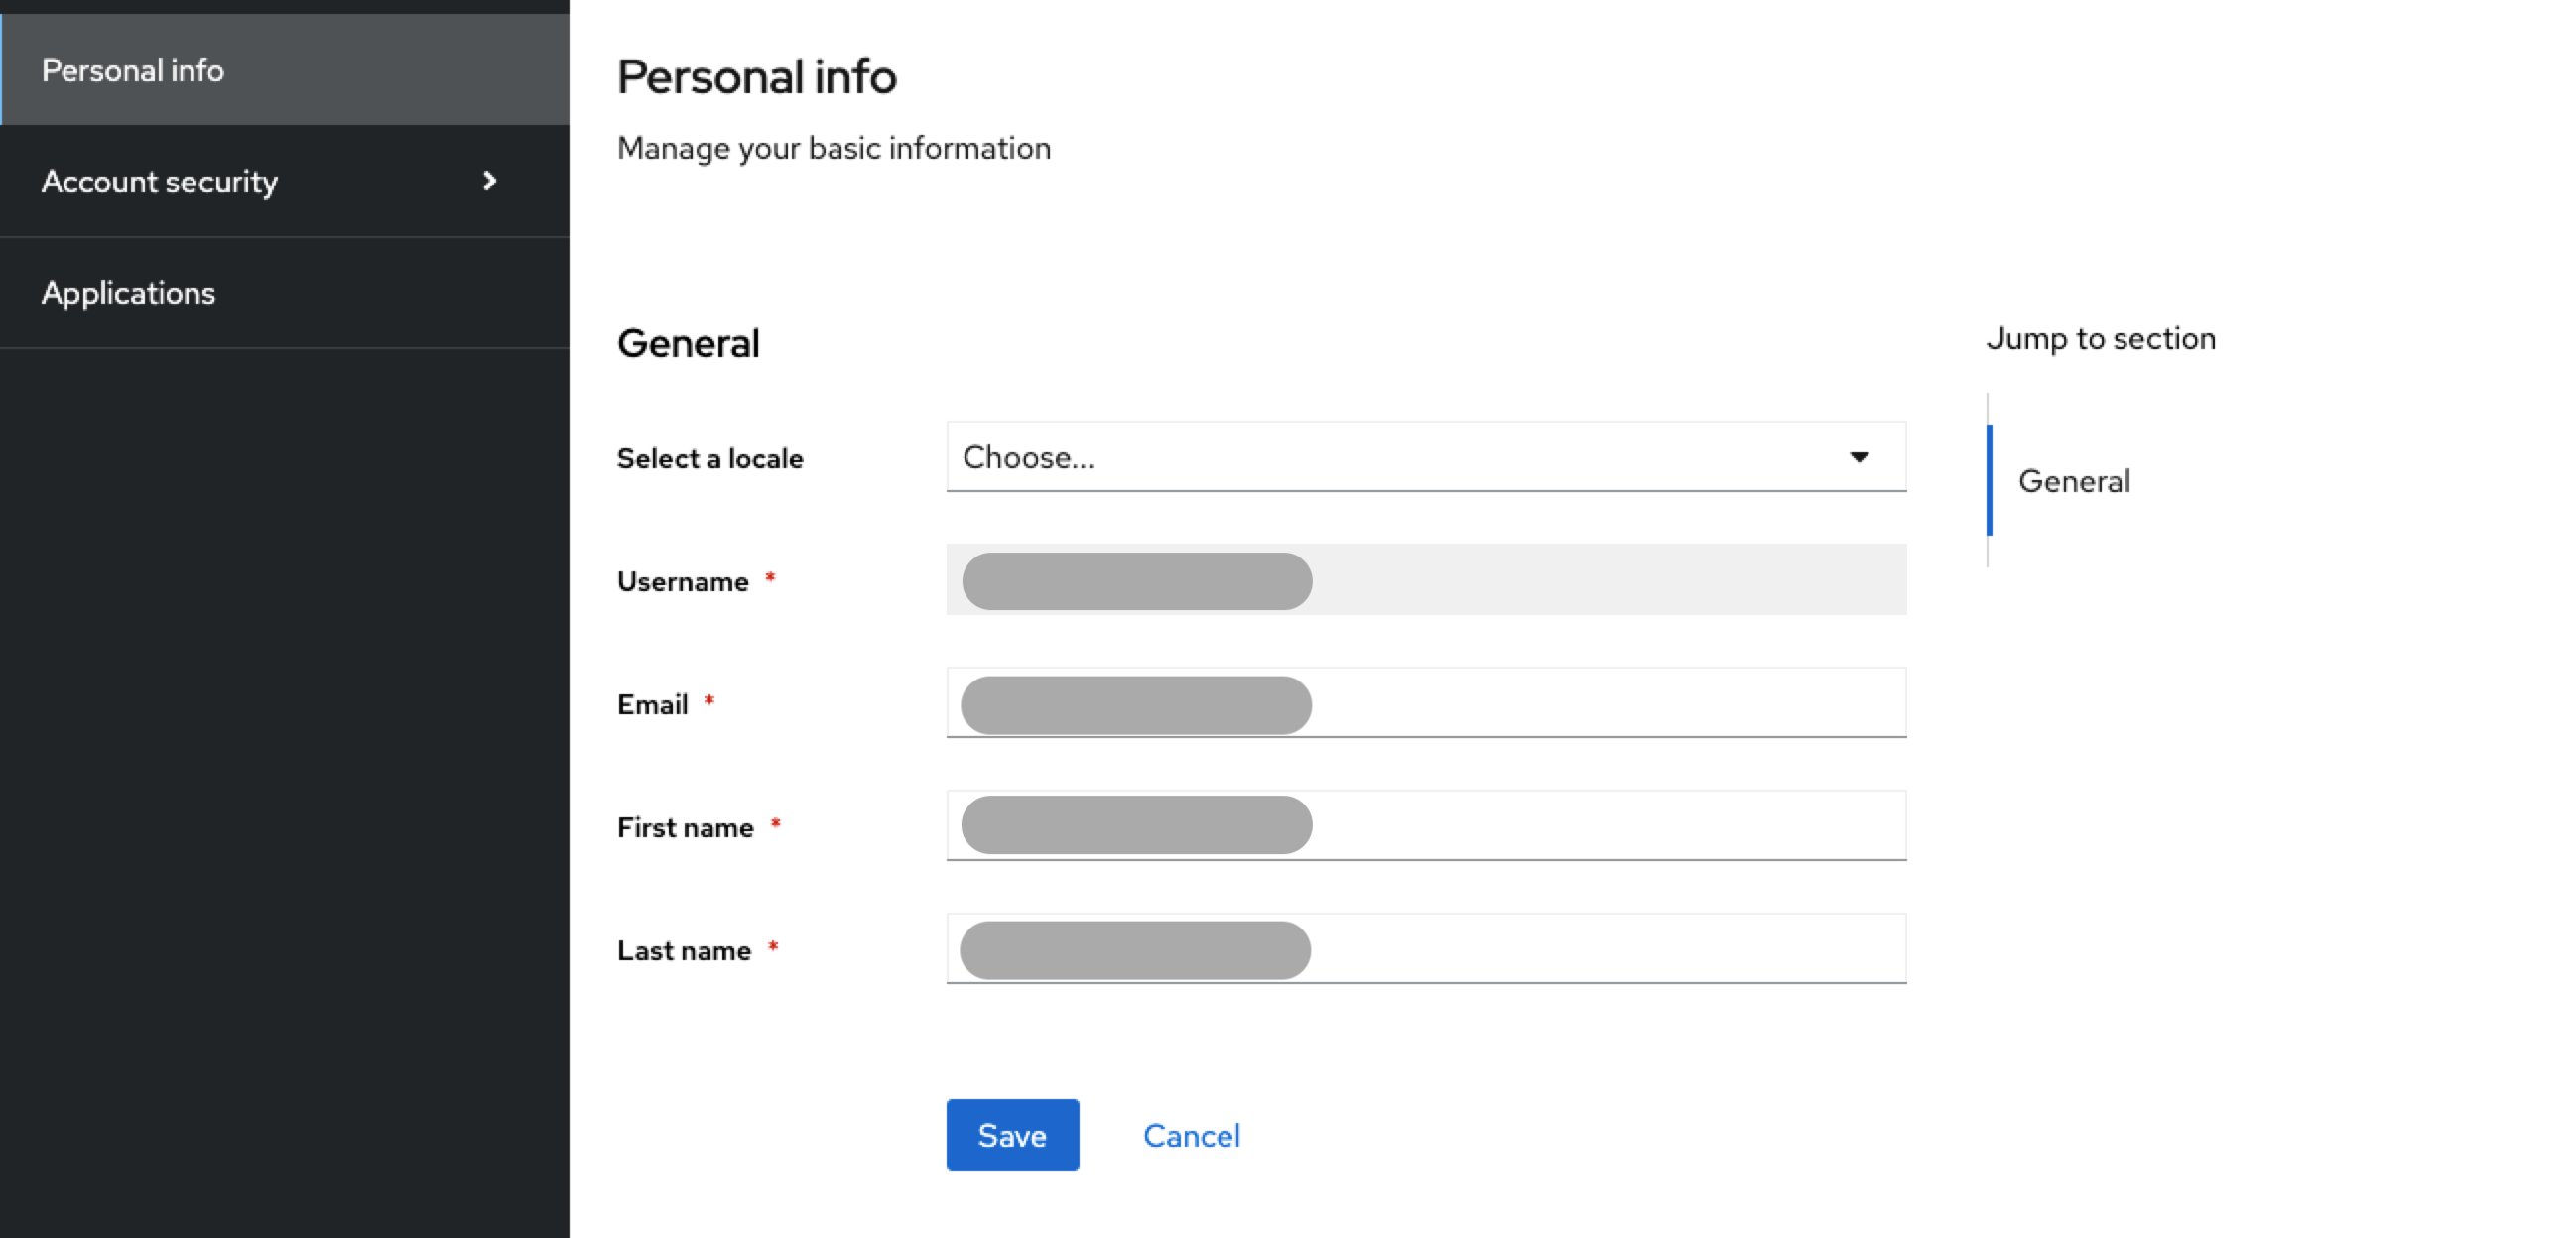
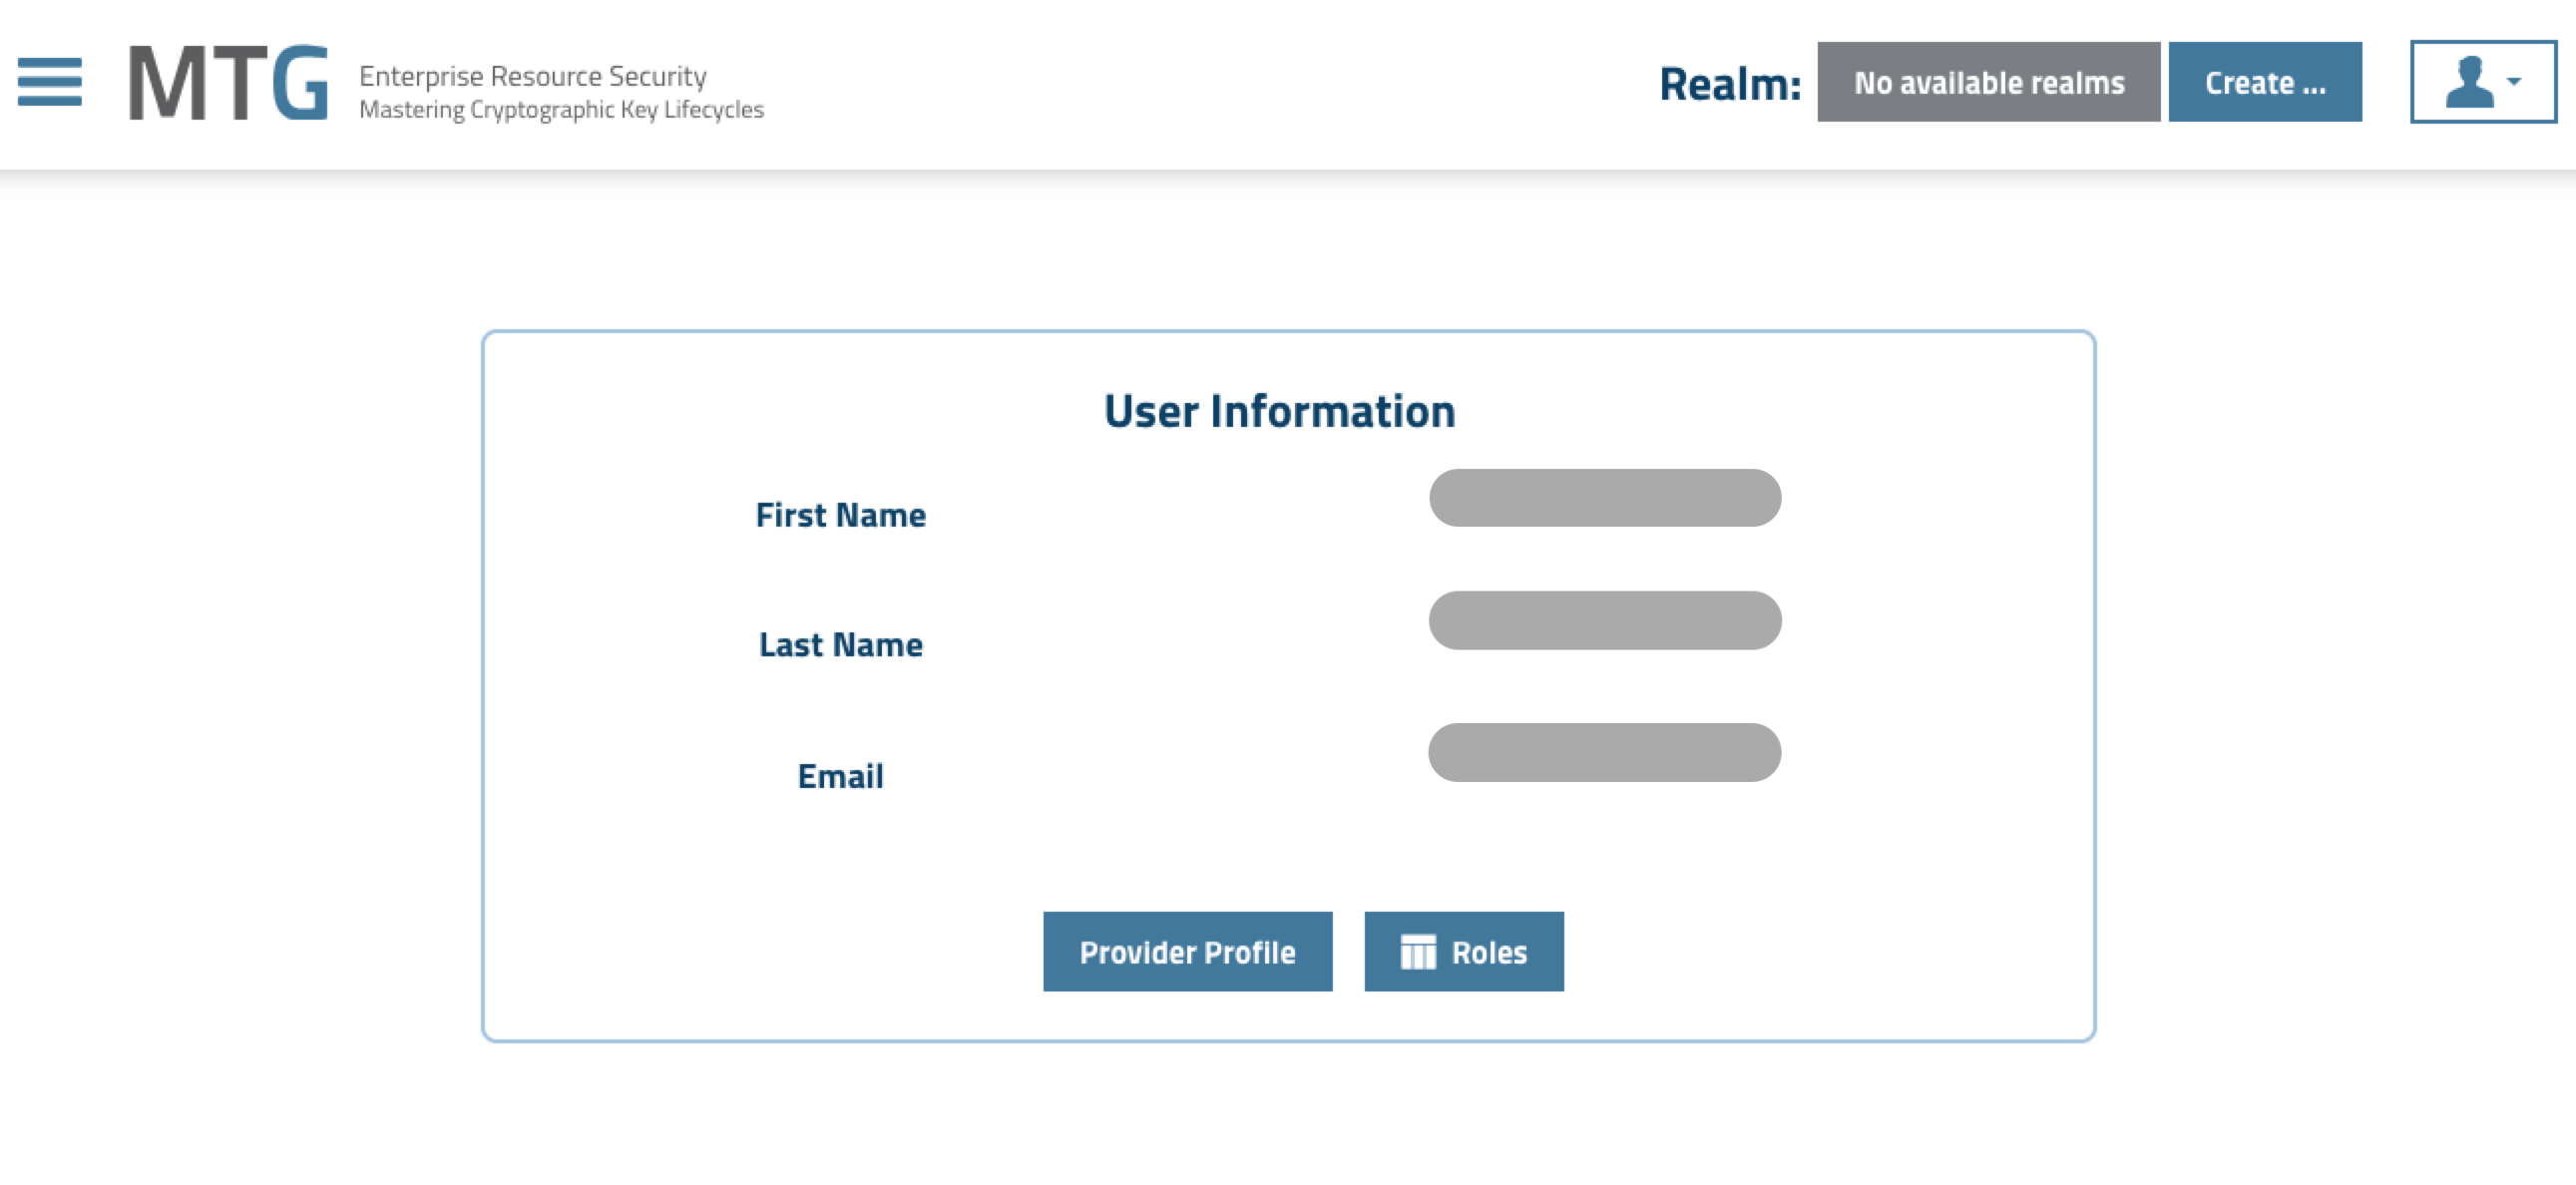
Confirm authentication and successful profile creation both in Keycloak and in MTG CLM.
Click to reveal screenshots