Employ MTG KMS as external Key Server in Nutanix Cloud
To install the KMS Server as an external Key Manager for your Nutanix Cluster, follow the steps below.
Create Node Certificates
-
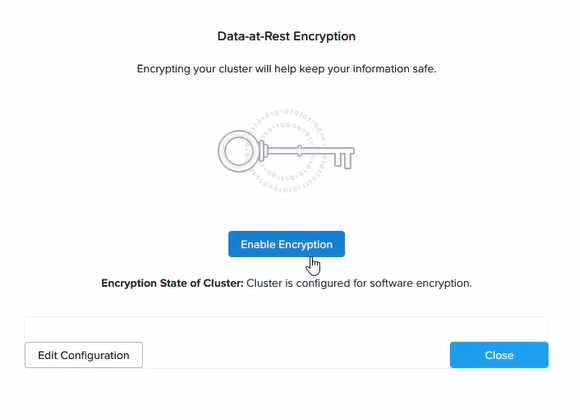
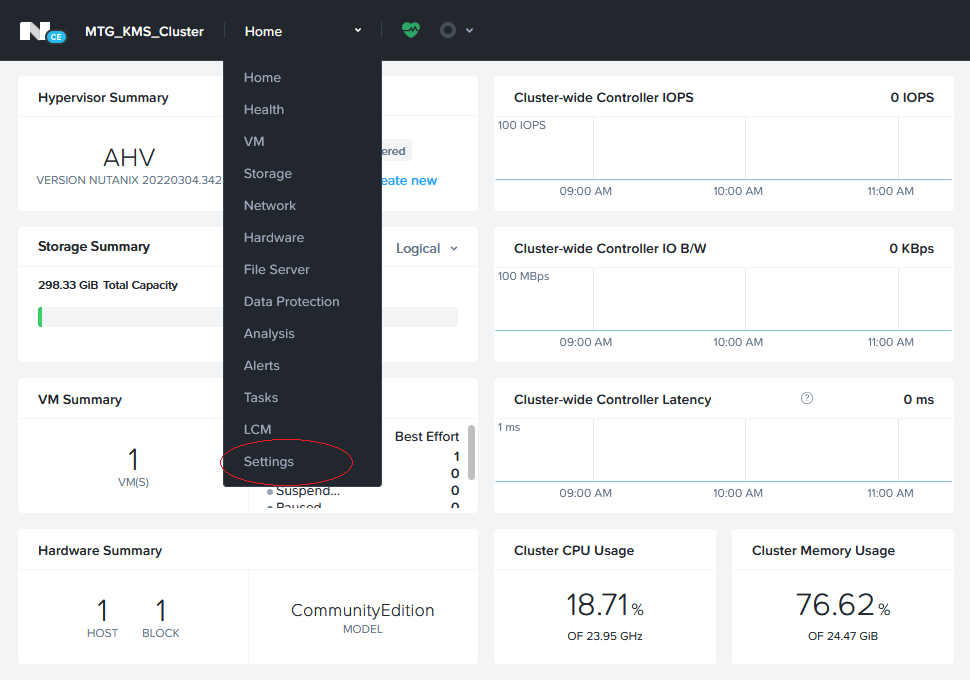
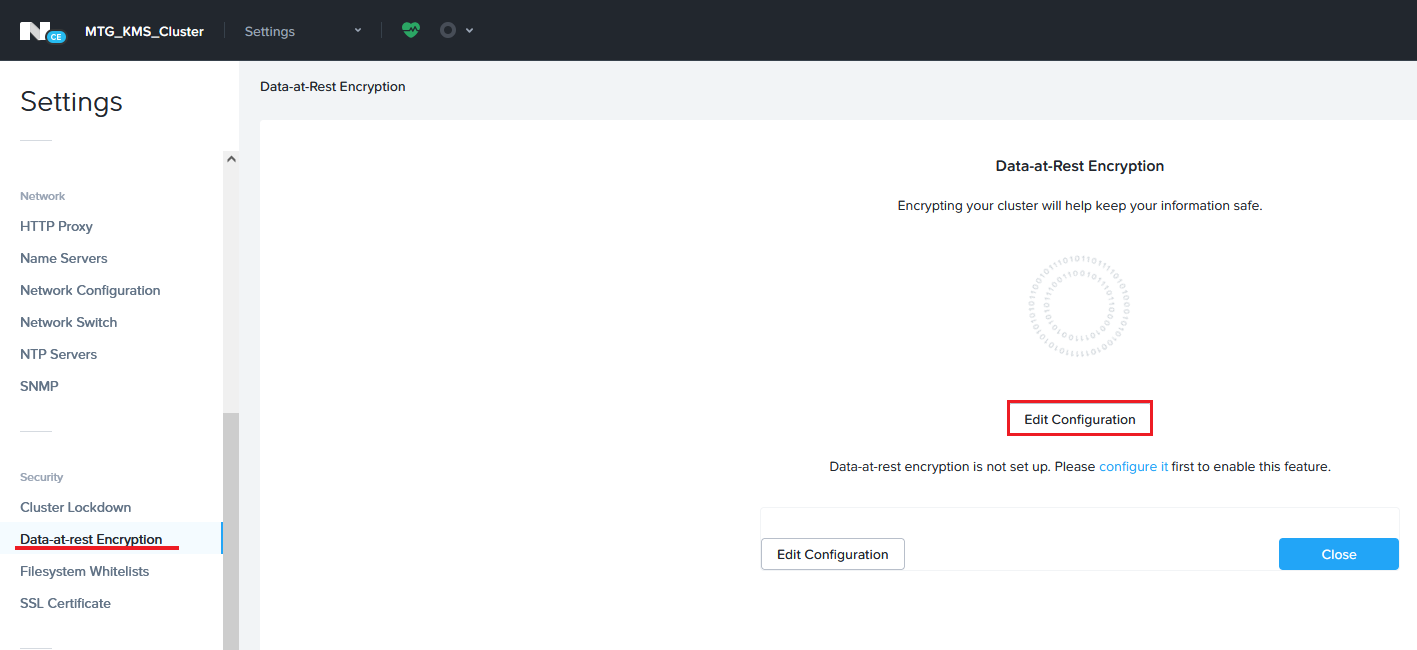
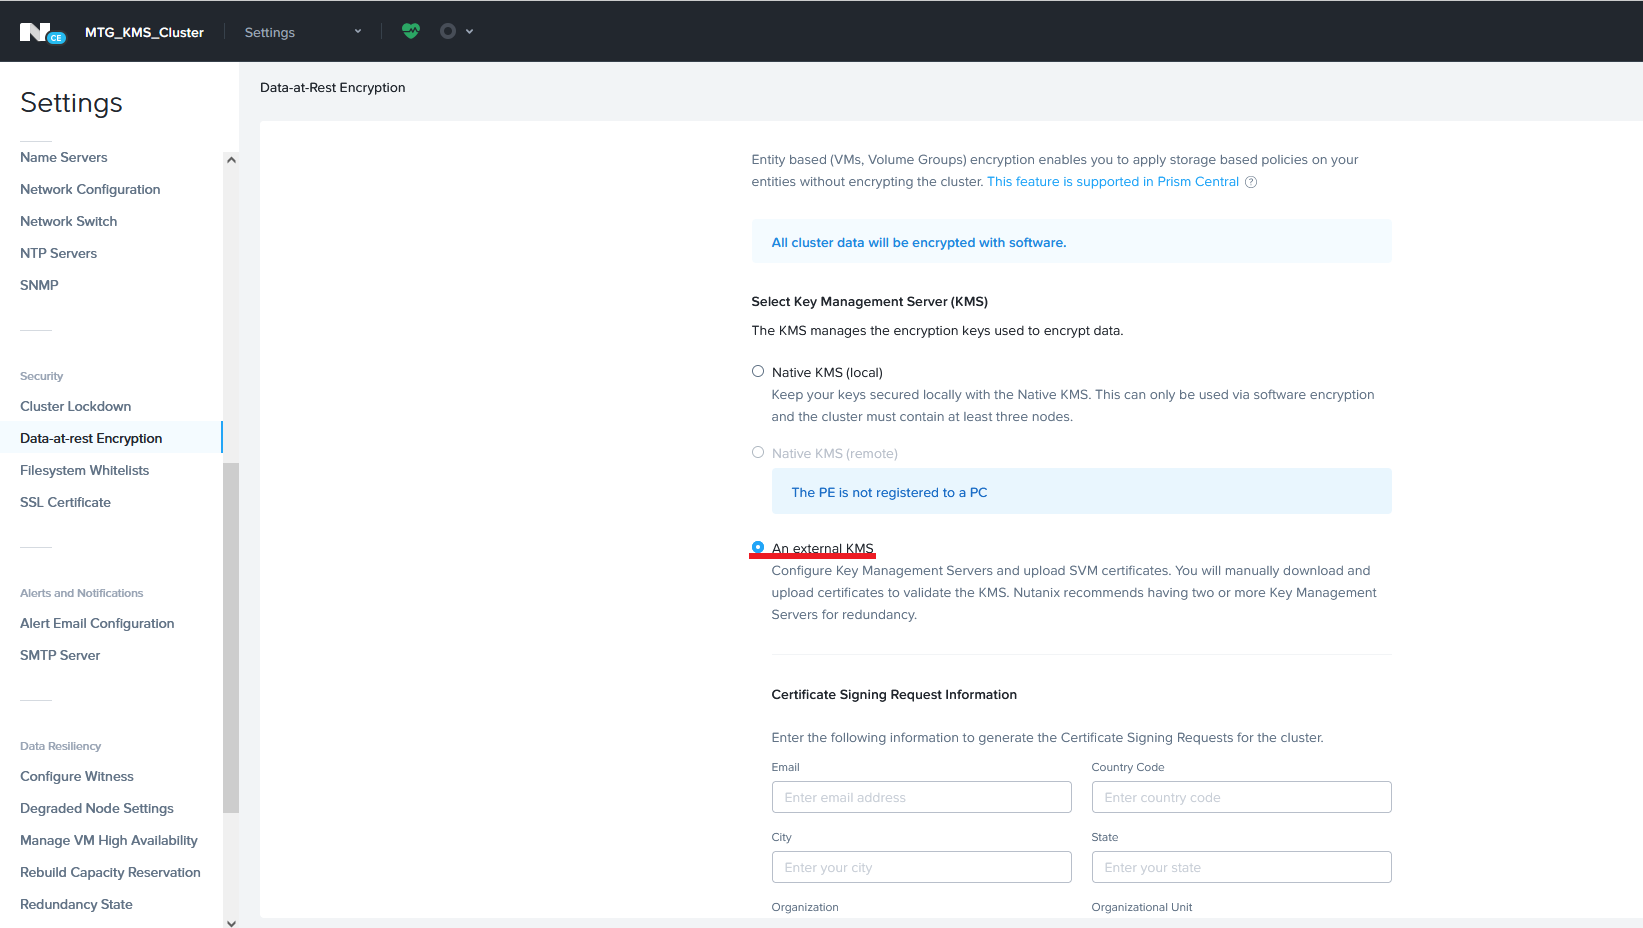
Navigate to Settings and then Data-at-Rest Encryption
-
Click on Edit Configuration
-
Select the external KMS option
-
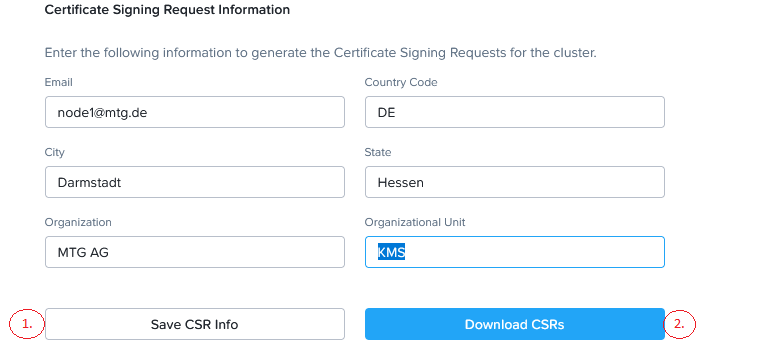
Further down go to Certificate Signing Request Information.
-
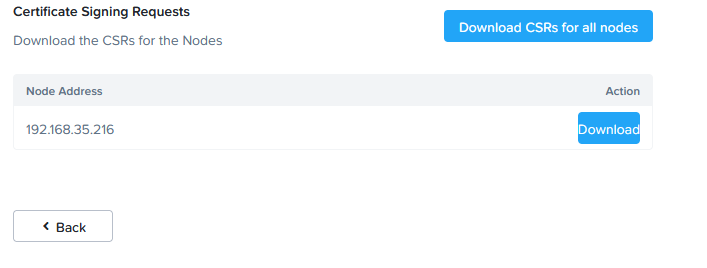
Here Fill out the Information and press Save. Create a CSR for every node and then Download the CSRs
-
Extract the CSR from the zip file.
-
Use the CARA Certification Manager to create each Node’s certificate from the CSRs.
When creating the certificate it is required to insert the name of the KMS-Tenant-Client, which is going to be used for the connection, in the CN (Common Name) of the certificate.
Add KMS to the Cluster
-
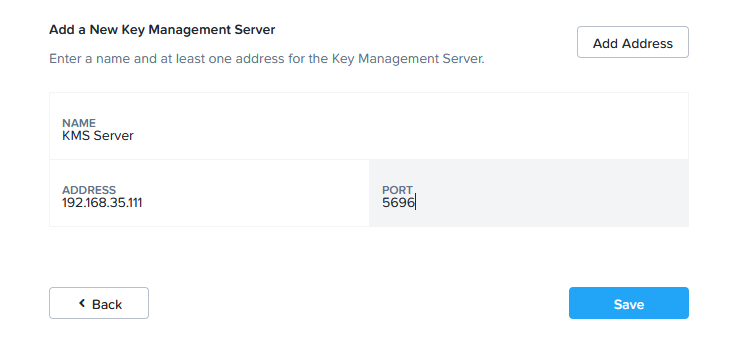
Within the Settings > Data-at-Rest Encryption > Edit Configuration scroll down to the "Add a new Key Management Server" option
-
Enter a name and the IP-Addresses of all the Nodes in the Cluster (Default Port is 5696) then Save
-
Now Select Add New Certificate Authority
Give a name, then select Upload CA Certificate and choose the cacert.pem created by CARA. Save.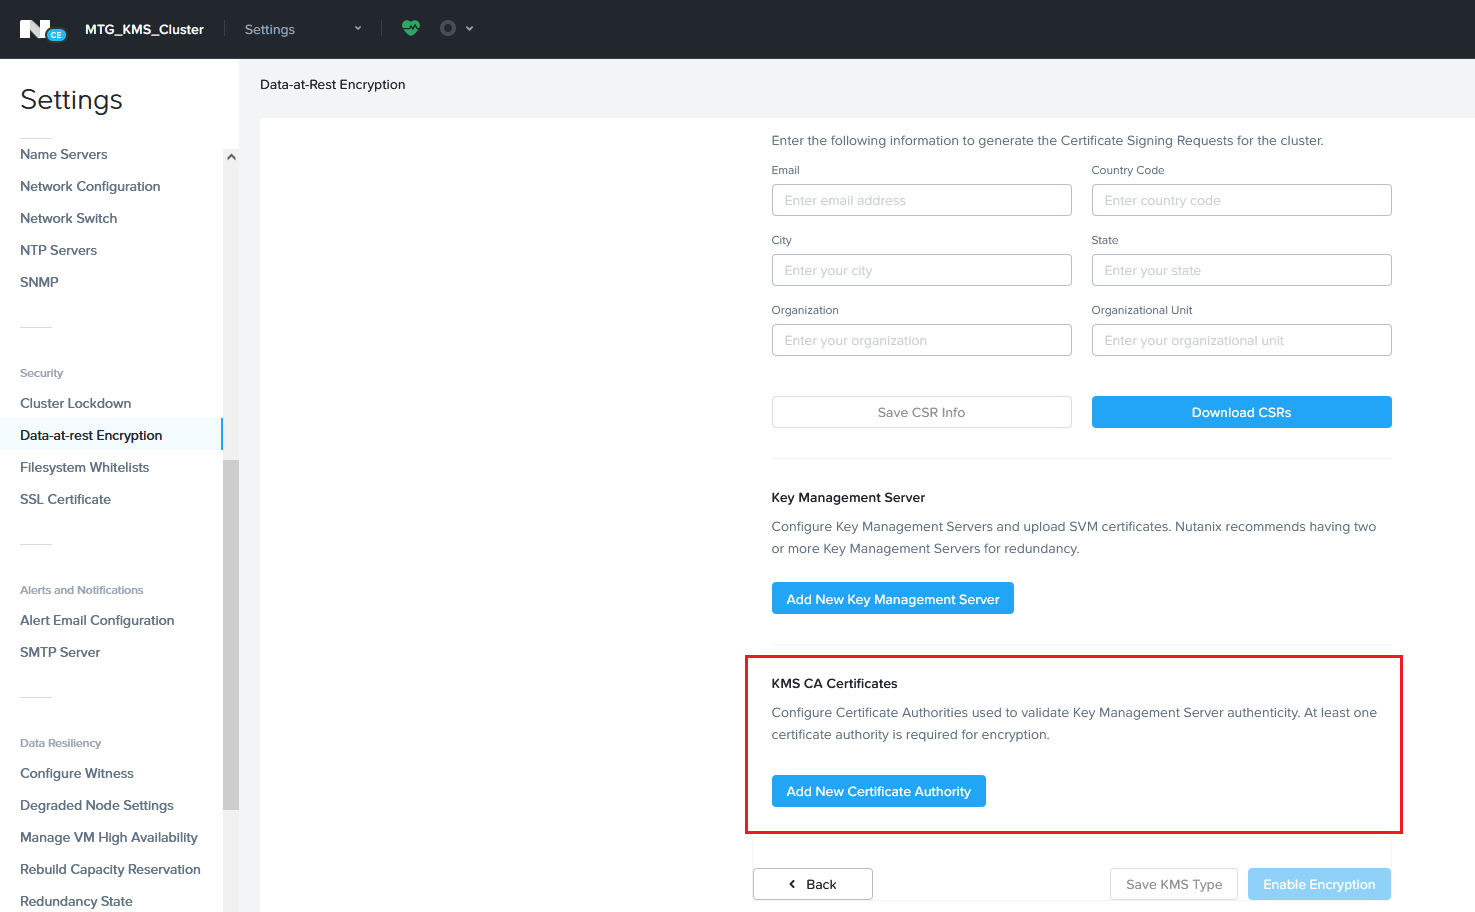
This step has to be done before we can upload the nodes' certificates
Add the User Certificates to the Nodes
In order for the communication between the cluster’s nodes and the KMS Server to be established securely, each node needs to have a certificate assigned to them.
-
For that, again go to Settings > Data-at-Rest Encryption > Edit Configuration
-
In the Key Management Server section click on Manage Certificates
-
Upload the Users' Certificates and Submit
-
Click Test CS to verify
-
Repeat for all nodes/certificate pairs