|
For the latest version, please use Certificate Lifecycle Manager 6.3.0! |
Active Directory Integration
This section describes the process of integrating MTG-CLM with Active Directory.
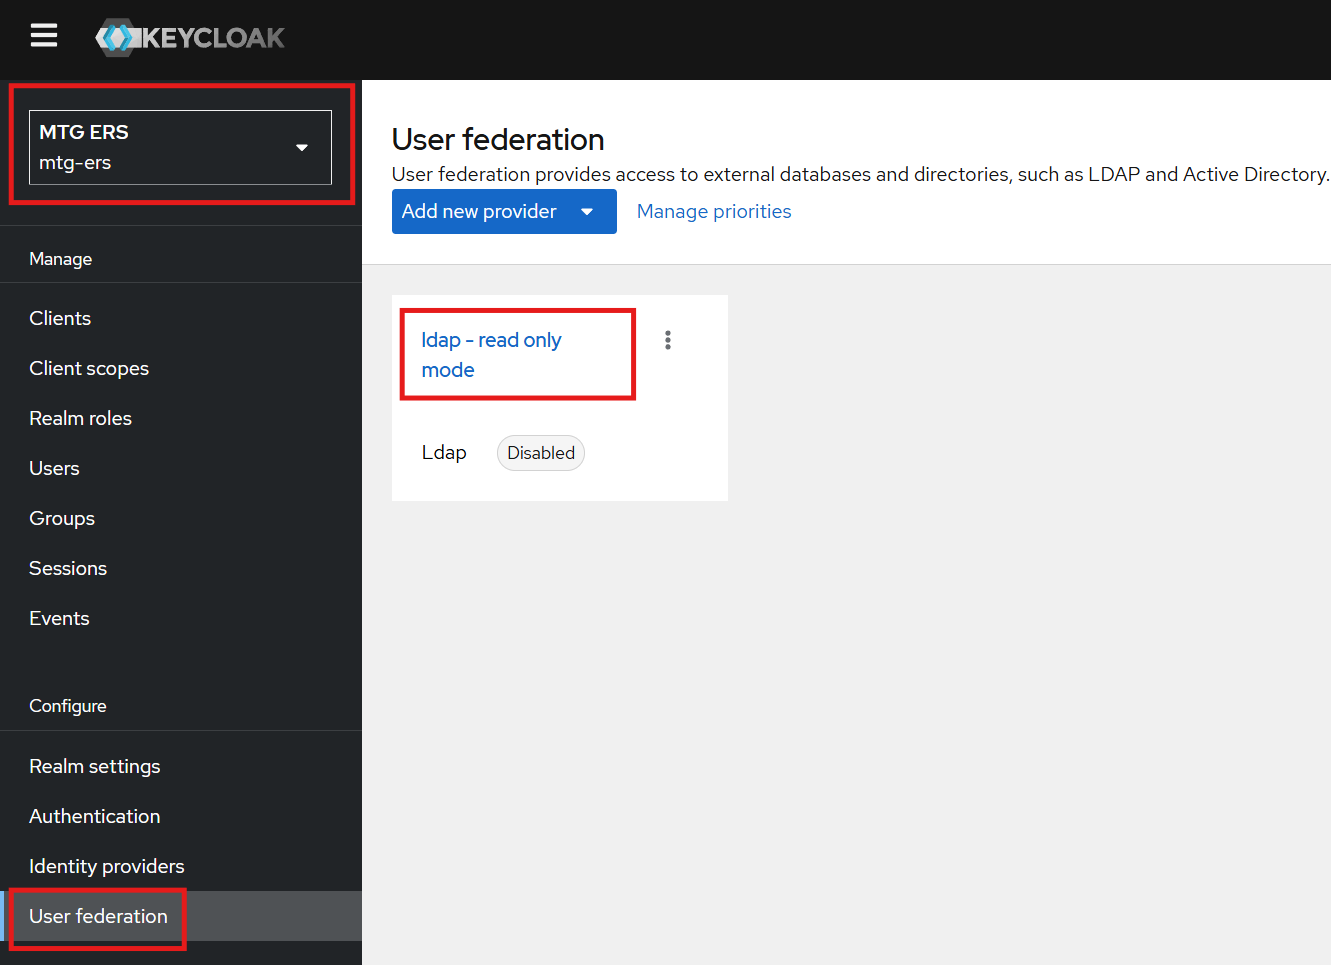
Access User Federation
-
Navigate to the left sidebar menu and select
User Federationas shown below:
Click to reveal screenshot
Enable the LDAP Provider
-
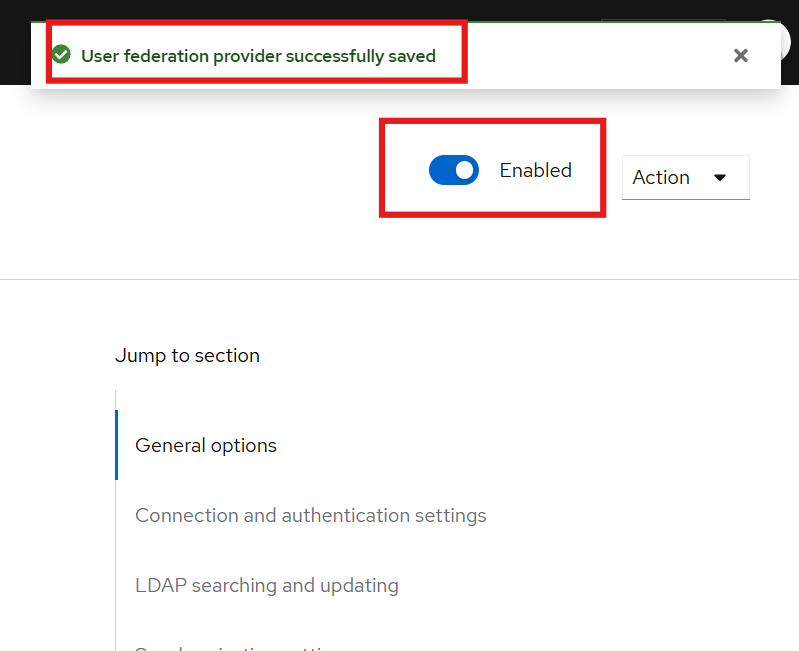
Click on the existing LDAP provider.
-
Enable it by clicking the
Enabled buttonin the top-right corner, as shown below:
Click to reveal screenshot
Configure LDAP Settings
-
Configure the fields with the appropriate information corresponding to your Active Directory.
-
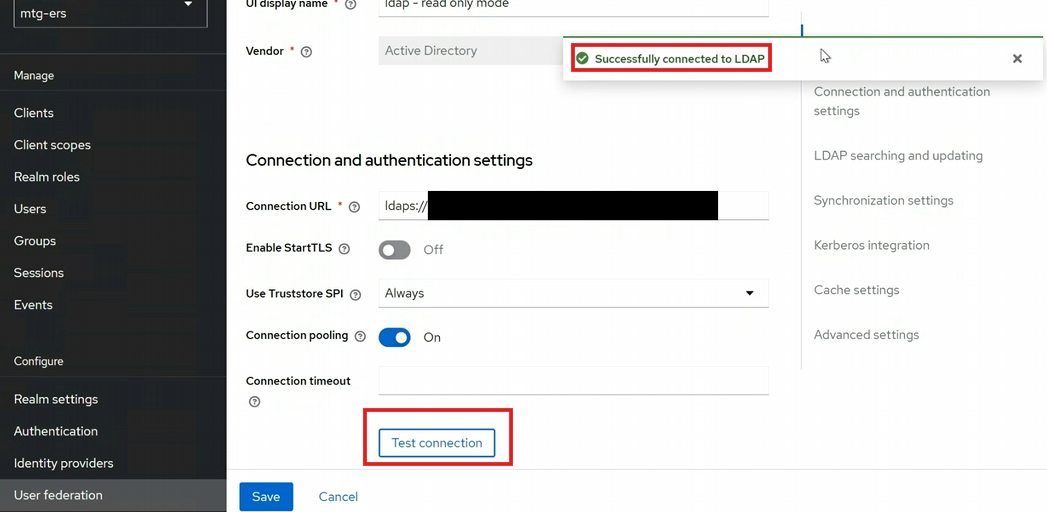
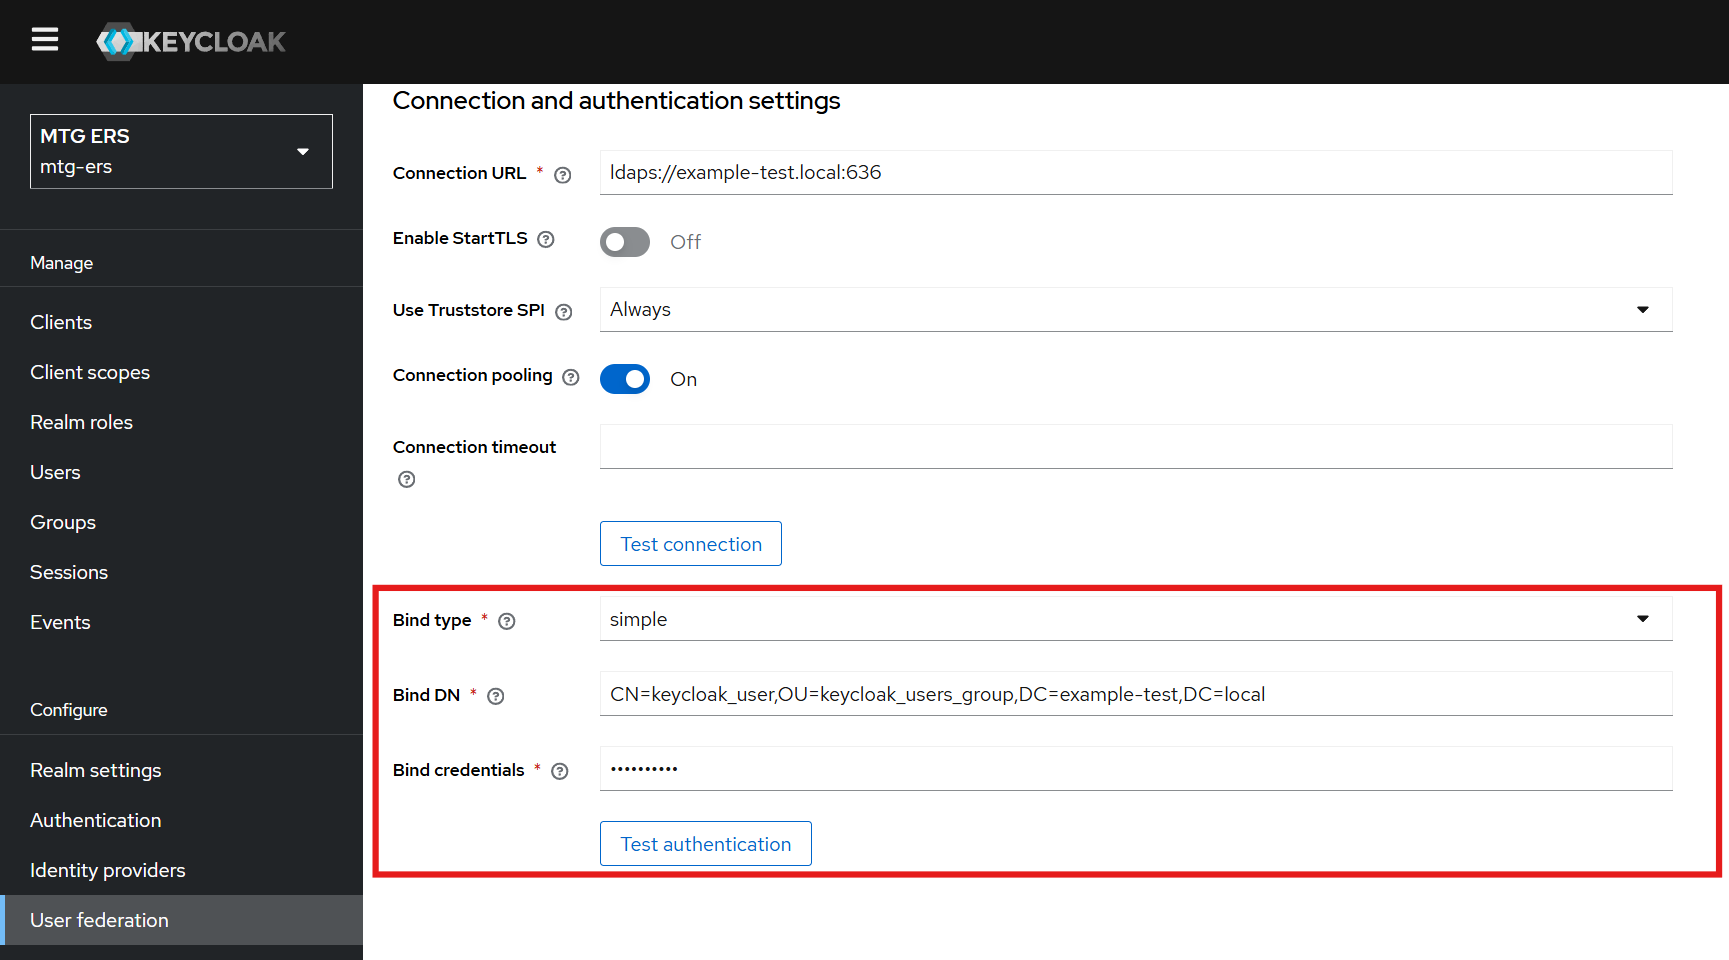
Navigate to the Connection and Authentication Settings section.
Configure Bind Type, DN, and Credentials
-
Set the following fields to enable authentication testing:
-
Bind Type: simple
-
Bind DN: Retrieve this value from Active Directory (see below).
-
Bind Credentials: Use the Active Directory admin password.
Retrieve Bind DN from Active Directory
-
Open the Active Directory Users and Computers tool.
-
Navigate to the
ad.example.comdomain dropdown. -
Create a dedicated group for the users you wish to bind with MTG-CLM (if not already created).
-
Select a user from this group, go to
Properties → Attribute Editor → distinguishedName, and copy the value. -
Paste the copied value into the Bind DN field in Keycloak.
Click to reveal screenshot
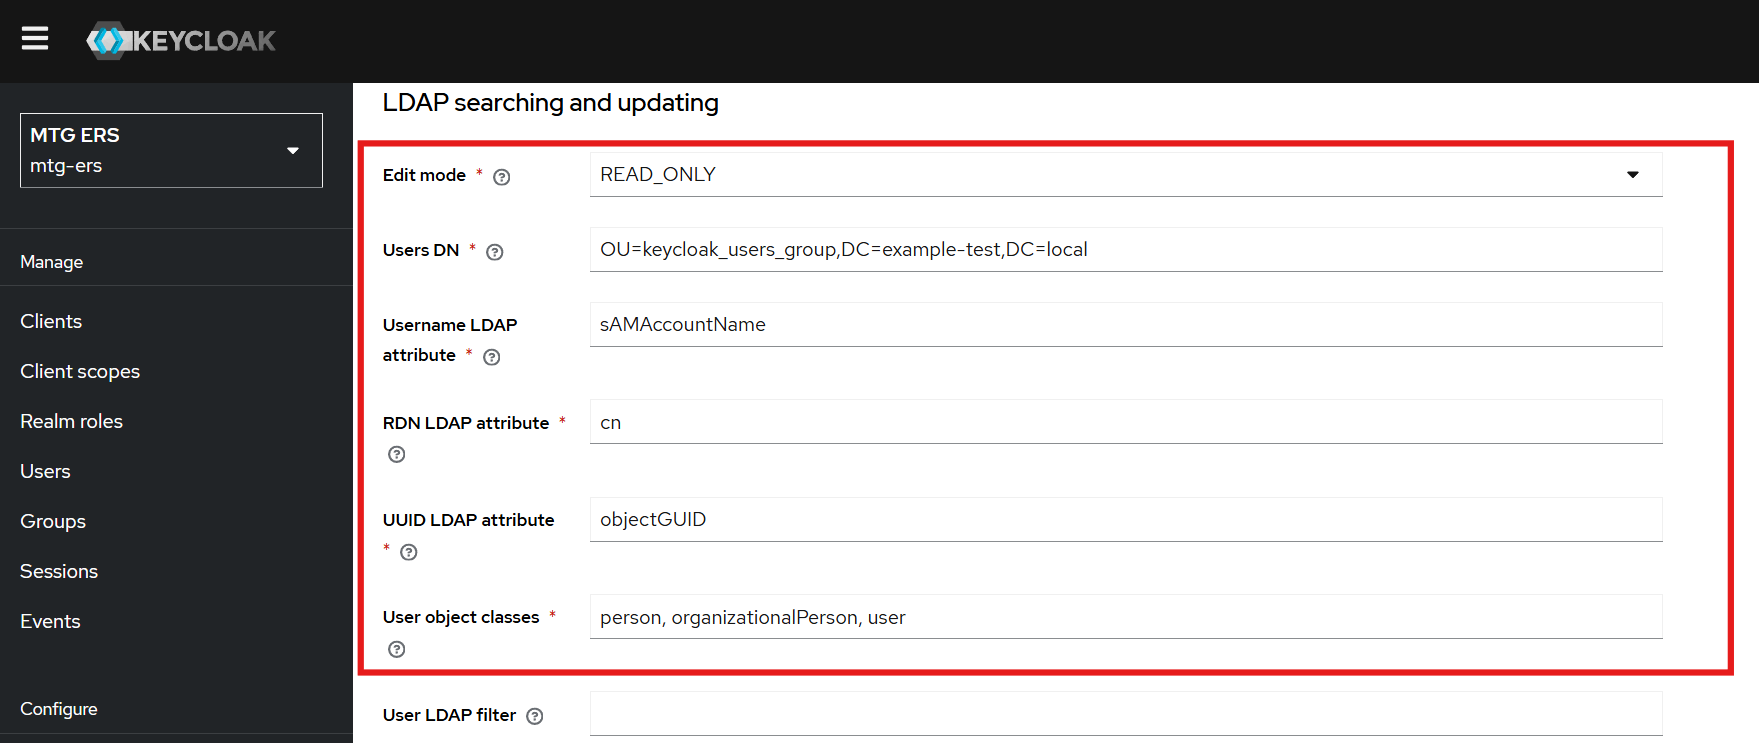
Proceed to the LDAP Searching and Updating section.
-
Keep the Edit Mode set to
UNSYNCED. -
Set the
Users DNfield to match the group of users you wish to import from Active Directory.
Click to reveal screenshot
The Edit Mode option must always be set to UNSYNCED.
UNSYNCED mode allows users to modify their profile information through MTG-CLM while maintaining integration with Active Directory.
However, it’s important to note that changes made within MTG-CLM (or Keycloak) are stored in Keycloak and not synchronized back to Active Directory.
While periodic synchronization from Active Directory to Keycloak will continue to work, any changes made in MTG-CLM may be overwritten during the next sync cycle.
This may result in data discrepancies between the two systems.
Make sure you are aware of this behavior and always monitor for potential inconsistencies between MTG-CLM and Active Directory user data.
|
Overview of Role Mapping
-
Keycloak groups can be mapped to Active Directory (AD) groups and vice versa.
-
Roles can be assigned to users and permissions can be granted to roles for better access control.
-
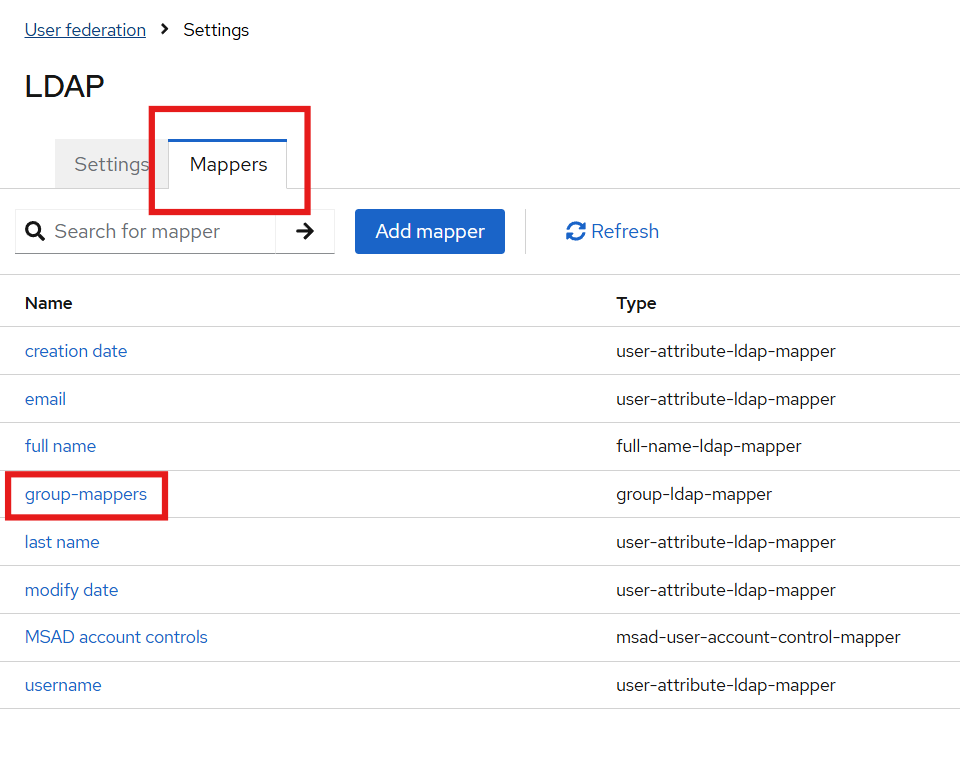
Preconfigured templates are available in the Mappers section for facilitating role mapping between AD and Keycloak.
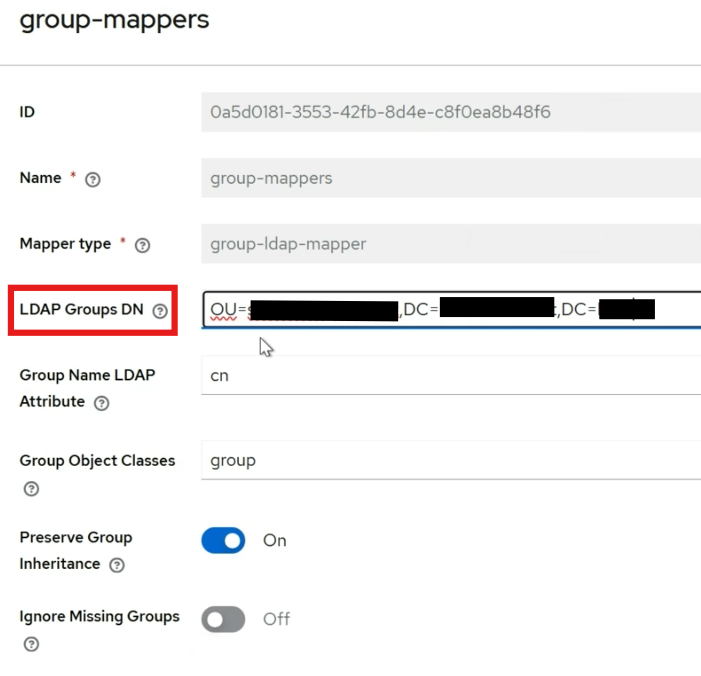
Configure LDAP Groups in Keycloak
-
Paste the copied distinguished name into the
LDAP Groups DNfield in Keycloak.
Click to reveal screenshot
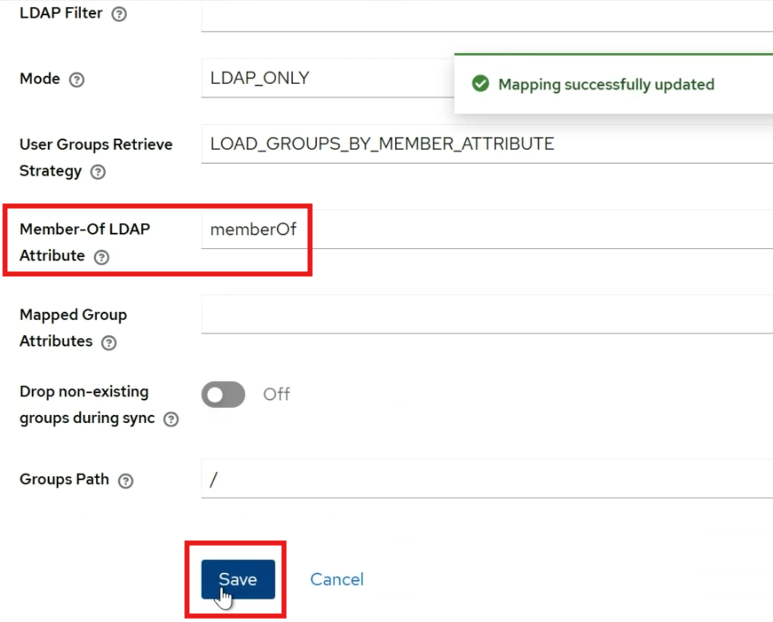
Set Member-Of Attribute
-
Ensure the
Member-Of LDAP Attributeis set tomemberOf. -
This ensures the mapping applies to all members of the specified group.
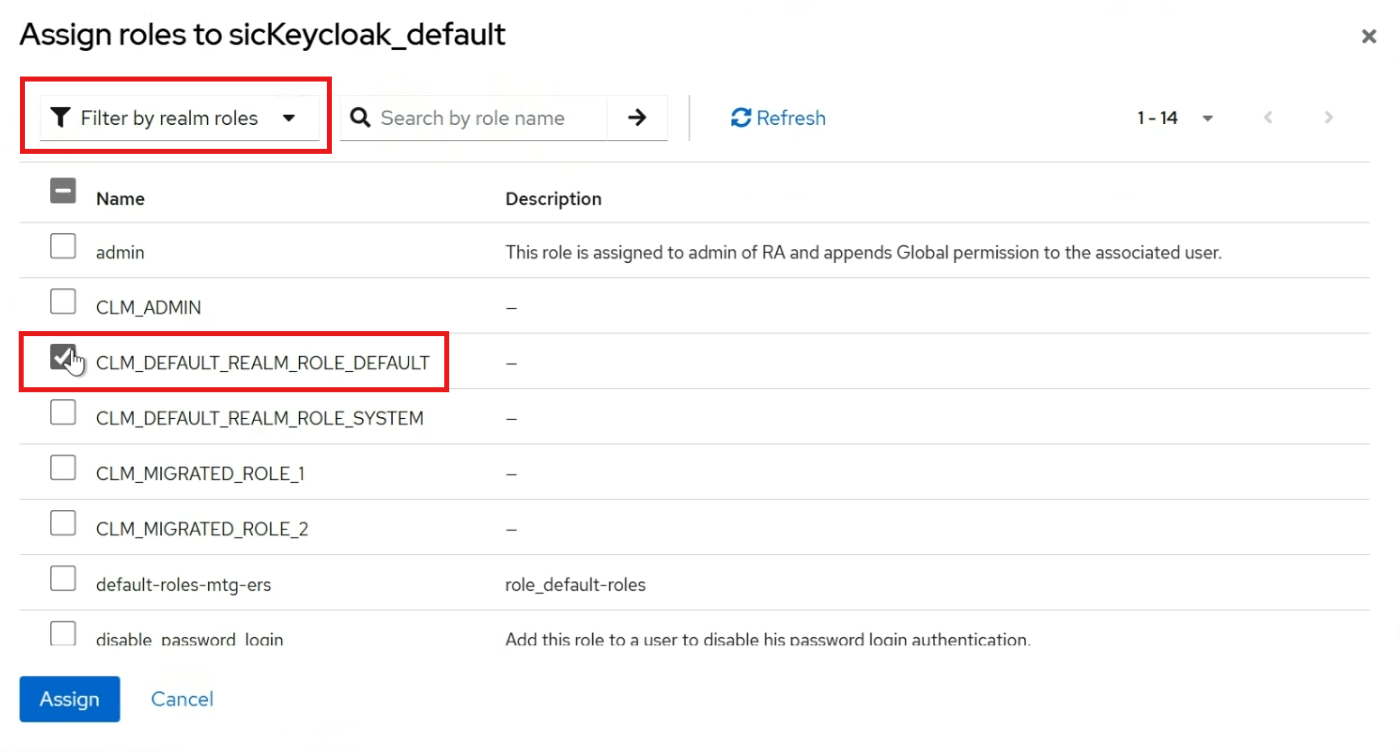
Assign Roles to Groups
-
Navigate to the Groups section in Keycloak.
-
Select the group to which you want to assign a role.
-
Go to the Role Mapping tab.