|
For the latest version, please use Certificate Lifecycle Manager 6.3.0! |
Integration with Active Directory
This page describes the process of integrating Certificate Lifecycle Manager with Active Directory.
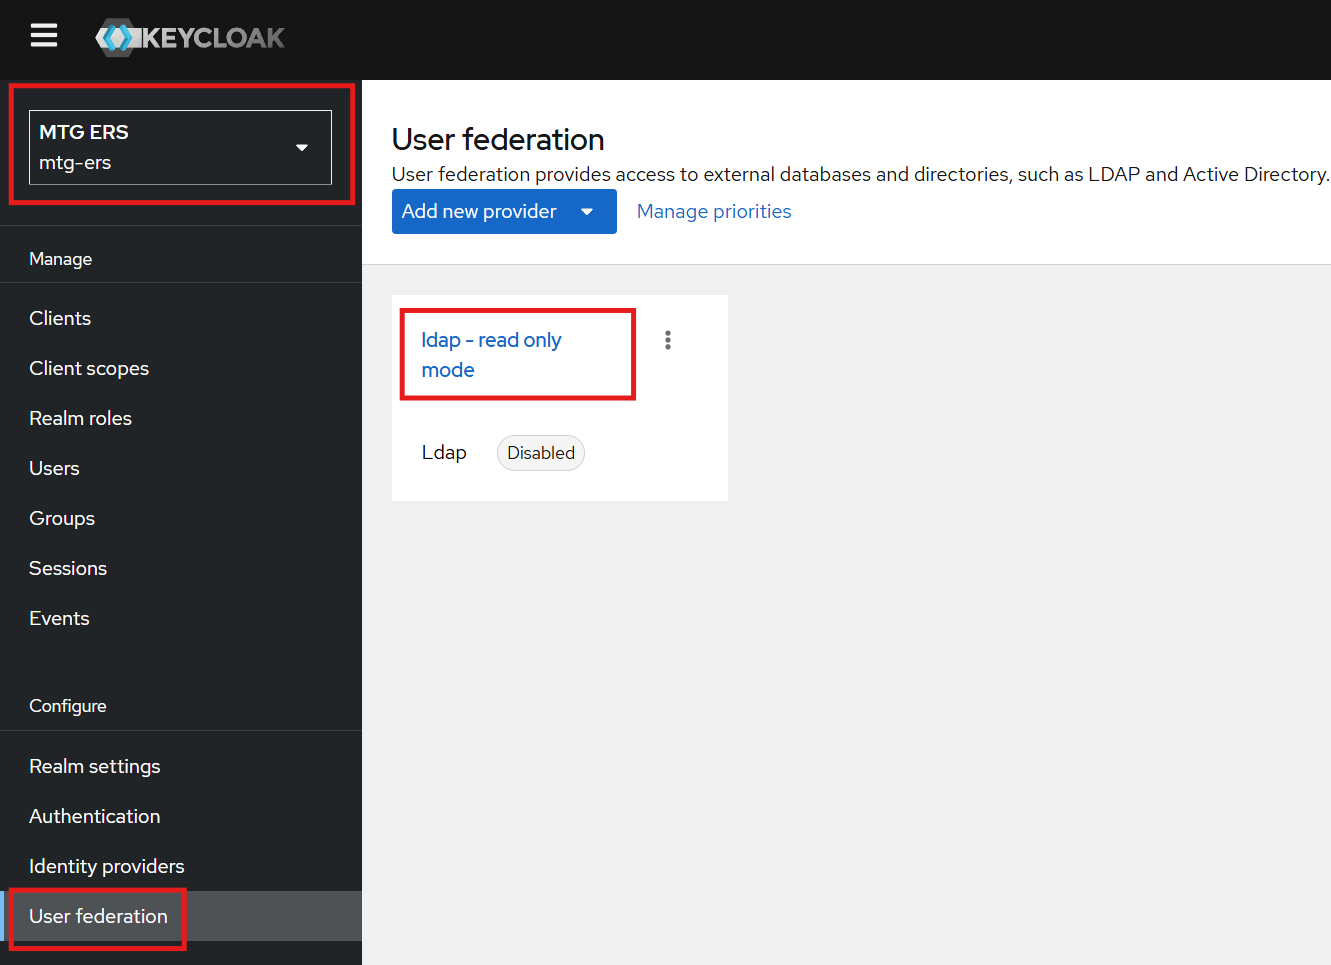
Enable the LDAP Provider
-
Click on the existing
ldap - read-only modeLDAP provider. -
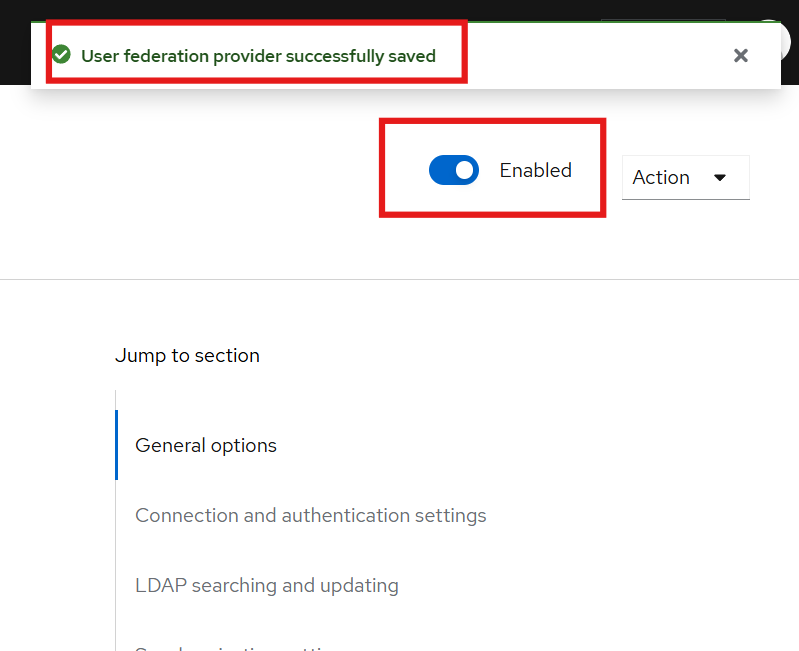
Enable it by clicking the
Enabled buttonin the top-right corner, as shown below:
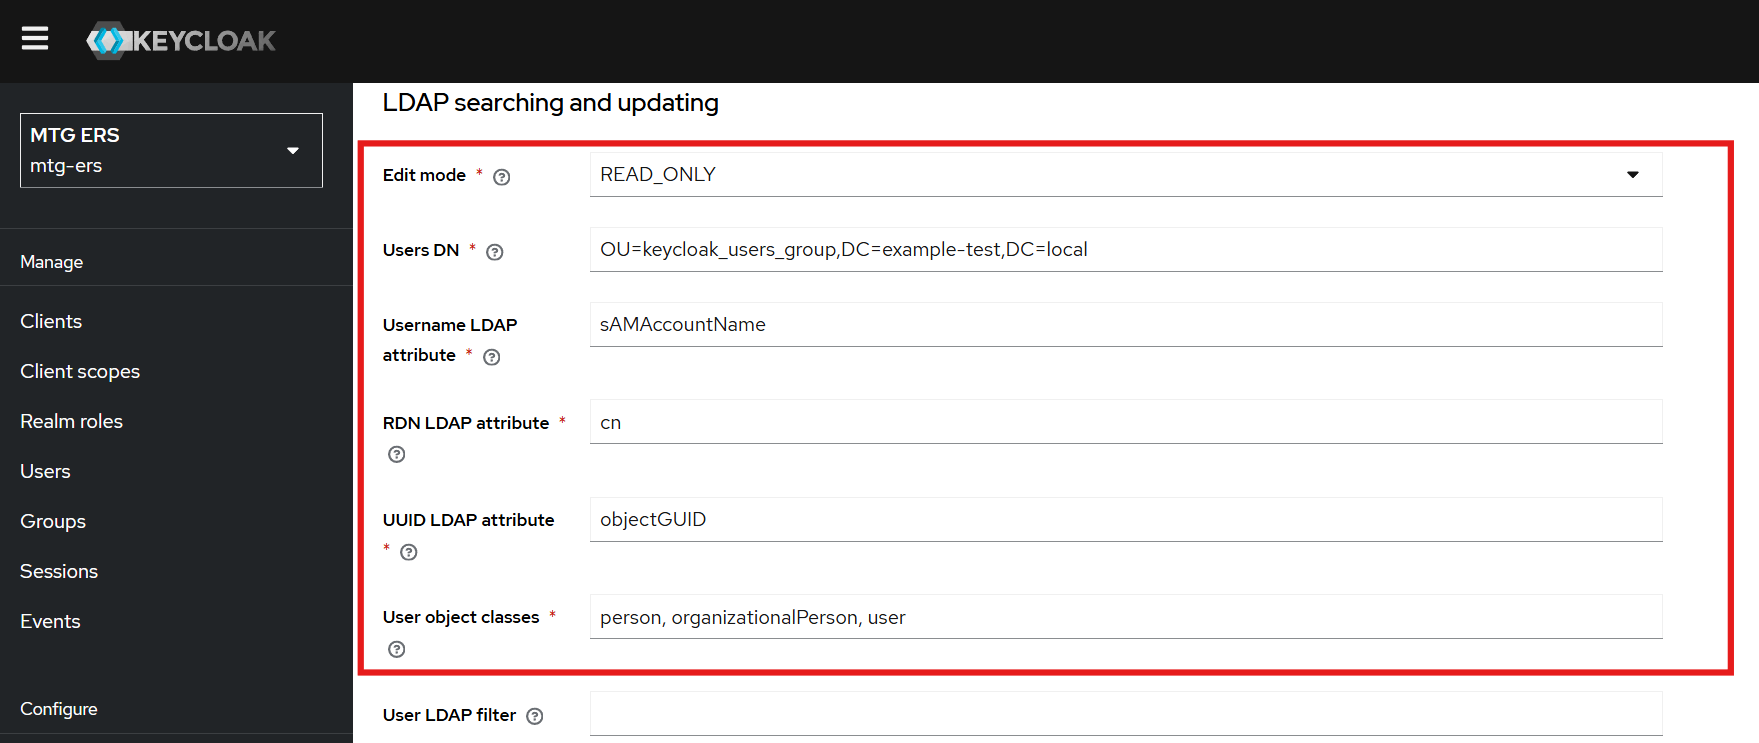
Configure LDAP Settings
-
Configure the fields with the appropriate information corresponding to your Active Directory.
-
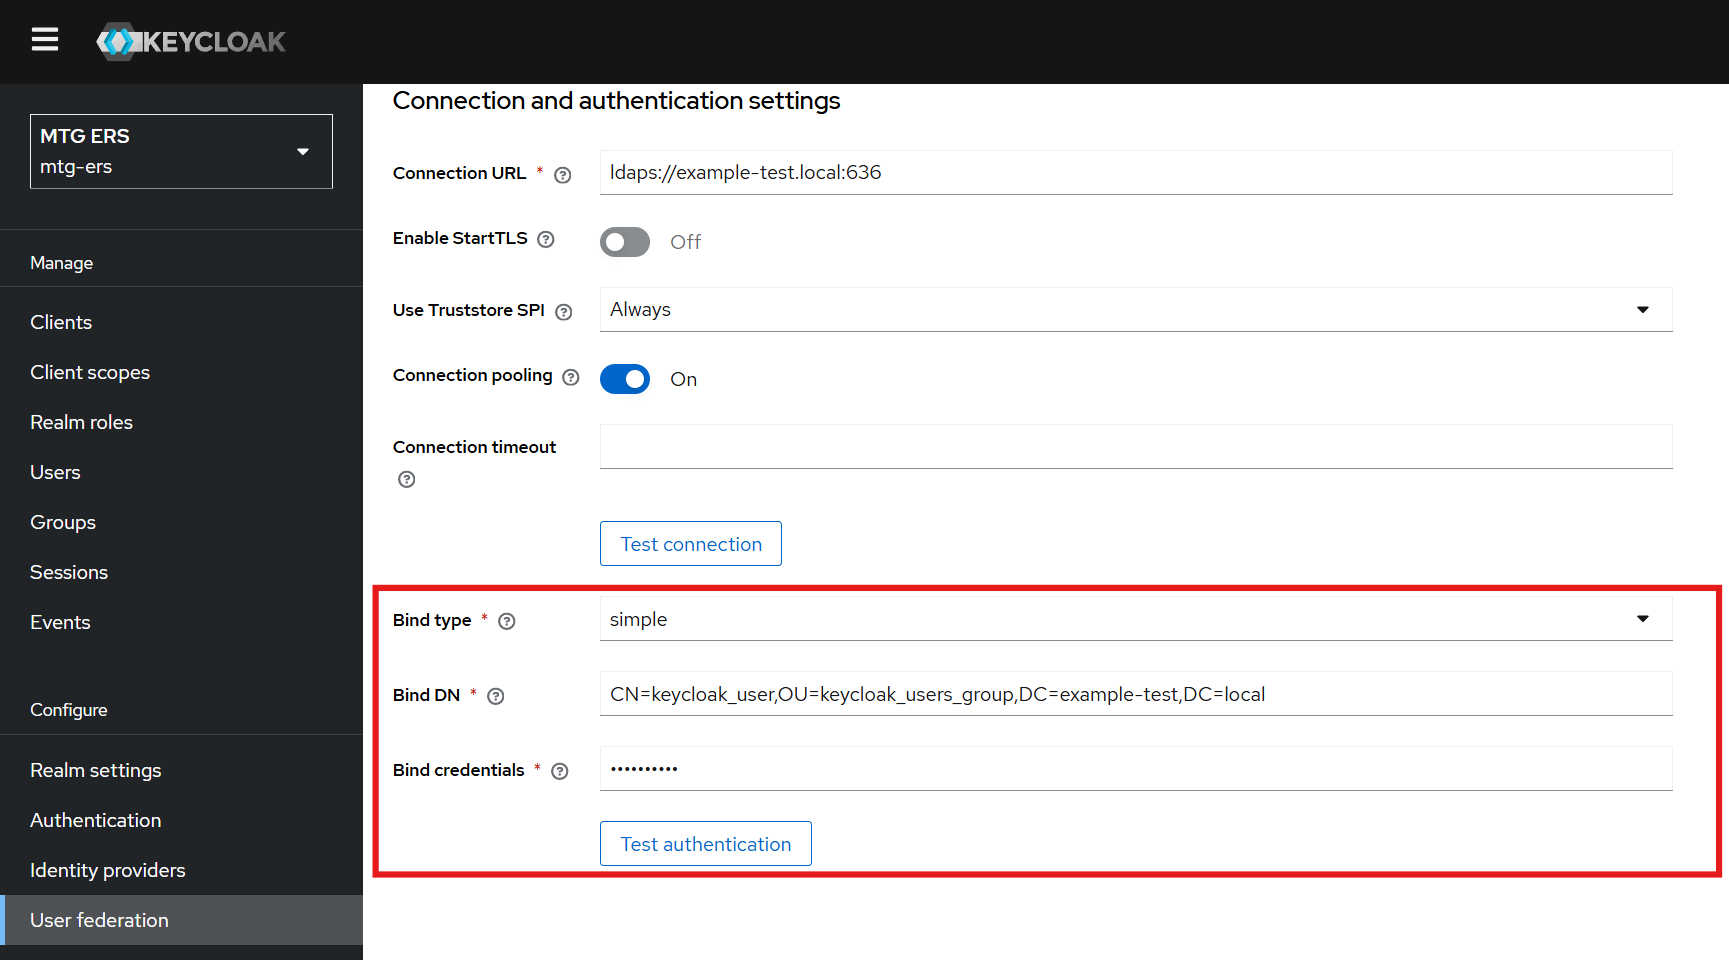
Navigate to the Connection and Authentication Settings section.

Configure Bind Type, DN, and Credentials
-
Set the following fields to enable authentication testing:
-
Bind Type: simple
-
Bind DN: Retrieve this value from Active Directory (see below).
-
Bind Credentials: Use the Active Directory admin password.
Retrieve Bind DN from Active Directory
-
Open the Active Directory Users and Computers tool.
-
Navigate to the
ad.example.comdomain dropdown. -
Create a dedicated group for the users you wish to bind with CLM (if not already created).
-
Select a user from this group, go to
Properties → Attribute Editor → distinguishedName, and copy the value. -
Paste the copied value into the Bind DN field in Keycloak.
Proceed to the LDAP Searching and Updating section.
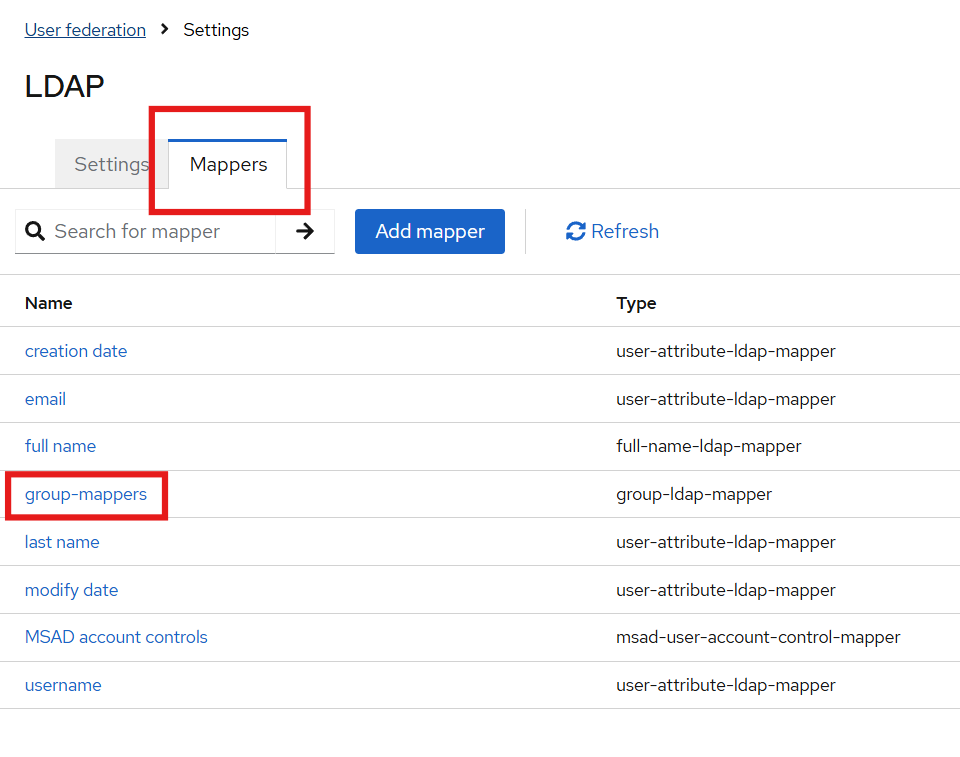
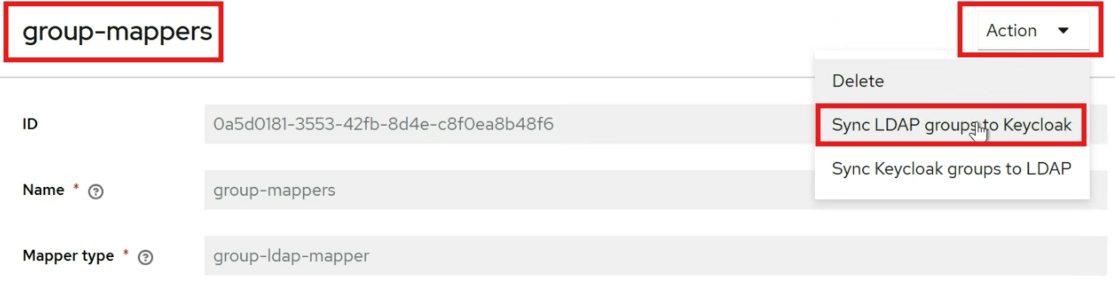
Overview of Role Mapping
-
Keycloak groups can be mapped to Active Directory (AD) groups and vice versa.
-
Roles can be assigned to users and permissions can be granted to roles for better access control.
-
Preconfigured templates are available in the Mappers section for facilitating role mapping between AD and Keycloak.
Configure LDAP Groups in Keycloak
-
Paste the copied distinguished name into the
LDAP Groups DNfield in Keycloak.
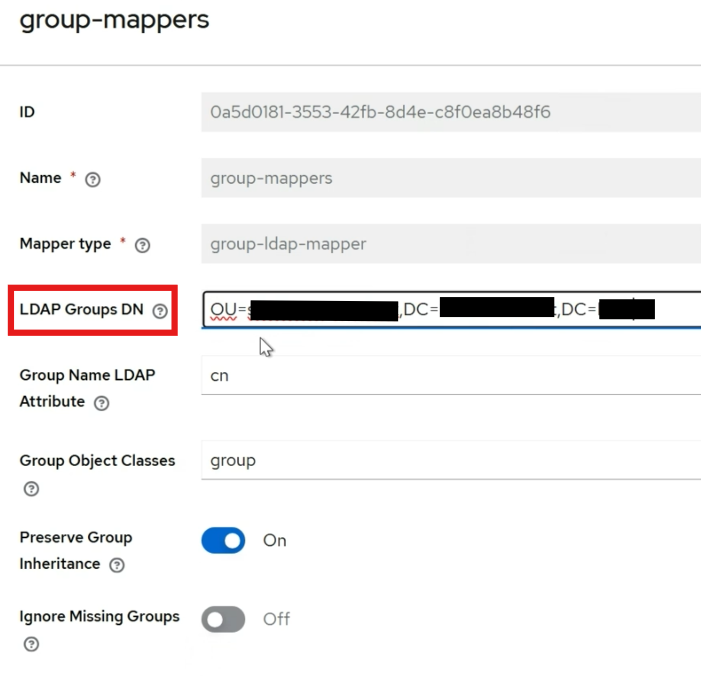
Set Member-Of Attribute
-
Ensure the
Member-Of LDAP Attributeis set tomemberOf. -
This ensures the mapping applies to all members of the specified group.

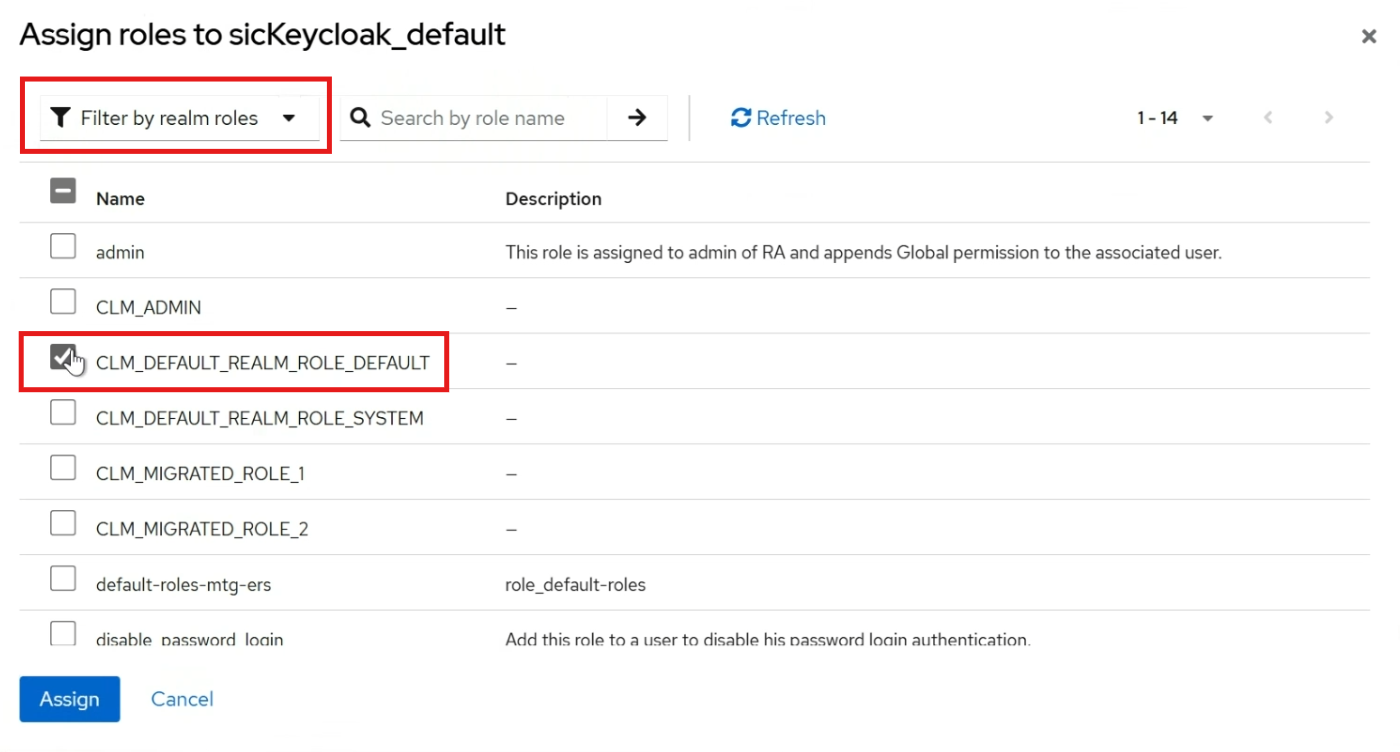
Assign Roles to Groups
-
Navigate to the Groups section in Keycloak.
-
Select the group to which you want to assign a role.
-
Go to the Role Mapping tab.