|
For the latest version, please use Certificate Lifecycle Manager 6.13.0! |
Autoenrollment Connector: Windows Integration
This guide describes how to configure the MTG Autoenrollment Connector (AEC) with Microsoft Active Directory. It covers installation, configuration, template setup, and client enrollment in a step-by-step workflow.
|
This page serves descriptive purposes only and is not a replacement to guides on installing, securing, or hardening an Active Directory, configuring DNS, or other administrative actions. It is meant as assistance to an administrator for the configuration of Windows systems to use the AEC. Security and hardening aspects of the installation and configuration of Windows components are not covered in this page. Security warnings shown in screenshots must be addressed in real-world installations. |
|
As of February 2026 the 2 initial chapters of the guide "Verify or Install Active Directory" and "Configure TLS for LDAP" have been moved here. Collapsible screenshot menus have also been removed, for more prominent navigation. |
Overview
Several steps may have already been performed in your organization (e.g., some components may already be installed). Deviations from real-world installations are expected.
This documentation covers:
-
Active Directory installation or verification of existing setup
-
TLS configuration for secure LDAP communication
-
Service account creation and Kerberos configuration
-
Certificate template configuration for autoenrollment
-
Group Policy setup for enrollment policies
-
Client-side policy updates and certificate requests
1. Create Service and LDAP User Accounts
For AEC to operate, two service accounts need to be created in Active Directory:
-
aec-service– The service account of the AEC -
aec-ldap-user– An Active Directory user needed by AEC to bind to Active Directory and perform LDAP operations
Create Account aec-service
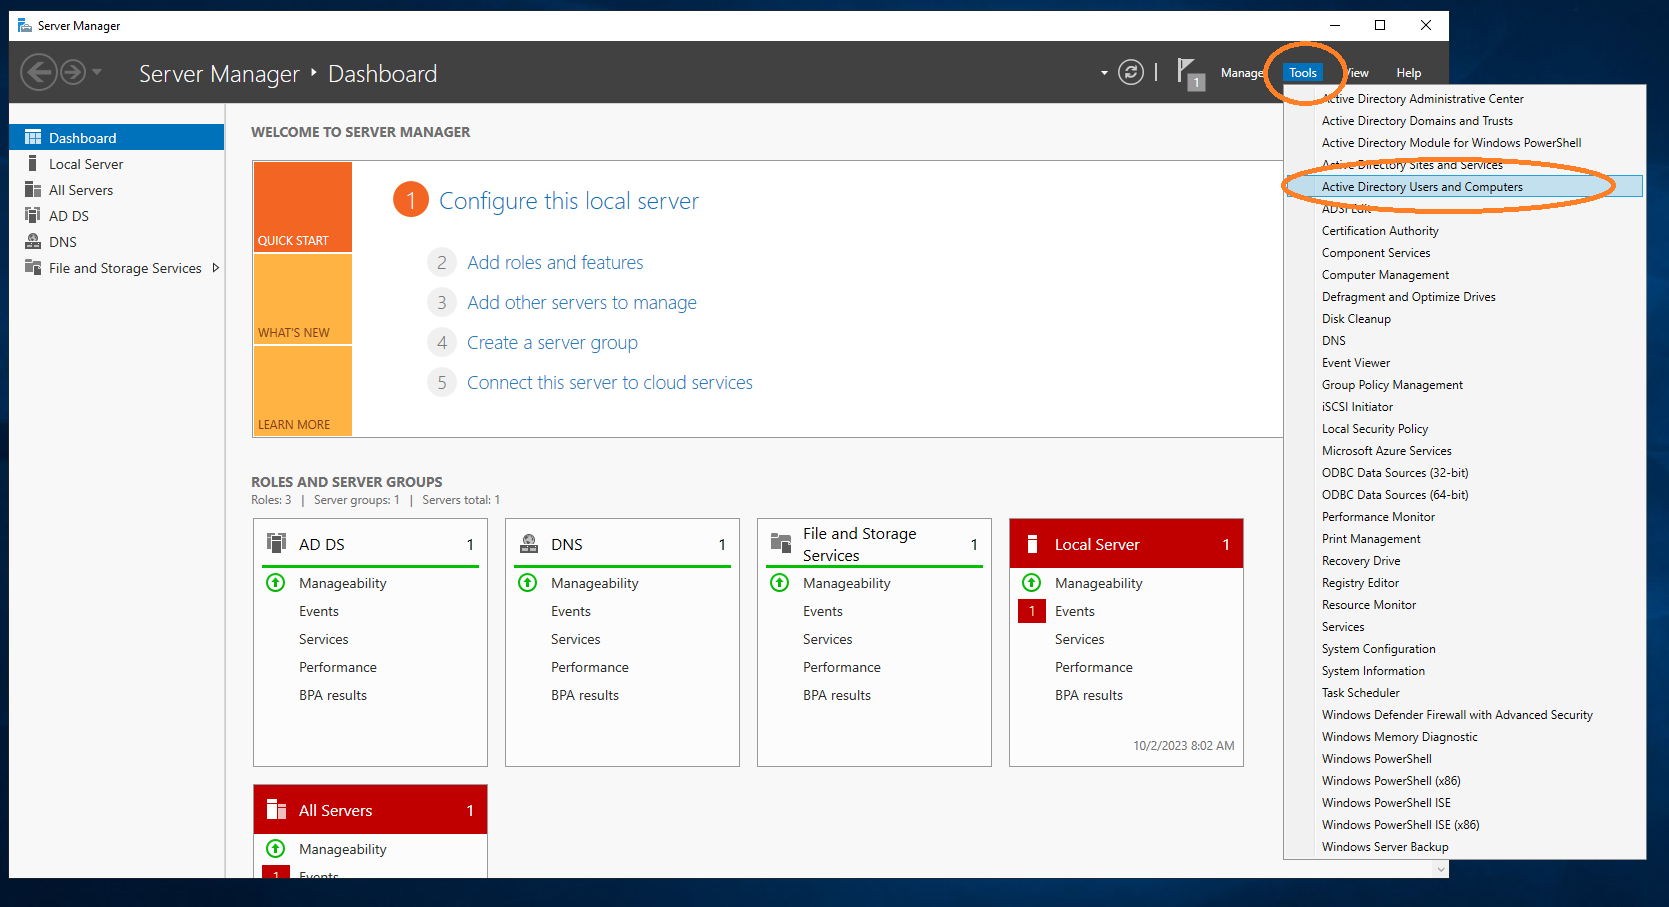
Under Tools → Active Directory Users and Computers, add the aec-service user.
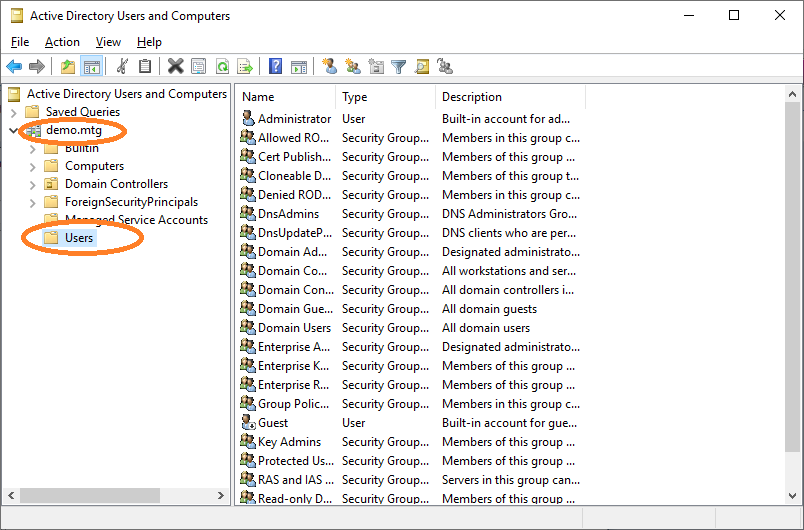
Go to Users.
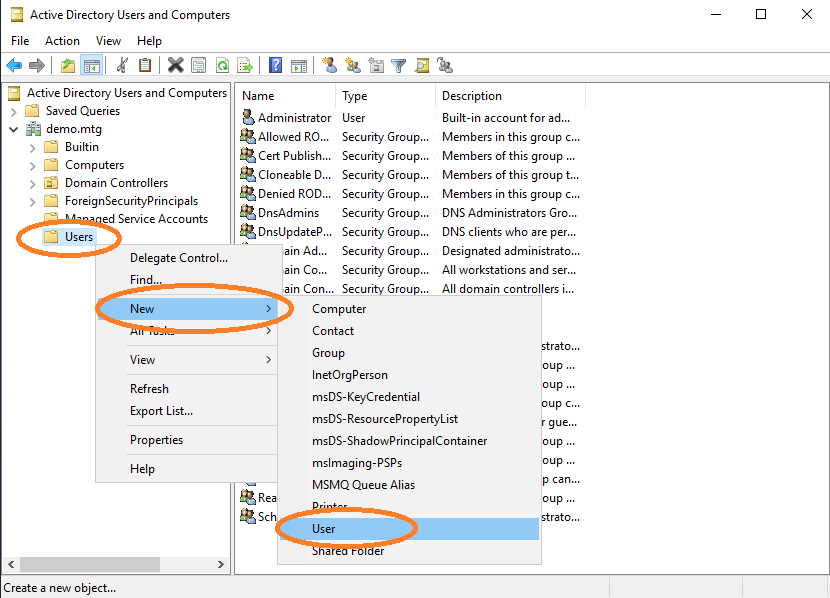
Select Users → New → Add.
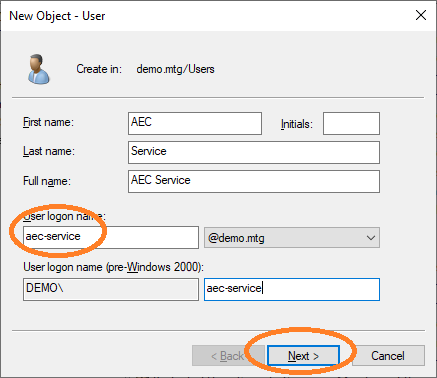
Provide a user logon name for this user. Choose aec-service.

Provide the password for this user and choose Password never expires. Finish the dialog to create the user.
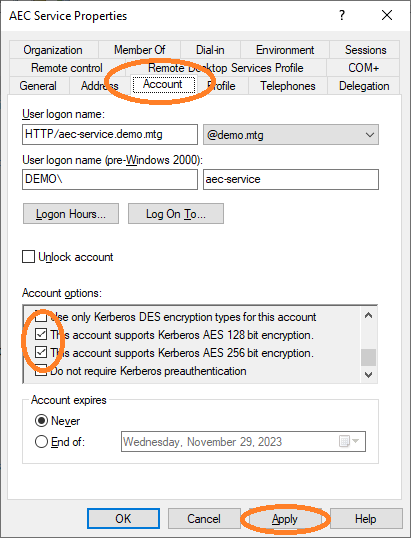
As a final step, activate support for AES128 and AES256 for this account.
Then set the Service Principal Name (SPN) to the Active Directory for this user account:
setspn -s HTTP/aec-service.demo.mtg aec-serviceWhich has the form HTTP/<FQDN where AEC runs>.
|
Configure the principal name of this user to the Example: |
|
The SPN of the user must match the domain name of the server running the AEC. In this example, the domain name of the server running AEC must be set to |
Then create a keytab file for this user to store its credentials:
ktpass -out application.keytab -mapUser aec-service@DEMO.MTG +rndPass -mapOp set +DumpSalt -crypto AES256-SHA1 -ptype KRB5_NT_PRINCIPAL -princ HTTP/aec-service.demo.mtg@DEMO.MTGGeneral use:
ktpass -out <keytab-path> -mapUser <service-user-account-name>@<domain-name-in-upper-case-letters> +rndPass -mapOp set +DumpSalt -crypto AES256-SHA1 -ptype KRB5_NT_PRINCIPAL -princ <service-principal-name>@<domain-name-in-upper-case-letters>|
Configure Example: |
Create Account aec-ldap-user
Create a user performing the same steps as before, using aec-ldap-user as user logon name.
This user must be able to write certificates into the AD. Therefore, this user must be added to the Cert Publishers group.

Navigate to aec-ldap-user and click Add to a group.
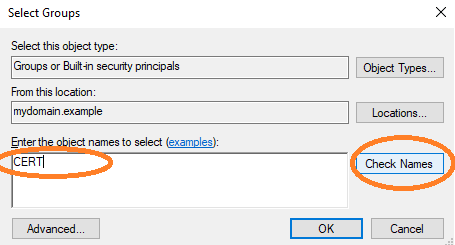
Check the group name.
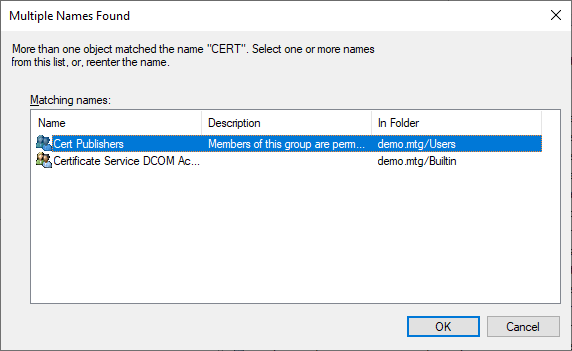
Select the Cert Publishers group.
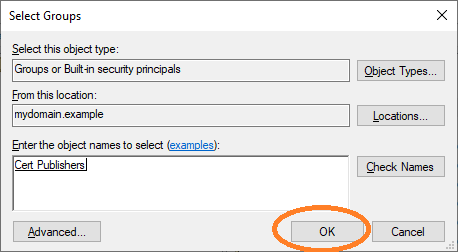
Finish the dialog by clicking OK.
Then create a keytab file for this user to store its credentials:
ktpass -out aec-ldap-user.keytab -mapUser aec-ldap-user@DEMO.MTG +rndpass -mapOp set +DumpSalt -crypto AES256-SHA1 -pType KRB5_NT_PRINCIPAL -princ aec-ldap-user@DEMO.MTGGeneral use:
ktpass -out <keytab-path> -mapUser <ldap-user-account-name>@<domain-name-in-upper-case-letters> +rndPass -mapOp set +DumpSalt -crypto AES256-SHA1 -ptype KRB5_NT_PRINCIPAL -princ <ldap-user-principal-name>|
Configure Example: Configure the principal name of this user to the Example: |
2. Register AEC Computer in DNS
The computer where the AEC application runs must be made known to the Windows system.
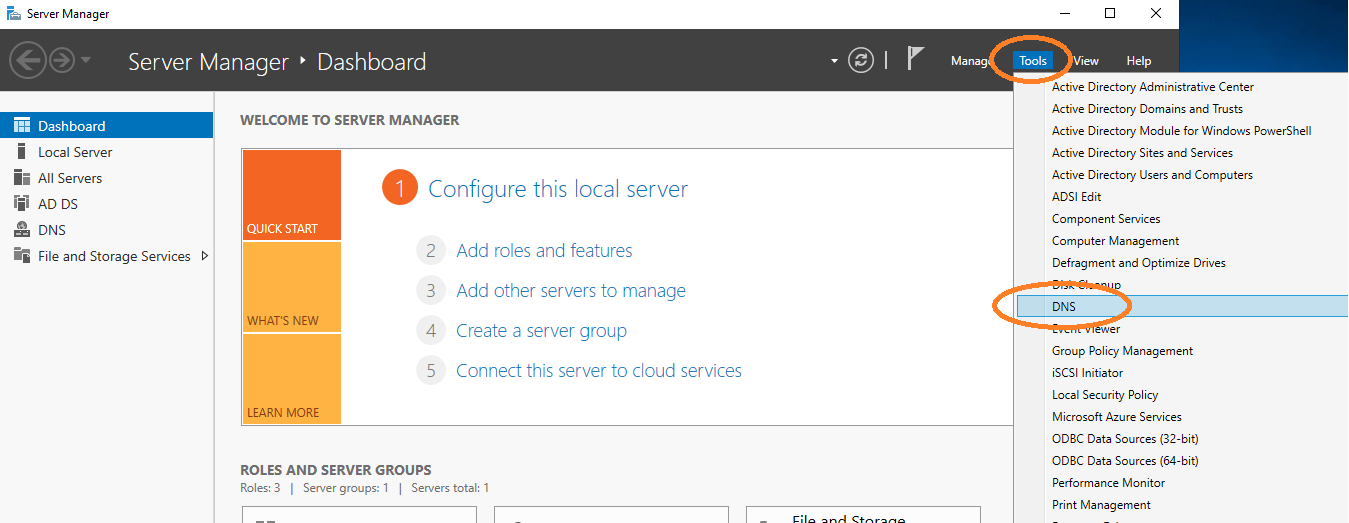
Go to DNS management.
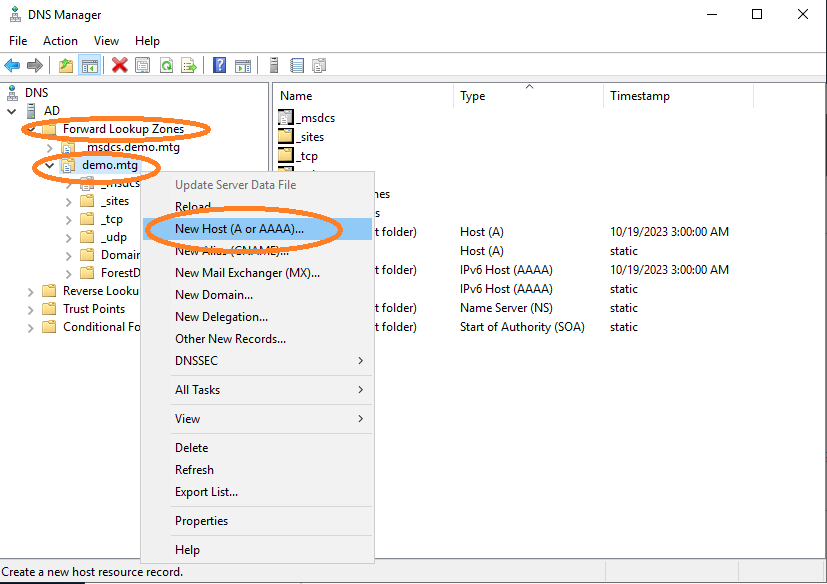
Add a new host.
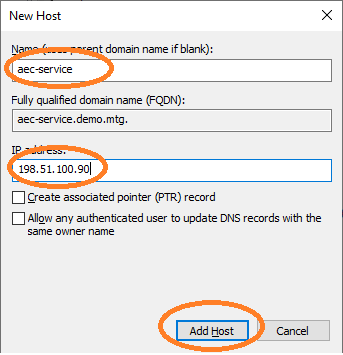
Provide a domain name for the IP where the AEC application runs (in this example at 198.51.100.90). The name must be aec-service. It is important that FQDN, SPN, and names are consistent with each other.
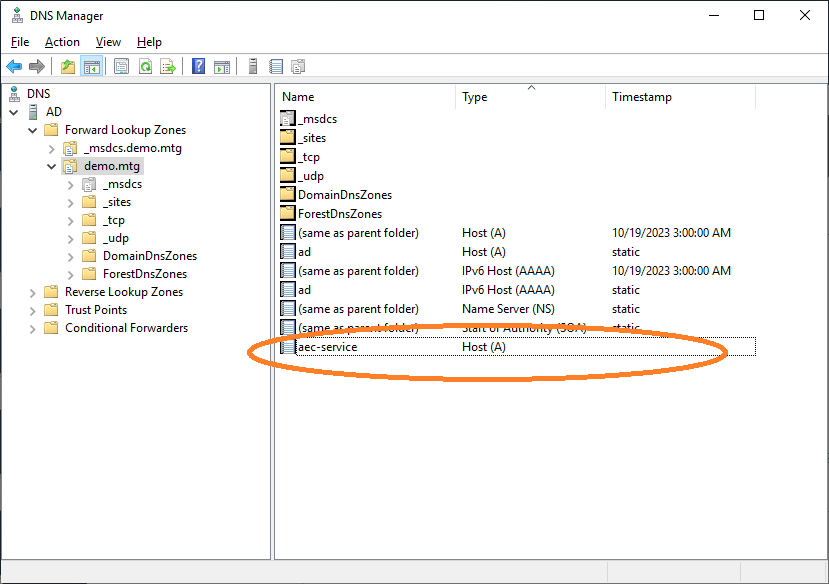
The computer has been properly registered.
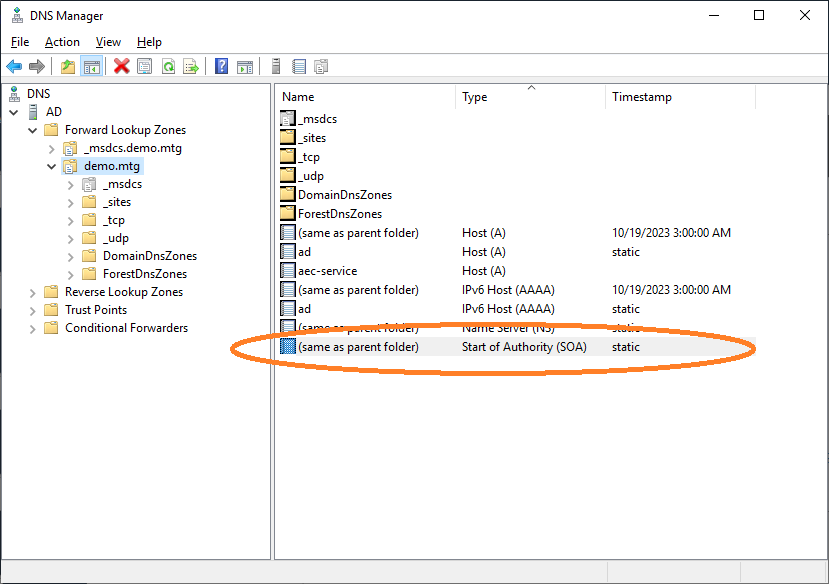
Navigate to Start of Authority.

Finally, increment the Start of Authority and click Apply.
3. Configure AEC and Kerberos
The AEC service must be able to verify and work with Kerberos tokens that arrive from various clients. A Kerberos configuration file is necessary for AEC to work with the Kerberos protocol.
Kerberos krb5.conf Example
The values in this file follow the configured domain demo.mtg of this document.
[libdefaults]
default_realm = DEMO.MTG
default_tkt_enctypes = aes256-cts aes128-cts
default_tgs_enctypes = aes256-cts aes128-cts
permitted_enctypes = aes256-cts aes128-cts
udp_preference_limit = 1

[realms]
DEMO.MTG = {
  kdc = ad.demo.mtg
  default_domain = demo.mtg
}

[domain_realm]
.demo.mtg = DEMO.MTG
demo.mtg = DEMO.MTG|
Configure the location of this file at the Example: |
4. Configure Certificate Templates
In this section, the setup of templates for user and computer autoenrollment is described.
User Templates for Autoenrollment
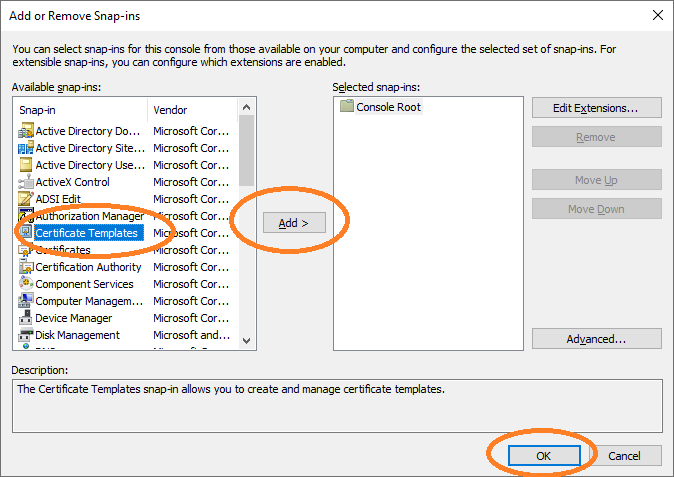
Open cmd and type mmc to get the Microsoft Management Console. Add Certificate Templates.
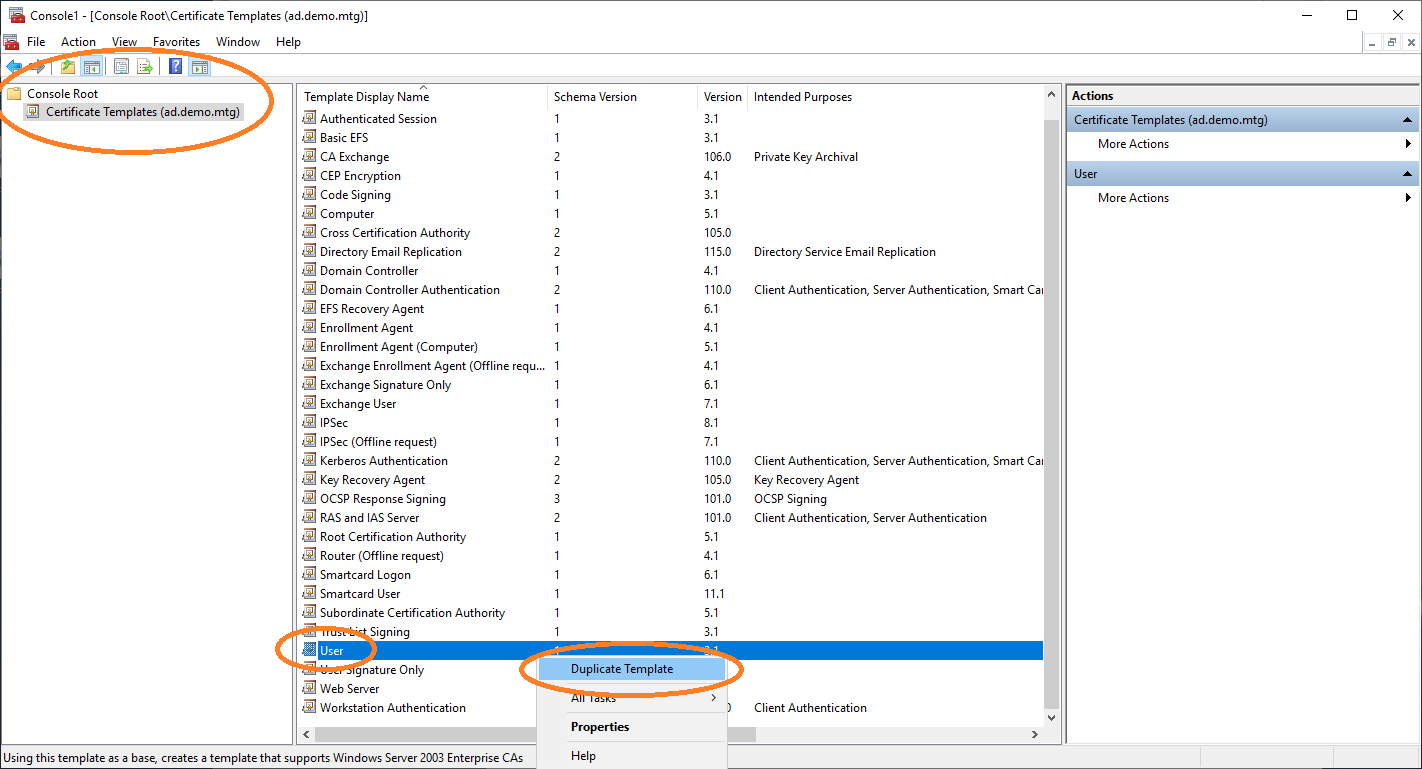
In the certificate templates view, duplicate the User template to retrieve a new template that you can configure for autoenrollment.
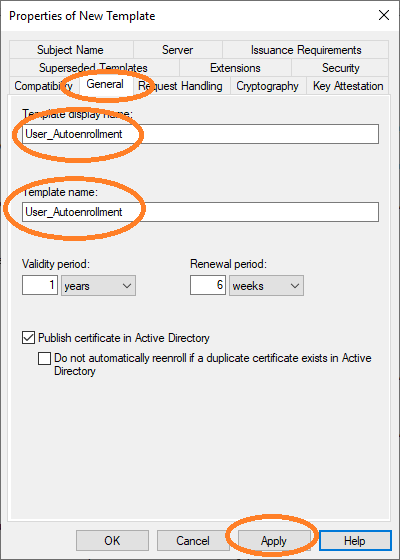
You must set the name of this new template in the General tab.
|
The template name |
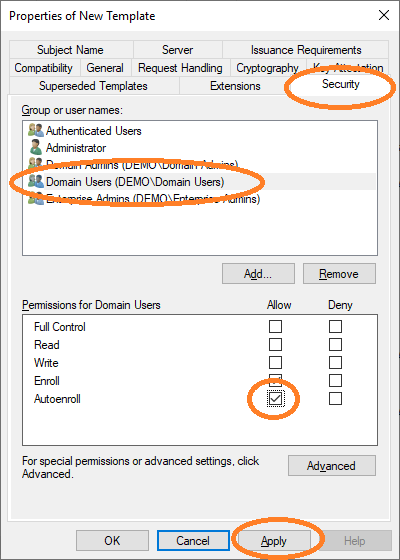
Then allow autoenroll for a certain group or users.
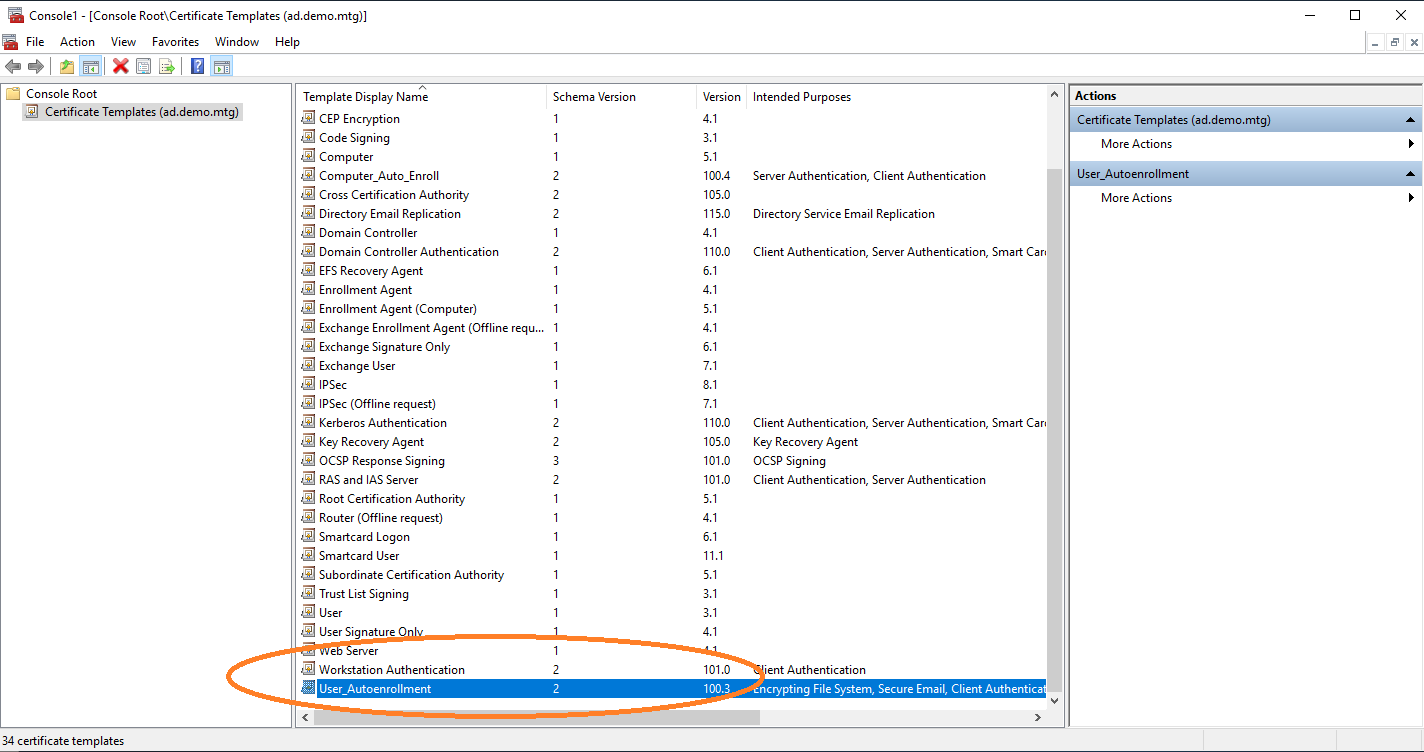
The new template is now listed.
5. Configure Enrollment Policies
You need to start AEC. For this step, it is required that the service is properly configured and in operation.
Computer Configuration
To request certificates, Windows clients query a policy server to receive information about the templates and location of the enrollment server. In this section, the configuration of the location of AEC as a policy server is described. This configuration is performed under Group Policy Management.
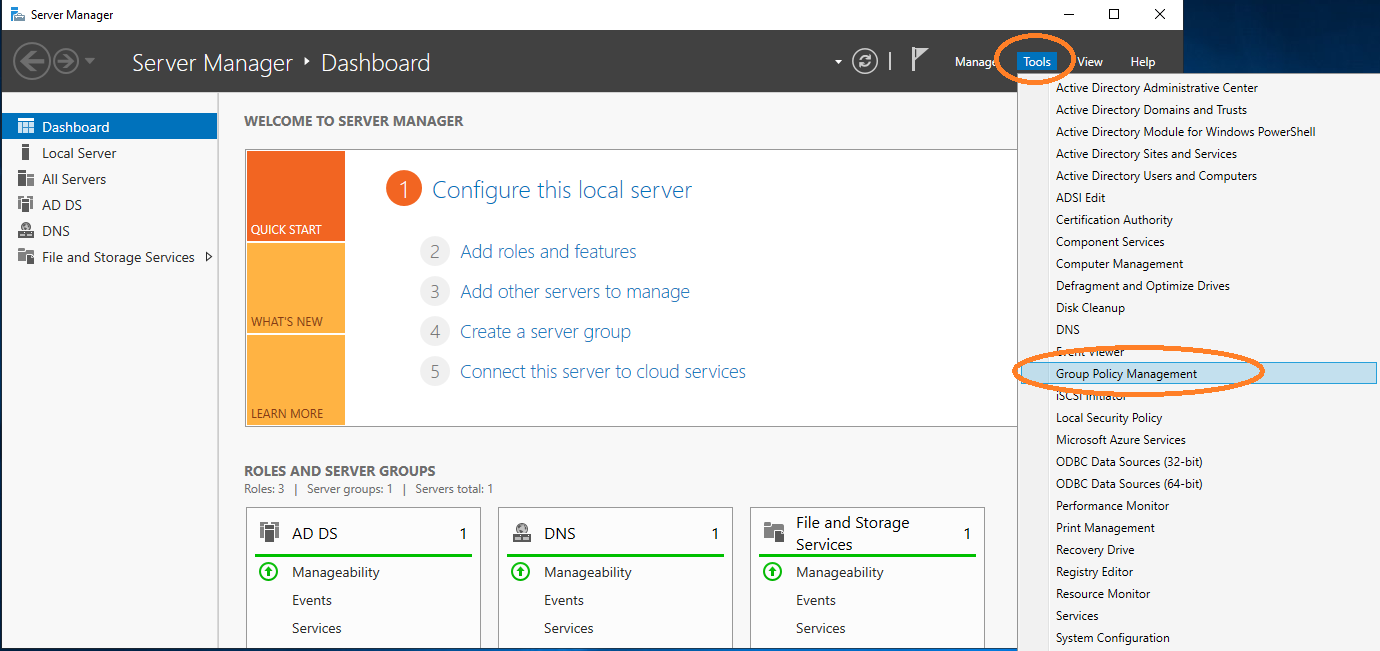
Open Group Policy Management.
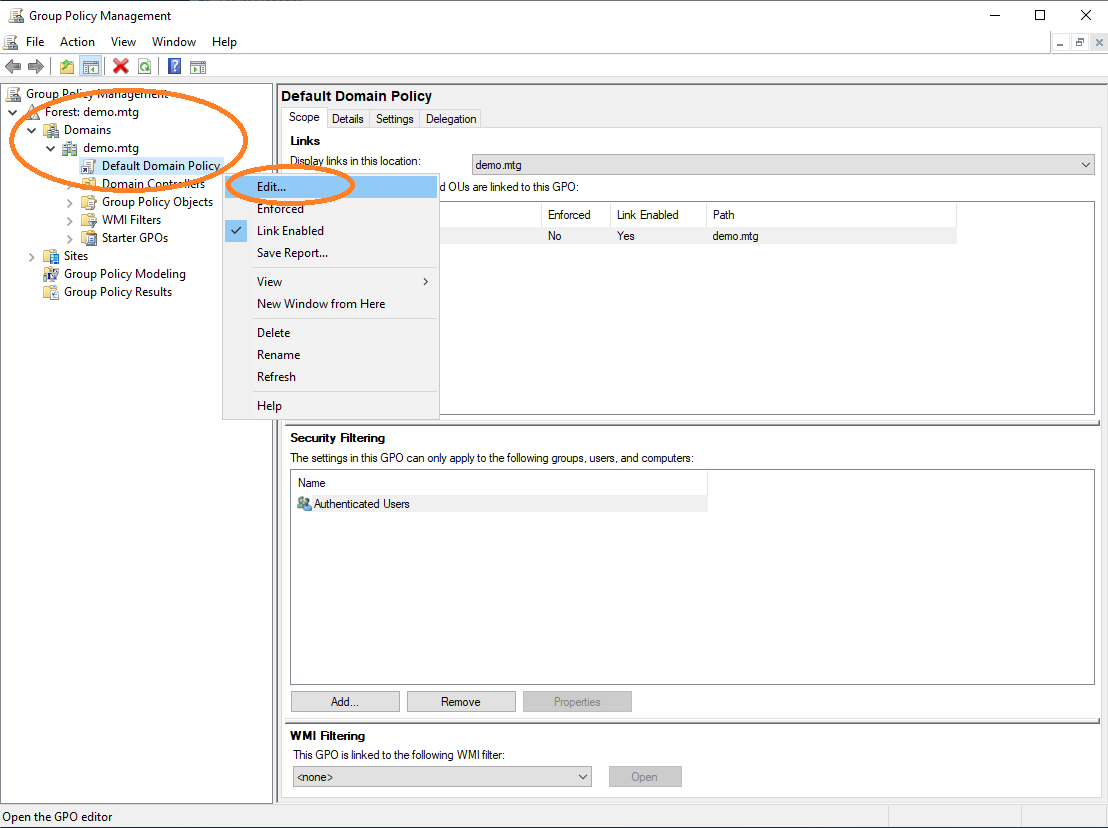
Edit the default policy of the domain.
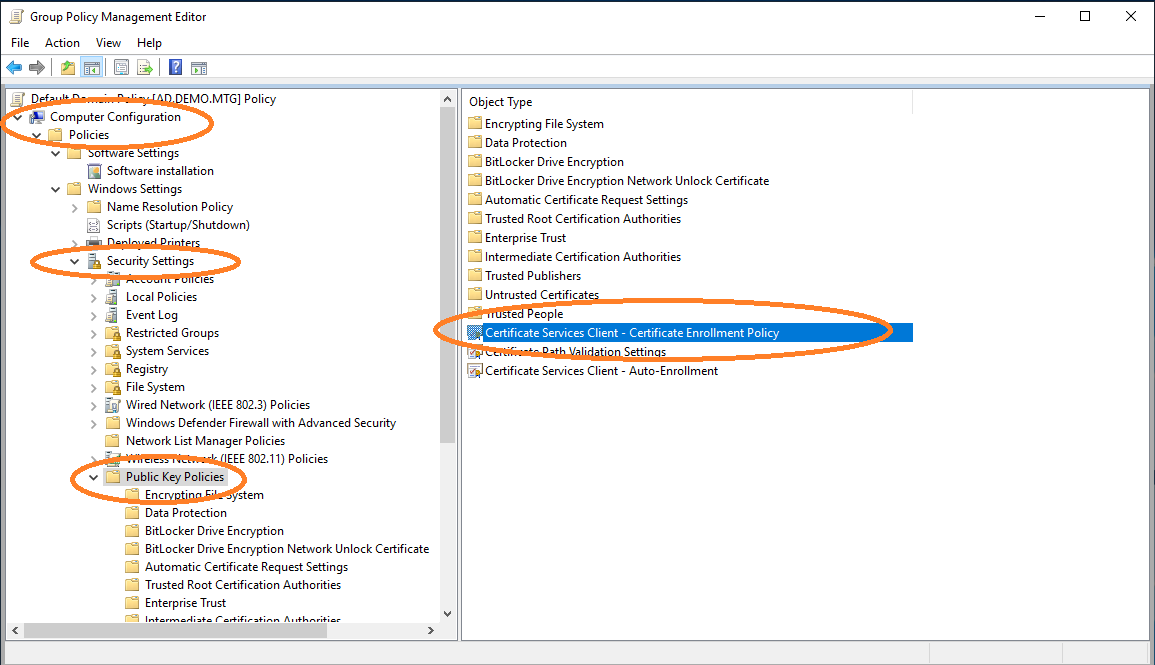
Choose the configuration of the certificate enrollment policy.
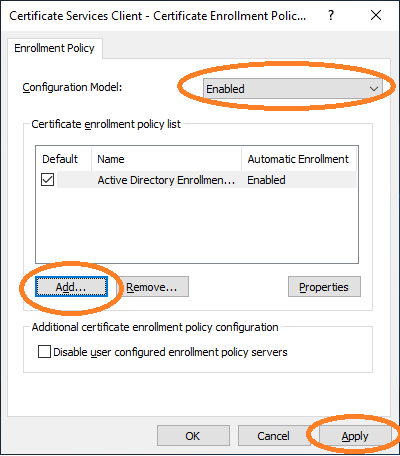
The AEC must be enabled and added as a new policy server.
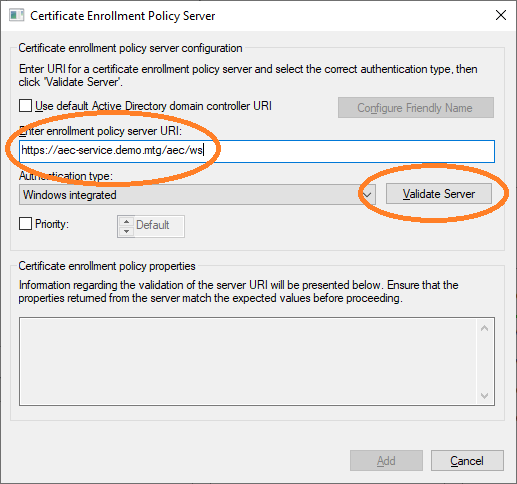
The URL of AEC must be entered. This URL can then be validated.
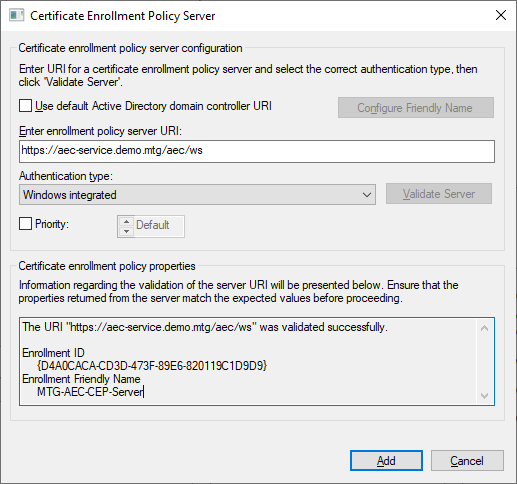
A successful validation is shown.
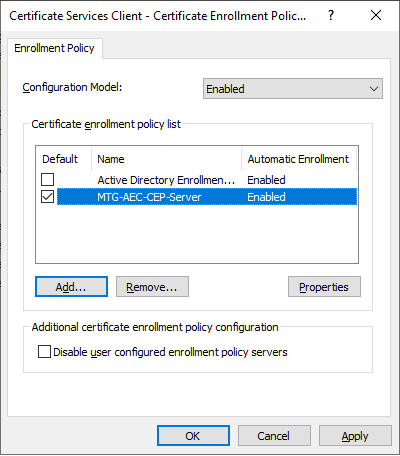
The newly configured policy server will then appear in the list of policy servers. It should be chosen as default certificate enrollment policy.
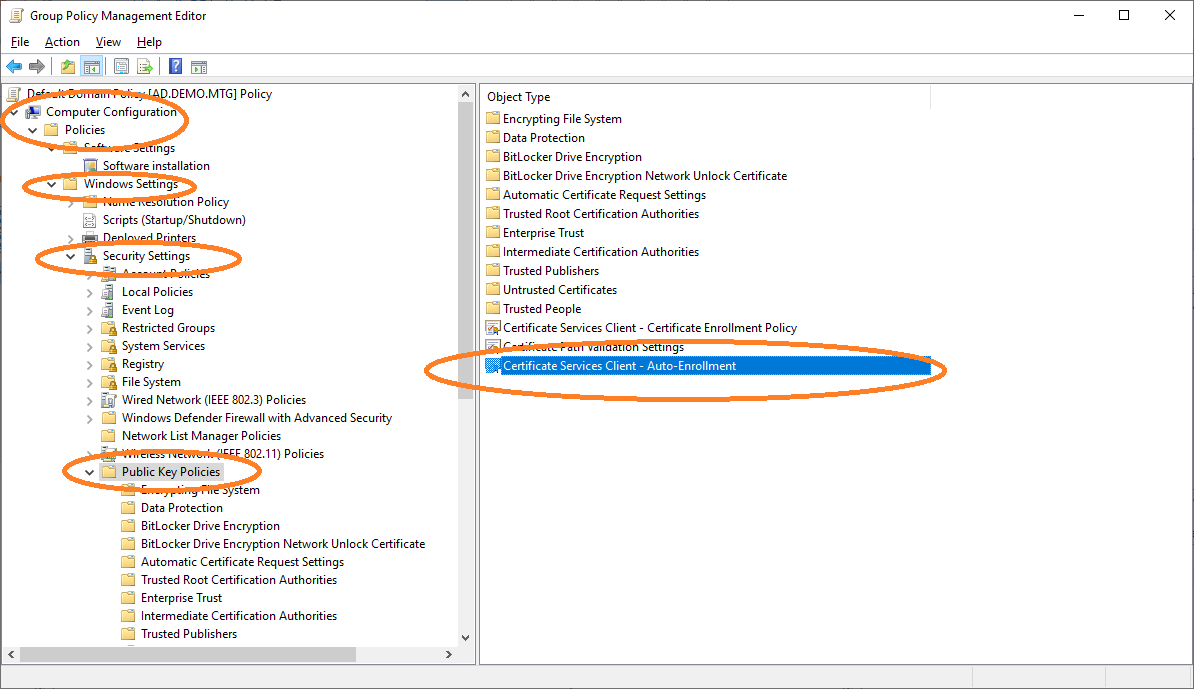
Navigate to Auto-Enrollment settings.
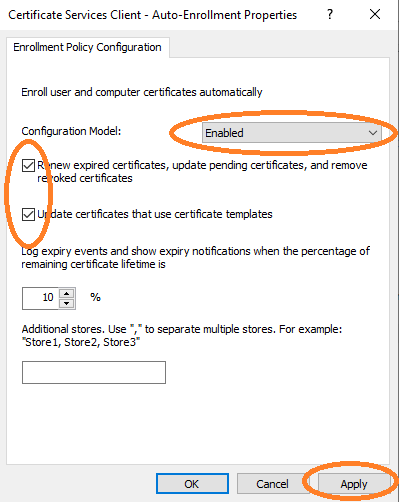
Enable Auto-Enrollment for the computer configuration.
Distribute Root and Sub CA Certificates
Import Root CA Certificate
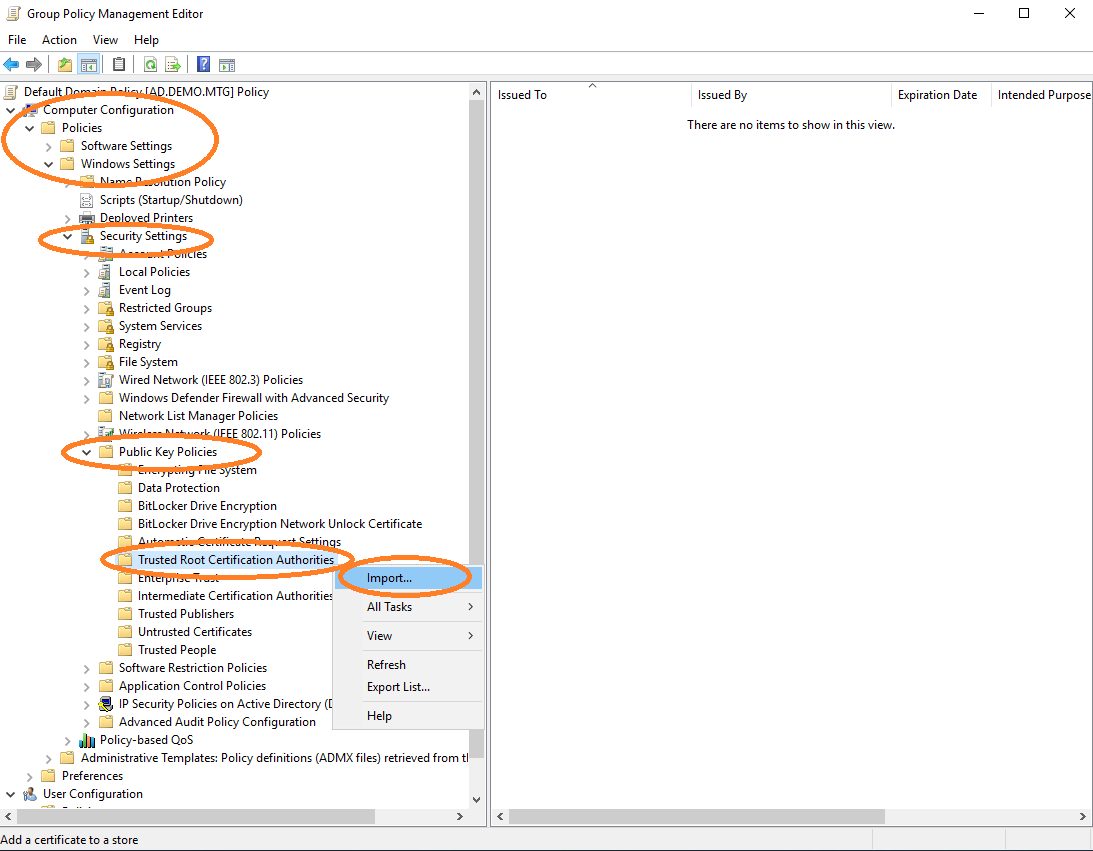
Import the root CA certificate into the policy, in order for it to be distributed to other clients. Edit default domain policy and import the root CA certificate.
To import the sub CA certificate, perform the above under Intermediate Certification Authorities.
6. Update Clients and Request Certificates
The server-side configuration is ready. You should also update the policy at the client-side, in order to receive the newest policy containing the newly configured policy servers, templates, etc.
gpupdate /forcecertutil -policyserver * -policycacheYou can also check whether the new policies are properly set.
certutil -f -user -policyserver * -policycacheThen request a new certificate for the user or computer you are working on.